Spring Boot (十五): 優雅的使用 API 文檔工具 Swagger2
- 2019 年 10 月 17 日
- 筆記

1. 引言
各位在開發的過程中肯定遇到過被接口文檔折磨的經歷,由於 RESTful 接口的輕量化以及低耦合性,我們在修改接口後文檔更新不及時,導致接口的調用方(無論是前端還是後端)經常抱怨接口與文檔不一致。程序員的特點是特別不喜歡寫文檔,但是又同時特別不喜歡別人不寫文檔。所以 API 文檔工具這時就應運而生了,本篇文章我們將會介紹 API 文檔工具 Swagger2 。
2. 快速上手
既然 Swagger2 是一個 API 文檔工具,我們就在代碼中看一下這個文檔工具在 Spring Boot 中是如何使用的吧。
2.1 引入依賴
代碼清單:spring-boot-swagger/pom.xml
***
<!-- swagger工具包 --> <dependency> <groupId>io.springfox</groupId> <artifactId>springfox-swagger2</artifactId> <version>${swagger.version}</version> </dependency> <!-- https://mvnrepository.com/artifact/io.springfox/springfox-swagger-ui --> <dependency> <groupId>io.springfox</groupId> <artifactId>springfox-swagger-ui</artifactId> <version>${swagger.version}</version> </dependency>這裡選用的版本是 2.9.2 ,同時也是目前最新的一個版本。
2.2 配置類 SwaggerConfig
代碼清單:spring-boot-swagger/src/main/java/com/springboot/springbootswagger/config/SwaggerConfig.java
***
@Configuration @EnableSwagger2 public class SwaggerConfig { @Value("${swagger.show}") private boolean swaggerShow; @Bean public Docket swaggerSpringMvcPlugin() { return new Docket(DocumentationType.SWAGGER_2) .enable(swaggerShow) .apiInfo(apiInfo()) .select() .apis(RequestHandlerSelectors.basePackage("com.springboot.springbootswagger")) .paths(PathSelectors.any()) .build(); } private ApiInfo apiInfo() { return new ApiInfoBuilder() .title("Swagger2 演示接口RESTful APIs") .version("1.0") .build(); } }由於 Swagger 是一個 API 文檔工具,我們肯定不能在生產環境中開啟,所以筆者這裡在配置中增加了 swagger.show ,在不同環境的配置文件中配置不同的值,或者如果有配置中心,這個配置可以添加到配置中心中,筆者這裡示例簡單起見就添加在 application 配置文件中了。這樣,我們就可以優雅的開啟或者關閉 Swagger 的功能。
2.3 實體類
代碼清單:spring-boot-swagger/src/main/java/com/springboot/springbootswagger/model/User.java
***
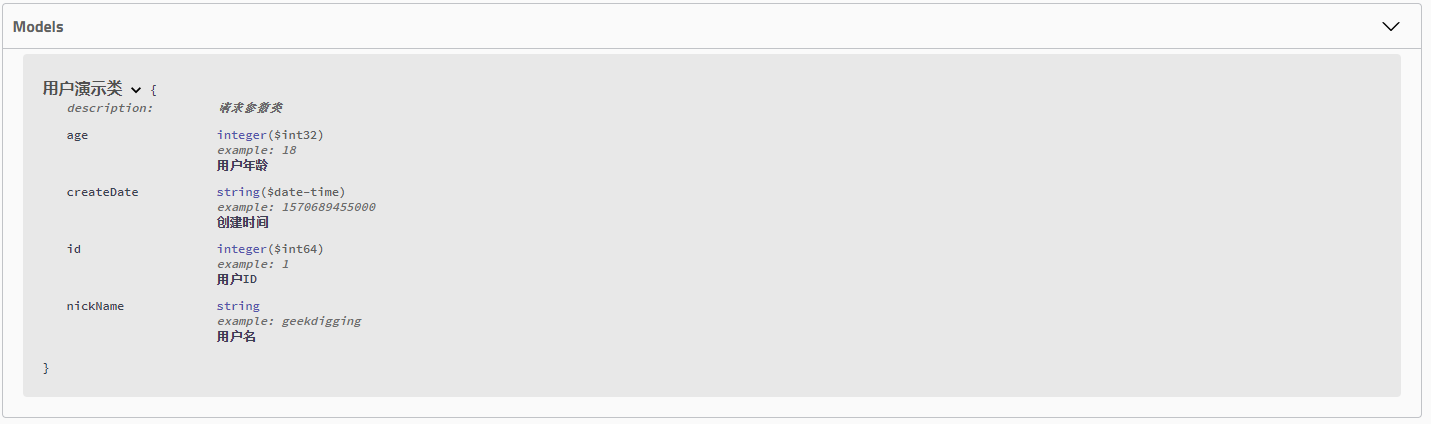
@Data @AllArgsConstructor @NoArgsConstructor @ApiModel(value = "用戶演示類", description = "請求參數類") public class User { @ApiModelProperty(example = "1", notes = "用戶ID") private Long id; @ApiModelProperty(example = "geekdigging", notes = "用戶名") private String nickName; @ApiModelProperty(example = "1570689455000", notes = "創建時間") private Date createDate; @ApiModelProperty(example = "18", notes = "用戶年齡") private Integer age; }Swagger 註解詳細說明:
| API | 作用範圍 | 使用位置 |
|---|---|---|
| @ApiModel | 描述返回對象的意義 | 用在返回對象類上 |
| @ApiModelProperty | 對象屬性 | 用在出入參數對象的字段上 |
| @Api | 協議集描述 | 用於 controller 類上 |
| @ApiOperation | 協議描述 | 用在 controller 的方法上 |
| @ApiResponses | Response集 | 用在 controller 的方法上 |
| @ApiResponse | Response | 用在 @ApiResponses 裡邊 |
| @ApiImplicitParams | 非對象參數集 | 用在 controller 的方法上 |
| @ApiImplicitParam | 非對象參數描述 | 用在 @ApiImplicitParams 的方法裡邊 |
2.4 Controller
代碼清單:spring-boot-swagger/src/main/java/com/springboot/springbootswagger/controller/UserController.java
***
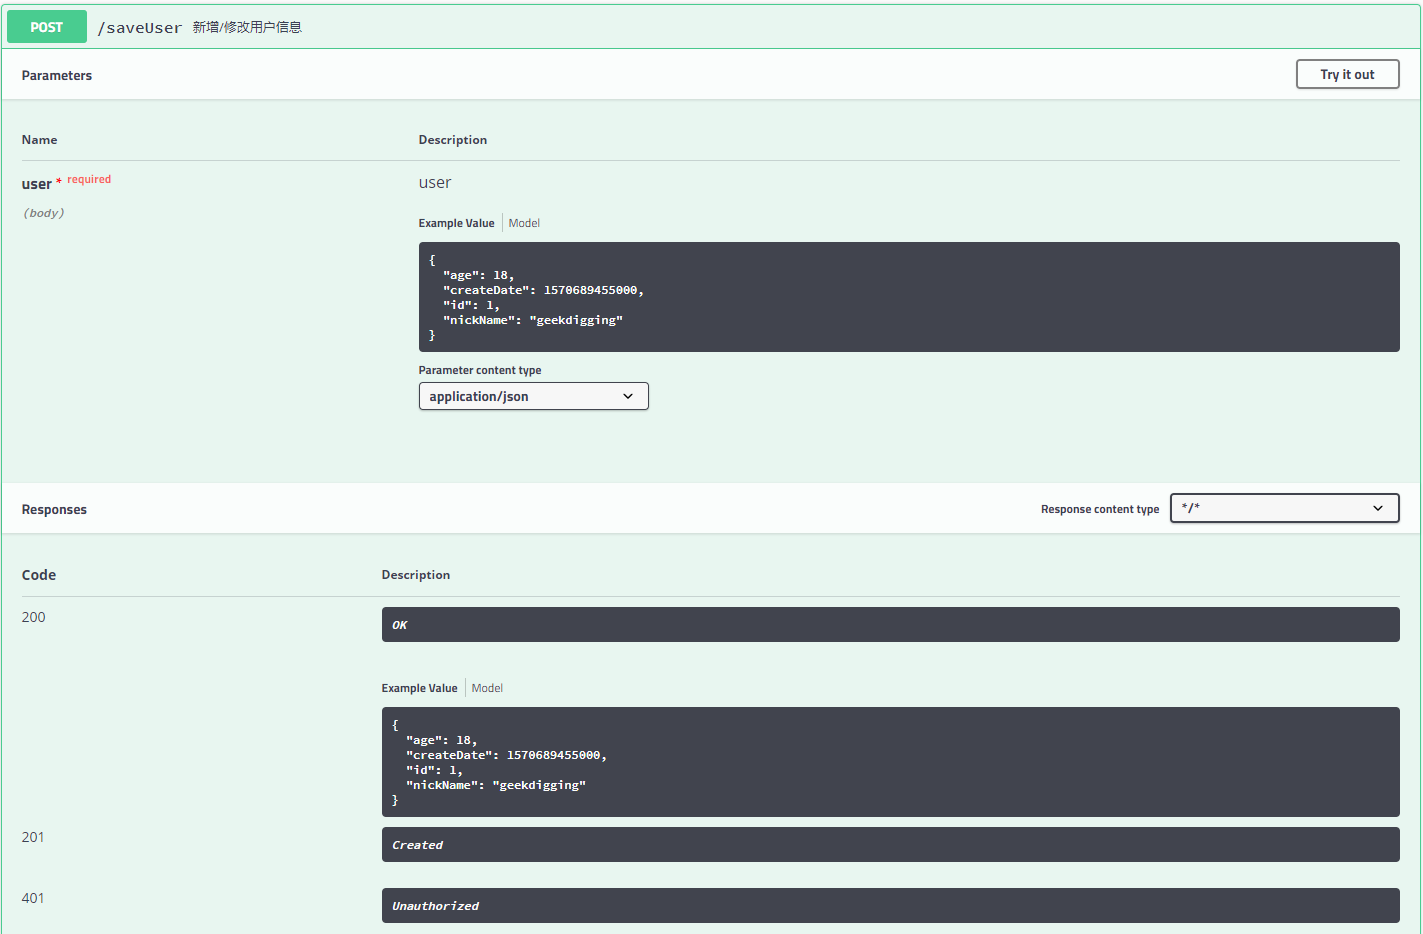
@Api(value = "用戶管理演示") @RestController public class UserController { @Autowired UserService userService; @GetMapping("/getUserById/{id}") @ApiOperation(value = "獲取用戶信息", notes = "根據用戶 id 獲取用戶信息", tags = "查詢用戶信息類") public User getUserById(@PathVariable Long id) { return userService.getUserById(id); } @GetMapping("/getAllUsers") @ApiOperation(value = "獲取全部用戶信息", notes = "獲取全部用戶信息", tags = "查詢用戶信息類") public List<User> getAllUsers() { return userService.getAllUsers(); } @PostMapping("/saveUser") @ApiOperation(value = "新增/修改用戶信息") public User saveUser(@RequestBody User user) { return userService.saveUser(user); } @DeleteMapping("/deleteById") @ApiOperation(value = "刪除用戶信息", notes = "根據用戶 id 刪除用戶信息") public String deleteById(@PathVariable Long id) { userService.deleteById(id); return "success"; } }- @ApiOperation 中的 tag 標籤可用於接口分組
2.5 展示結果如下
啟動工程,打開瀏覽器訪問: http://localhost:8080/swagger-ui.html ,可以看到如下頁面:

這張圖中可以看到我們的 tag 分組。
3. 示例代碼
4. 參考
https://blog.csdn.net/xupeng874395012/article/details/68946676