flutter系列之:深入理解布局的基礎constraints
簡介
我們在flutter中使用layout的時候需要經常對組件進行一些大小的限制,這種限制就叫做constraints,用來控制layout中的組件大小。
掌握了constraints才算對layout有了真正的了解,但是flutter中的constraints和我們熟悉的HTML中的constraints區別比較大,所以我們還是需要深入了解flutter中contraints的特性。
Tight和loose constraints
對於constraints來說,只有四個屬性,分別是最小width,最大width,最小height和最大height。這四個屬性所能限制的就是寬度和高度的範圍。
根據這兩個屬性的範圍不同,constraints可以分為tight constraints和loose constraints。
那麼tight和loose有什麼區別呢?
對於tight來說,它的 maximum width = minimum width, 並且maximum height = minimum height, 也就是說為width和height提供了一個特定的值。
具體而言,可以看下BoxConstraints的tight實現:
BoxConstraints.tight(Size size)
   : minWidth = size.width,
     maxWidth = size.width,
     minHeight = size.height,
     maxHeight = size.height;
和tight相對應的就是loose,在loose中我們設置了最大的width和height,但是希望widget越小越好,這樣對應width和height的最小值為0,同樣以BoxConstraints為例看下它的定義:
BoxConstraints.loose(Size size)
   : minWidth = 0.0,
     maxWidth = size.width,
     minHeight = 0.0,
     maxHeight = size.height;
理解constraints的原則
前面我們講到了constraints的分類,這裡我們會講一下constraints的基本原則。
通常來說,在flutter中,一個widget的constraints是從它的parent繼承而來的。然後這個widget會將constraints告訴他的子widget.
子widget會有自己定義的大小,那麼子widget會根據自己定義的大小來設置自己的大小,並將結果回饋跟父widget,父widget會最終根據所有子widget的大小來設置自己的大小。
所以總結而言就是,constraints是向下傳遞的,而size是向上傳遞的。
可能大家還不太明白是什麼意思,沒關係,接下來我們用具體的例子來說明。
首先,我們使用BoxConstraints.tightFor來創建一個儘可能大的width和height的Constraints,然後在這個constraint內部新建widget來觀察他們的表現。
ConstrainedBox(
     constraints: const BoxConstraints.tightFor(
           width: double.infinity, height: double.infinity),
            child: exampleWidget)
通過替換上面的exampleWidget,我們來觀察不同的表現形式。
首先是最基礎的Container,對於Container本身來說,他可以設置width和height,但是這兩個屬性並不是constraint,所以還得從parent widget中繼承。
那麼對於下面的一個widget來說:
  Widget build(BuildContext context) {
    return Container(color: blue);
  }
它會使用從parent繼承的constraints,也就是說儘可能的大,所以會展示下面的介面:

填滿所有的區域。
如果給Container指定了width和hight,同樣的,Container需要從parent繼承constraints,所以仍然是填滿整個區域:
  Widget build(BuildContext context) {
    return Container(width: 100, height: 100, color: blue);
  }
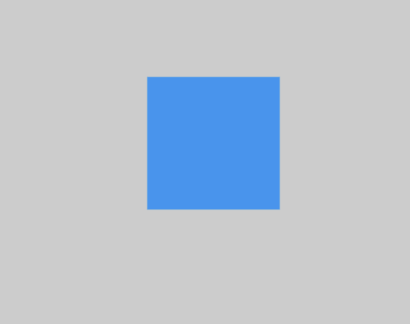
但是,如果我們在Container的外面再加上一個constraints,比如Center:
  Widget build(BuildContext context) {
    return Center(
      child: Container(width: 100, height: 100, color: blue),
    );
  }
那麼雖然Center會從parent繼承constraints,去填滿整個區域,但是Center本身的constraints是告訴子widget可以按照他自己的意願來調整大小,所以這個時候最終Container的大小就是100×100:

除了Center之外,我們還可以使用Align,效果和Center是一致的:
  Widget build(BuildContext context) {
    return Align(
      alignment: Alignment.bottomLeft,
      child: Container(width: 100, height: 100, color: blue),
    );
  }

下面是一個使用Center的很有趣的例子:
  Widget build(BuildContext context) {
    return Center(
      child: Container(
        color: blue,
        child: Container(color: green, width: 30, height: 30),
      ),
    );
  }
這裡Center中有一個Container,Container中有一個Container,但是這兩個Container設置了不同的顏色。
因為外層的Container並沒有設置大小,所以他的大小是由child Container來決定的,因為兩個Container大小一樣,所以外部的顏色會被內部的覆蓋,我們可以得到下面的介面:

如果我們給外層的添加一個padding如下:
  Widget build(BuildContext context) {
    return Center(
      child: Container(
        padding: const EdgeInsets.all(20.0),
        color: blue,
        child: Container(color: green, width: 30, height: 30),
      ),
    );
  }
那麼外層現在就比內層的widget要大了,顏色也可以展示出來了:

我們再來看下面的例子:
  Widget build(BuildContext context) {
    return ConstrainedBox(
      constraints: const BoxConstraints(
        minWidth: 70,
        minHeight: 70,
        maxWidth: 150,
        maxHeight: 150,
      ),
      child: Container(color: blue, width: 10, height: 10),
    );
  }
上面的例子在Container外面添加了一個ConstrainedBox,指定了四個constraints屬性,但是這個ConstrainedBox並不會應用到child上,所以最終得到的介面還是全部的藍色。
為什麼呢?這是因為不同的widget對constraints有不同的定義,對於ConstrainedBox來說,他是一個對其子項施加額外約束的小部件。記住,這裡是額外的約束。因為對於它的parent來說,約束已經制定好了,所以ConstrainedBox會被忽略。
我們再看下下面的程式碼:
  Widget build(BuildContext context) {
    return Center(
      child: ConstrainedBox(
        constraints: const BoxConstraints(
          minWidth: 70,
          minHeight: 70,
          maxWidth: 150,
          maxHeight: 150,
        ),
        child: Container(color: blue, width: 10, height: 10),
      ),
    );
  }
這裡因為使用了Center,Center會讓child來自行決定他們的大小,所以這裡的ConstrainedBox是生效的,如下:
flutter中除了ConstrainedBox,還有一個UnconstrainedBox,它的作用和ConstrainedBox是相反的,大家可以自行嘗試。
總結
從上面的具體例子,我們可以看出,雖然我們有通用的Constraint規則,但是具體的表現還是要看不同的widget來定。
所以大家在使用widget的時候,一定要去讀一下widget的程式碼,從而加深對widget的掌握。
本文的例子://github.com/ddean2009/learn-flutter.git
更多內容請參考 //www.flydean.com/13-flutter-ui-constraints/
最通俗的解讀,最深刻的乾貨,最簡潔的教程,眾多你不知道的小技巧等你來發現!
歡迎關注我的公眾號:「程式那些事」,懂技術,更懂你!

