vue 路由視圖,router-view嵌套跳轉
實現功能:製作一個登錄頁面,跳轉到首頁,首頁包含菜單欄、頂部導航欄、主體,標準的後台網頁格式。菜單欄點擊不同菜單控制主體展示不同的組件(不同的頁面)。
配置router-view嵌套跳轉需要準備兩個主要頁面,一個由app.vue跳轉的登錄頁面(login.vue),一個由登錄頁面(login.vue)跳轉首頁(index.vue)。另外還需要兩個用於菜單跳轉頁面,頁面內容自定義
我這裡使用的是element-ui作為模板
前置:引入element-ui
在項目目錄下執行命令:npm i element-ui -s
修改main.js,引入element組件

步驟
- 創建登錄頁面(login.vue)
- 創建後台操作頁面(index.vue)
- 配置後台操作頁面菜單跳轉
- 配置嵌套路由視圖路由控制菜單跳轉
1、修改app.vue頁面
app頁面只要放置一個router-view標籤即可,每一個路由請求默認都是從這裡進去跳轉
<template>
  <div id="app">
    <router-view></router-view>
  </div>
</template>

<script>
export default {
  name: 'App',
  methods: {
  }
}
</script>

<style>
</style>
2、創建登錄頁面(/views/login/login.vue)
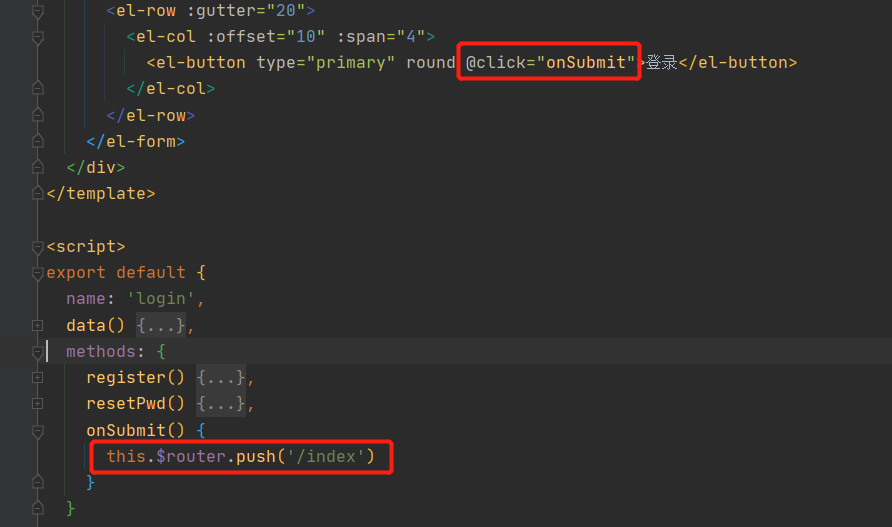
這裡的登錄按鈕跳轉是直接跳轉到主頁面,當前登陸頁面將完全被替換掉
登錄頁程式碼👇


<template>
  <div id="login">
    <el-form>
      <el-row :gutter="20">
        <el-col class="title" :offset="9" :span="6">
          <h1>一個登錄頁面</h1>
        </el-col>
      </el-row>
      <el-row :gutter="20">
        <el-col class="col-label" :offset="7" :span="4">
          <span class="label">帳號:</span>
        </el-col>
        <el-col :span="4">
          <el-input type="text" placeholder="請輸入帳號" v-model="account.username"></el-input>
        </el-col>
      </el-row>
      <el-row :gutter="20">
        <el-col class="col-label" :offset="7" :span="4">
          <span class="label">密碼:</span>
        </el-col>
        <el-col :span="4">
          <el-input type="password" placeholder="請輸入密碼" v-model="account.password"></el-input>
        </el-col>
      </el-row>
      <el-row :gutter="20">
        <el-col :offset="8" :span="8">
          <span>
            <a href="#" @click="register" >註冊帳號</a>
            /
            <a href="#" @click="resetPwd" >重置密碼</a>
          </span>
        </el-col>
      </el-row>
      <el-row :gutter="20">
        <el-col :offset="10" :span="4">
          <el-button type="primary" round @click="onSubmit">登錄</el-button>
        </el-col>
      </el-row>
    </el-form>
  </div>
</template>

<script>
export default {
  name: 'login',
  data() {
    return {
      account: {
        username: '',
        password: ''
      }
    }
  },
  methods: {
    register() {
      this.$message({
        message: '好像沒這功能',
        type: 'info'
      })
    },
    resetPwd() {
      this.$message({
        message: '下輩子吧',
        type: 'success'
      })
    },
    onSubmit() {
      this.$router.push('/index')
    }
  }
}
</script>

<style scoped>
  #login {
    text-align: center;
    margin: 0 auto;
  }
  .label {
    height: 40px;
    line-height: 40px;
  }
  .col-label {
    text-align: right;
  }
  .el-row {
    margin-top: 15px;
  }
  .el-button {
    width: 120px;
  }
  .title {
    margin-top: 10%;
  }
</style>
View Code
2.1、在router/index.js中添加登錄頁面路由
{
      path: '/',
      name: 'login',
      component: () => import('../views/login/login.vue')
},
3、創建主頁面(/components/index.vue)
主頁面主要分為三塊,左側菜單欄(el-menu),頂部導航欄(el-container),主體展示頁面(el-main),這部分是從elment-ui中的布局容器實例拷貝過來的(//element.eleme.cn/#/zh-CN/component/container)
<template>
  <el-container style="border: 1px solid #eee">
    <el-aside width="200px" style="background-color: rgb(238, 241, 246)">
      <el-menu :default-openeds="['1']" :router="true">
        <el-submenu index="1">
          <template slot="title"><i class="el-icon-message"></i>導航一</template>
          <el-menu-item-group>
            <template slot="title">分組一</template>
            <el-menu-item index="1-1">選項1</el-menu-item>
            <el-menu-item index="1-2">選項2</el-menu-item>
          </el-menu-item-group>
        </el-submenu>
      </el-menu>
    </el-aside>

    <el-container class="table-div">
      <el-header style="text-align: right; font-size: 12px">
        <el-dropdown>
          <i class="el-icon-setting" style="margin-right: 15px"></i>
          <el-dropdown-menu slot="dropdown">
            <el-dropdown-item>查看</el-dropdown-item>
            <el-dropdown-item>新增</el-dropdown-item>
            <el-dropdown-item>刪除</el-dropdown-item>
          </el-dropdown-menu>
        </el-dropdown>
        <span>王小虎</span>
      </el-header>

      <el-main>
        <table></table>
      </el-main>
    </el-container>
  </el-container>
</template>

<style>
.el-header {
  background-color: #B3C0D1;
  color: #333;
  line-height: 60px;
}

.el-aside {
  color: #333;
}
</style>

<script>
export default {
  name: 'index',
  data() {
  }
}
</script>

<style>
  .table-div {
    width: 100%;
  }
  .el-table {
    height: 100%;
  }
</style>
2.1、創建主頁面路由
{
      path: '/index',
      name: 'index',
      component: () => import('@/components/index')
}
至此,由登錄頁面跳轉到主頁面的操作配置就完成了。看看效果。啟動項目,訪問//localhost:8080/#/
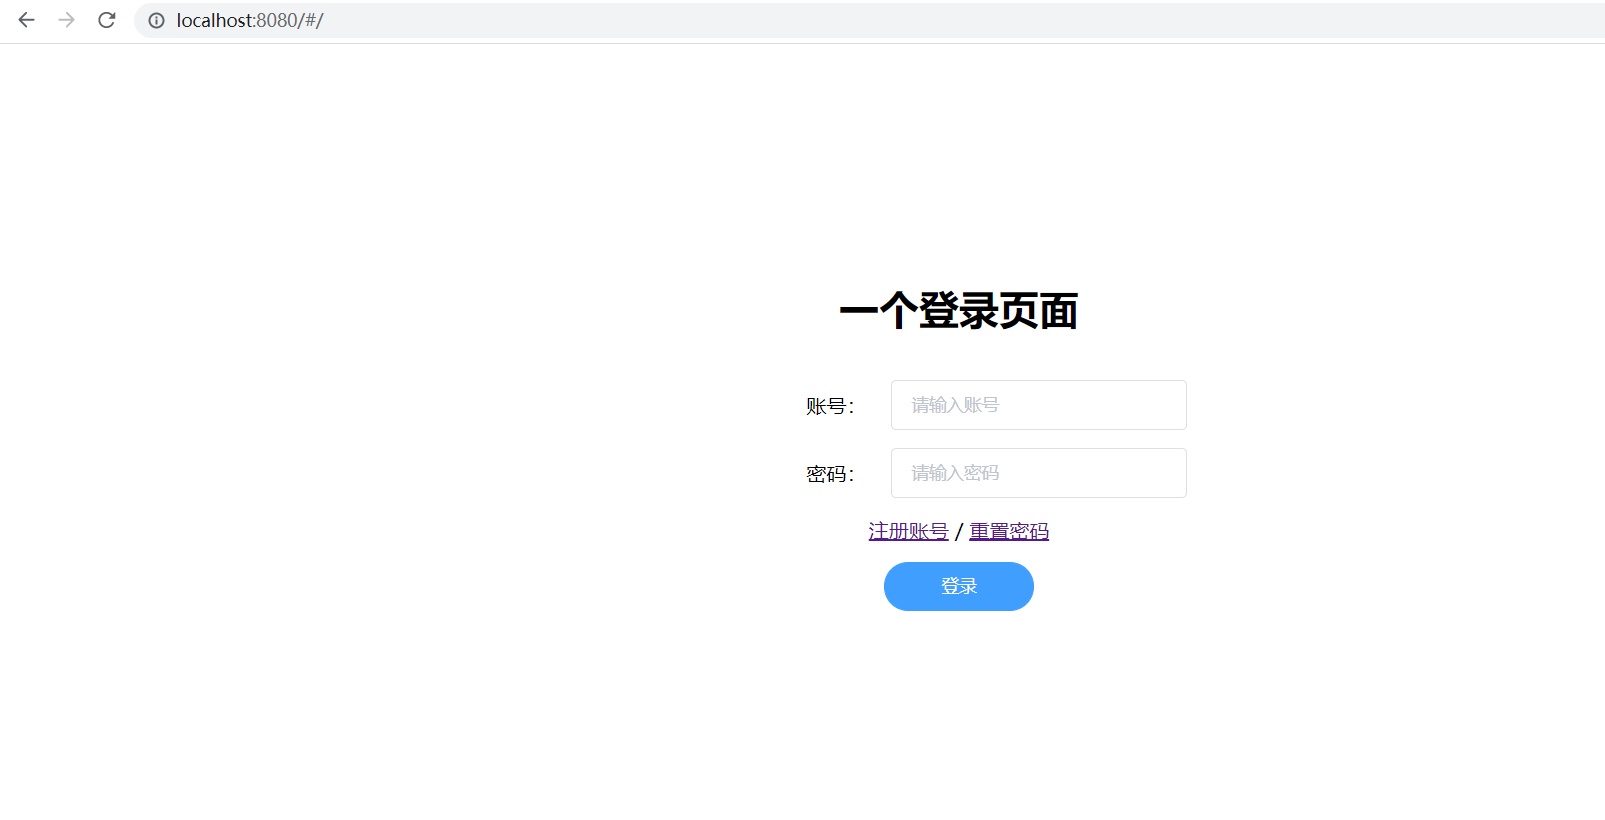
點擊登錄,跳轉到首頁

3、修改首頁,主要修改兩個部分,菜單跳轉路徑,主體配置路由視圖
3.1、開啟菜單路由模式,並修改菜單跳轉路徑
在el-menu菜單中開啟vue-router模式,並在el-menu-item標籤中的index配置要跳轉的頁面地址
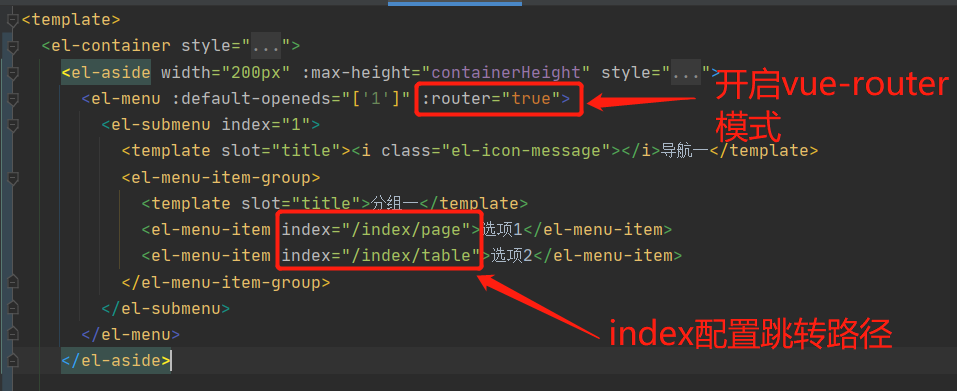
3.2、添加router-view,直接將主體內容替換為router-view標籤,並為name屬性添加參數,我這使用table標識,這個很重要,路由需要根據這個name屬性指定跳轉的路由視圖

4、創建兩個子頁面(頁面可以在任意位置,只要路由地址配置正確即可)
我這創建了first-page.vue,first-table.vue(頁面內容自定義)
在router/index.js配置路由,在哪個頁面下增加的router-view組件,就在相應的路由配置中添加children,這裡是在index路由修改配置,添加children,配置path、name和components(這裡注意,如果只配置默認路由視圖跳轉,用的參數是component,配置多路由視圖跳轉時components)
{
      path: '/index',
      name: 'index',
      component: () => import('@/components/index'),   // 這裡配置首頁默認路由跳轉的頁面組件
      children: [   // 添加子路由
        {
          path: 'page',  // 注意點:路徑前面不要帶/,否則無法跳轉,在這裡吃過虧
          name: 'page',
          components: {   // 注意參數名帶s
            table: () => import('@/components/first-page')  // 這裡的table跟首頁的router-view標籤的name一致,才會在首頁的路由視圖進行跳轉,看3.2
          }
        },
        {
          path: 'table',
          name: 'table',
          components: {
            table: () => import('@/components/first-table')
          }
        }
      ]
}
這樣配置訪問地址為:localhost:8080/#/index/page、localhost:8080/#/index/table
到這裡配置完成,訪問頁面測試一下
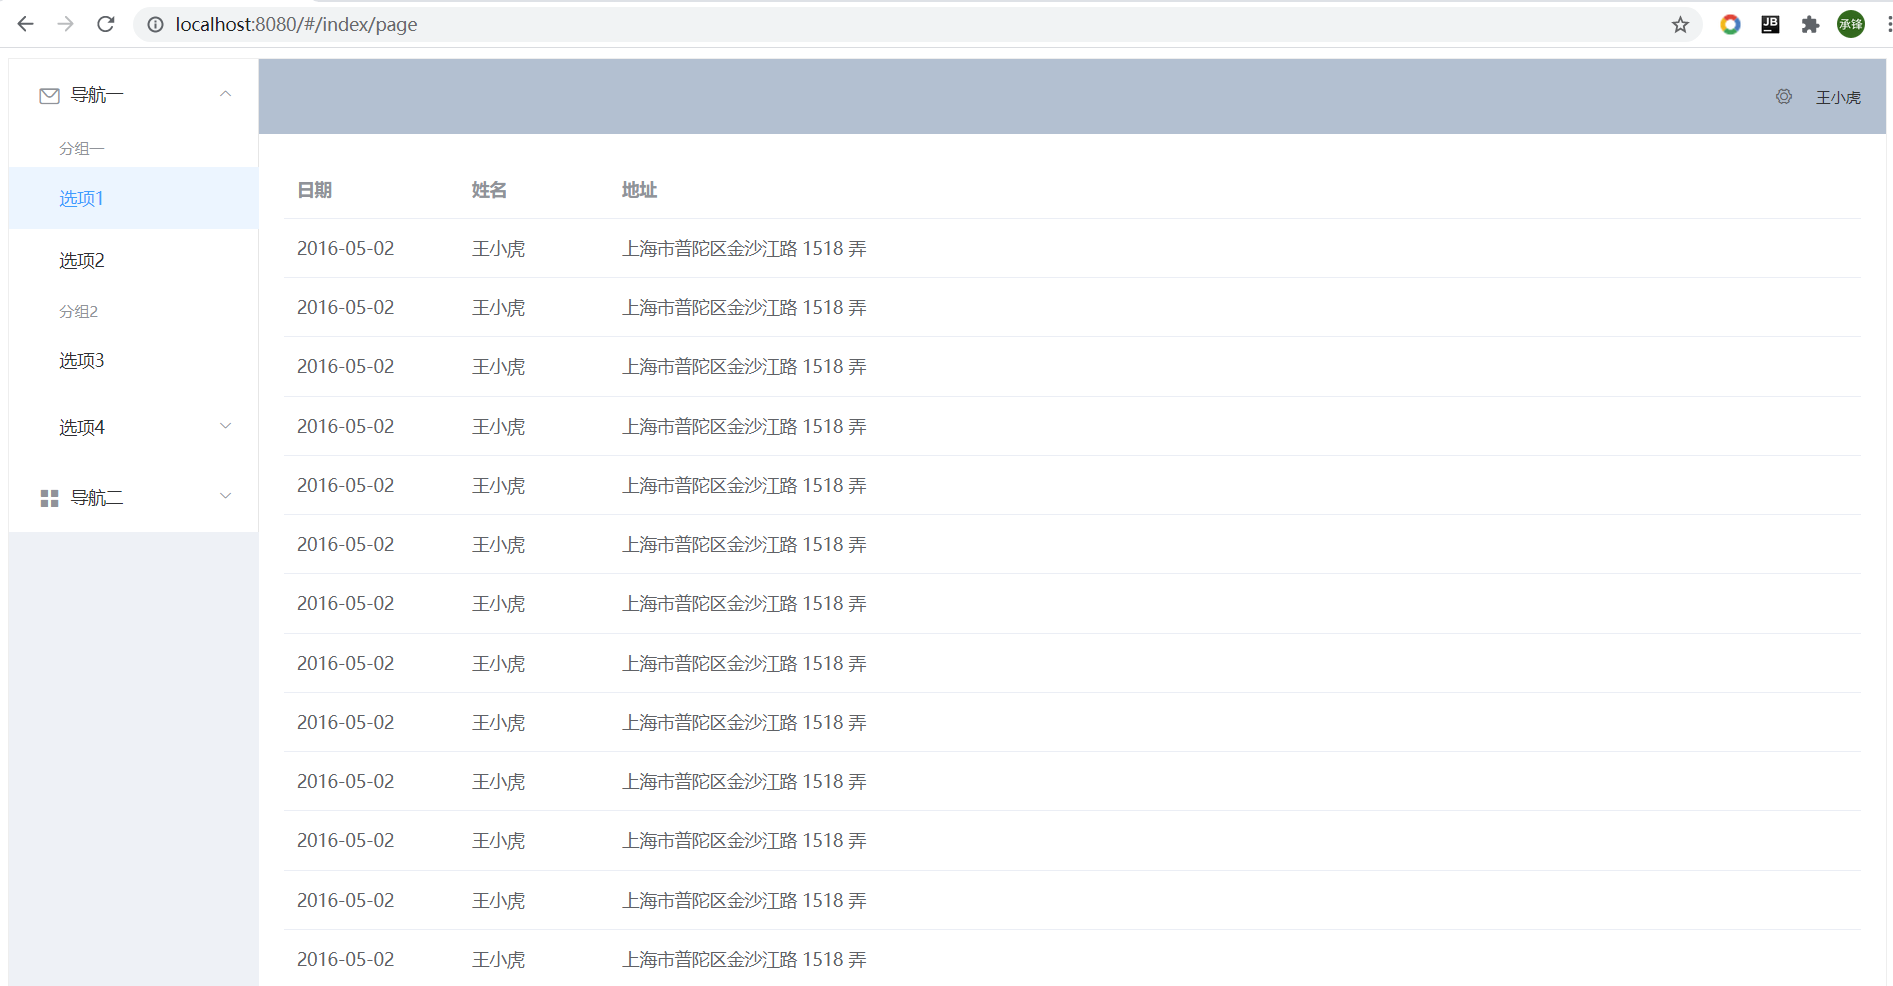
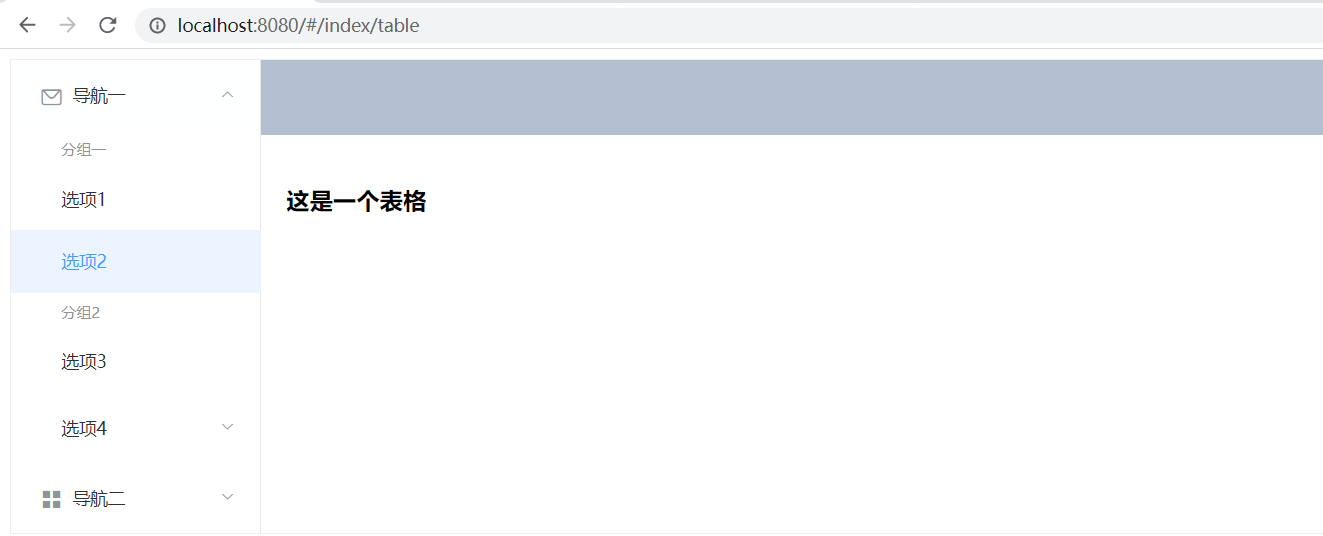
可以看到,兩個菜單配置改變了主體的路由視圖,控制視圖展示的頁面組件。配置完成


