ROSIntegration ROSIntegrationVision與虛幻引擎4(Unreal Engine 4)的配置
- 2022 年 11 月 17 日
- 筆記
- ROS, Unreal Engine
ROSIntegration ROSIntegrationVision與虛幻引擎4(Unreal Engine 4)的配置
操作系統:Ubuntu 18.04
虛幻引擎:4.26.2
一、虛幻引擎源代碼下載與編譯運行
參照官方文檔:虛幻引擎Linux快速入門
二、ROSIntegration下載與配置運行
1、配置ROSBridge
要啟用虛幻和ROS之間的通信,需要一個正在運行的ROSBridge和bson_mode
注意:請使用 rosbridge 版本=>0.8.0 以獲得完整的 BSON 支持
安裝rosbridge的推薦方法是在ROS工作空間使用源代碼進行編譯,即把rosbridge作為其中一個功能包,按照如下命令順序執行
sudo apt-get install ros-ROS1_DISTRO-rosauth # 將 ROS1_DISTRO 替換為ROS對應的版本名稱
cd ~/ros_workspace/ # 替換 ros_workspace 為工作空間目錄名稱
source devel/setup.bash
cd src/
git clone -b ros1 //github.com/RobotWebTools/rosbridge_suite.git
cd ..
catkin_make
source devel/setup.bash
此外,ROSIntegration使用包含在PyMongo包中的BSON,可以單獨安裝
sudo pip3 install pymongo
2、配置ROSIntegration
使用git命令下載ROSIntegration,放置在虛幻引擎項目文件Plugins文件夾下
cd unreal_engine_project # 替換 unreal_engine_project 為項目目錄文件夾路徑
mkdir Plugins # 如果沒有 Plugins 文件夾則手動創建
cd Plugins
git clone //github.com/code-iai/ROSIntegration.git
此時,ROSIntegration在虛幻項目中的文件結構如下:
unreal_engine_project/Plugins/ROSIntegration/ROSIntegration.uplugin
在虛幻引擎源代碼UnrealEngine下的Engine/Source/Developer/DesktopPlatform/Private/DesktopPlatformBase.cpp文件中執行此操作
查找此行:
Arguments += " -Progress -NoEngineChanges -NoHotReloadFromIDE";
替換為:
Arguments += " -Progress";
然後重新編譯引擎:
cd UnrealEngine
./Setup.sh
./GenerateProjectFiles.sh
make
編譯完成後,啟動項目並接受重建
(如果不進行上述步驟可能會遇到虛幻引擎自建項目打不開或遇到engine modules are out of date and cannot be compiled while the engine is running的情況)
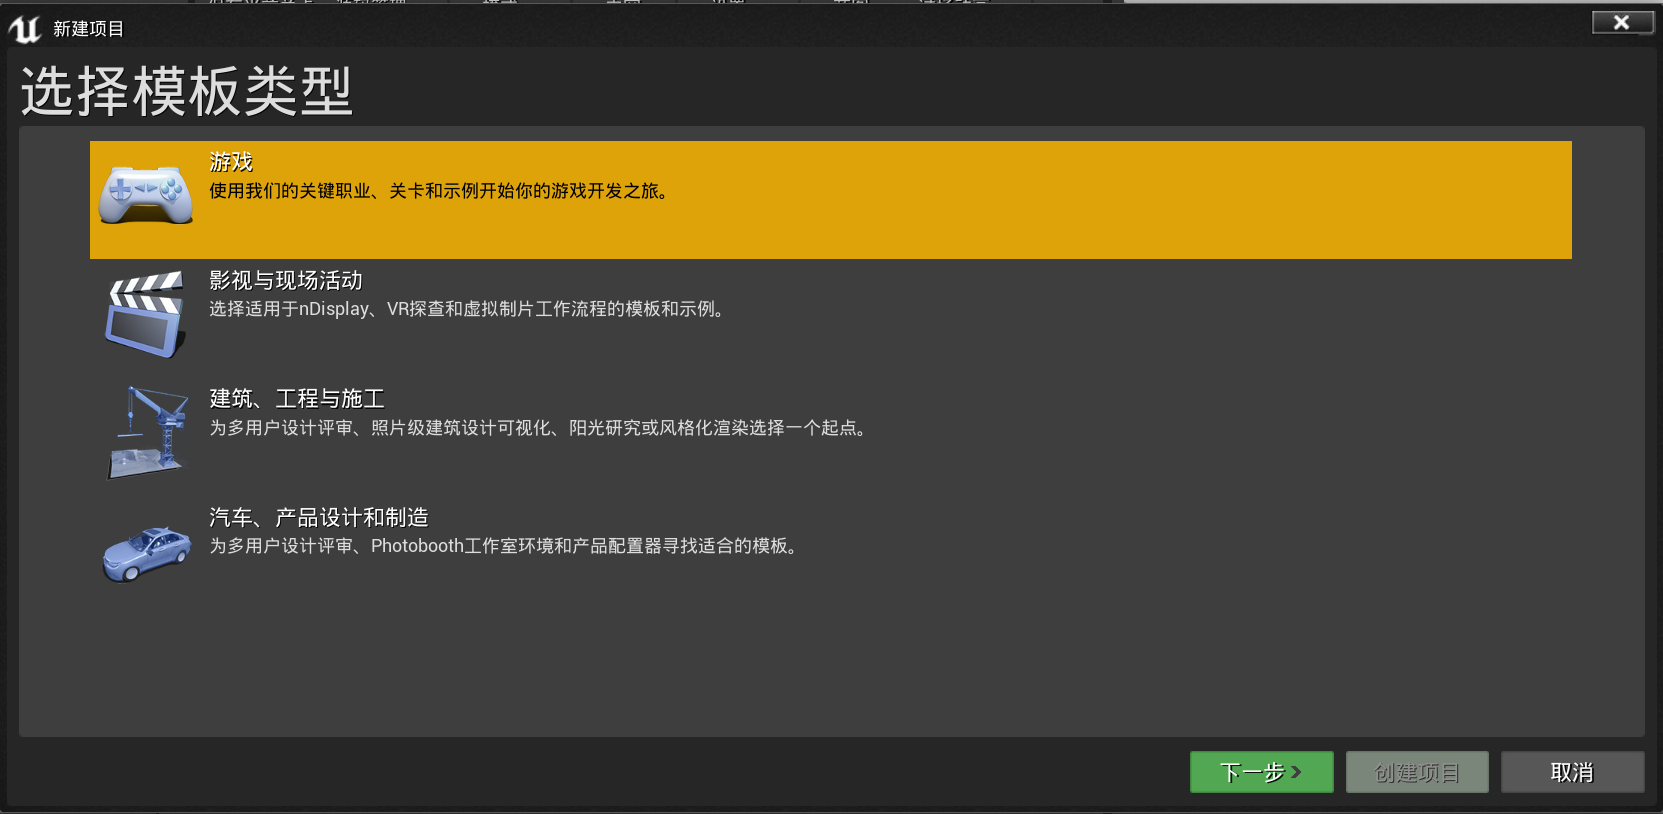
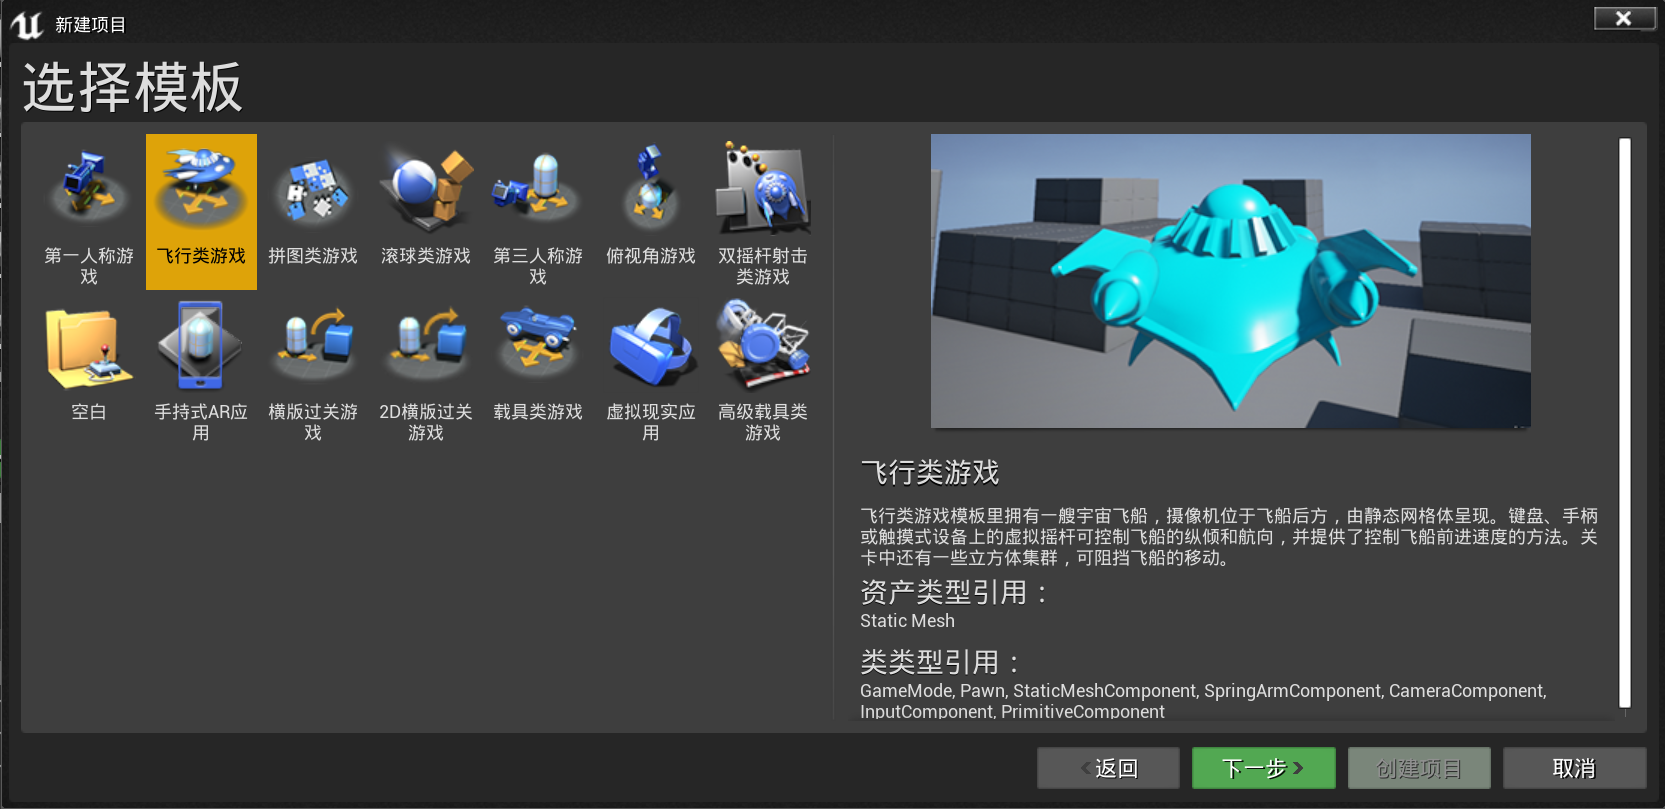
創建一個新的C++虛幻項目,或打開現有項目
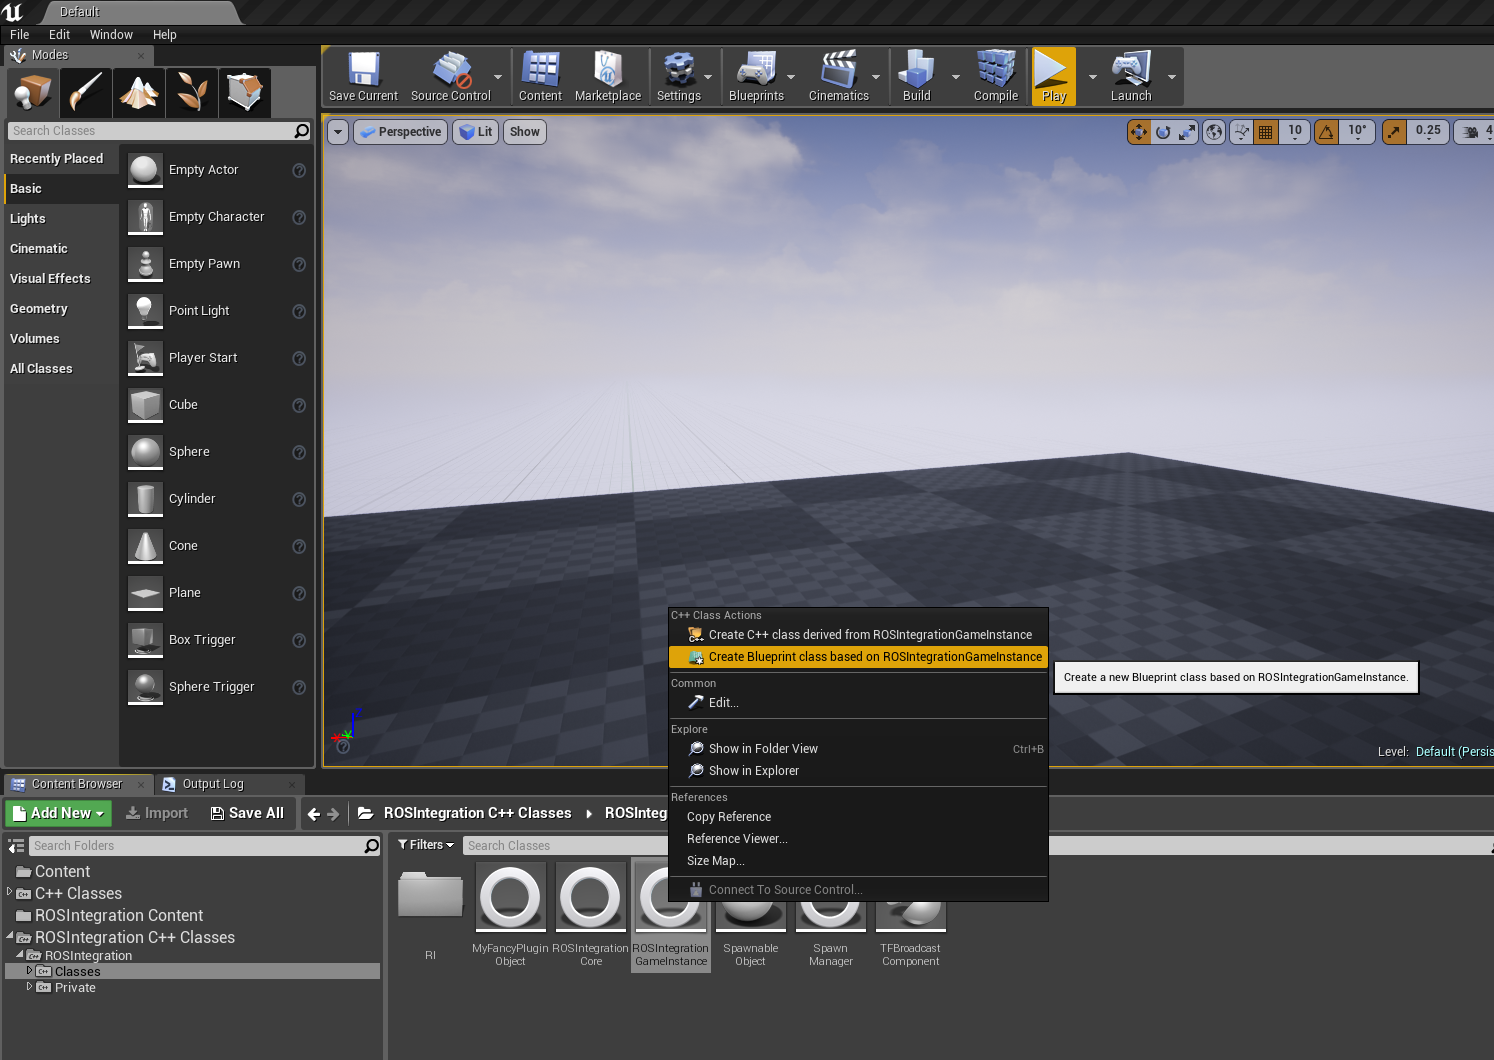
在內容瀏覽器中查找(在內容瀏覽器的右下角啟用「查看選項」>「顯示插件內容」)
點擊「添加/導入」按鈕下方的三條線按鈕,展開左側區域
選中「ROSIntegration「>「Classes」,右鍵ROSIntegrationGameInstance,點擊下圖黃色選項
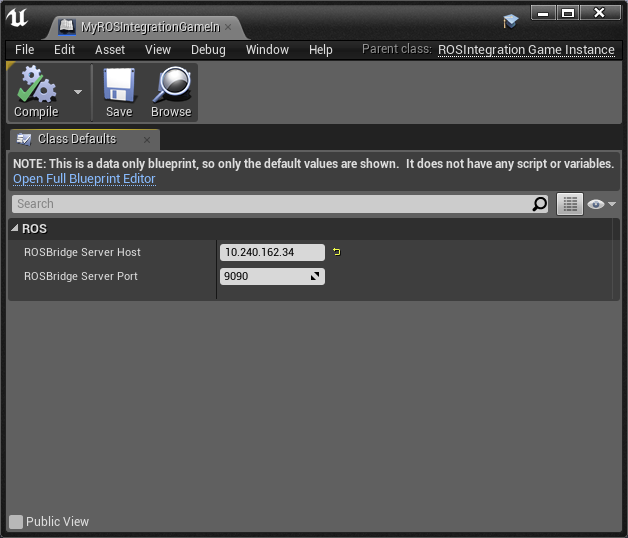
打開新的C++類/藍圖對象,並更改ROSBridgeSeverHost 和ROSBridgeServerPort,如果是本地運行的ROSBridge,則改為127.0.0.1即可
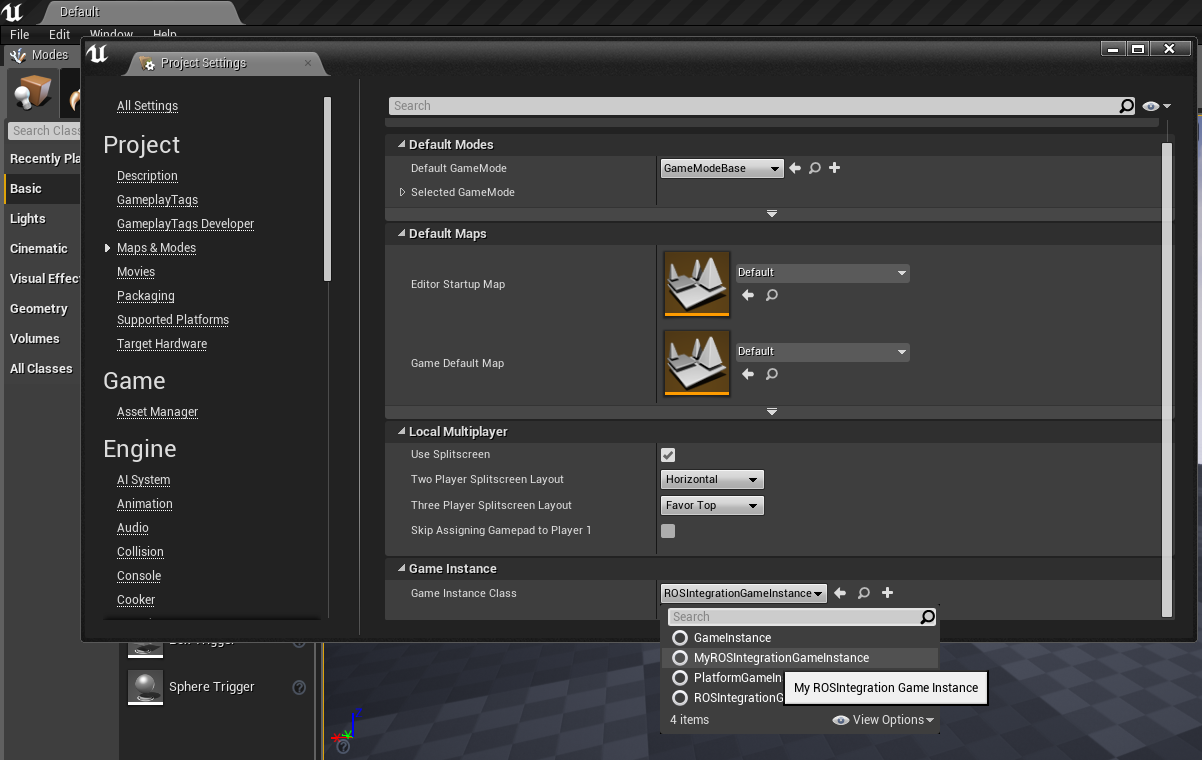
打開「地圖和模式」>「項目設置」,並將遊戲實例設置為與新的遊戲實例對象匹配,比如MyROSIntegrationGameInstance,而不是插件中的ROSIntegrationGameInstance
使用Ctrl + Shift + S保存所有更改
3、使用ROSIntegration
要進行與 ROS 的簡單發佈/訂閱通信,需要在創建一個新的C++ Actor,而非中文的角色(Charactor)。
接着創建 SamplePubliser
SamplePublisher.h
#include "ROSIntegration/Classes/RI/Topic.h"
#include "ROSIntegration/Classes/ROSIntegrationGameInstance.h"
#include "ROSIntegration/Public/std_msgs/String.h"
注意:上述代碼必須在#include "SamplePublisher.generated.h"之前,否則會報錯
SamplePublisher.cpp
// Initialize a topic
UTopic *ExampleTopic = NewObject<UTopic>(UTopic::StaticClass());
UROSIntegrationGameInstance* rosinst = Cast<UROSIntegrationGameInstance>(GetGameInstance());
ExampleTopic->Init(rosinst->ROSIntegrationCore, TEXT("/example_topic"), TEXT("std_msgs/String"));

// (Optional) Advertise the topic
ExampleTopic->Advertise();

// Publish a string to the topic
TSharedPtr<ROSMessages::std_msgs::String> StringMessage(new ROSMessages::std_msgs::String("This is an example"));
ExampleTopic->Publish(StringMessage);
注意:上述代碼放置在BeginPlay()函數中
進入unreal_engine_project/Source/unreal_engine_project目錄(替換 unreal_engine_project 為真實的項目名稱),打開unreal_engine_project.Build.cs文件
找到:
PublicDependencyModuleNames.AddRange(new string[] { "Core", "CoreUObject", "Engine", "InputCore" });
添加ROSIntegrationy依賴,形如:
PublicDependencyModuleNames.AddRange(new string[] { "Core", "CoreUObject", "Engine", "InputCore", "ROSIntegration" });
進入ROS工作空間的src目錄,創建測試功能包:
catkin_create_pkg ue_test std_msgs rospy roscpp
編譯並source:
catkin_make
source devel/setup.bash
創建一個監聽者cpp文件:
cd ue_test/src
touch listener.cpp
打開cpp並鍵入如下代碼:
#include "ros/ros.h"
#include "std_msgs/String.h"

/**
 * This tutorial demonstrates simple receipt of messages over the ROS system.
 */
void chatterCallback(const std_msgs::String::ConstPtr& msg)
{
  ROS_INFO("I heard: [%s]", msg->data.c_str());
}

int main(int argc, char **argv)
{
  /**
   * The ros::init() function needs to see argc and argv so that it can perform
   * any ROS arguments and name remapping that were provided at the command line.
   * For programmatic remappings you can use a different version of init() which takes
   * remappings directly, but for most command-line programs, passing argc and argv is
   * the easiest way to do it.  The third argument to init() is the name of the node.
   *
   * You must call one of the versions of ros::init() before using any other
   * part of the ROS system.
   */
  ros::init(argc, argv, "listener");

  /**
   * NodeHandle is the main access point to communications with the ROS system.
   * The first NodeHandle constructed will fully initialize this node, and the last
   * NodeHandle destructed will close down the node.
   */
  ros::NodeHandle n;

  /**
   * The subscribe() call is how you tell ROS that you want to receive messages
   * on a given topic.  This invokes a call to the ROS
   * master node, which keeps a registry of who is publishing and who
   * is subscribing.  Messages are passed to a callback function, here
   * called chatterCallback.  subscribe() returns a Subscriber object that you
   * must hold on to until you want to unsubscribe.  When all copies of the Subscriber
   * object go out of scope, this callback will automatically be unsubscribed from
   * this topic.
   *
   * The second parameter to the subscribe() function is the size of the message
   * queue.  If messages are arriving faster than they are being processed, this
   * is the number of messages that will be buffered up before beginning to throw
   * away the oldest ones.
   */
  ros::Subscriber sub = n.subscribe("/example_topic", 1000, chatterCallback);

  /**
   * ros::spin() will enter a loop, pumping callbacks.  With this version, all
   * callbacks will be called from within this thread (the main one).  ros::spin()
   * will exit when Ctrl-C is pressed, or the node is shutdown by the master.
   */
  ros::spin();

  return 0;
}
在CMakeLists.txt添加:
add_executable(listener src/listener.cpp)
target_link_libraries(listener ${catkin_LIBRARIES})
add_dependencies(listener listener)
4、測試ROSIntegration
啟動rosbridge
roslaunch rosbridge_server rosbridge_tcp.launch bson_only_mode:=True
運行新建功能包的監聽者
# rosrun <your package> talker
# 比如
rosrun ue_test talker
將在UE中新建的SamplePublisher托入三維世界中,並點擊運行
此時可以看到:
[INFO] [1588662504.536355639]: I heard: [This is an example]
恭喜你成功配置並運行了ROSIntegration!!!
三、ROSIntegrationVision下載與配置運行
1、虛幻引擎配置修改
在PATH_TO_UNREAL/Engine/Source/Programs/UnrealBuildTool/Platform/Linux/LinuxToolChain.cs中找到GetCLArguments_Global函數,並在其中添加語句Result += " -mf16c";,形如:
		protected virtual string GetCLArguments_Global(CppCompileEnvironment CompileEnvironment)
		{
			string Result = "";

			// build up the commandline common to C and C++
			Result += " -c";
			Result += " -pipe";
            Result += " -mf16c";

			if (ShouldUseLibcxx(CompileEnvironment.Architecture))
			{
				Result += " -nostdinc++";
				Result += " -I" + "ThirdParty/Linux/LibCxx/include/";
				Result += " -I" + "ThirdParty/Linux/LibCxx/include/c++/v1";
			}
而後重新編譯虛幻引擎(注意如下語句必須都執行才算是重新編譯):
cd UnrealEngine
./Setup.sh
./GenerateProjectFiles.sh
make
2、配置ROSIntegrationVision
使用git命令下載ROSIntegrationVision,放置在虛幻引擎項目文件Plugins文件夾下
cd unreal_engine_project # 替換 unreal_engine_project 為項目目錄文件夾路徑
mkdir Plugins # 如果沒有 Plugins 文件夾則手動創建
cd Plugins
git clone //github.com/code-iai/ROSIntegrationVision/.git
如果你是在Linux上編譯虛幻引擎4而非Windows,則在打開項目時可能會遇到
Building forest2Editor...
Performing 3 actions (6 in parallel)
[1/3] Compile Module.ROSIntegrationVision.cpp
In file included from .../Plugins/ROSIntegrationVision/Intermediate/Build/Linux/B4D820EA/UE4Editor/Development/ROSIntegrationVision/Module.ROSIntegrationVision.cpp:6:
.../Plugins/ROSIntegrationVision/Source/ROSIntegrationVision/Private/VisionComponent.cpp:754:4: error: use of undeclared identifier '_mm_div_epi16'; did you mean '_mm_min_epi16'?
_mm_div_epi16(
^~~~~~~~~~~~~
_mm_min_epi16
/home/pisces/Gitware/UnrealEngine/Engine/Extras/ThirdPartyNotUE/SDKs/HostLinux/Linux_x64/v17_clang-10.0.1-centos7/x86_64-unknown-linux-gnu/lib/clang/10.0.1/include/emmintrin.h:2412:1: note: '_mm_min_epi16' declared here
_mm_min_epi16(__m128i __a, __m128i __b)
^
1 error generated.
LogInit: Warning: Still incompatible or missing module: ROSIntegrationVision
這是由於官方參考了Windows for UVisionComponent上的編譯問題::convertDepth #28這一問題的回答,將源碼改為了適配Windows的環境,但在Ubuntu18.04中並不存在_mm_div_epi16這一函數
因而,改變代碼
void UVisionComponent::convertDepth(const uint16_t *in, __m128 *out) const
{
  const size_t size = (Width * Height) / 4;
  for (size_t i = 0; i < size; ++i, in += 4, ++out)
  {
    // Divide by 100 here in order to convert UU (cm) into ROS units (m)
    *out = _mm_cvtph_ps(
      _mm_div_epi16(
        _mm_set_epi16(0, 0, 0, 0, *(in + 3), *(in + 2), *(in + 1), *(in + 0)),
        _mm_set_epi16(100, 100, 100, 100, 100, 100, 100, 100)
      )
    );// / 100;
  }
}
為
void UVisionComponent::convertDepth(const uint16_t *in, __m128 *out) const
{
  const size_t size = (Width * Height) / 4;
  for (size_t i = 0; i < size; ++i, in += 4, ++out)
  {
    // Divide by 100 here in order to convert UU (cm) into ROS units (m)
    *out = _mm_cvtph_ps(_mm_set_epi16(
      0, 0, 0, 0, *(in + 3), *(in + 2), *(in + 1), *(in + 0))) / 100;
  }
}
即可成功自動編譯打開項目
3、使用ROSIntegrationVision
在內容瀏覽器ROSIntegrationVision/ROSIntegrationVision/Private中包含VisionActor C++文件,將其托入三維世界中即可現實攝像頭圖像信息
4、問題
注意:使用時需要先在VisionActor.cpp中作如下修改
AVisionActor::AVisionActor() : AActor()
{
	UE_LOG(LogTemp, Warning, TEXT("VisionActor CTOR"));

	// Set this actor to call Tick() every frame.  You can turn this off to improve performance if you don't need it.
	PrimaryActorTick.bCanEverTick = true;

    RootComponent = CreateDefaultSubobject<USceneComponent>(TEXT("Root"));
    SetRootComponent(RootComponent);

    vision = CreateDefaultSubobject<UVisionComponent>(TEXT("Vision"));
    vision->DisableTFPublishing = true;   // 添加
    //vision->ParentLink = "/world";   注釋掉
    vision->ParentLink = "desired_link";  // 添加
    vision->SetupAttachment(RootComponent);
}
將ROSIntegrationVision插件中的Binaries和Intermediate文件夾刪除,重新打開項目,使引擎重新編譯插件
如果在運行rosbridge時遇到如下問題
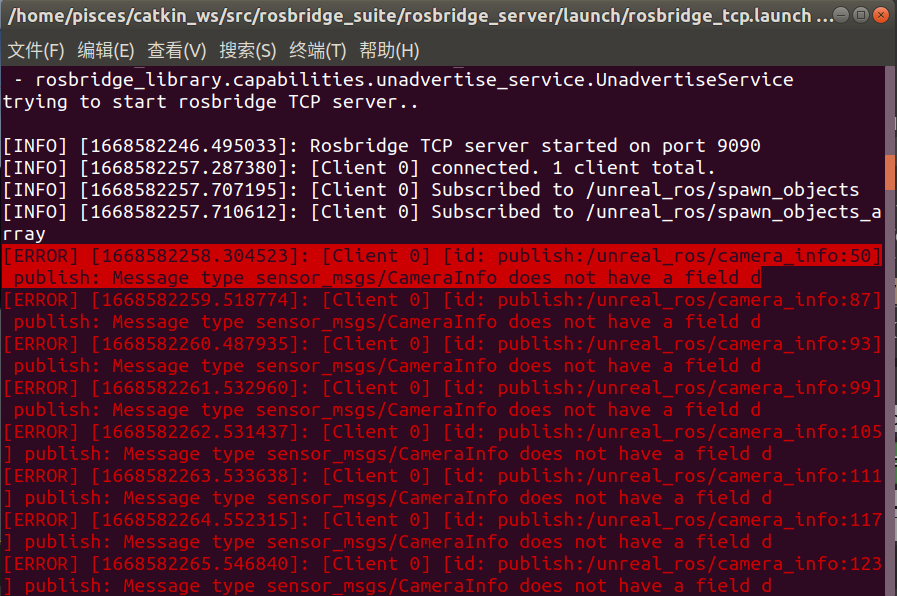
可以修改ROSIntegration/Source/ROSIntegration/Private/Conversion/Messages/sensor_msgs/SensorMsgsCameraInfoConverter.h文件
替換
	static void _bson_append_camera_info(bson_t *b, const ROSMessages::sensor_msgs::CameraInfo *msg)
	{
		// assert(CastMsg->D.Num() == 5); // TODO: use Unreal assertions
		assert(CastMsg->K.Num() == 9); // TODO: use Unreal assertions
		assert(CastMsg->R.Num() == 9);
		assert(CastMsg->P.Num() == 12);

		UStdMsgsHeaderConverter::_bson_append_child_header(b, "header", &msg->header);
		BSON_APPEND_INT32(b, "height", msg->height);
		BSON_APPEND_INT32(b, "width", msg->width);
		BSON_APPEND_UTF8(b, "distortion_model", TCHAR_TO_UTF8(*msg->distortion_model));
		_bson_append_double_tarray(b, "d", msg->D);
		_bson_append_double_tarray(b, "k", msg->K);
		_bson_append_double_tarray(b, "r", msg->R);
		_bson_append_double_tarray(b, "p", msg->P);
		BSON_APPEND_INT32(b, "binning_x", msg->binning_x);
		BSON_APPEND_INT32(b, "binning_y", msg->binning_y);
		USensorMsgsRegionOfInterestConverter::_bson_append_child_roi(b, "roi", &msg->roi);
	}
為
	static void _bson_append_camera_info(bson_t *b, const ROSMessages::sensor_msgs::CameraInfo *msg)
	{
		// assert(CastMsg->D.Num() == 5); // TODO: use Unreal assertions
		assert(CastMsg->K.Num() == 9); // TODO: use Unreal assertions
		assert(CastMsg->R.Num() == 9);
		assert(CastMsg->P.Num() == 12);

		UStdMsgsHeaderConverter::_bson_append_child_header(b, "header", &msg->header);
		BSON_APPEND_INT32(b, "height", msg->height);
		BSON_APPEND_INT32(b, "width", msg->width);
		BSON_APPEND_UTF8(b, "distortion_model", TCHAR_TO_UTF8(*msg->distortion_model));
		_bson_append_double_tarray(b, "D", msg->D); // 替換
		_bson_append_double_tarray(b, "K", msg->K); // 替換
		_bson_append_double_tarray(b, "R", msg->R); // 替換
		_bson_append_double_tarray(b, "P", msg->P);	// 替換
		BSON_APPEND_INT32(b, "binning_x", msg->binning_x);
		BSON_APPEND_INT32(b, "binning_y", msg->binning_y);
		USensorMsgsRegionOfInterestConverter::_bson_append_child_roi(b, "roi", &msg->roi);
	}
如果相機圖象FPS較低,可以考慮修改VisionComponent.cpp中 Framerate(1) 為 Framerate(100)
UVisionComponent::UVisionComponent() :
Width(640),
Height(480),
Framerate(100),    // change 1 to 100
UseEngineFramerate(false),
ServerPort(10000),
FrameTime(1.0f / Framerate),
TimePassed(0),
ColorsUsed(0)
四、參考資料
[1] code-iai/ROSIntegration markdown說明文檔及issues
[2] code-iai/ROSIntegrationVision markdown說明文檔及issues
[3] ROS Communication Sample on Unreal Engine Using ROSIntegration
[4] upgrade c++ project from ue 4.24 to 4.25 under Linux
部分圖片來源於網絡
轉載請註明出處!
本篇發佈在以下博客或網站:
雙魚座羊駝 的個人主頁 – 動態 – 掘金 (juejin.cn)


