6.Sentinel源碼分析—Sentinel是如何動態加載配置限流的?
- 2019 年 10 月 3 日
- 筆記
Sentinel源碼解析系列:
1.Sentinel源碼分析—FlowRuleManager加載規則做了什麼?
2. Sentinel源碼分析—Sentinel是如何進行流量統計的?
3. Sentinel源碼分析— QPS流量控制是如何實現的?
4.Sentinel源碼分析— Sentinel是如何做到降級的?
5.Sentinel源碼分析—Sentinel如何實現自適應限流?
有時候我們做限流的時候並不想直接寫死在代碼裏面,然後每次要改規則,或者增加規則的時候只能去重啟應用來解決。而是希望能夠動態的更改配置,這樣萬一出現緊急情況還能動態的進行配置修改。例如2018年的雙十一,淘寶的其他服務沒有一點問題,萬萬沒想到在前幾分鐘購物車服務掛了,這個時候就可以緊急限流,對應用進行拯救。
其實看完前面的內容,對動態配置應該是水到渠成的事情,因為所有的配置修改都是通過限流管理器如FlowRuleManager的內部監聽器來實現的,所以只要動態的給監聽器信號,那麼就可以做到動態的修改配置。
接下來我們來看看Sentinel是怎麼做的。一般的情況下,動態配置常見的實現方式有兩種:
- 拉模式:客戶端主動向某個規則管理中心定期輪詢拉取規則,這個規則中心可以是 RDBMS、文件,甚至是 VCS 等。這樣做的方式是簡單,缺點是無法及時獲取變更;
- 推模式:規則中心統一推送,客戶端通過註冊監聽器的方式時刻監聽變化,比如使用 Nacos、Zookeeper 等配置中心。這種方式有更好的實時性和一致性保證。
而Sentinel目前兩種都支持:
- Pull-based: 文件、Consul (since 1.7.0)
- Push-based: ZooKeeper, Redis, Nacos, Apollo
由於支持的方式太多,我這裡只講解兩種,文件和ZooKeeper,分別對應推拉兩種模式。
Pull-based: 文件
首先上個例子:
FlowRule.json
[ { "resource": "abc", "controlBehavior": 0, "count": 20.0, "grade": 1, "limitApp": "default", "strategy": 0 }, { "resource": "abc1", "controlBehavior": 0, "count": 20.0, "grade": 1, "limitApp": "default", "strategy": 0 } ]SimpleFileDataSourceDemo:
public class SimpleFileDataSourceDemo { private static final String KEY = "abc"; public static void main(String[] args) throws Exception { SimpleFileDataSourceDemo simpleFileDataSourceDemo = new SimpleFileDataSourceDemo(); simpleFileDataSourceDemo.init(); Entry entry = null; try { entry = SphU.entry(KEY); // dosomething } catch (BlockException e1) { // dosomething } catch (Exception e2) { // biz exception } finally { if (entry != null) { entry.exit(); } } } private void init() throws Exception { String flowRulePath = "/Users/luozhiyun/Downloads/test/FlowRule.json"; // Data source for FlowRule FileRefreshableDataSource<List<FlowRule>> flowRuleDataSource = new FileRefreshableDataSource<>( flowRulePath, flowRuleListParser); FlowRuleManager.register2Property(flowRuleDataSource.getProperty()); } private Converter<String, List<FlowRule>> flowRuleListParser = source -> JSON.parseObject(source, new TypeReference<List<FlowRule>>() {}); }這個例子主要就是寫死一個資源文件,然後讀取資源文件裏面的內容,再通過自定義的資源解析器來解析文件的內容後設置規則。
這裡我們主要需要分析FileRefreshableDataSource是怎麼加載文件然後通過FlowRuleManager註冊的。
FileRefreshableDataSource繼承關係:

FileRefreshableDataSource
private static final int MAX_SIZE = 1024 * 1024 * 4; private static final long DEFAULT_REFRESH_MS = 3000; private static final int DEFAULT_BUF_SIZE = 1024 * 1024; private static final Charset DEFAULT_CHAR_SET = Charset.forName("utf-8"); public FileRefreshableDataSource(String fileName, Converter<String, T> configParser) throws FileNotFoundException { this(new File(fileName), configParser, DEFAULT_REFRESH_MS, DEFAULT_BUF_SIZE, DEFAULT_CHAR_SET); } public FileRefreshableDataSource(File file, Converter<String, T> configParser, long recommendRefreshMs, int bufSize, Charset charset) throws FileNotFoundException { super(configParser, recommendRefreshMs); if (bufSize <= 0 || bufSize > MAX_SIZE) { throw new IllegalArgumentException("bufSize must between (0, " + MAX_SIZE + "], but " + bufSize + " get"); } if (file == null || file.isDirectory()) { throw new IllegalArgumentException("File can't be null or a directory"); } if (charset == null) { throw new IllegalArgumentException("charset can't be null"); } this.buf = new byte[bufSize]; this.file = file; this.charset = charset; // If the file does not exist, the last modified will be 0. this.lastModified = file.lastModified(); firstLoad(); }FileRefreshableDataSource的構造器裏面會設置各種參數,如:緩衝區大小、字符編碼、文件上次的修改時間、文件定時刷新時間等。
這個方法會調用父類的構造器進行初始化,我們再看一下AutoRefreshDataSource做了什麼。
AutoRefreshDataSource
public AutoRefreshDataSource(Converter<S, T> configParser, final long recommendRefreshMs) { super(configParser); if (recommendRefreshMs <= 0) { throw new IllegalArgumentException("recommendRefreshMs must > 0, but " + recommendRefreshMs + " get"); } this.recommendRefreshMs = recommendRefreshMs; startTimerService(); }AutoRefreshDataSource的構造器一開始會調用父類的構造器進行初始化,如下:
AbstractDataSource
public AbstractDataSource(Converter<S, T> parser) { if (parser == null) { throw new IllegalArgumentException("parser can't be null"); } this.parser = parser; this.property = new DynamicSentinelProperty<T>(); }AbstractDataSource的構造器是為了給兩個變量設值parser和property,其中property是DynamicSentinelProperty的實例。
我們再回到AutoRefreshDataSource中,AutoRefreshDataSource設值完recommendRefreshMs參數後會調用startTimerService方法來開啟一個定時的調度任務。
AutoRefreshDataSource#startTimerService
private void startTimerService() { service = Executors.newScheduledThreadPool(1, new NamedThreadFactory("sentinel-datasource-auto-refresh-task", true)); service.scheduleAtFixedRate(new Runnable() { @Override public void run() { try { if (!isModified()) { return; } T newValue = loadConfig(); getProperty().updateValue(newValue); } catch (Throwable e) { RecordLog.info("loadConfig exception", e); } } }, recommendRefreshMs, recommendRefreshMs, TimeUnit.MILLISECONDS); } public SentinelProperty<T> getProperty() { return property; }這個方法裏面會開啟一個線程,每3000ms調用一次run方法。run方法里會首先會校驗一下文件有沒有被修改過,如果有的話就調用loadConfig來加載配置,然後調用getProperty方法獲取父類設置的property來更新配置。
下來我們依次來講解一下這幾個主要的方法:
isModified方法是一個鉤子,調用的是FileRefreshableDataSource的isModified方法:
FileRefreshableDataSource#isModified
protected boolean isModified() { long curLastModified = file.lastModified(); if (curLastModified != this.lastModified) { this.lastModified = curLastModified; return true; } return false; }isModified每次都會查看file有沒有被修改,並記錄一下修改的時間。
接着往下是調用loadConfig加載文件:
AbstractDataSource#loadConfig
public T loadConfig() throws Exception { return loadConfig(readSource()); } public T loadConfig(S conf) throws Exception { T value = parser.convert(conf); return value; }FileRefreshableDataSource#readSource
public String readSource() throws Exception { if (!file.exists()) { // Will throw FileNotFoundException later. RecordLog.warn(String.format("[FileRefreshableDataSource] File does not exist: %s", file.getAbsolutePath())); } FileInputStream inputStream = null; try { inputStream = new FileInputStream(file); FileChannel channel = inputStream.getChannel(); if (channel.size() > buf.length) { throw new IllegalStateException(file.getAbsolutePath() + " file size=" + channel.size() + ", is bigger than bufSize=" + buf.length + ". Can't read"); } int len = inputStream.read(buf); return new String(buf, 0, len, charset); } finally { if (inputStream != null) { try { inputStream.close(); } catch (Exception ignore) { } } } }loadConfig方法的實現還是很清晰的,首先是調用readSource通過io流讀取文件,然後再通過傳入的解析器解析文件的內容。
接着會調用DynamicSentinelProperty的updateValue方法,遍歷監聽器更新配置:
DynamicSentinelProperty#updateValue
public boolean updateValue(T newValue) { //判斷新的元素和舊元素是否相同 if (isEqual(value, newValue)) { return false; } RecordLog.info("[DynamicSentinelProperty] Config will be updated to: " + newValue); value = newValue; for (PropertyListener<T> listener : listeners) { listener.configUpdate(newValue); } return true; }當然,還沒加載FlowRuleManager的時候肯定是沒有監聽器的。
講完了FileRefreshableDataSource的父類的加載,我們再回到FileRefreshableDataSource的構造器中。繼續往下走會調用firstLoad方法首次加載配置文件初始化一次。
FileRefreshableDataSource#firstLoad
private void firstLoad() { try { T newValue = loadConfig(); getProperty().updateValue(newValue); } catch (Throwable e) { RecordLog.info("loadConfig exception", e); } }下面我們再看一下FlowRuleManager是怎麼註冊的。註冊的時候會調用register2Property方法進行註冊:
FlowRuleManager#register2Property
public static void register2Property(SentinelProperty<List<FlowRule>> property) { AssertUtil.notNull(property, "property cannot be null"); synchronized (LISTENER) { RecordLog.info("[FlowRuleManager] Registering new property to flow rule manager"); currentProperty.removeListener(LISTENER); property.addListener(LISTENER); currentProperty = property; } }這個方法實際上就是添加了一個監聽器,然後將FlowRuleManager的currentProperty替換成flowRuleDataSource創建的property。然後flowRuleDataSource裏面的定時線程會每隔3秒鐘調用一下這個LISTENER的configUpdate方法進行刷新規則,這樣就實現了動態更新規則。
Push-based:ZooKeeper
我們還是先給出一個例子:
public static void main(String[] args) { final String remoteAddress = "127.0.0.1:2181"; final String path = "/Sentinel-Demo/SYSTEM-CODE-DEMO-FLOW"; ReadableDataSource<String, List<FlowRule>> flowRuleDataSource = new ZookeeperDataSource<>(remoteAddress, path, source -> JSON.parseObject(source, new TypeReference<List<FlowRule>>() {})); FlowRuleManager.register2Property(flowRuleDataSource.getProperty()); }在這裡我定義了/Sentinel-Demo/SYSTEM-CODE-DEMO-FLOW這個path,如果這個path內的內容發生了變化,那麼就會刷新規則。
我們先看一下ZookeeperDataSource的繼承關係:
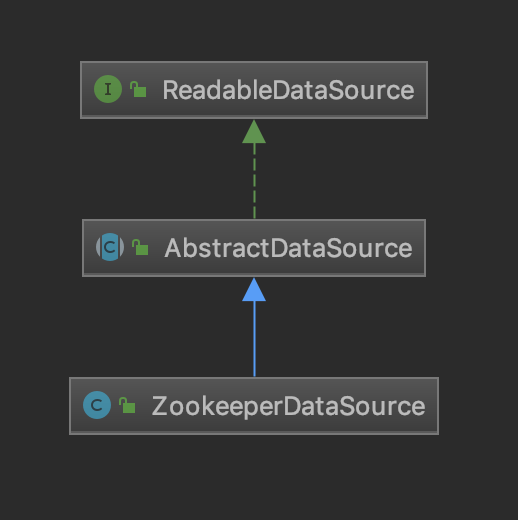
ZookeeperDataSource
public ZookeeperDataSource(final String serverAddr, final String path, Converter<String, T> parser) { super(parser); if (StringUtil.isBlank(serverAddr) || StringUtil.isBlank(path)) { throw new IllegalArgumentException(String.format("Bad argument: serverAddr=[%s], path=[%s]", serverAddr, path)); } this.path = path; init(serverAddr, null); }AbstractDataSource
public AbstractDataSource(Converter<S, T> parser) { if (parser == null) { throw new IllegalArgumentException("parser can't be null"); } this.parser = parser; this.property = new DynamicSentinelProperty<T>(); }ZookeeperDataSource首先會調用父類進行參數的設置,在校驗完之後調用init方法進行初始化。
ZookeeperDataSource#init
private void init(final String serverAddr, final List<AuthInfo> authInfos) { initZookeeperListener(serverAddr, authInfos); loadInitialConfig(); }ZookeeperDataSource#initZookeeperListener
private void initZookeeperListener(final String serverAddr, final List<AuthInfo> authInfos) { try { //設置監聽 this.listener = new NodeCacheListener() { @Override public void nodeChanged() { try { T newValue = loadConfig(); RecordLog.info(String.format("[ZookeeperDataSource] New property value received for (%s, %s): %s", serverAddr, path, newValue)); // Update the new value to the property. getProperty().updateValue(newValue); } catch (Exception ex) { RecordLog.warn("[ZookeeperDataSource] loadConfig exception", ex); } } }; String zkKey = getZkKey(serverAddr, authInfos); if (zkClientMap.containsKey(zkKey)) { this.zkClient = zkClientMap.get(zkKey); } else { //如果key不存在,那麼就加鎖設值 synchronized (lock) { if (!zkClientMap.containsKey(zkKey)) { CuratorFramework zc = null; //根據不同的條件獲取client if (authInfos == null || authInfos.size() == 0) { zc = CuratorFrameworkFactory.newClient(serverAddr, new ExponentialBackoffRetry(SLEEP_TIME, RETRY_TIMES)); } else { zc = CuratorFrameworkFactory.builder(). connectString(serverAddr). retryPolicy(new ExponentialBackoffRetry(SLEEP_TIME, RETRY_TIMES)). authorization(authInfos). build(); } this.zkClient = zc; this.zkClient.start(); Map<String, CuratorFramework> newZkClientMap = new HashMap<>(zkClientMap.size()); newZkClientMap.putAll(zkClientMap); newZkClientMap.put(zkKey, zc); zkClientMap = newZkClientMap; } else { this.zkClient = zkClientMap.get(zkKey); } } } //為節點添加watcher //監聽數據節點的變更,會觸發事件 this.nodeCache = new NodeCache(this.zkClient, this.path); this.nodeCache.getListenable().addListener(this.listener, this.pool); this.nodeCache.start(); } catch (Exception e) { RecordLog.warn("[ZookeeperDataSource] Error occurred when initializing Zookeeper data source", e); e.printStackTrace(); } }這個方法主要就是用來創建client和設值監聽,都是zk的常規操作,不熟悉的,可以去看看Curator是怎麼使用的。
private void loadInitialConfig() { try { //調用父類的loadConfig方法 T newValue = loadConfig(); if (newValue == null) { RecordLog.warn("[ZookeeperDataSource] WARN: initial config is null, you may have to check your data source"); } getProperty().updateValue(newValue); } catch (Exception ex) { RecordLog.warn("[ZookeeperDataSource] Error when loading initial config", ex); } }設值完zk的client和監聽後會調用一次updateValue,首次加載節點的信息。
AbstractDataSource
public T loadConfig() throws Exception { return loadConfig(readSource()); } public T loadConfig(S conf) throws Exception { T value = parser.convert(conf); return value; }父類的loadConfig會調用子類的readSource讀取配置信息,然後調用parser.convert進行反序列化。
ZookeeperDataSource#readSource
public String readSource() throws Exception { if (this.zkClient == null) { throw new IllegalStateException("Zookeeper has not been initialized or error occurred"); } String configInfo = null; ChildData childData = nodeCache.getCurrentData(); if (null != childData && childData.getData() != null) { configInfo = new String(childData.getData()); } return configInfo; }這個方法是用來讀取zk節點裏面的信息。
最後FlowRuleManager.register2Property的方法就和上面的文件動態配置的是一樣的了。
