svelte組件:svelte3.x自定義美化虛擬滾動條組件svelte-scrollbar
- 2022 年 5 月 6 日
- 筆記
- Svelte知識, svelte自定義組件, svelte3美化滾動條, svelte3.x虛擬滾動條, svelte自定義滾動條, svelte.js滾動條組件
基於svelte3.0自定義pc端虛擬滾動條組件svelteScrollbar。
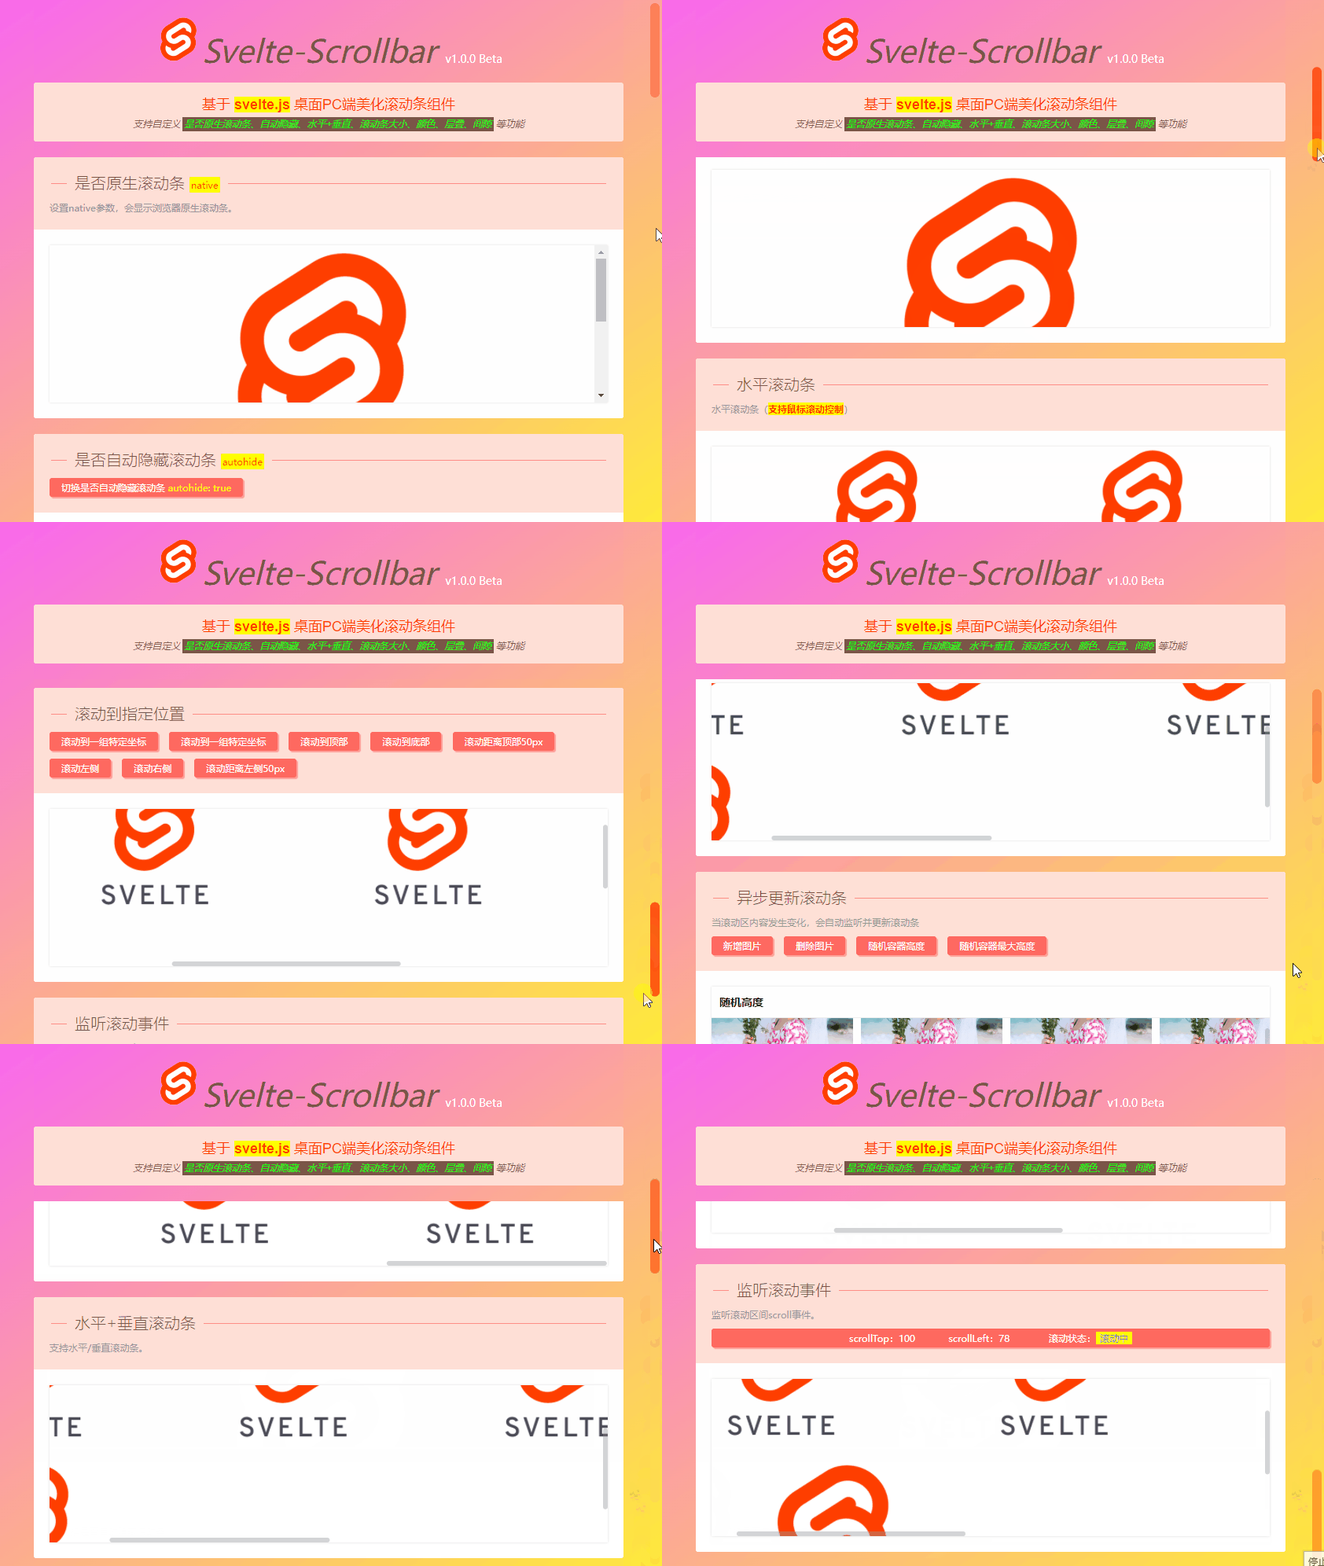
svelte-scrollbar:運用svelte3.x創建的桌面pc版自定義美化滾動條組件。支援是否原生滾動條、自動隱藏、水平+垂直滾動(滾輪滑動)、自定義滾動條大小、背景色、間距及動態實時更新等功能。

svelteScrollbar功能及效果有些類似elementUI組件庫中的el-scrollbar組件。
◆ 引入使用
在需要使用虛擬滾動條的頁面引入組件。
import Scrollbar from '$lib/Scrollbar'
◆ 快速使用
使用 <Scrollbar></Scrollbar> 包住的內容,即可快速生成一個虛擬滾動條組件。
<!-- //原生滾動條 -->
<Scrollbar native>
    <div>自定義內容資訊。</div>
</Scrollbar>

<!-- //自動隱藏滾動條 -->
<Scrollbar autohide={true}>
    <div>自定義內容資訊。</div>
</Scrollbar>

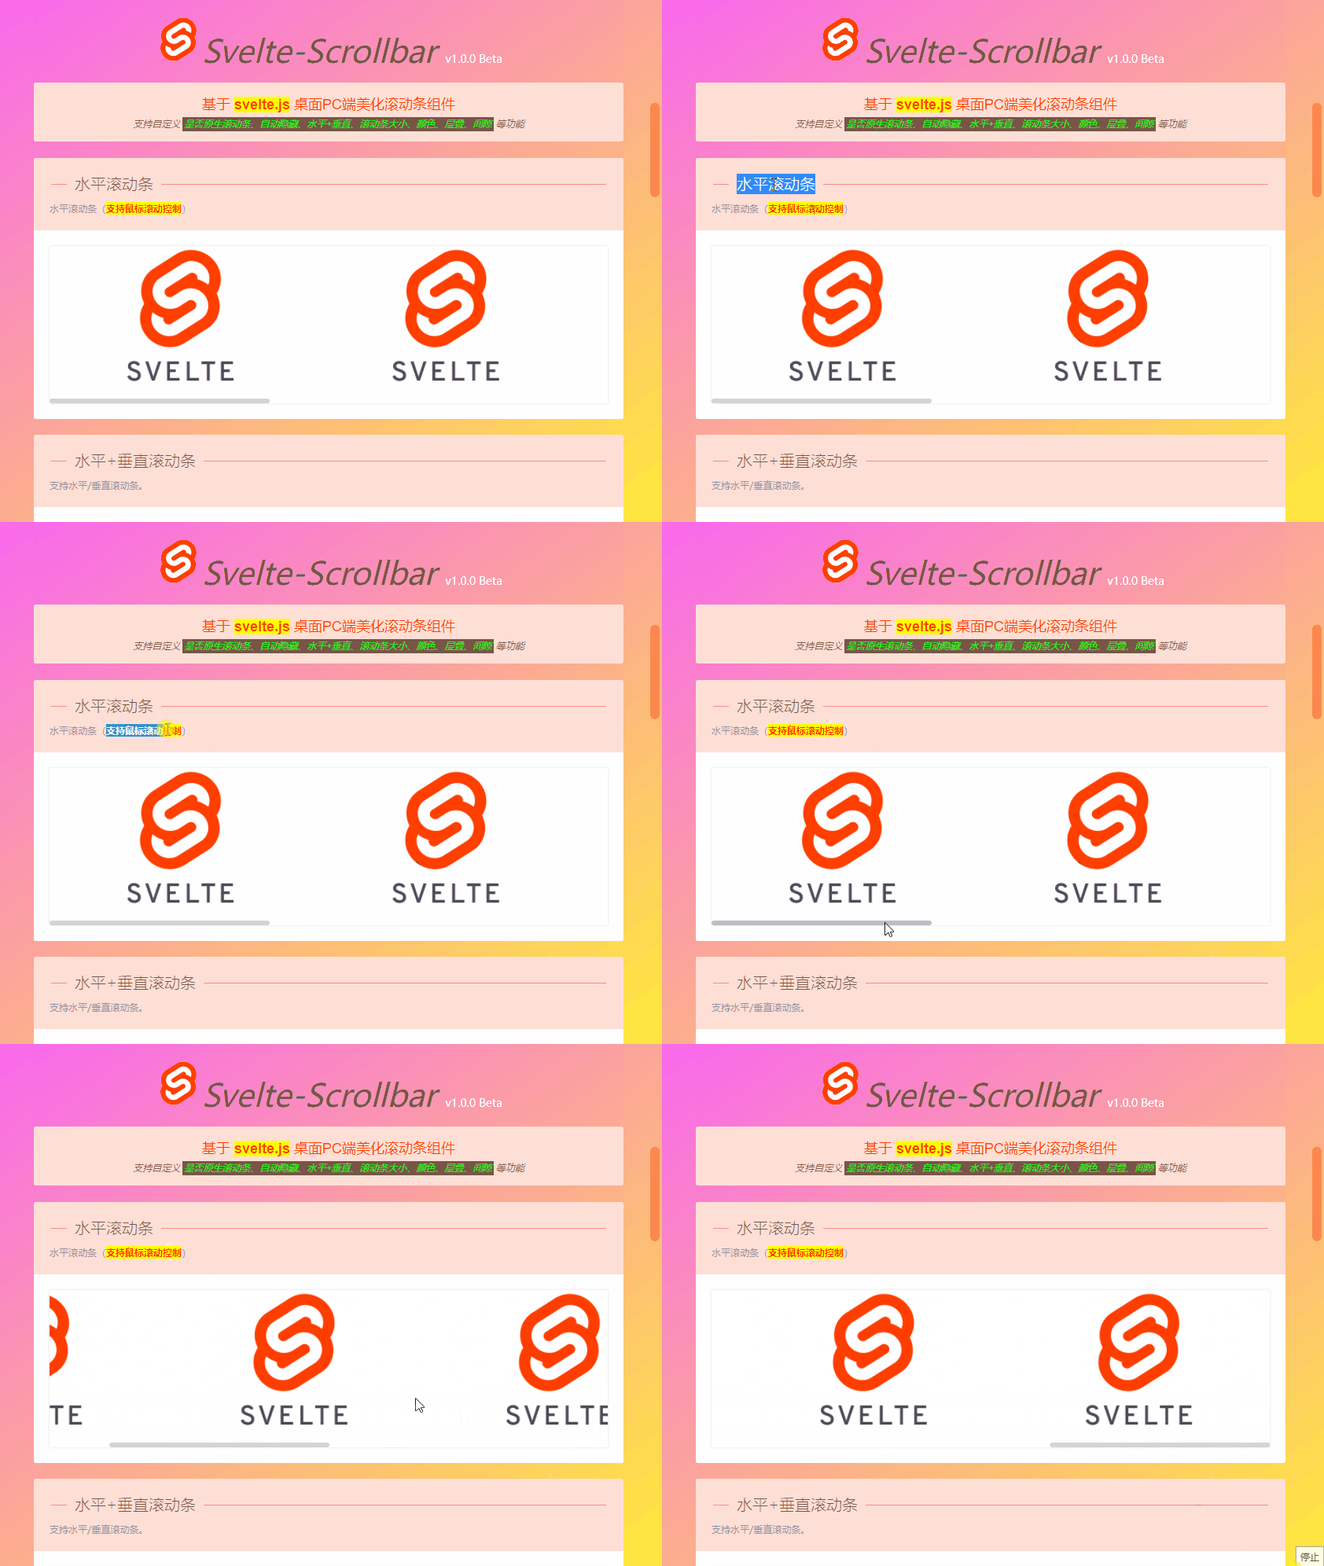
<!-- //水平滾動條(支援滾輪滑動) -->
<Scrollbar mousewheel>
    <div>自定義內容資訊。</div>
</Scrollbar>

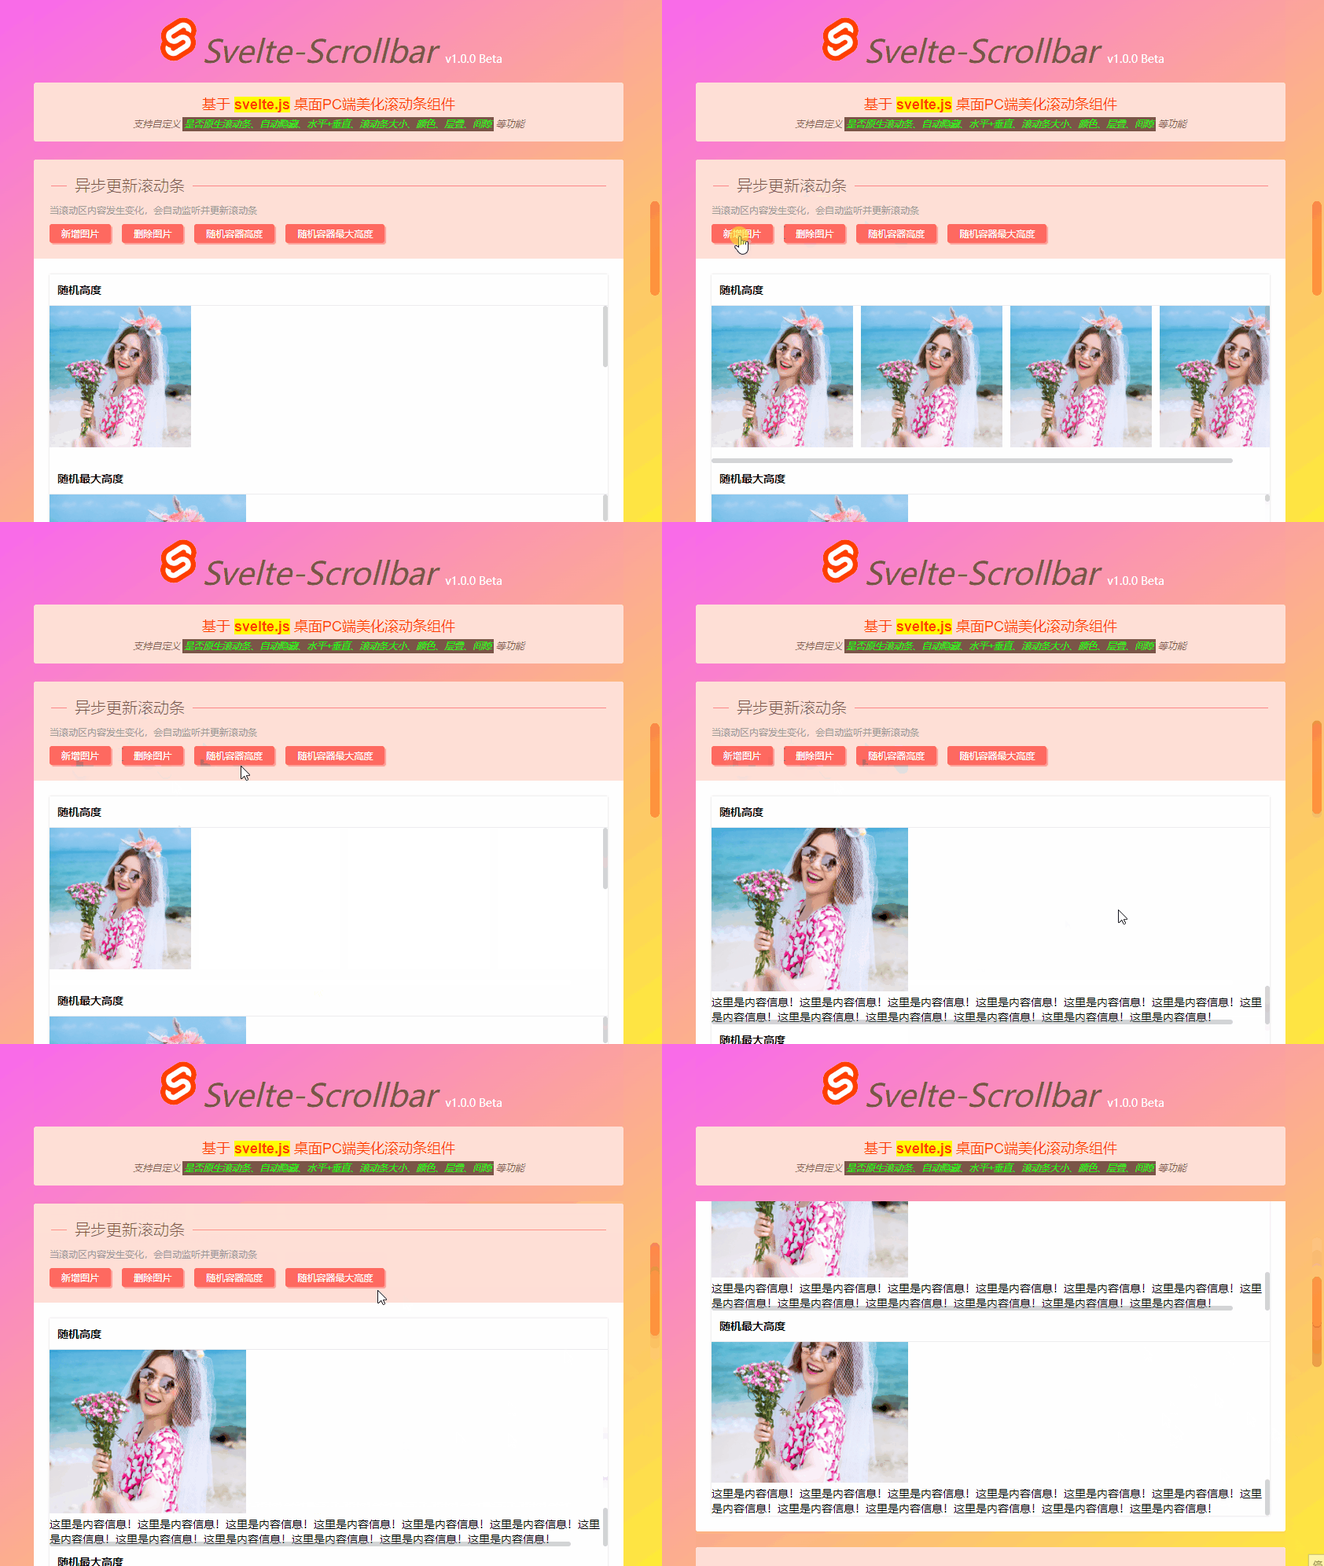
<!-- //自定義高度/最大高度 -->
<Scrollbar height="200" maxHeight="350">
    <div>自定義內容資訊。</div>
</Scrollbar>

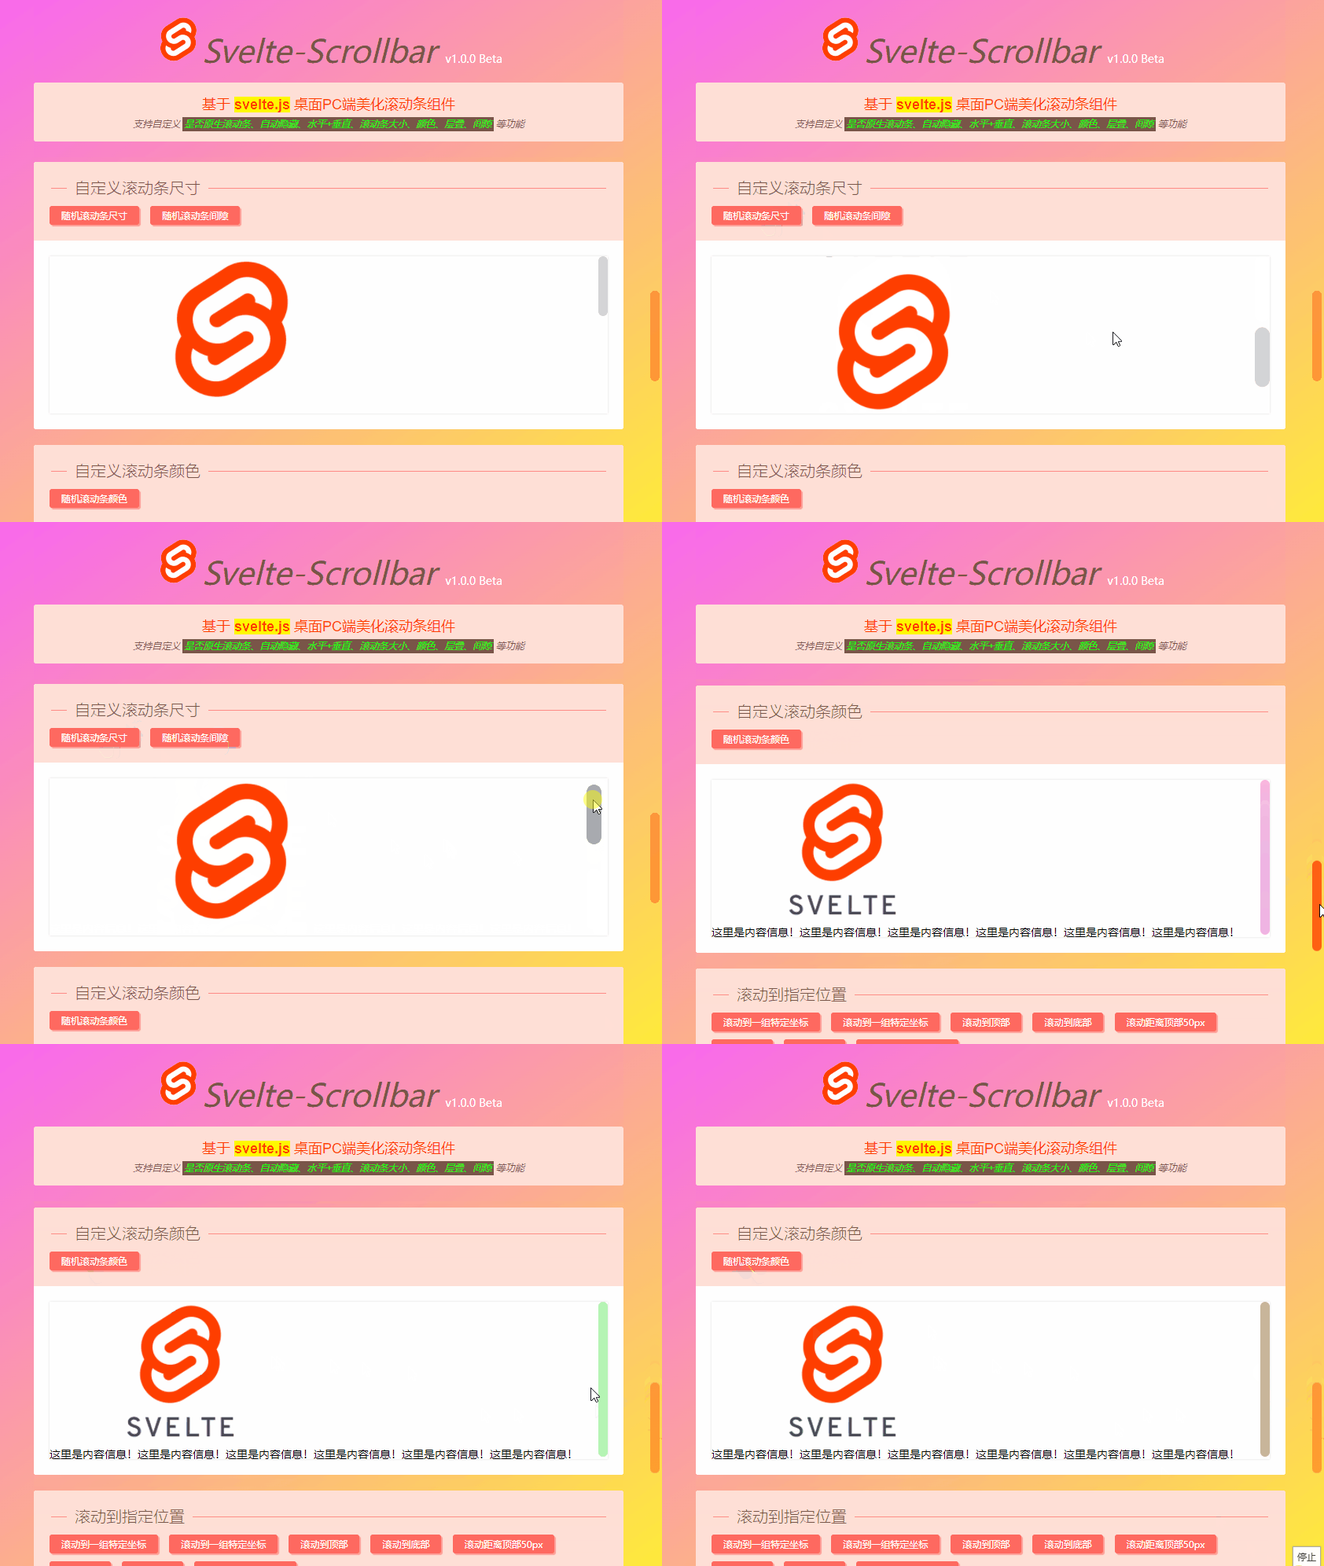
<!-- //自定義大小/間隙/顏色 -->
<Scrollbar size="10px" gap="5" color="#09f">
    <div>自定義內容資訊。</div>
</Scrollbar>


◆ 實現過程
svelteScrollbar支援如下自定義參數配置。
<script>
    // 是否開啟原生滾動條
    export let native = false
    // 是否自動隱藏滾動條
    export let autohide = false
    // 滾動條尺寸
    export let size = undefined
    // 滾動條顏色
    export let color = ''
    // 滾動條層疊
    export let zIndex = null
    // 滾動條區域高度
    export let height = undefined
    // 滾動條區域最大高度
    export let maxHeight = undefined
    // 滾動條間隙
    export let gap = 0
    // 是否開啟水平滾輪滾動控制
    export let mousewheel = false

    ...
</script>
組件模板及js邏輯處理部分。
<div class="vui__scrollbar" bind:this={el} on:mouseenter={handleMouseEnter} on:mouseleave={handleMouseLeave}>
    <div class="vscroll__wrap" class:hidenative={!bool(native)} bind:this={wrap} on:scroll={handleScroll} on:mousewheel={handleMouseWheel} style="{wrapStyle}">
        <slot />
    </div>
    <div class="vscroll__bar vertical" class:ishide={!data.isShowBar} on:mousedown={e => handleClickTrack(e, 0)} >
        <div class="vscroll__thumb" bind:this={barY} style="background: {color}; height: {data.barHeight}px; width: {addUnit(size)}" on:mousedown={e => handleDragThumb(e, 0)}></div>
    </div>
    <div class="vscroll__bar horizontal" class:ishide={!data.isShowBar} on:mousedown={e => handleClickTrack(e, 1)}>
        <div class="vscroll__thumb" bind:this={barX} style="background: {color}; width: {data.barWidth}px; height: {addUnit(size)}" on:mousedown={e => handleDragThumb(e, 1)}></div>
    </div>
</div>

<script>
    /**
     * @Desc     svelte3.x桌面端虛擬滾動條組件SvelteScrollbar
     * @Time     andy by 2022-05
     * @About    Q:282310962  wx:xy190310
     */

    // ...

    import { onMount, afterUpdate, createEventDispatcher, tick } from 'svelte'
    const dispatch = createEventDispatcher()

    import util from './util'

    $: data = {
        // 滾動條寬度
        barWidth: 0,
        // 滾動條高度
        barHeight: 0,
        // 滾動條水平偏移率
        ratioX: 1,
        // 滾動條垂直偏移率
        ratioY: 1,
        // 滑鼠是否按住滾動條
        isTaped: false,
        // 滑鼠是否懸停於滾動區域
        isHover: false,
        // 顯示滾動條
        isShowBar: !bool(autohide)
    }

    const bool = (boolean) => JSON.parse(boolean) ? true : false
    const addUnit = (val) => val ? parseInt(val) + 'px' : null

    let observeTimer = null
    let c = {}
    // 滾動條對象
    let el
    let wrap
    let barX
    let barY

    $: wrapStyle = `height: ${addUnit(height)}; max-height: ${addUnit(maxHeight)}`
    $: GAP = addUnit(gap)

    onMount(() => {
        console.log('監聽滾動條開啟...')

        updated()

        let observer = new MutationObserver(mutation => {
            updated()
        })

        observer.observe(wrap, {
            attributes: true,
            childList: true,
            subtree: true,
            attributeFilter: [
                'style', 'class'
            ]
        })

        window.addEventListener('resize', util.throttle(updated))

        return () => {
            observer.disconnect()
            window.removeEventListener('resize', updated)
            console.log('監聽滾動條關閉...')
        }
    })

    afterUpdate(() => {
        // console.log('監聽dom更新...')
    })

    // 滑鼠滑入
    function handleMouseEnter() {
        data.isHover = true
        data.isShowBar = true
        updated()
    }

    // 滑鼠滑出
    function handleMouseLeave() {
        data.isHover = false
        if(!data.isTaped && bool(autohide)) {
            data.isShowBar = false
        }
    }

    // 拖動滾動條
    function handleDragThumb(e, index) {
        // ...
    }

    // 點擊滾動條插槽
    function handleClickTrack(e, index) {
        if(index == 0) {
            wrap.scrollTop = (Math.abs(e.target.getBoundingClientRect().top - e.clientY) - barY.offsetHeight / 2) * data.ratioY
            barY.style.transform = `translateY(${wrap.scrollTop / data.ratioY}px)`
        }else {
            wrap.scrollLeft = (Math.abs(e.target.getBoundingClientRect().left - e.clientX) - barX.offsetWidth / 2) * data.ratioX
            barX.style.transform = `translateX(${wrap.scrollLeft / data.ratioX}px)`
        }
    }

    // 更新滾動區
    async function updated() {
        // ...
    }

    // 滑鼠滾動事件
    function handleScroll(e) {
        let target = e.target
        let status
        if(target.scrollTop == 0) {
            status = 'top' // 滾動至頂部
        }else if(target.scrollTop + target.offsetHeight >= target.scrollHeight) {
            status = 'bottom' // 滾動至底部
        }

        /**
         * 父組件調用 const { target, status, scrollTop, scrollLeft } = e.detail
         */
        dispatch('scroll', {
            target, // 滾動對象
            status, // 滾動狀態(記錄滾動位置)
            scrollTop: target.scrollTop,
            scrollLeft: target.scrollLeft
        })
        updated()
    }

    // 控制滾輪水平滾動
    function handleMouseWheel(e) {
        if(!bool(mousewheel)) return
        e.preventDefault()
        if(wrap.scrollWidth > wrap.offsetWidth) {
            wrap.scrollLeft += e.deltaY
        }
    }

    // 滾動到一組特定坐標
    export async function scrollTo(arg1, arg2) {
        await tick()

        if(typeof arg1 == 'object') {
            wrap.scrollTo(arg1)
        }else if(!isNaN(arg1) && !isNaN(arg2)) {
            wrap.scrollTo(arg1, arg2)
        }
    }

    // 設置滾動條到頂部的距離
    export async function setScrollTop(value) {
        await tick()

        wrap.scrollTop = value == 'top' ? 0 : value == 'bottom' ? wrap.scrollHeight : parseInt(value)
        barY.style.transform = `translateY(${wrap.scrollTop / data.ratioY}px)`
    }

    // 設置滾動條到左邊的距離
    export async function setScrollLeft(value) {
        await tick()

        wrap.scrollLeft = value == 'left' ? 0 : value == 'right' ? wrap.scrollWidth : parseInt(value)
        barX.style.transform = `translateX(${wrap.scrollLeft / data.ratioX}px)`
    }
</script>

<style>
    @import 'Scrollbar.scss';
</style>
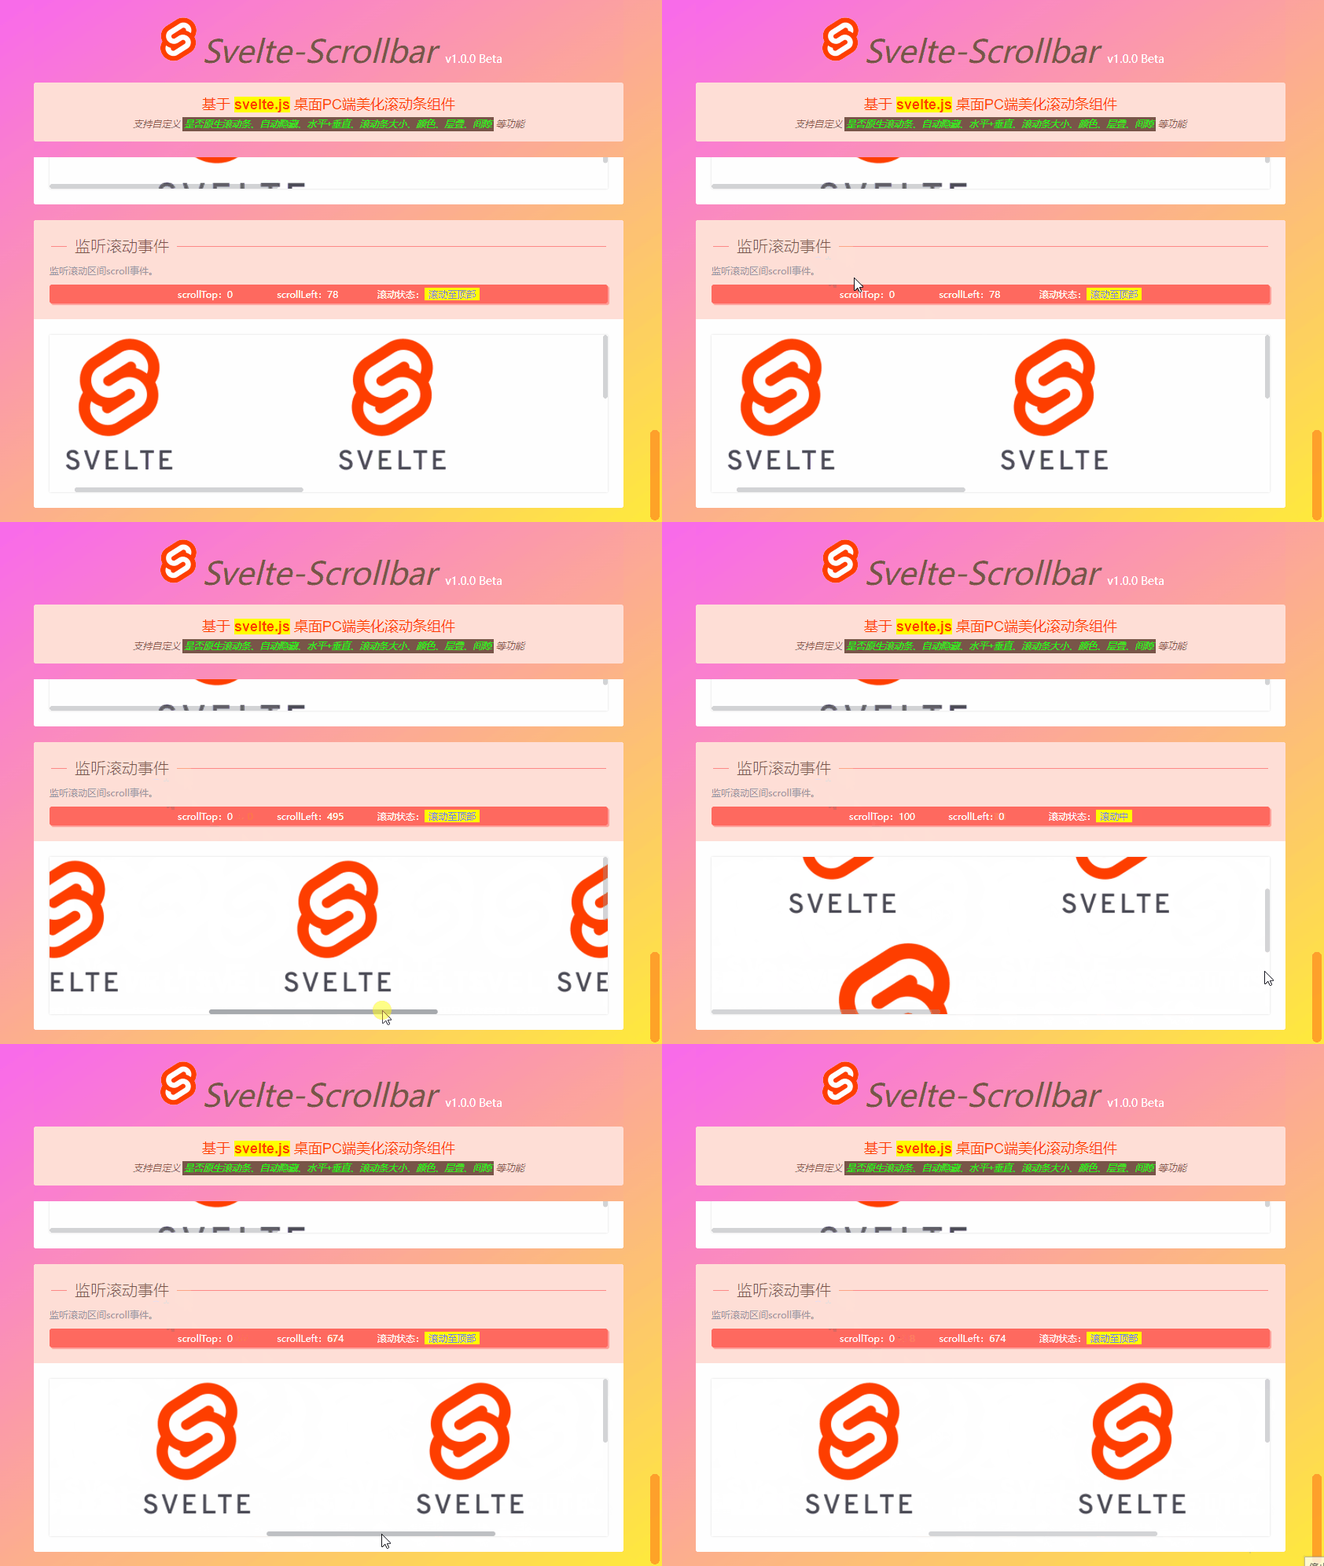
如上圖:支援監聽scroll滾動事件。
<Scrollbar on:scroll={handleScroll}>
    <div>自定義內容資訊。</div>
</Scrollbar>

<script>
    // 監聽滾動事件
    function handleScroll(e) {
        const { target, status, scrollTop, scrollLeft } = e.detail
        scrollTopVal = scrollTop
        scrollLeftVal = scrollLeft

        // 判斷滾動狀態(方法1)
        /*if(scrollTop == 0) {
            scrollStatus = '滾動至頂部'
        }else if(scrollTop + target.offsetHeight >= target.scrollHeight) {
            scrollStatus = '滾動底部'
        }else {
            scrollStatus = '滾動中'
        }*/

        // // 判斷滾動狀態(方法2)
        if(status == 'top') {
            scrollStatus = '滾動至頂部'
        }else if(status == 'bottom') {
            scrollStatus = '滾動底部'
        }else {
            scrollStatus = '滾動中'
        }
    }
</script>
Okay,基於svelte.js開發自定義虛擬滾動條組件就分享到這裡。希望對大家有些幫助哈~~😃
最後附上一個Svelte3自定義pc端對話框組件
svelte-layer基於svelte3.x自定義彈窗組件://www.cnblogs.com/xiaoyan2017/p/16158044.html