consul+ansible+shell批量下發註冊node_exporter
- 2020 年 7 月 22 日
- 筆記
- Prometheus, Consul, 監控相關
--日期:2020年7月21日
--作者:飛翔的小胖豬
文檔功能說明:
文檔通過ansible+shell+consul的方式實現批量下發安裝Linux作業系統監控的node_exporter軟體,自動載入node_exporter軟體到系統開機啟動中並通過consul註冊的功能。為部署prometheus系統做好前期準備。
適用範圍:
文檔試用於centos、redhat系列作業系統。由於文檔使用了ansible對主機操作,被管理端linux需要有python2.6以上的環境才能使用,對於centos和redhat系統默認只能控制6及以上的系統,6以下的作業系統需要單獨的升級python版本。所有被管主機上請提前安裝好wget工具。
註:
對於已有業務承載的6以下作業系統不建議升級python包來實現,該部分機器請手動下發軟體及腳本。
環境準備:
ansible伺服器一台 批量操作控制主機節點
httpd伺服器一台 存放soft文件和腳本文件
consul伺服器一台 實現自動註冊node_exporter到資源中
ansible和consul可以部署到一台設備上,也可以分開部署。文檔中不涉及到ansible及consul服務的安裝部署操作,如有需求請查看作者其他部署筆記或自己百度。

步驟:
1.在ansible中添加被管控節點列表
2.編寫腳本下發軟體及腳本至伺服器
3.實現node_exporter註冊到consul中
4.檢查查看consul註冊情況
step1:配置ansible服務及ansible控制清單
文章不對ansible安裝進行介紹,在ansible安裝完成的前提下進行配置。進行配置前需要保證環境中以完成ansible軟體安裝。
配置配置首次通過ssh協議登錄被控主機時不用敲yes。
修改/etc/ansible/ansible.cfg文件中的host_key_checking = False
# vim /etc/ansible/ansible.cfg
# additional paths to search for roles in, colon separated
#roles_path = /etc/ansible/roles
# uncomment this to disable SSH key host checking
host_key_checking = False
# change the default callback, you can only have one 'stdout' type enabled at a time.
修改/etc/ssh/ssh_config中StrictHostKeyChecking ask選項為StrictHostKeyChecking no
# vim /etc/ssh/ssh_config
#   CheckHostIP yes
#   AddressFamily any
#   ConnectTimeout 0
StrictHostKeyChecking no
#   IdentityFile ~/.ssh/id_rsa
#   IdentityFile ~/.ssh/id_dsa
編輯/etc/ansible/hosts文件添加需要控制的主機清單,文檔使用明文密碼添加內容。
# vim /etc/ansible/hosts
[node_exporter_group]
node_1   ansible_ssh_host=192.168.111.12   ansible_ssh_user=root    ansible_ssh_pass=yinwan
node_2   ansible_ssh_host=192.168.111.124   ansible_ssh_user=root    ansible_ssh_pass=yinwan
配置說明:
ansible_ssh_host: 被控主機ip地址或域名
ansible_ssh_user: 被控主機可訪問用戶
ansible_ssh_pass: 對應ansible_ssh_user用戶的密碼
驗證ansible服務配置成功,使用ansible調用命令查看被控主機主機名,如果正常能夠顯示出主機名。
查看ansible中一共有多少個被控主機
# ansible all --list

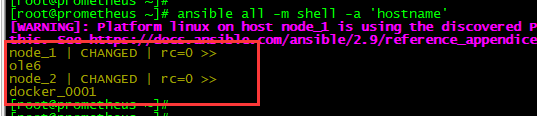
查看被控主機的主機名,能夠正常查看主機名表示主機能夠被ansible服務控制,配置添加成功。
# ansible all -m shell -a 'hostname'
step2:編寫腳本下發軟體及腳本至伺服器
實驗使用http放置node_exporter軟體和各種腳本,客戶主機通過wget可從http伺服器獲取到資源。在進行軟體及腳本下發前需要讀者自定搭建一個http服務,作者直接使用yum命令安裝了一個httpd服務,把軟體及腳本放置/var/www/html/soft/文件夾中。
腳本說明:
存放地址:/var/www/html/soft/
# ls -l /var/www/html/soft/

get_soft.sh:客戶端主機下載node_exporter軟體、node_exporter啟動腳本。並且完成node_exporter安裝。
auto_start_node_exporter.sh:客戶端啟動node_exporter腳本
auto_consul_zc.sh:使用/etc/ansible/hosts列表生成註冊consul命令
auto_prometh_server.sh:啟動prometheus+consul+alertmanager腳本
# vim get_soft.sh


#!/bin/bash
    if uname -a | grep -i _64 &> /dev/null ;then
        echo "64位處理方式"
        if [ -f /root/node_exporter-1.0.0.linux-amd64.tar.gz ];then
            echo ' node_exporter-1.0.0.linux-amd64.tar.gz file exist'
        else
            if timeout 20  wget -P /root  http://192.168.111.83/soft/node_exporter-1.0.0.linux-amd64.tar.gz;then
                if [ -f  /usr/local/node_exporter/node_exporter ];then
                    echo "node_exporter file exist , not exec command. "
                else
                    if [ -f /root/auto_start_node_exporter.sh ];then
                        echo 'auto_start_node_exporter.sh  exist '
                    else
                        if timeout 20  wget -P /root  http://192.168.111.83/soft/auto_start_node_exporter.sh;then
                            if cat /etc/rc.d/rc.local | grep -i auto_start_node_exporter &> /dev/null ;then
                                echo "file in auto startup  low"
                            else
                                echo '/root/auto_start_node_exporter.sh'  >> /etc/rc.d/rc.local
                                chmod a+x /etc/rc.d/rc.local
                            fi
                        else
                            echo 'auto_start_node_exporter.sh  copy faile !! '
                        fi
                    fi
                    mkdir /scripts/soft/   -p
                    tar -zxvf /root/node_exporter-1.0.0.linux-amd64.tar.gz  -C /scripts/soft/   && mv /scripts/soft/node_exporter-1.0.0.linux-amd64/ /usr/local/node_exporter
                    chmod a+x /root/auto_start_node_exporter.sh
                fi
            else
                echo "node_exporter soft_file copy faile !!"
            fi
        fi
    else
        echo "32位處理方式"
        if [ -f /root/node_exporter-1.0.0.linux-amd64.tar.gz ];then
            echo ' node_exporter-1.0.0.linux-amd64.tar.gz file exist'
        else
            if timeout 20  wget -P /root  http://192.168.111.83/soft/node_exporter-1.0.0.linux-386.tar.gz;then
                if [ -f  /usr/local/node_exporter/node_exporter ];then
                    echo "node_exporter file exist , not exec command. "
                else
                    if [ -f /root/auto_start_node_exporter.sh ];then
                        echo 'auto_start_node_exporter.sh  exist '
                    else
                        if timeout 20  wget -P /root  http://192.168.111.83/soft/auto_start_node_exporter.sh;then
                            if cat /etc/rc.d/rc.local | grep -i auto_start_node_exporter &> /dev/null ;then
                                echo "file in auto startup  low"
                            else
                                echo '/root/auto_start_node_exporter.sh'  >> /etc/rc.d/rc.local
                                chmod a+x /etc/rc.d/rc.local
                            fi
                        else
                            echo 'auto_start_node_exporter.sh  copy faile !! '
                        fi
                    fi
                    mkdir /scripts/soft/   -p
                    tar -zxvf /root/node_exporter-1.0.0.linux-386.tar.gz  -C /scripts/soft/   && mv /scripts/soft/node_exporter-1.0.0.linux-386/ /usr/local/node_exporter
                    chmod a+x /root/auto_start_node_exporter.sh
                fi
            else
                echo "node_exporter soft_file copy faile !!"
            fi
        fi
    fi
# vim auto_start_node_exporter.sh
#!/bin/bash
if  which netstat &> /dev/null;then
        if netstat -alntup | grep -i 9100 &> /dev/null;then
                echo "9100 port exist  netstat !"
        else
              /usr/local/node_exporter/node_exporter  &> /dev/null &
        fi
elif  which ss &> /dev/null ;then
        if  ss -alntup | grep -i 9100 &> /dev/null;then
                echo "9100 port exist ss ! "
        else
              /usr/local/node_exporter/node_exporter  &> /dev/null &
        fi
else
        echo "未知錯誤,不啟動程式"
fi
# vim auto_consul_zc.sh
#!/bin/bash
cat /etc/ansible/hosts  | grep -v '\[' | grep -v ^$  | sed 's/=/ /'  | awk '{print $1,$3}' > /prometheus/tmp_consul_list.txt
sleep 1
cat /prometheus/tmp_consul_list.txt  | while read  host_name    host_addr
do
    echo " curl -X PUT -d ' {\"id\": \"${host_name}\",\"name\": \"${host_name}\",\"address\": \"${host_addr}\",\"port\": 9100,\"tags\": [\"test\",\"node\",\"linux\"],\"checks\":  [{\"http\": \"//${host_addr}:9100/metrics\", \"interval\": \"5s\"}]}' //192.168.111.83:8500/v1/agent/service/register "
done
# vim auto_prometh_server.sh
#!/bin/bash
sleep 1
prometheus --config.file="/usr/local/prometheus/prometheus.yml" --storage.tsdb.retention.time=90d &> /dev/null &
consul agent -server -bootstrap-expect 1 -data-dir=/usr/local/consul_data/data -ui -bind 192.168.111.83 -client 0.0.0.0  &> /dev/null &
alertmanager --config.file=/usr/local/alertmanager/alertmanager.yml --cluster.advertise-address=0.0.0.0:9093 &> /dev/null &
執行ansible批量下發node_exporter和啟動腳本並在主機端自動安裝node_exporter軟體加入啟動腳本到開機啟動。
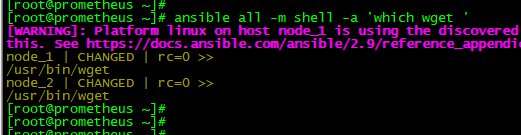
在下發之前需要確認被控主機節點有wget命令,如果沒有wget命令則需要先完成wget安裝。
# ansible all -m shell -a 'which wget '
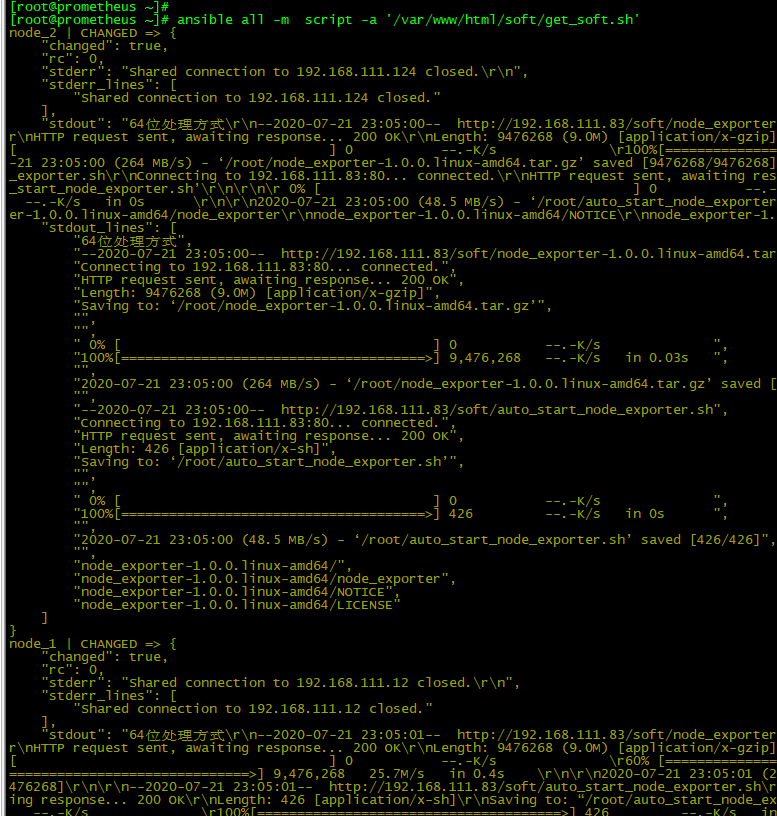
使用ansible的script模組執行腳本/var/www/html/soft/get_soft.sh
# ansible all -m script -a '/var/www/html/soft/get_soft.sh'
確認客戶端上是否存在node_exporter軟體,如果存在/usr/local/node_exporter/node_exporter文件表示軟體安裝成功。
# ansible all -m shell -a ' ls -l /usr/local/node_exporter/node_exporter '

rc=0表示命令有返回值,則表示文件存在,軟體安裝成功。
確認客戶端上是否存在auto_start_node_exporter.sh啟動腳本,如果存在/root/auto_start_node_exporter.sh則啟動腳本獲取成功。
# ansible all -m shell -a ' ls -l /root/auto_start_node_exporter.sh '

rc=0表示命令有返回值,則表示啟動腳本存在。
確認客戶端上是否成功添加啟動腳本到開機啟動,如果/etc/rc.d/rc.local中有/root/auto_start_node_exporter.sh行則開機啟動添加成功。
# ansible all -m shell -a ' cat /etc/rc.d/rc.local | grep -i auto_start_node_exporter '

rc=0表示命令有返回值,則表示/etc/rc.d/rc.local文件中有/root/auto_start_node_exporter.sh行,表示腳本開機啟動配置完成。
通過命令啟動客戶端的node_exporter軟體,啟動後查看客戶主機上9100埠是否處於監聽狀態。
# ansible all -m shell -a 'nohup /root/auto_start_node_exporter.sh '
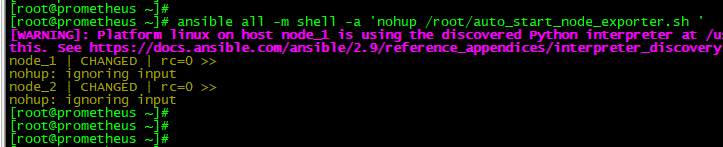
調用客戶端腳本啟動node_exporter軟體。
確認客戶端9100埠有node_exporter軟體監聽。
# ansible all -m shell -a 'ss -alntup | grep -i 9100 '

9100埠啟動表示node_exporter軟體安裝完成。能夠正常為prometheus提供數據。
step3:註冊客戶端node_exporter到consul
使用shell腳本從/etc/ansible/hosts中提取被控主機資訊,自動生成註冊consul命令。
在進行該步驟前需要提前完成consul軟體的安裝與配置。
# source /var/www/html/soft/auto_consul_zc.sh

註:
auto_consul_zc.sh腳本中//192.168.111.83:8500/v1/agent/service/register中的ip地址是寫死的,讀者請根據自己的consul伺服器地址修改。
複製腳本生成的命令並執行。
curl -X PUT -d '{"id": "node_1","name": "node_1","address": "192.168.111.12","port": 9100,"tags": ["test","node","linux"],"checks": [{"http": "//192.168.111.12:9100/metrics", "interval": "5s"}]}'  http://192.168.111.83:8500/v1/agent/service/register
curl -X PUT -d '{"id": "node_2","name": "node_2","address": "192.168.111.124","port": 9100,"tags": ["test","node","linux"],"checks": [{"http": "//192.168.111.124:9100/metrics", "interval": "5s"}]}'  http://192.168.111.83:8500/v1/agent/service/register

step4:確認consul註冊資訊
使用網頁瀏覽器打開輸入consul伺服器的地址埠查看介面中是否有新註冊伺服器,如果有則表示註冊成功。

能夠在web介面查看到節點表示節點註冊成功,此時可以在prometheus中添加consul資源實現對數據的收集工作。

