SpringMVC 配置 & 初識 & 註解 &重定向與轉發
初識
在web.xml 中註冊DispatcherServlet


    <servlet>
        <servlet-name>springmvc</servlet-name>
        <servlet-class>org.springframework.web.servlet.DispatcherServlet</servlet-class>
<!--        關聯一個springmvc配置文件  xxx-servlet.xml-->
        <init-param>
            <param-name>contextConfigLocation</param-name>
            <param-value>classpath:springmvc-servlet.xml</param-value>
        </init-param>
        <load-on-startup>1</load-on-startup>
    </servlet>

<!--    /匹配所有的請求  不包括.jsp-->
<!--    /*匹配所有的請求  包括.jsp-->
    <servlet-mapping>
        <servlet-name>springmvc</servlet-name>
        <url-pattern>/</url-pattern>
    </servlet-mapping>
在資源包中添加springmvc-servlet.xml
<?xml version="1.0" encoding="UTF-8"?>
<beans xmlns="//www.springframework.org/schema/beans"
       xmlns:xsi="//www.w3.org/2001/XMLSchema-instance"
       xsi:schemaLocation="//www.springframework.org/schema/beans
        //www.springframework.org/schema/beans/spring-beans.xsd">
<!--    匹配url去處理-->
    <bean class="org.springframework.web.servlet.handler.BeanNameUrlHandlerMapping"/>
    <bean class="org.springframework.web.servlet.mvc.SimpleControllerHandlerAdapter"/>

    <bean class="org.springframework.web.servlet.view.InternalResourceViewResolver" id="internalResourceView">
<!--        前綴-->
        <property name="prefix" value="/WEB-INF/jsp/"/>
<!--        後綴-->
        <property name="suffix" value=".jsp"/>
<!--        所以到時我們轉發的時候只需給核心名字就行,避免寫路徑-->
    </bean>

    <bean id="/hello" class="com.ljm.controller.HelloController"/>

</beans>
HelloController類
import org.springframework.web.servlet.ModelAndView;
import org.springframework.web.servlet.mvc.Controller;

import javax.servlet.http.HttpServletRequest;
import javax.servlet.http.HttpServletResponse;

public class HelloController implements Controller {
    @Override
    public ModelAndView handleRequest(HttpServletRequest httpServletRequest, HttpServletResponse httpServletResponse) throws Exception {
        ModelAndView mv = new ModelAndView();
        mv.addObject("msg","HelloSpringMVC");
        mv.setViewName("hello");  //WEB-INF/jsp/hello.jsp
        return mv;
    }
}
啟動失敗的話,若是程式碼無問題 顯示404什麼的可以看下IDEA的項目發布中,有沒有添加lib有關依賴
添加後,在maven裡面clean下生命周期 , 重啟tomcat 就行
--------------------------------------------------------------------------------------------------------------------------------------------
使用註解開發
web.xml
<?xml version="1.0" encoding="UTF-8"?>
<web-app xmlns="//xmlns.jcp.org/xml/ns/javaee"
         xmlns:xsi="//www.w3.org/2001/XMLSchema-instance"
         xsi:schemaLocation="//xmlns.jcp.org/xml/ns/javaee //xmlns.jcp.org/xml/ns/javaee/web-app_4_0.xsd"
         version="4.0">

    <servlet>
        <servlet-name>springmvc</servlet-name>
        <servlet-class>org.springframework.web.servlet.DispatcherServlet</servlet-class>
        <!--        關聯一個springmvc配置文件  xxx-servlet.xml-->
        <init-param>
            <param-name>contextConfigLocation</param-name>
            <param-value>classpath:springmvc-servlet.xml</param-value>
        </init-param>
        <load-on-startup>1</load-on-startup>
    </servlet>

    <!--    /匹配所有的請求  不包括.jsp-->
    <!--    /*匹配所有的請求  包括.jsp-->
    <servlet-mapping>
        <servlet-name>springmvc</servlet-name>
        <url-pattern>/</url-pattern>
    </servlet-mapping>
</web-app>
springmvc-servlet.xml
<?xml version="1.0" encoding="UTF-8"?>
<beans xmlns="//www.springframework.org/schema/beans"
       xmlns:xsi="//www.w3.org/2001/XMLSchema-instance"
       xmlns:mvc="//www.springframework.org/schema/mvc"
       xmlns:context="//www.springframework.org/schema/context"
       xsi:schemaLocation="
        //www.springframework.org/schema/beans
        //www.springframework.org/schema/beans/spring-beans.xsd
        //www.springframework.org/schema/context
        //www.springframework.org/schema/context/spring-context.xsd
        //www.springframework.org/schema/mvc
        //www.springframework.org/schema/mvc/spring-mvc.xsd
">


<!--    自動掃描包,指定包下的註解生效,由IOC容器統一管理-->
    <context:component-scan base-package="com.ljm.controller"/>
<!--    讓SpringMVC不處理靜態資源  css,js,html,mp3 4-->
    <mvc:default-servlet-handler/>
<!--    自動完成之前bean的兩個實例注入-->
    <mvc:annotation-driven/>

    <bean class="org.springframework.web.servlet.view.InternalResourceViewResolver" id="internalResourceView">
<!--        前綴-->
        <property name="prefix" value="/WEB-INF/jsp/"/>
<!--        後綴-->
        <property name="suffix" value=".jsp"/>
<!--        所以到時我們轉發的時候只需給核心名字就行,避免寫路徑-->
    </bean>


</beans>
controller
@Controller   //完成之前bean的註冊作用
//@RequestMapping("/hello")
//@RequestMapping可以作用於類 也可以作用於方法  一般選後者  兩者都有的話url地址要疊加
public class HelloController  {

    @RequestMapping("/hello")  //真實訪問地址   項目名/*/hello
    public String hello666(Model model){
        //封裝數據
        model.addAttribute("msg","hello anno");
        return "jojohello";  //會被視圖解析器處理  jsp目錄下的jsp文件
    }

}
JSON格式返回的話用註解@RestController
視圖(.jsp)可以被複用
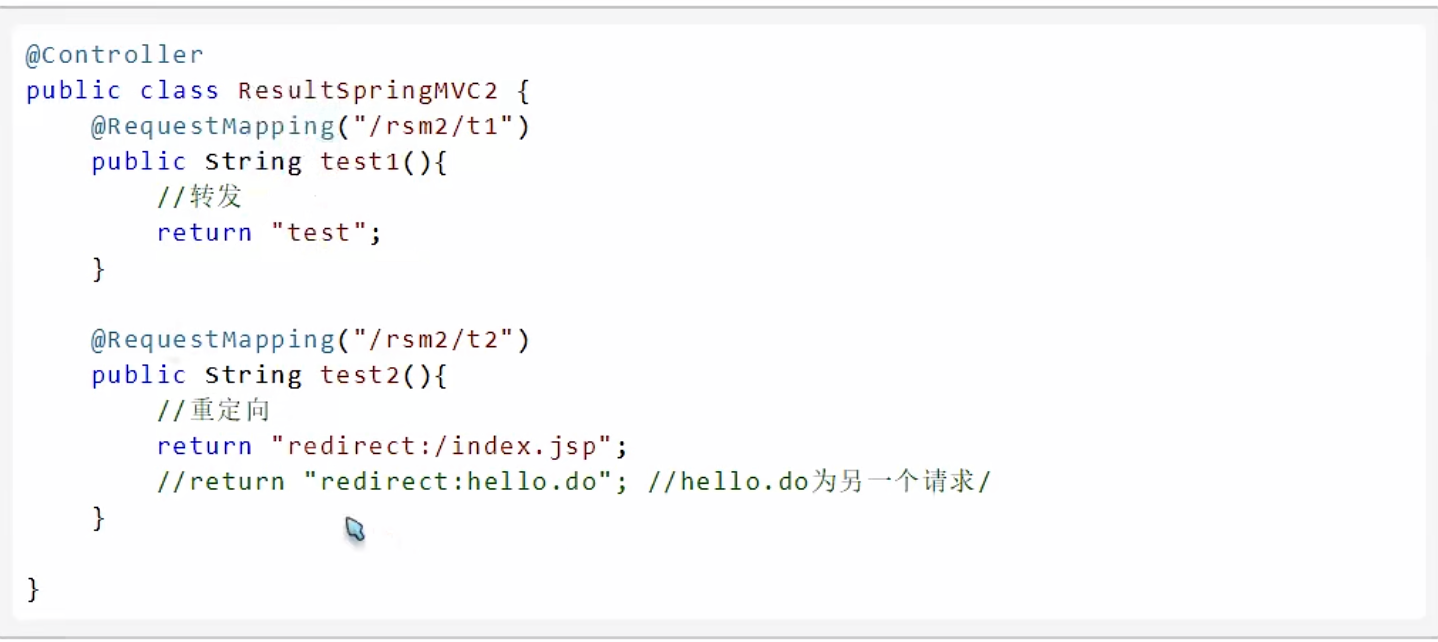
重定向與轉發