Qt+Python開發百度圖片下載器
一、資源下載地址
//www.aliyundrive.com/s/jBU2wBS8poH
本項目路徑:項目->收費->百度圖片下載器(可試用5分鐘)
安裝包直接下載地址://139.9.165.1/media/BaiduPicDown.exe
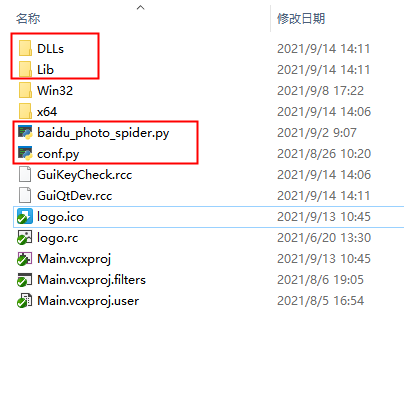
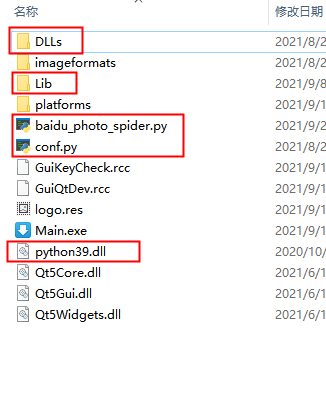
二、項目介紹
1、本項目使用Vs2019+Qt庫+Python庫來開發一個百度圖片播放下載器(支援Gif)。
Qt播放Gif圖片參考文章:
//www.cnblogs.com/liangqin/p/15161809.html
本文主要描述Qt調用Python庫來獲取百度圖片。
2、本項目完成的功能如下:
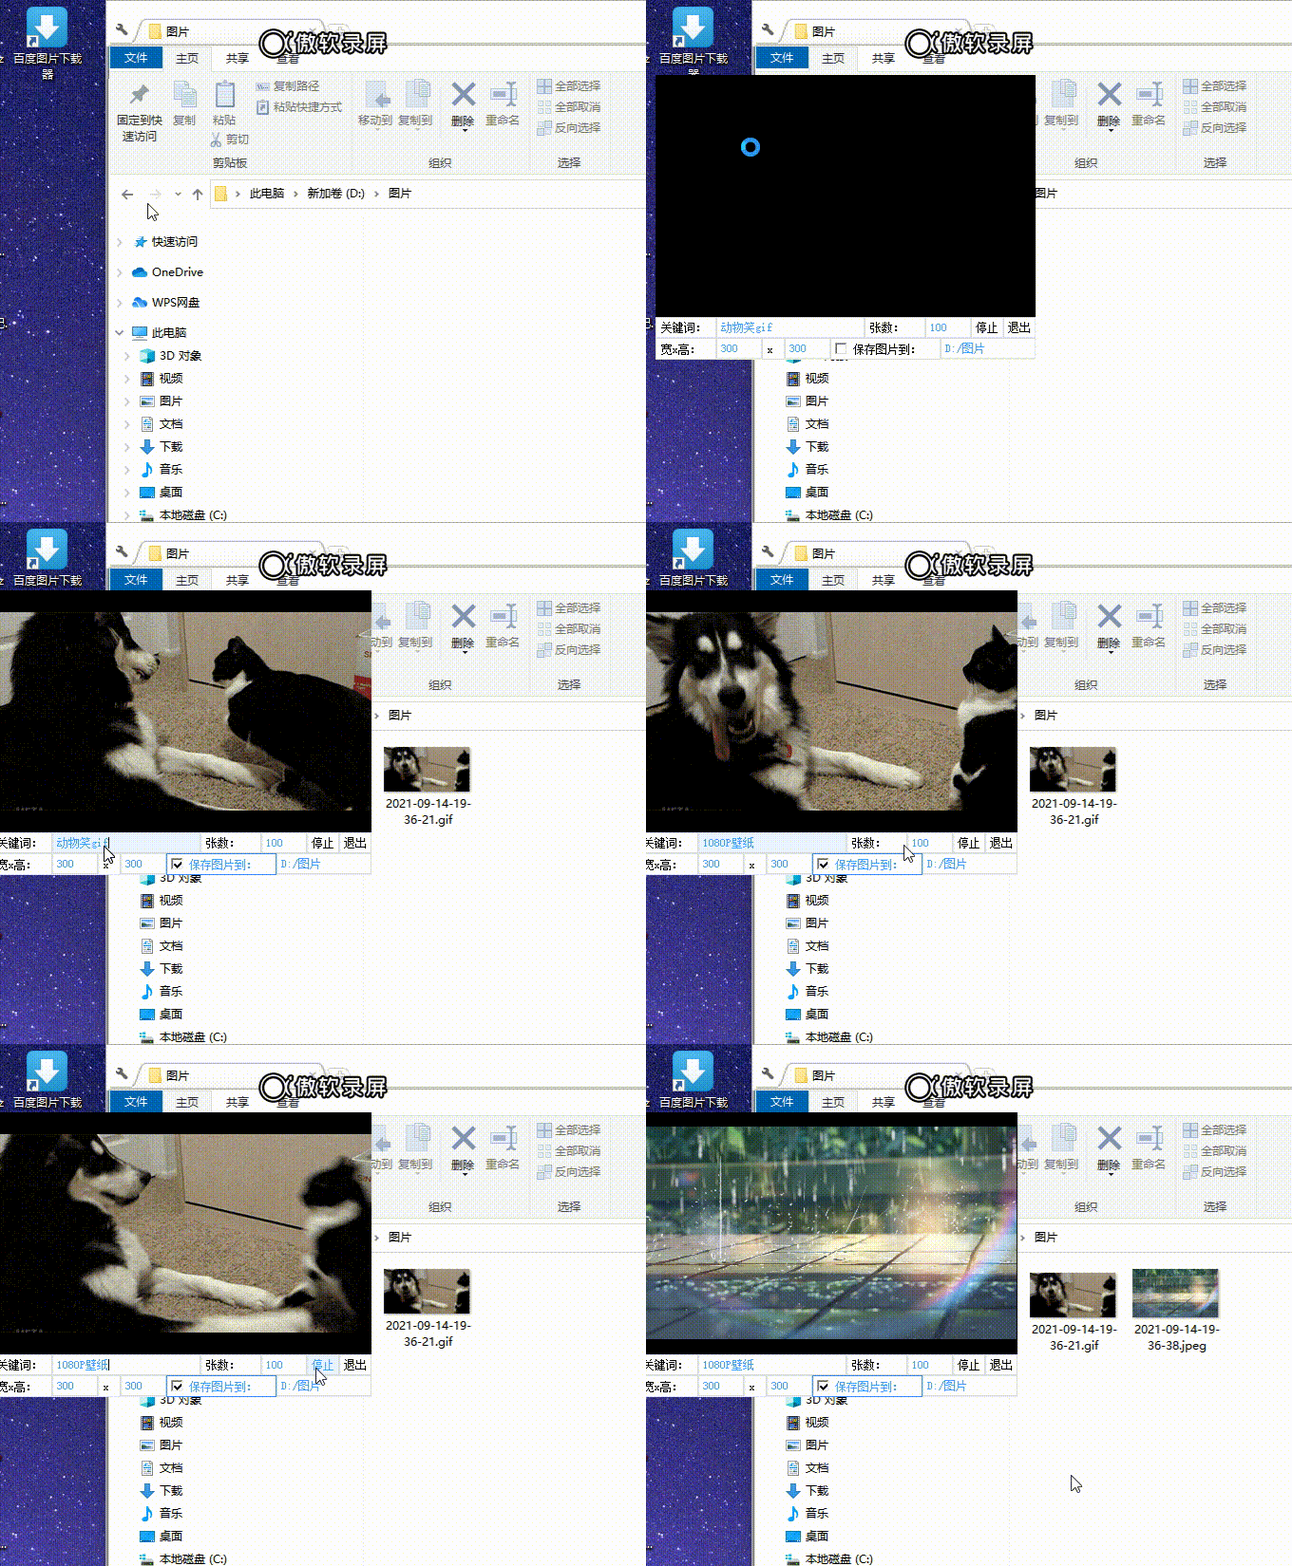
(1)、支援通過搜索關鍵詞及圖片張數來獲取百度圖片進行循環播放及保存原文件。
(2)、支援設置播放圖片窗口大小。
(3)、支援Gif圖片。
3、效果展示:
三、項目開始
1、準備工作
搭建一份Qt播放Gif圖片的工程環境。然後獲取python對應平台的頭文件及庫:
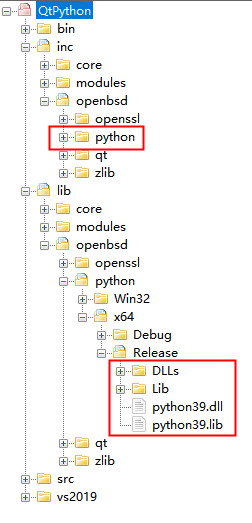
注意:安裝的python的Lib目錄下有很多文件,整個目錄比較大,不便於我們程式發布。我們只需要保留程式所需要的文件即可,找到本程式的安裝路徑即可看到基本所需的Lib文件。
2、寫python程式來爬取百度圖片
這裡參考文章:
//blog.csdn.net/xiligey1/article/details/73321152
然後進行簡單修改,提供一個getImgUrls(key,num)介面給C++調用獲取當前關鍵詞多少張urls,提供一個getImg()介面給C++調用循環獲取爬取到的圖片,該介面返回給C++的是圖片的base64編碼。
修改後的內容如下:
baidu_photo_spider.py:
  1 """根據搜索詞下載百度圖片"""
  2 import os
  3 import re
  4 import base64
  5 import time
  6 from typing import List, Tuple
  7 from urllib.parse import quote
  8
  9 import requests
 10
 11 from conf import *
 12
 13 # 關鍵詞, 改為你想輸入的詞即可, 相當於在百度圖片里搜索一樣
 14 keyword = '治癒系柴犬'
 15
 16 # 最大下載數量
 17 max_download_images = 100
 18
 19 all_pic_urls = []
 20 count = 0
 21
 22 def get_page_urls(page_url: str, headers: dict) -> Tuple[List[str], str]:
 23     """獲取當前翻頁的所有圖片的鏈接
 24     Args:
 25         page_url: 當前翻頁的鏈接
 26         headers: 請求表頭
 27     Returns:
 28         當前翻頁下的所有圖片的鏈接, 當前翻頁的下一翻頁的鏈接
 29     """
 30     if not page_url:
 31         return [], ''
 32     try:
 33         html = requests.get(page_url, headers=headers)
 34         html.encoding = 'utf-8'
 35         html = html.text
 36     except IOError as e:
 37         print(e)
 38         return [], ''
 39     pic_urls = re.findall('"objURL":"(.*?)",', html, re.S)
 40     next_page_url = re.findall(re.compile(r'<a href="(.*)" class="n">下一頁</a>'), html, flags=0)
 41     next_page_url = '//image.baidu.com' + next_page_url[0] if next_page_url else ''
 42     return pic_urls, next_page_url
 43
 44 def getImgUrls(key,num):
 45     global keyword
 46     global max_download_images
 47     global all_pic_urls
 48     keyword = key
 49     max_download_images = num
 50     url_init = url_init_first + quote(keyword, safe='/')
 51     page_urls, next_page_url = get_page_urls(url_init, headers)
 52     all_pic_urls.extend(page_urls)
 53     page_count = 0
 54     while 1:
 55         page_urls, next_page_url = get_page_urls(next_page_url, headers)
 56         page_count += 1
 57         print('正在獲取第%s個翻頁的所有圖片鏈接' % str(page_count))
 58         if next_page_url == '' and page_urls == []:
 59             print('已到最後一頁,共計%s個翻頁' % page_count)
 60             return
 61         all_pic_urls.extend(page_urls)
 62         if len(all_pic_urls) >= max_download_images:
 63             print('已達到設置的最大下載數量%s' % max_download_images)
 64             return
 65
 66 def down_pic(i,pic_url):
 67     try:
 68         pic = requests.get(pic_url, timeout=15)
 69         image_output_path = './images/' + str(i + 1) + '.jpg'
 70         with open(image_output_path, 'wb') as f:
 71             f.write(pic.content)
 72             print('成功下載第%s張圖片: %s' % (str(i + 1), str(pic_url)))
 73     except IOError as e:
 74         print('下載第%s張圖片時失敗: %s' % (str(i + 1), str(pic_url)))
 75         print(e)
 76         return
 77
 78 def getImg():
 79     global all_pic_urls
 80     global count
 81     global max_download_images
 82     none='none'
 83     try:
 84         pic = requests.get(list(set(all_pic_urls))[count], timeout=15)
 85         imgbase64 = base64.b64encode(pic.content).decode()
 86         #print(count)
 87         count += 1
 88         if count == max_download_images:
 89             count = 0
 90         return imgbase64,none
 91     except IOError as e:
 92         print(e)
 93         return none,none
 94
 95 if __name__ == '__main__':
 96     if not os.path.exists('./images'):
 97         os.mkdir('./images')
 98
 99     getImgUrls('貓', 2)
100
101     #下載圖片
102     for i, pic_url in enumerate(list(set(all_pic_urls))[:max_download_images]):
103         down_pic(i, pic_url)
104
105     #循環讀取列表中的圖片
106     while 1:
107         print(getImg())
108         time.sleep(5)
3、封裝C++調用python庫的介面
直接上程式碼:
 1 #include "PythonDevApi.h"
 2 #include "Python.h"
 3
 4 void initPython()
 5 {
 6     Py_Initialize();//載入Python解釋器
 7     PyRun_SimpleString("import sys");
 8     PyRun_SimpleString("sys.path.append('Dlls/')");
 9 }
10
11 void unInitPython()
12 {
13     Py_Finalize();//卸載Python解釋器
14 }
15
16 static PyObject* pBaiduModule = NULL;
17
18 int pyGetBaiduImgInit(const char* key, int num)
19 {
20     pBaiduModule = PyImport_ImportModule("baidu_photo_spider");//Python py文件名
21     PyImport_ReloadModule(pBaiduModule);
22     if (pBaiduModule == nullptr)
23         return -1;
24
25     PyObject* pFunc = NULL;
26     PyObject* pArgs = NULL;
27     PyObject* pResult = NULL;
28     pFunc = PyObject_GetAttrString(pBaiduModule, "getImgUrls");//py文件內函數名
29     //執行函數
30     pArgs = Py_BuildValue("si", key, num);
31     pResult = PyObject_CallObject(pFunc, pArgs);
32
33     return 0;
34 }
35
36 int pyGetBaiduImgWork(char* img, int imgSize)
37 {
38     //執行函數
39     PyObject* pBaiduFunc = PyObject_GetAttrString(pBaiduModule, "getImg");//py文件內函數名
40     if (pBaiduFunc == NULL)
41         return -1;
42
43     PyObject* pArgs = NULL;
44     PyObject* pResult = PyObject_CallObject(pBaiduFunc, pArgs);
45     if (pResult == NULL)
46         return -1;
47
48     char* imgbase64, * none;
49     int ret = PyArg_ParseTuple(pResult, "s|s", &imgbase64, &none);
50     if (ret == 1)
51     {
52         if (memcmp(imgbase64, none, strlen(none)) != 0 && img != NULL && strlen(imgbase64) < imgSize)
53         {
54             memcpy(img, imgbase64, strlen(imgbase64));
55             return 0;
56         }
57     }
58     else
59     {
60         printf("ret:%d\n", ret);
61     }
62
63     return -1;
64 }
65
66 int pyGetBaiduImgUninit()
67 {
68     return 0;
69 }
4、調用封裝好的python介面來進行圖片獲取與保存文件:
 1 void GuiQtDevThread::run()
 2 {
 3     int count = 0;
 4
 5     pyGetBaiduImgInit(m_key.toStdString().c_str(), m_num);
 6
 7     while (1)
 8     {
 9         //程式退出時終止執行緒
10         if (m_gui->getGetImgThreadState() == THREAD_STATE_E_PrepareStop)
11         {
12             m_gui->setGetImgThreadState(THREAD_STATE_E_Stop);
13             pyGetBaiduImgUninit();
14             return ;
15         }
16         count++;
17         if (count == 50)
18         {
19             count = 0;
20             //只能使用emit方式操作控制項,直接操作控制項會死機,這裡會等待槽函數結束才繼續運行(Qt::BlockingQueuedConnection)
21             memset(m_img, 0, m_img_size);
22             int ret = pyGetBaiduImgWork(m_img, m_img_size);
23             if (ret != 0)
24             {
25                 QThread::msleep(100);
26                 continue;
27             }
28
29             QByteArray decodeimg = QByteArray::fromBase64(m_img);
30
31             CQVString filenamet;
32             filenamet.Append("%s%d", "imgtmp", _getpid());
33             QFile file(filenamet.GetBuffer());
34             file.open(QIODevice::WriteOnly);
35             file.write(decodeimg);
36             file.close();
37             QThread::msleep(50);
38
39             QString saveFileName = m_gui->getSaveDir();
40             if (saveFileName.length() > 1)
41             {
42                 bool dirExist = true;
43                 QDir dir;
44                 if (!dir.exists(saveFileName))
45                 {
46                     dirExist = dir.mkdir(saveFileName);
47                 }
48
49                 if (dirExist)
50                 {
51                     CQVString filenamet;
52                     filenamet.Append("%s%d", "imgtmp", _getpid());
53                     QImageReader reader(filenamet.GetBuffer());
54                     reader.setDecideFormatFromContent(true);
55                     int nCount = reader.imageCount();
56                     if (nCount > 0 && reader.canRead())
57                     {
58                         QString fileFomate(QImageReader::imageFormat(filenamet.GetBuffer()));
59
60                         saveFileName += "/";
61                         QDateTime current_date_time = QDateTime::currentDateTime();
62                         QString current_date = current_date_time.toString("yyyy-MM-dd-hh-mm-ss");
63                         saveFileName += current_date;
64                         saveFileName += ".";
65                         saveFileName += fileFomate;
66                         QFile saveFile(saveFileName);
67                         saveFile.open(QIODevice::WriteOnly);
68                         saveFile.write(decodeimg);
69                         saveFile.close();
70                         QThread::msleep(50);
71
72                     }
73                 }
74             }
75
76             m_gui->setFileChange();
77         }
78         QThread::msleep(100);
79     }
80 }
5、項目生成後事件需要把python的dll拷貝到exe目錄下,並且把python的DLLs和Lib目錄以及我們寫的py程式拷貝到主工程和exe目錄下。這樣才能保證vs2019和雙擊exe正常運行程式,如圖: