SpringSecurity總結
基礎
核心
認證與授權
與Shiro聯繫
SpringSecurity 在 SpringBoot 出現前因為配置複雜使用較少,但是在SpringBoot 出現後搭配使用開發效率大大提高。是一款重量級框架。而 Shiro 是一款輕量級框架,配置簡單一些,所以如果不使用 SpringBoot,那麼一般搭配 Shiro,而使用SpringBoot 就搭配 SpringSecurity。
核心介面
UserDetailsService
定義了SpringSecurity 查詢用戶資訊的介面方法,在SpringSecurity 認證時,並不是直接通過用戶名密碼去資料庫比對,沒有對應就返回,而是先通過 username 去資料庫查到對應的用戶資訊,然後進行拼接成 SpringSecurity 內部維護的用戶對象,然後由內部方法進行密碼比對。而查詢資料庫返回用戶對象的介面方法就是由 UserDetailsService 介面定義的。
UserDetails
上面說到資料庫查詢用戶資訊會返回一個SpringSecurity 內部維護的用戶對象。這個用戶抽象類就是 UserDetails,其內部結構如下
public interface UserDetails extends Serializable {
    // ~ Methods
    // ========================================================================================================

    /**
     * Returns the authorities granted to the user. Cannot return <code>null</code>.
     * 授權列表
     * @return the authorities, sorted by natural key (never <code>null</code>)
     */
    Collection<? extends GrantedAuthority> getAuthorities();

    /**
     * Returns the password used to authenticate the user.
     *
     * @return the password
     */
    String getPassword();

    /**
     * Returns the username used to authenticate the user. Cannot return <code>null</code>.
     *
     * @return the username (never <code>null</code>)
     */
    String getUsername();

    /**
     * Indicates whether the user's account has expired. An expired account cannot be
     * authenticated.
     * 是否過期
     * @return <code>true</code> if the user's account is valid (ie non-expired),
     * <code>false</code> if no longer valid (ie expired)
     */
    boolean isAccountNonExpired();

    /**
     * Indicates whether the user is locked or unlocked. A locked user cannot be
     * authenticated.
     * 是否鎖定,如果鎖定就無法驗證
     * @return <code>true</code> if the user is not locked, <code>false</code> otherwise
     */
    boolean isAccountNonLocked();

    /**
     * Indicates whether the user's credentials (password) has expired. Expired
     * credentials prevent authentication.
     * 用戶憑證是否過期,過期的憑證會阻止身份驗證
     * @return <code>true</code> if the user's credentials are valid (ie non-expired),
     * <code>false</code> if no longer valid (ie expired)
     */
    boolean isCredentialsNonExpired();

    /**
     * Indicates whether the user is enabled or disabled. A disabled user cannot be
     * authenticated.
     * 用戶是啟用還是禁用,無法對禁用的用戶進行身份驗證
     * @return <code>true</code> if the user is enabled, <code>false</code> otherwise
     */
    boolean isEnabled();
}
在使用時可以讓自定義用戶來實現這個介面。
PasswordEncoder
密碼介面,一般使用 BCryptPasswordEncoder 來作為默認的密碼轉換器。SpringSecurity 在加密時引入鹽,使得加密過程是不可逆的,而加密後的字元串包含鹽資訊,在比較方法中會對加密後的密碼進行解析,解析出鹽值,然後對輸入密碼進行加密,比較輸入密碼加密後的結果是否與原密碼加密後的結果一致。使用 encode 方法進行加密, matches 方法進行密碼比較。如果一致返回 true。
常用配置
用戶名密碼配置
方式一、配置文件
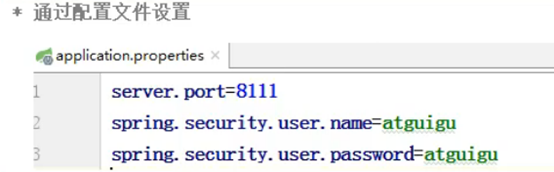
方式二、配置類

方式三、自定義配置
因為一般項目用戶名密碼都是存在資料庫的,所以這是最主流的。
1、配置UserDetails,返回用戶資訊

2、添加配置類,將userDetails註冊進 SpringSecurity

記住我
原理
在登陸後會向資料庫的 persistent_logins 表中插入一條記錄,表結構如下

series 是主鍵, 隨後將 series 和 token 進行演算法轉換成字元串發給客戶端,後面客戶端會攜帶 Cookie ,當下次訪問時後端會解析 Cookie ,解析成 series 和 token ,然後去表中匹配,驗證token是否一致,以及 last_used + 存活時間是否到期,如果都滿足就再以 name 走 UserDetailsService 的方法,返回用戶資訊。
配置

建表語句:
DROP TABLE IF EXISTS `persistent_logins`;
CREATE TABLE `persistent_logins` (
  `username` varchar(64) NOT NULL,
  `series` varchar(64) NOT NULL,
  `token` varchar(64) NOT NULL,
  `last_used` timestamp NOT NULL DEFAULT CURRENT_TIMESTAMP ON UPDATE CURRENT_TIMESTAMP,
  PRIMARY KEY (`series`)
) ENGINE=InnoDB DEFAULT CHARSET=utf8;
   @Resource
    private DataSource datasource;

    /**
     * 注入記住我token表的數據源
     * @return
     */
    @Bean
    public PersistentTokenRepository persistentTokenRepository(){
        JdbcTokenRepositoryImpl jdbcTokenRepository = new JdbcTokenRepositoryImpl();
        jdbcTokenRepository.setDataSource(datasource);
//        jdbcTokenRepository.setCreateTableOnStartup(true);      // 是否自動創建token數據表,如果是第一次可以勾選,後面表存在還開啟就會報錯
        return jdbcTokenRepository;
    }

可以使用在配置方法中添加 ".rememberMeParameter("rem") " 配置記住我功能的name
注意:
1、這裡的過期時間是拒上次打開瀏覽器登陸開始計算的,也就是每次打開瀏覽器訪問一次上次登陸時間都會刷新一次。而瀏覽器內部訪問並不會刷新時間。
2、退出後(退出登陸狀態)會清除資料庫的token數據,再次訪問需要重新登錄
登陸成功處理器
步驟一:增加組件
方式一、繼承實現類

方式二、實現底層介面

步驟二:將組件註冊進成功處理器配置中

登陸失敗處理器
步驟一:增加組件
方式一、實現介面

方式二、繼承實現類

步驟二:將組件註冊進失敗處理器配置中

許可權認證失敗處理器
1、組件

2、配置

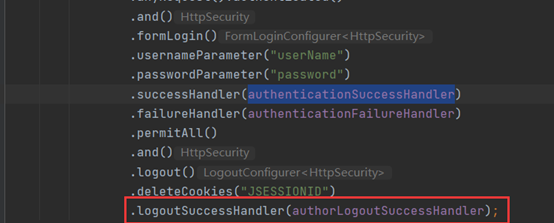
用戶退出處理器
1、組件

2、配置
角色許可權
訪問一個需要許可權或角色的頁面需要先登陸,如果登陸後還是不能訪問就會返回500.
角色、許可權、用戶關係
許可權與角色是多對多,角色與用戶也是多對多。許可權指的是對某個表具體的增刪改查許可權,而角色是一系列許可權的集合。比如管理員角色擁有對所有表增刪改查的許可權,普通用戶角色只擁有對所有表查詢的許可權,而用戶 admin 擁有管理員角色,用戶 A 擁有普通用戶的角色。
定義許可權

在config里配置路徑所需許可權,在UserDetailsService里配置用戶所擁有的許可權。
1、hasAuthority 是與關係,如果在config里配置了多個許可權,如」admin,manager」,那麼在UserDetailsService也必須對用戶配置兩個角色許可權才可以訪問
2、hasAnyAuthority 是或關係,如果在 config里配置了多個許可權,如」admin,manager」,那麼在UserDetailsService只需要對用戶配置一個許可權就可以訪問
定義角色

角色在 UserDetailsService 實現類中配置需要加 "ROLE_" 前綴
而hasRole 和hasAnyRole 對應許可權里的hasAuthority 和hasAnyAuthority,是與和或的關係。
Access 來定義許可權、角色
上面的hasRole、hasAuthority 底層都是使用 access 來實現的,所以我們還可以通過底層的access 方法來主直接定義許可權、角色。
那麼 config 里配置就是如下:
自定義 Access 校驗規則
1、組件

2、配置

基於 IP 來限制

這樣的話只能接收來自 127.0.0.1 的請求。
定義角色註解

@Secured單個」」里不支援使用,隔開,也就是不支援與關係。如果要配置多個或關係,可以使用{}, 在UserDetailsService里只要配置一個就可以訪問。
並且只支援定義角色,不支援定義許可權,也就是Secured里必須是ROLE_開頭
定義角色、許可權註解

可以定義角色、也可以定義許可權

如果用戶擁有的角色是abc,那麼在這裡可以配置hasRole(『abc』),也可以配置hasRole(『ROLE_abc』),而使用config配置類配置則不可以,會報錯。而大小寫則和配置類一樣會區分
先執行後校驗註解

可以用於記錄訪問日誌
對返回和傳入數據過濾註解


CSRF
CSRF 是為了防止用戶在開啟記住登陸後,其他非法用戶截取到登陸用戶的 Cookie ,登陸其他用戶進行非法操作。
默認是開啟的,開啟後用戶登錄時,系統發放一個CsrfToken值(key是 _csrf,value是token值),用戶攜帶該CsrfToken值與用戶名、密碼等參數完成登錄。系統記錄該會話的 CsrfToken 值,之後在用戶的任何請求中,都必須帶上該CsrfToken值,並由系統進行校驗。
配置:

相關依賴:
        <dependency>
            <groupId>org.springframework.boot</groupId>
            <artifactId>spring-boot-starter-thymeleaf</artifactId>
        </dependency>
        <!--對Thymeleaf添加Spring Security標籤支援-->
        <dependency>
            <groupId>org.thymeleaf.extras</groupId>
            <artifactId>thymeleaf-extras-springsecurity5</artifactId>
        </dependency>
開啟 CSRF 時配置類不能配置 loginProcessingUrl 和 defaultSuccessUrl 。會影響登陸跳轉邏輯。
其他配置

1、如果配置了登陸的URL(也就是loginProcessingUrl),那麼自定義Controller里處理的登陸請求就會用不到,走的是SpringSecurity內部的驗證方法。
2、anyRequest()必須配置在所有的antMatches後面,也就是籠統的許可權配置必須放在其他許可權的最後
3、and()是用於連接多個http配置。
4、在開發時需要添加@EnableWebSecurity註解,這個註解會自動配置安全認證策略和認證資訊。
整合OAuth2
關於 OAuth2 與 JWT 可以移步 淺談常見的認證機制 。
基礎依賴
        <dependency>
            <groupId>org.springframework.cloud</groupId>
            <artifactId>spring-cloud-starter-oauth2</artifactId>
        </dependency>
        <dependency>
            <groupId>org.springframework.cloud</groupId>
            <artifactId>spring-cloud-starter-security</artifactId>
        </dependency>
        <dependency>
            <groupId>org.springframework.boot</groupId>
            <artifactId>spring-boot-starter-web</artifactId>
        </dependency>
基礎配置
因為 OAuth2 涉及到資源伺服器和授權伺服器,所以除了配置 SpringSecurity ,還需要配置資源伺服器和授權伺服器。
1、SpringSecurity配置:

2、授權伺服器配置:定義 app_id、app_secret,以及重定向地址,授權範圍等

3、資源伺服器配置:定義資源伺服器資源許可權角色配置。

4、其他:userDetailsService 配置

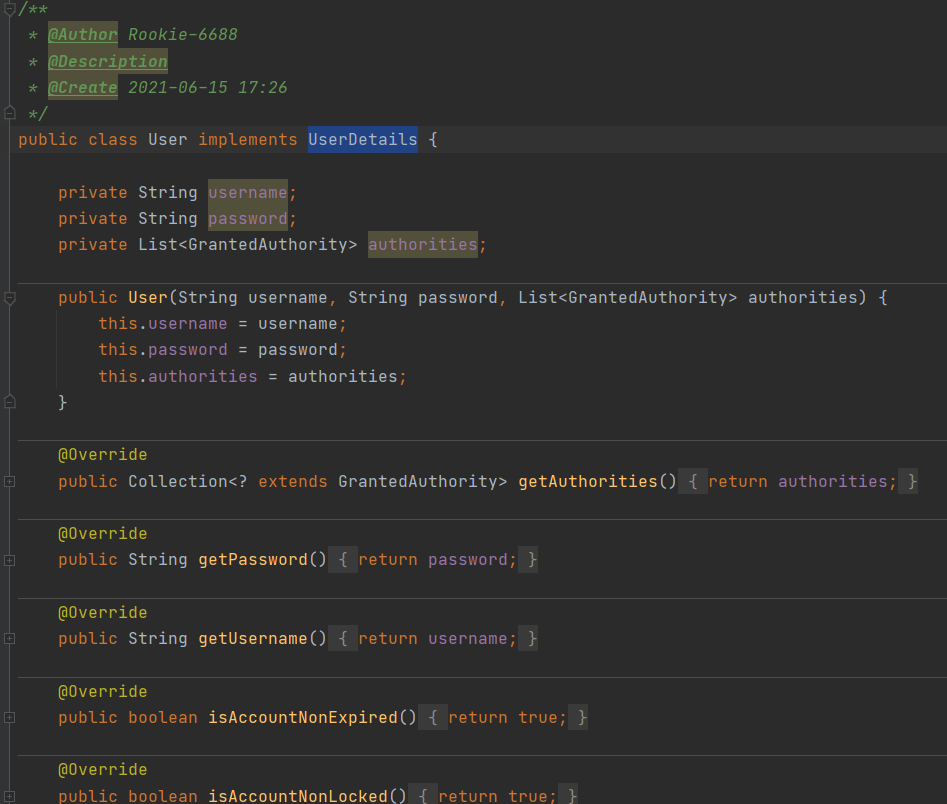
自定義用戶實體類 user ,許可權屬性全部設為 true。
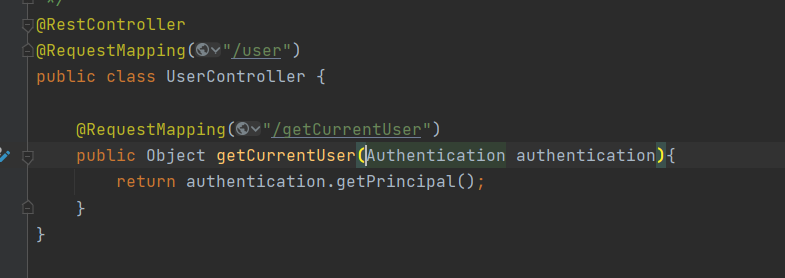
資源伺服器的資源Controller
授權碼模式
在上面的授權伺服器配置中,已將授權類型設為 授權碼模式,所以直接使用上面的配置。
驗證
1、獲取授權碼
訪問 //localhost:8080/oauth/authorize?response_type=code&client_id=client&redirect_uri=//www.baidu.com&scope=all ,在登陸成功後(因為走的是上面 userDetailsService 的方法,所以用戶名任意,密碼123456就通過登陸),會重定向授權伺服器配置中配置好的 //www.baidu.com 。並且攜帶授權伺服器返回的授權碼 code。

2、獲取授權令牌
接下來就可以再次訪問 localhost:8080/oauth/token 攜帶授權碼及其他數據來向授權伺服器獲取授權令牌。


3、通過令牌訪問資源伺服器的資源,訪問資源伺服器上資源的 URL,並攜帶授權令牌。

密碼模式
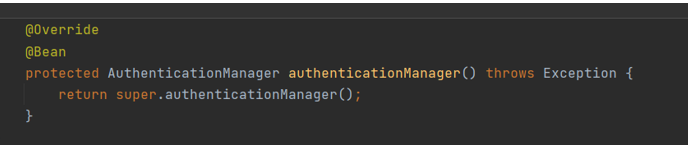
密碼模式因為是通過密碼直接獲取授權令牌,所以不需要先獲取授權碼,同時需要設置自定義的 userDetailsService 實現類,以及 authenticationManager 組件
1、ServurityConfig里增加配置:
2、授權伺服器增加配置:

這樣配置是同時支援授權碼模式與密碼模式
驗證
通過密碼獲取授權令牌


訪問資源伺服器的資源則和授權碼模式驗證一樣。
整合 redis 將令牌存入 redis
1、引入依賴
        <dependency>
            <groupId>org.springframework.boot</groupId>
            <artifactId>spring-boot-starter-data-redis</artifactId>
        </dependency>
        <dependency>
            <groupId>org.apache.commons</groupId>
            <artifactId>commons-pool2</artifactId>
        </dependency>
2、註冊 redis 的 tokenStore 組件進容器

3、在授權伺服器里註冊 tokenStore

4、在配置文件里配置 redis 地址密碼等。
使用 JWT 作為令牌
1、增加依賴
        <dependency>
            <groupId>io.jsonwebtoken</groupId>
            <artifactId>jjwt</artifactId>
            <version>0.9.0</version>
        </dependency>
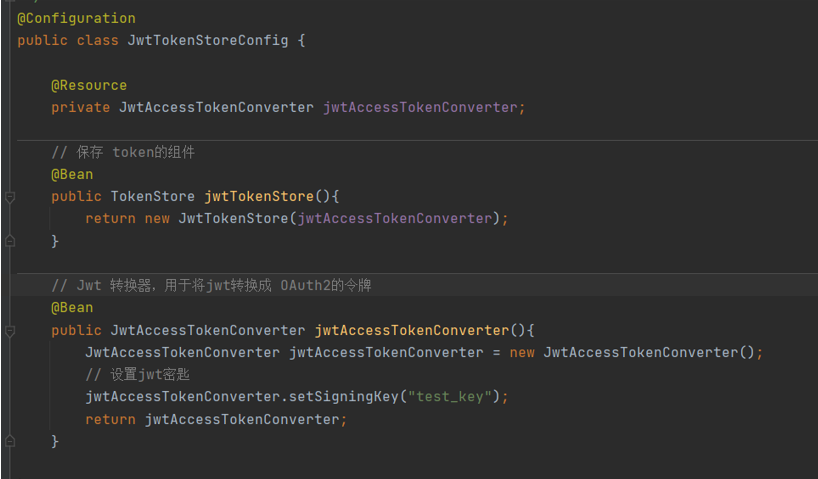
2、從容器中移除 redis 的 tokenStore 組件,同時想容器中加入 jwt 的 tokenStore 組件,並且配置 jwt 的轉換器
3、註冊進授權伺服器

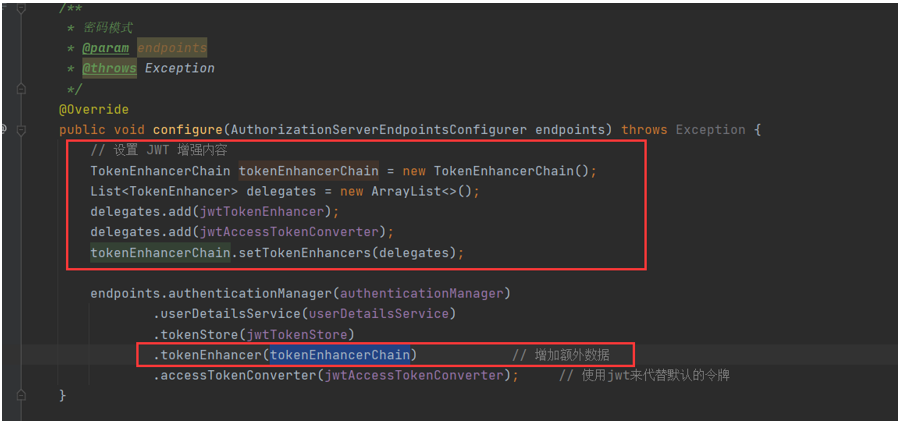
JWT 增加額外資訊
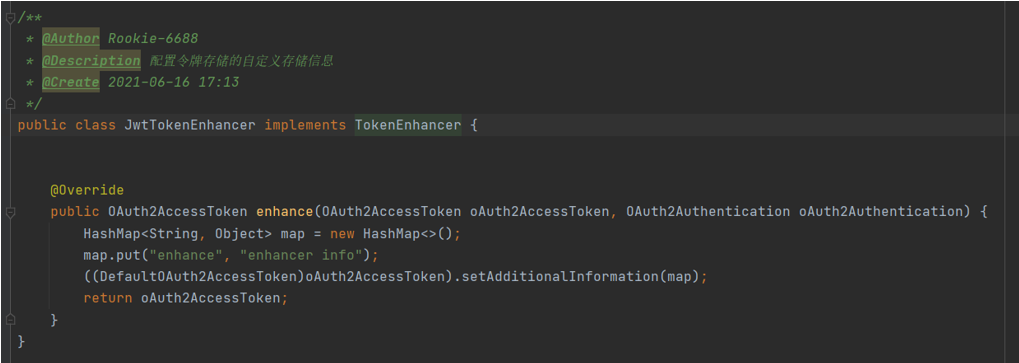
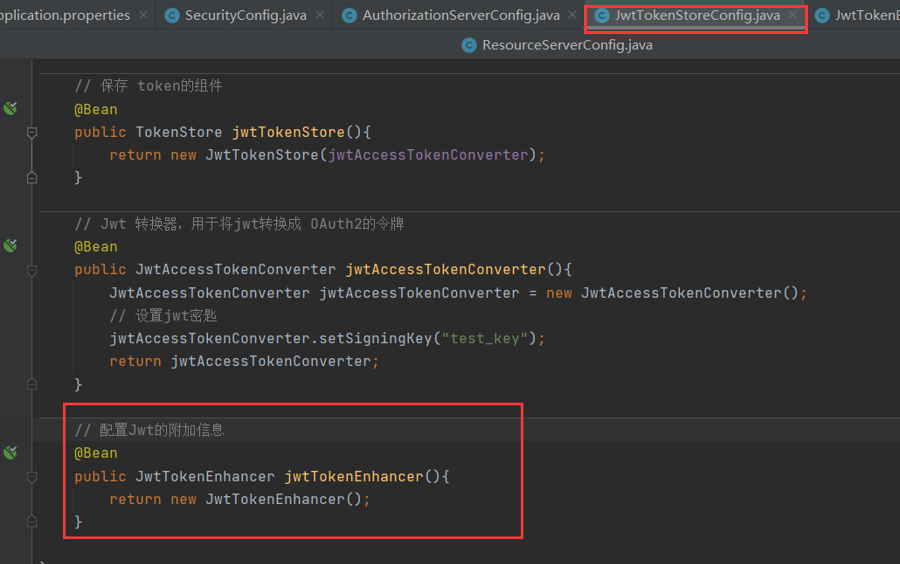
1、增加 Jwt 附加資訊組件並註冊進容器
2、在授權伺服器里配置 jwt 附加資訊組件
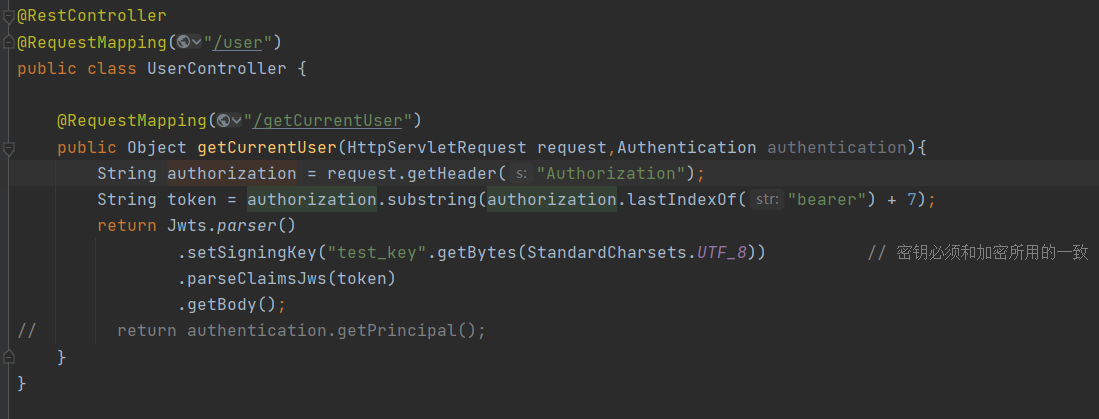
3、驗證,修改資源伺服器資源返回的資訊

設置過期時間和刷新令牌
在授權伺服器里增加配置:
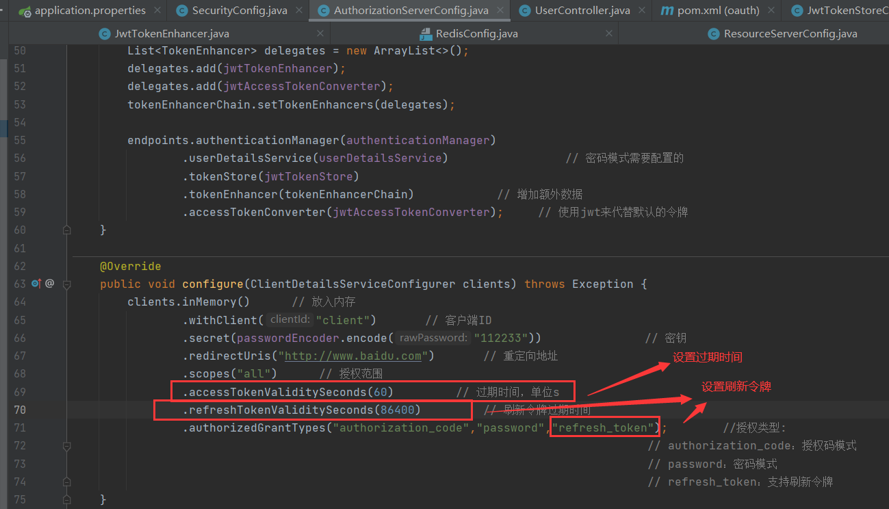

在60s後token令牌(access_token)失效後,可以使用刷新令牌重新獲取新的令牌,新的令牌過期時間也是60s。
因為密碼模式不支援刷新令牌,所以通過授權碼模式使用刷新令牌來獲取新的令牌
通過刷新令牌獲取令牌


整合SSO(單點登陸)
1、引入依賴
        <dependency>
            <groupId>org.springframework.cloud</groupId>
            <artifactId>spring-cloud-starter-oauth2</artifactId>
        </dependency>
        <dependency>
            <groupId>org.springframework.cloud</groupId>
            <artifactId>spring-cloud-starter-security</artifactId>
        </dependency>
        <dependency>
            <groupId>org.springframework.boot</groupId>
            <artifactId>spring-boot-starter-web</artifactId>
        </dependency>
        <dependency>
            <groupId>io.jsonwebtoken</groupId>
            <artifactId>jjwt</artifactId>
            <version>0.9.0</version>
        </dependency>
2、新建一個模組,配置 SSO 訪問授權伺服器的地址

3、增加 SSO 模組的資源

4、主程式開啟 OAuth2 自動配置

5、在授權伺服器的配置增加配置

隨後訪問客戶端資源 //localhost:8081/user/getCurrentUser 就會先跳轉到 //localhost:8080/login ,也就是授權伺服器進行授權驗證,通過後經重定向回到 //localhost:8081/login ,也就是客戶端的登陸頁面,並且攜帶授權伺服器提供的jwt令牌,所以會自動解析通過驗證,最後再訪問客戶端的資源