[2]嘗試用Unity3d製作一個王者榮耀(持續更新)->選擇英雄-(上)
- 2019 年 10 月 3 日
- 筆記
如果已經看過本章節:目錄傳送門:這是目錄鴨~
1.場景搭建:
首先我們去AssetStore逛淘寶~~~

我淘到的是這個資源,其他好看的場景(消耗不高的都行)。
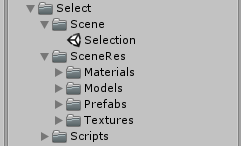
然後我們導入了這個資源後,把資源根文件夾的名字改為Select,把Demo場景文件的名字改為Selection,我這樣修改的emmm...
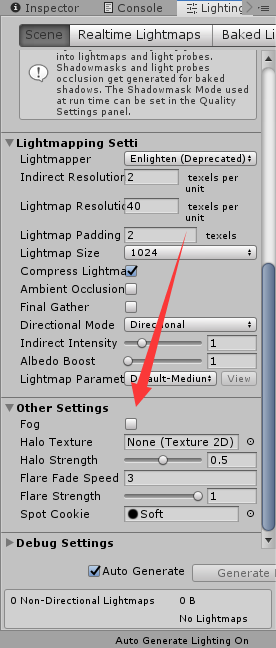
然後打開那個Demo場景,走到LightningSetting關閉霧效果(這個消耗有點大,關一下,你開心也可以不關的~):
然後我們就在場景里移動Main Camera到你喜歡的好看的位置~
順便創建個Reflection Probe(反射效果的):
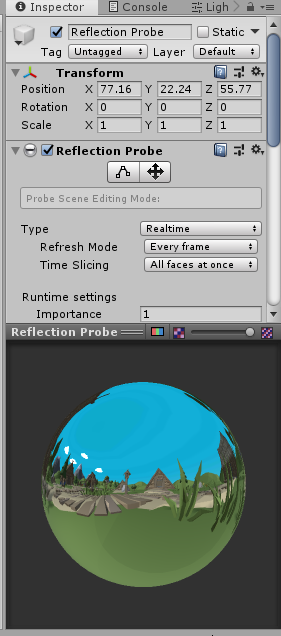
前面是沒加的,後面是加了的,區別有點小,仔細看右邊的更漂亮誒~~~

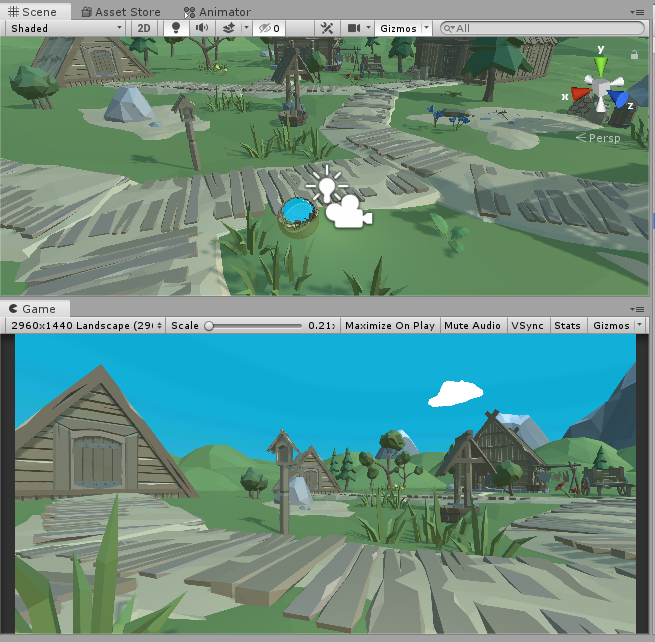
然後我們在場景中創建空對象,重新命名為你喜歡的名字,用於展示英雄的角色坐標的定位,我在裡面放了個阿離並把相對坐標設置為零來測試站的位置是否準確(我這裡面還有個光照是因為臉部比較暗,你可以自己調整光照的,對~說的就是你o(*^▽^*)o):
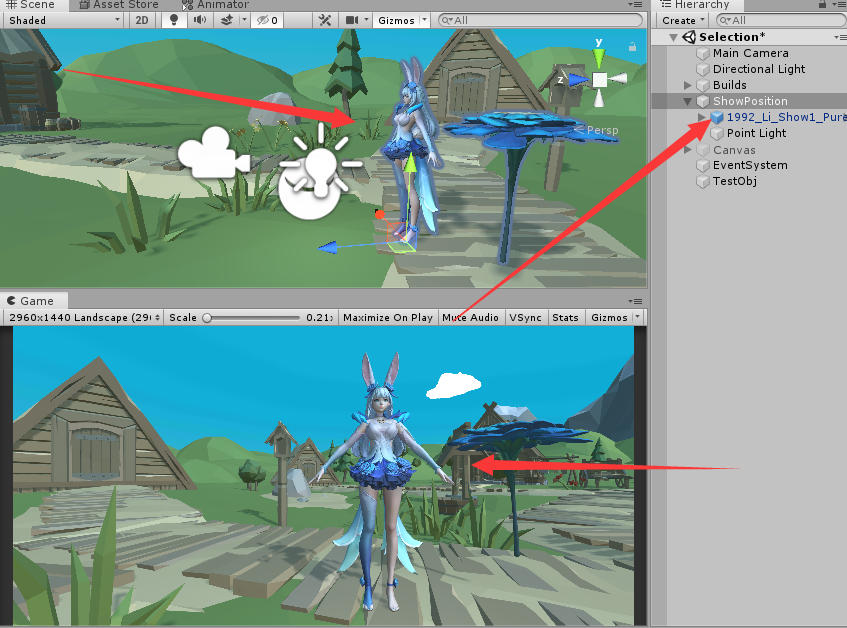
到此為止~我們的場景就搭建完畢了親親~
2.英雄資源的打包相關(重要!!!):
命名規則:我們可以看到,農藥的AssetBundle命名結構是:英雄ID+皮膚編號(沒有空格,比如說阿離的ID是199,這個花間舞是第二個皮膚,所以ID為1992,第一個默認皮膚不需要輸入皮膚ID就199就好了)_英雄拼音_資源類型.assetbbundle。(下面可以看到廉頗ID是105,這個設定使得我們提資源十分方便~良心TX~):
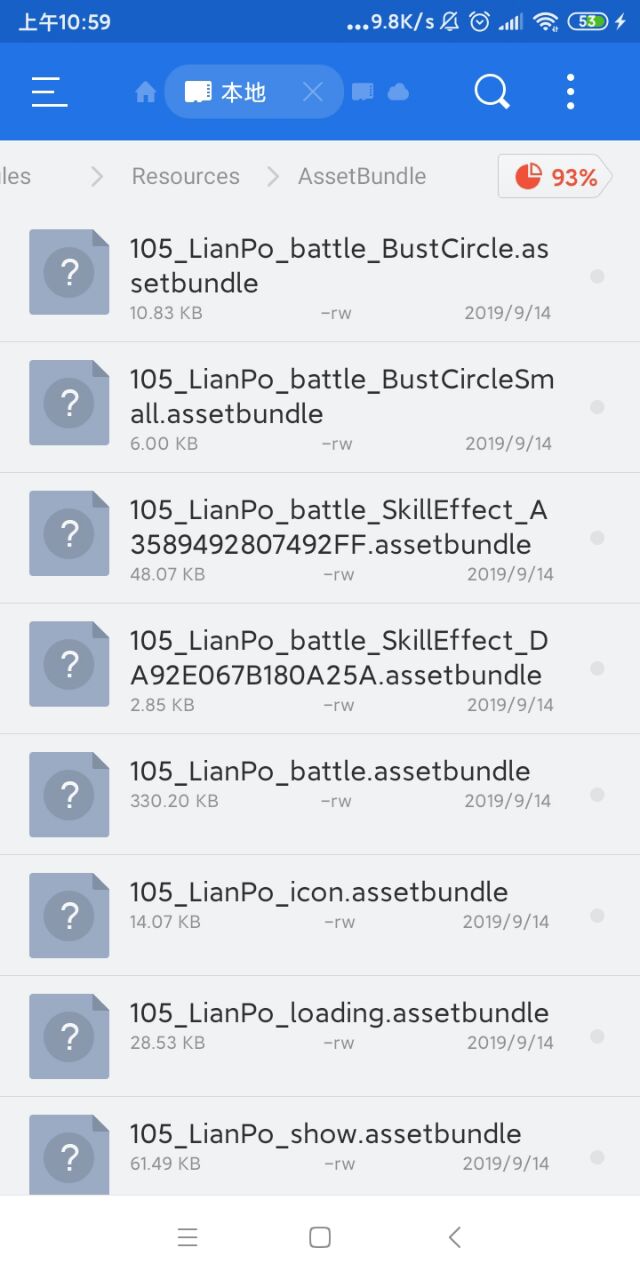
然後我們也打算用這種規則來命名~
下面部分含有程式碼~
創建幾個新文件夾在根工程目錄下,路徑是 ActorManager/Scripts,然後再在裡面創建一個Csharp(即C#),名為ActorManager:
1 /* 2 * 編輯者:Miku醬 3 * 版本:1 4 * 首次編寫日期:2019/09/15 13:53 5 * 修改日期:2019/09/15 13:53 6 * 強行加一行~~~ 7 */ 8 9 using System.Collections; 10 using System.Collections.Generic; 11 using UnityEngine; 12 using LuoHao.AssetBundleManager; 13 14 namespace LuoHao.Actor 15 { 16 public class ActorManager : MonoBehaviour 17 { 18 /// <summary> 19 /// 角色資訊文件的列表 20 /// </summary> 21 [TextArea] 22 public List<string> actorFileList = new List<string>(); 23 /// <summary> 24 /// 全部的角色資訊 25 /// </summary> 26 public static Dictionary<int, ActorInfoData> allActor = new Dictionary<int, ActorInfoData>(); 27 28 private void Awake() 29 { 30 LoadAllActor();//載入 31 DontDestroyOnLoad(this.gameObject);//切換場景不銷毀這個物體 32 // Debug.Log(allActor[100].actorName);//測試 33 34 } 35 /// <summary> 36 /// 載入角色資訊 37 /// </summary> 38 public bool LoadAllActor() 39 { 40 for(int i = 0; i < actorFileList.Count; i++) 41 { 42 //取得文件 43 PackageForAssetBundle pfa= AssetBundleManager.AssetBundleManager.GetAssetBundle(actorFileList[i]); 44 //載入資源 45 GameObject[] gms = pfa.GetAssetBundle().LoadAllAssets<GameObject>(); 46 ActorInfo[] ai = gms[0].GetComponents<ActorInfo>(); 47 if (ai.Length == 0)//數組長度為0則返回錯誤 48 { 49 Debug.LogError("載入角色資訊文件失敗!n錯誤文件位置:"+actorFileList[i]); 50 return false; 51 } 52 else 53 { 54 for (int i1 = 0; i1 < ai.Length; i1++) 55 allActor.Add(ai[i1]._actorInfoData.actorID, ai[i1]._actorInfoData); 56 //資訊載入字典.... 57 } 58 pfa.UnLoadAssetBundle(true);//卸載ab包 59 } 60 61 return true; 62 } 63 64 } 65 66 /// <summary> 67 /// 儲存單個角色資訊的類 68 /// </summary> 69 [System.Serializable]//序列化,注意要用System命名空間下面的 70 public class ActorInfoData 71 { 72 /// <summary> 73 /// 角色名字 74 /// </summary> 75 public string actorName = "英雄名字"; 76 /// <summary> 77 /// 角色拼音 78 /// </summary> 79 public string actorPinYin = "PinYin"; 80 /// <summary> 81 /// 角色ID 82 /// </summary> 83 public int actorID = 100; 84 /// <summary> 85 /// 屏蔽英雄 86 /// </summary> 87 public bool banActor = false; 88 /// <summary> 89 /// 角色背景 90 /// </summary> 91 [TextArea]//這個是文本框,顯示在編輯器的 92 public string actorBG = "背景故事"; 93 94 /// <summary> 95 /// 皮膚列表(第一個就是原皮,必填) 96 /// </summary> 97 public List<ActorSkin> actorSkins = new List<ActorSkin>(); 98 99 } 100 /// <summary> 101 /// 儲存單個皮膚的 102 /// </summary> 103 [System.Serializable]//序列化 104 public class ActorSkin 105 { 106 /// <summary> 107 /// 皮膚名字 108 /// </summary> 109 public string skinName = "皮膚名字"; 110 /// <summary> 111 /// 皮膚展示模型資源路徑 112 /// </summary> 113 [TextArea]//這個是文本框,顯示在編輯器的 114 public string skinShowModelPath = "皮膚展示模型資源路徑"; 115 /// <summary> 116 /// 皮膚對戰模型資源路徑 117 /// </summary> 118 [TextArea]//這個是文本框,顯示在編輯器的 119 public string skinBattleModelPath = "皮膚對戰模型資源路徑"; 120 /// <summary> 121 /// 皮膚展示特效資源路徑 122 /// </summary> 123 [TextArea]//這個是文本框,顯示在編輯器的 124 public string skinShowEffectPath = "皮膚展示特效資源"; 125 /// <summary> 126 /// 皮膚對戰特效資源路徑 127 /// </summary> 128 [TextArea]//這個是文本框,顯示在編輯器的 129 public string skinBattleEffectPath = "皮膚對戰特效資源"; 130 /// <summary> 131 /// 皮膚原畫位置 132 /// </summary> 133 [TextArea]//這個是文本框,顯示在編輯器的 134 public string skinBannerPath = "皮膚原畫位置"; 135 /// <summary> 136 /// 皮膚小圖標位置 137 /// </summary> 138 [TextArea]//這個是文本框,顯示在編輯器的 139 public string skinIconPath = "皮膚小圖標位置"; 140 } 141 }
腳本ActorInfo(承載資訊的載體):
1 /* 2 * 編輯者:Miku醬 3 * 版本:1 4 * 首次編寫日期:2019/09/15 13:53 5 * 修改日期:2019/09/15 13:53 6 * 強行加一行~~~ 7 */ 8 9 using System.Collections; 10 using System.Collections.Generic; 11 using UnityEngine; 12 13 namespace LuoHao.Actor { 14 public class ActorInfo : MonoBehaviour 15 { 16 [Header("角色資訊")] 17 public ActorInfoData _actorInfoData; 18 } 19 }
創建角色資訊資料庫:
新建一個物體,並掛上腳本ActorInfo,修改資訊(你開心就好隨便想改啥就改啥~),然後製作成預製體並且設置標籤:

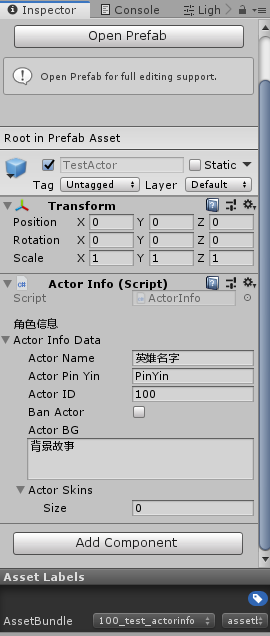
然後在點擊工具欄的打包AssetBundle的按鈕,打包這個預製體,最後我們在場景中隨便找個物體掛上ActorManager,並增加一個路徑(就是你預製體標籤的名字加後綴,標籤默認是全部小寫,我們設置的時候大小寫不影響文件讀取):

這步載入沒錯誤就OK了,記得刪除測試用的Test對象,請看下一節。
施工了一個中午emmm~頭髮又少了幾根,下一部分再見咯~
如果已經看過本章節:目錄傳送門:這是目錄鴨~