寫一個自己的打包工具-打包原生項目
- 2019 年 10 月 3 日
- 筆記
背景
早期寫了一個很老的項目,目前一直在迭代維護。
沒有用到模組化的思想,也沒有用到目前流行的框架,就是引入了一些簡單的樣式庫。
目前遇到的問題有:
1、程式碼未做壓縮等處理,佔用空間比較大
2、每次更新版本都需要清一下快取才能讀取到最新的靜態資源
3、有一些新的ES6語法和老的語法混用之後兼容性不佳
所以就想著自己寫一個簡單的打包工具吧
需求分析
1、循環讀取本地文件,分離不同類型文件
2、用babel對JS文件做一次轉換後壓縮,壓縮CSS文件
3、對JS、CSS文件做hash計算,並在輸出的文件名後面添加hash小尾巴
4、修改HTML中的引用鏈接,壓縮HTML
功能實現
1、循環讀取本地文件,分離不同類型文件。
這裡用的最簡單的正則表達式來區分不同的文件類型,主要用到了node中的fs模組和path模組。
const readRegDirSync = (filePath, reg, pathArray) => { const pa = fs.readdirSync(filePath); if (!pathArray) { pathArray = []; } pa.forEach(function (ele) { let info = fs.statSync(path.join(filePath, ele)); if (info.isDirectory()) { return pathArray.concat(readRegDirSync(path.join(filePath, ele), reg, pathArray)); } else { let newPath = path.join(filePath, ele); if (reg.test(ele)) { pathArray.push(newPath); } } }); return pathArray };
對於node我也還是個小白,就不分享自己的心得,具體使用說明最好看文檔。
具體的文檔點這裡:fs | Node.js API 文檔 path | Node.js API 文檔
另外需要注意的是,不同作業系統的路徑分隔符有所不同。
最後會得到類似這樣的文件路徑數組:["my_sourcecssglobal.css", "my_sourcecssindex.css"]
2-3、對文件進行處理
JS使用babel對語法進行處理,用babel-minify壓縮整個文件,CSS用clean-css來進行壓縮
然後用crypto模組來計算文件內容的hash值,給文件添加一個hash的小尾巴。
最後把對應的文件名返回,建立一個依賴對應表,方面我們後續替換路徑使用。
const fileAnalyser = (filePath, dirPath, fileType) => { let fileContent = getScript(filePath); let writeCode; if (fileType === 'script') { fileContent = babel.transformSync(fileContent, { presets: ["@babel/preset-env"] }).code; if (mode === 'production') { const {code} = babelMinify(fileContent, { mangle: { keepClassName: true } }); writeCode = code; } else if (mode === 'development') { writeCode = fileContent; } } else if (fileType === 'css') { if (mode === 'production') { writeCode = new CleanCSS({}).minify(fileContent).styles; } else if (mode === 'development') { writeCode = fileContent; } } let dir = path.parse(filePath).dir; let sourceDir = dir.slice(dir.indexOf("\") + 1); let nowName = path.parse(filePath).name + '.' + crypto.createHash('md5').update(writeCode).digest('hex') + (fileType === 'script' ? '.js' : '.css'); let fileDir = path.join(dirPath, sourceDir); let filename = path.join(fileDir, nowName); if (mkdirsSync(fileDir)) { fs.writeFileSync(filename, writeCode); return filename } };
我在這裡區分了不同的環境的打包模式,這個模式的值是命令行傳入可修改的,默認值為development
然後將得到的文件名和原始的文件名建立一個依賴對應表
cssDependencies[path.parse(cssArray[i]).base] = path.parse(cssPath).base;
我們就會得到類似這樣的對應關係
{global.css: "global.ac2aa87fad6ff0ced8abd4d300013047.css"
,index.css: "index.3261ae5739c390959d2105336d2b2733.css"}
4、修改HTML中的引用鏈接
用cheerio來解析HTML,然後根據剛才我們存下來的依賴對應表來修改其中的鏈接引用。
最後再用html-minifier壓縮一下HTML。
const htmlAnalyseScript = (filePath, scriptDependencies, cssDependencies, dirPath) => { const content = fs.readFileSync(filePath, 'utf-8'); const $ = cheerio.load(content); const getScript = $('script'); for (let i = 0; i < getScript.length; i++) { if (getScript[i].attribs.src) { let pathIndex = getScript[i].attribs.src.lastIndexOf("/") + 1; let prePath = getScript[i].attribs.src.slice(0, pathIndex); let scriptPath = getScript[i].attribs.src.slice(pathIndex); let scriptKey = Object.keys(scriptDependencies); let scriptIndex = scriptKey.indexOf(scriptPath); if (scriptIndex > -1) { $(getScript[i]).attr('src', prePath + scriptDependencies[scriptPath]) } } } const getCSS = $('link'); for (let i = 0; i < getCSS.length; i++) { if (getCSS[i].attribs.href) { let pathIndex = getCSS[i].attribs.href.lastIndexOf("/") + 1; let prePath = getCSS[i].attribs.href.slice(0, pathIndex); let cssPath = getCSS[i].attribs.href.slice(pathIndex); let cssKey = Object.keys(cssDependencies); let cssIndex = cssKey.indexOf(cssPath); if (cssIndex > -1) { $(getCSS[i]).attr('href', prePath + cssDependencies[cssPath]) } } } let dir = path.parse(filePath).dir; let sourceDir = dir.slice(dir.indexOf("\") > -1 ? dir.indexOf("\") + 1 : dir.length); let fileDir = path.join(dirPath, sourceDir); let filename = path.join(fileDir, path.parse(filePath).base); if (mkdirsSync(fileDir)) { fs.writeFileSync(filename, minifyHTML($.html(), { removeComments: true, collapseWhitespace: true, minifyCSS: true })); return filename } };
需要注意的是cheerio會將HTML中的中文轉換為unicode字元,因為對項目沒有影響,也就沒有再去做處理。
來看看最後的效果
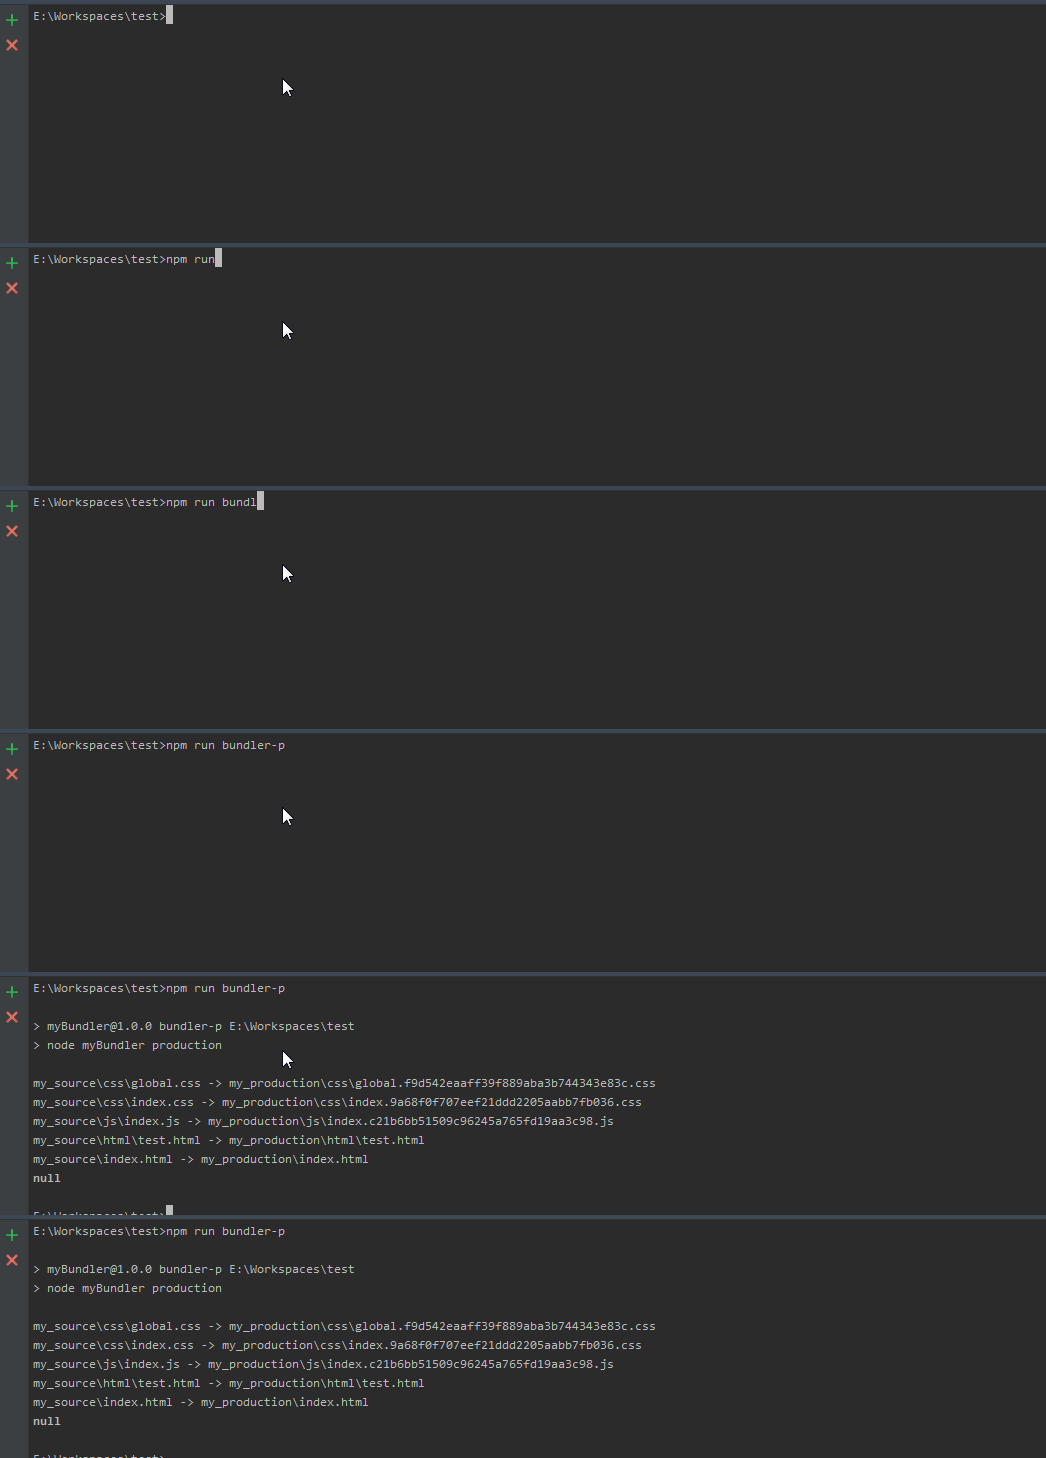
對於我自己的項目來說,還是很有用的,每次更版本不用清一些快取,也不用擔心一些簡單的兼容性問題,最主要的是整個項目的大小縮小了很多。
當然最好的情況自然是用模組化的方式來寫項目。
總結一下:node真滴好用!很多模組已經很成熟了,文檔也很完整,想做什麼功能一搜就有!
目前做的功能還是很單薄的,希望能給想自己寫一個小工具的人,提供一些可行的思路。
這個小工具的不足之處:
1、只對JS、HTML、CSS文件做了處理,下面應該還要對圖片等靜態資源做處理。
2、打包速度還是有點慢原因在於:讀取文件的時候是每讀一種文件都循環一次的,這個邏輯應該可以改成讀一個文件識別為某個文件類型就進行處理。
源碼地址:https://github.com/Chellyyy/myBundler