SSM使用Ueditor
- 2020 年 11 月 6 日
- 筆記
富文本编辑器(UEditor)
1. 下载UEditor富文本编辑器
建议下载 utf8-jsp 版本的,结构目录如下:

- 下载地址:链接://pan.baidu.com/s/1Nq0oJBAXI8QqM2JU_Bczsg 提取码:sjxy
下载解压完成后打开 index.html 可查看 ueditor 庐山真面目

2. 创建测试项目
-
注意:在以下步骤之前,你得有一个搭建完成的SSM框架的项目
2.1 在 SSM 项目的 web 目录下创建 ueditor 目录 ,将下载好的目录解压并导入

2.2 在 jsp 文件加下的 lib 目录下包含ueditor开发所需jar包,将jar包导入SSM项目中

- 导入项目后可删除,减小项目的所占内存
3. 创建测试项目
3.1 在web目录下创建一个 ueditor.jsp
<%@ page contentType="text/html;charset=UTF-8" language="java" %>
<html>
<head>
    <title>UEditor测试</title>
    <meta http-equiv="Content-Type" content="text/html;charset=utf-8"/>
    <script type="text/javascript" charset="utf-8" src="ueditor/ueditor.config.js"></script>
    <script type="text/javascript" charset="utf-8" src="ueditor/ueditor.all.min.js"></script>
    <!--建议手动加在语言,避免在ie下有时因为加载语言失败导致编辑器加载失败-->
    <!--这里加载的语言文件会覆盖你在配置项目里添加的语言类型,比如你在配置项目里配置的是英文,这里加载的中文,那最后就是中文-->
    <script type="text/javascript" charset="utf-8" src="ueditor/lang/zh-cn/zh-cn.js"></script>
    <style type="text/css">
        div {
            width: 100%;
        }
    </style>
</head>

<body>

<h1>UEditor测试</h1>
<form action="${pageContext.request.contextPath}/ueditor/uploading">
    <div id="editor" type="text/plain" style="width:1024px;height:500px;"></div>
    <input type="submit" value="提交">
</form>

</body>

<script type="text/javascript">
    // 实例化编辑器
    //建议使用工厂方法getEditor创建和引用编辑器实例,如果在某个闭包下引用该编辑器,直接调用UE.getEditor('editor')就能拿到相关的实例
    var ue = UE.getEditor('editor');
</script>
</html>
在下载的 utf8-jsp 中的 index.html 有 ueditor 初始化的内容,上述代码只是选择了本次案例所需的内容并进行修改,如果内容不符合读者所需,可以自行 copy 进行修改
3.2 配置 springmvc.xml
- 因为
SpringMVC会把ueditor加载所需是资源拦截了,所以需要在springmvc的配置文件中把资源放行
<!--过滤静态资源-->
<mvc:resources mapping="/ueditor/**" location="/ueditor/"/>
启动Web项目,你会看到如下

说明此时 ueditor 可以在页面显示了
随便填点东西提交,此时可以发现导航栏如下有以 editorValue 提交的属性

3.3 创建 UeditorController.java
package com.itheima.controller;

import org.springframework.stereotype.Controller;
import org.springframework.ui.Model;
import org.springframework.web.bind.annotation.RequestMapping;

@Controller
@RequestMapping("/ueditor")
public class UeditorController {

    @RequestMapping("/uploading")
    public String uploading(String editorValue, Model model){
        // editorValue 为接收富文本编辑器提交的内容
        model.addAttribute("editorValue", editorValue);
        return "ueditorList";
    }

}
3.4 编写 ueditorList.jsp 页面
<%@ page contentType="text/html;charset=UTF-8" language="java" %>
<html>
<head>
    <title>ueditor接收页面</title>
</head>
<body>
	${editorValue}
</body>
</html>
3.5 测试
在 ueditor.jsp 页面填写信息并点击 提交

会跳转到 ueditroList.jsp 页面显示信息

此时说明 ueditor 测试完成
注意:如果使用IDEA,并且打包的方式是 war , 则需要到项目下的 class 路径去寻找上传的文件
-
如下是我的上传路径:
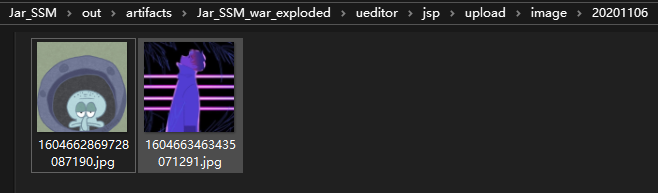
-
你也可以继续往下看,按照步骤自定义文件上传路径

4. UEditor配置属性(需要注意)
1.config.json

1.1 在 config.json 中可以配置 ueditor 的其他属性,可以根据自己需求进行更改

1.2 从这可以看出我的 Web 项目没有项目名


