用 Python 寫個七夕表白神器

今天是七夕節,相比於現代人自創的 502,不對是 520,七夕才是中國傳統意義上的情人節,本文分享幾個 Python 表白程式,情侶可以現學現用,單身的話也可以先收藏一下,說不定下次就用上了。
愛心樹
首先,我們來畫一棵長滿愛心果實的樹。

主要實現程式碼:
# 畫愛心
def love(x, y):
lv = turtle.Turtle()
lv.hideturtle()
lv.up()
# 定位
lv.goto(x, y)
# 畫圓弧
def curvemove():
for i in range(20):
lv.right(10)
lv.forward(2)

lv.color('red', 'pink')
lv.speed(10000000)
lv.pensize(1)
lv.down()
lv.begin_fill()
lv.left(140)
lv.forward(22)
curvemove()
lv.left(120)
curvemove()
lv.forward(22)
# 畫完複位
lv.left(140)
lv.end_fill()

# 畫樹
def tree(branchLen, t):
# 剩餘樹枝太少要結束遞歸
if branchLen > 5:
# 如果樹枝剩餘長度較短則變綠
if branchLen < 20:
t.color("green")
t.pensize(random.uniform((branchLen + 5) / 4 - 2, (branchLen + 6) / 4 + 5))
t.down()
t.forward(branchLen)
love(t.xcor(), t.ycor())
t.up()
t.backward(branchLen)
t.color("brown")
return
t.pensize(random.uniform((branchLen + 5) / 4 - 2, (branchLen + 6) / 4 + 5))
t.down()
t.forward(branchLen)
# 以下遞歸
ang = random.uniform(15, 45)
t.right(ang)
# 隨機決定減小長度
tree(branchLen - random.uniform(12, 16), t)
t.left(2 * ang)
# 隨機決定減小長度
tree(branchLen - random.uniform(12, 16), t)
t.right(ang)
t.up()
t.backward(branchLen)
表白氣球
我們接著看一下表白氣球的實現,要實現的效果是:隨機生成各種顏色向上漂浮的氣球,點擊氣球會破。
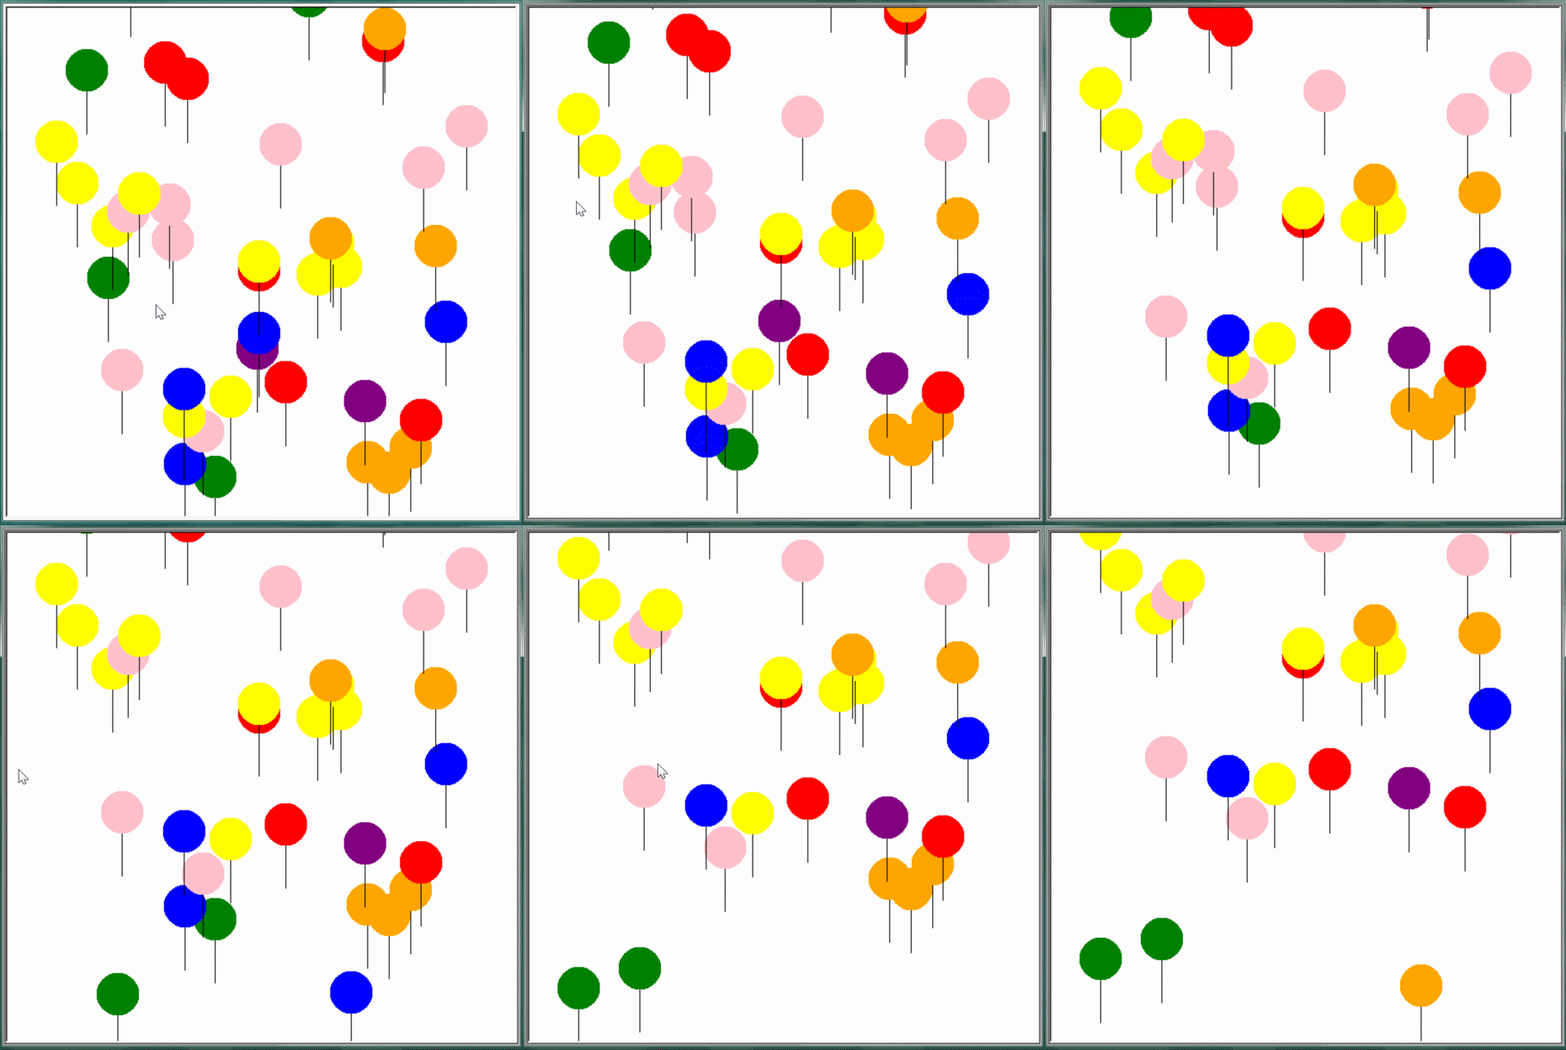
主要實現程式碼如下:
# 氣球
balloons = []
# 顏色
color_option = ["red", "blue", "green", "purple", "pink", "yellow", "orange"]
# 氣球大小
size = 50
# 氣球線
def line(x, y, a, b, line_width=1, color_name="black"):
up()
goto(x, y)
down()
color(color_name)
width(line_width)
goto(a, b)

def distance(x, y, a, b):
# 判斷滑鼠點擊位置和氣球坐標的距離
return ((a - x) ** 2 + (b - y) ** 2) ** 0.5
def tap(x, y):
for i in range(len(balloons)):
# 判斷是否點擊氣球隊列中的其中一個
if distance(x, y, balloons[i][0], balloons[i][1]) < (size / 2):
# 刪除氣球
balloons.pop(i)
return
def draw():
# 清除畫布
clear()
for i in range(1, (len(balloons) + 1)):
line(balloons[-i][0], balloons[-i][1], balloons[-i][0], balloons[-i][1] - size * 1.5, 1)
up()
goto(balloons[-i][0], balloons[-i][1])
# 畫原點,參數為大小和顏色
dot(size, balloons[-i][2])
# 改變縱坐標,模仿氣球上升
balloons[-i][1] = balloons[-i][1] + 1
# 修改畫布
update()
def gameLoop():
# 1/50 的概率生成一個氣球
if randrange(0, 50) == 1:
# 氣球坐標,在邊框位置減去氣球大小
x = randrange(-200 + size, 200 - size)
# 隨機在顏色隊列選擇一個顏色
c = choice(color_option)
# 添加氣球隊列
balloons.append([x, -200 - size, c])
draw()
ontimer(gameLoop, 10)
表白卡
我們可以通過 Python 在原有照片上添加一些適合主題的詩詞來製作表白卡。
原圖:

效果圖:

主要實現程式碼如下:
img = cv2.imread('test.png')
mask = np.zeros(img.shape[:2], np.uint8)
size = (1, 65)
bgd = np.zeros(size, np.float64)
fgd = np.zeros(size, np.float64)
rect = (1, 1, img.shape[1], img.shape[0])
cv2.grabCut(img, mask, rect, bgd, fgd, 10, cv2.GC_INIT_WITH_RECT)
mask2 = np.where((mask == 2) | (mask == 0), 1, 255)
img = img.astype(np.int32)
img *= mask2[:, :, np.newaxis]
img[img>255] = 255
img =img.astype(np.uint8)
img = cv2.cvtColor(img, cv2.COLOR_BGR2RGB)
img = Image.fromarray(img, 'RGB')
img.save('test1.jpg')
fp = open(r"word.txt", "r", encoding="utf-8")
text = fp.read()
mask_pic=np.array(Image.open(r"test1.jpg"))
wordcloud = WordCloud(font_path='hyr3gjm.ttf',mask=mask_pic,max_words=200).generate(text)
image=wordcloud.to_image()
image.save("wordcloud2.png")
cloud_data = np.array(image)
alpha = np.copy(cloud_data[:,:,0])
alpha[alpha>0] = 255
new_image = Image.fromarray(np.dstack((cloud_data, alpha)))
card = Image.open("test.png")
card = card.convert("RGBA")
card.paste(new_image, (0,0), mask=new_image)
card.save("card.png")
當然了,除了這些還可以畫玫瑰花什麼的,可以看一下:520。
歡迎微信搜索 Python小二,第一時間閱讀、獲取源碼,回復關鍵字 1024 可以免費領取個人整理的各類程式語言學習資料。

