Mac 10.14.4 编译openjdk1.9源码 及集成clion动态调试
- 2019 年 10 月 3 日
- 筆記
警告⚠️:本文耗时很长,先做好心理准备;编译openjdk源码需要很大的耐心,因为要踩很多坑,解决很多问题,本人从编译开始到结束用了两天时间,按照本篇教程踩坑会少许;谢谢观看
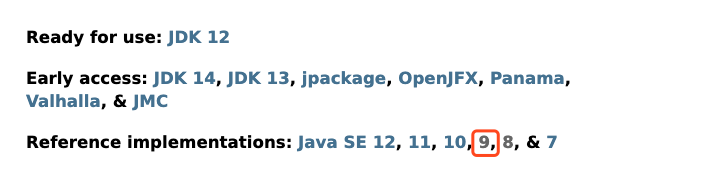
一、获取openjdk源码:
官网地址: http://jdk.java.net/

二、准备环境
安装 homwbrew:
/usr/bin/ruby -e "$(curl -fsSL https://raw.githubusercontent.com/Homebrew/install/master/install)”
安装依赖:
brew install ccache //加速编译 brew install freetype //字体引擎,编译过程中会被依赖到
三:环境编译(此处需要注意,mac系统版本与xcode版本及openjdk版本要相对应,否则会出现很多问题!!!)
./configure --with-target-bits=64 --with-freetype=/usr/local/Cellar/freetype/2.10.1 --enable-ccache --with-jvm-variants=server,client --with-boot-jdk-jvmargs="-Xlint:deprecation -Xlint:unchecked"
--disable-warnings-as-errors --with-debug-level=slowdebug 2>&1 | tee configure_mac_x64.log
注意: 将–with-freetype指向你自己的freetype安装路径, 可能会出现权限不足情况: 请在./config加上 -bash (或者自行查找解决方案)
输出如下内容,基本就说明你的环境没问题了:
A new configuration has been successfully created in /Users/yourname/jdk9/build/macosx-x86_64-normal-serverANDclient-slowdebug using configure arguments '--with-target-bits=64 --with-freetype=/usr/local/Cellar/freetype/2.9.1 --enable-ccache --with-jvm-variants=server,client --with-boot-jdk-jvmargs='-Xlint:deprecation -Xlint:unchecked' --disable-warnings-as-errors --with-debug-level=slowdebug'. Configuration summary: * Debug level: slowdebug * HS debug level: debug * JDK variant: normal * JVM variants: server client * OpenJDK target: OS: macosx, CPU architecture: x86, address length: 64 * Version string: 9-internal+0-adhoc.daiyongzhi.jdk9 (9-internal) Tools summary: * Boot JDK: java version "1.8.0_101" Java(TM) SE Runtime Environment (build 1.8.0_101-b13) Java HotSpot(TM) 64-Bit Server VM (build 25.101-b13, mixed mode) (at /Library/Java/JavaVirtualMachines/jdk1.8.0_101.jdk/Contents/Home) * Toolchain: clang (clang/LLVM from Xcode 9.2) * C Compiler: Version 9.0.0 (at /usr/bin/clang) * C++ Compiler: Version 9.0.0 (at /usr/bin/clang++) Build performance summary: * Cores to use: 8 * Memory limit: 16384 MB * ccache status: Active (3.5) NOTE: You have requested to build more than one version of the JVM, which will result in longer build times.
进行编译 openjdk1.9:
export LANG=C make all LOG=debug 2>&1 | tee make_mac_x64.log
如果一切顺利,看到此结果就算编译成功了:

最后,验证一下:
cd openjdk/build/macosx-x86_64-normal-serverANDclient-slowdebug/jdk/bin 执行: ./java -version

警告⚠️:编译过程中遇到的问题(此处列举几次常见错误,如若出现其他错误请自行查找解决方案):
总结一下编译过程中遇到的问题:
vi src/share/vm/memory/virtualspace.cpp (char *):

vi src/share/vm/opto/loopPredicate.cpp (const TypeInt *):

vi src/share/vm/opto/loopPredicate.cpp (const TypeInt *):

修改报错信息( 错误解决方案):
#1. src/hotspot/share/memory/virtualspace.cpp # l585  if (base() != NULL) {
  #2. src/hotspot/share/opto/lcm.cpp # l42  if (Universe::narrow_oop_base() != NULL) { // Implies UseCompressedOops.

  #3. src/hotspot/share/opto/loopPredicate.cpp # l915  assert(rng->Opcode() == Op_LoadRange || iff->is_RangeCheck() || _igvn.type(rng)->is_int()->_lo >= 0, "must be");
四、编译成功之后进行调试:
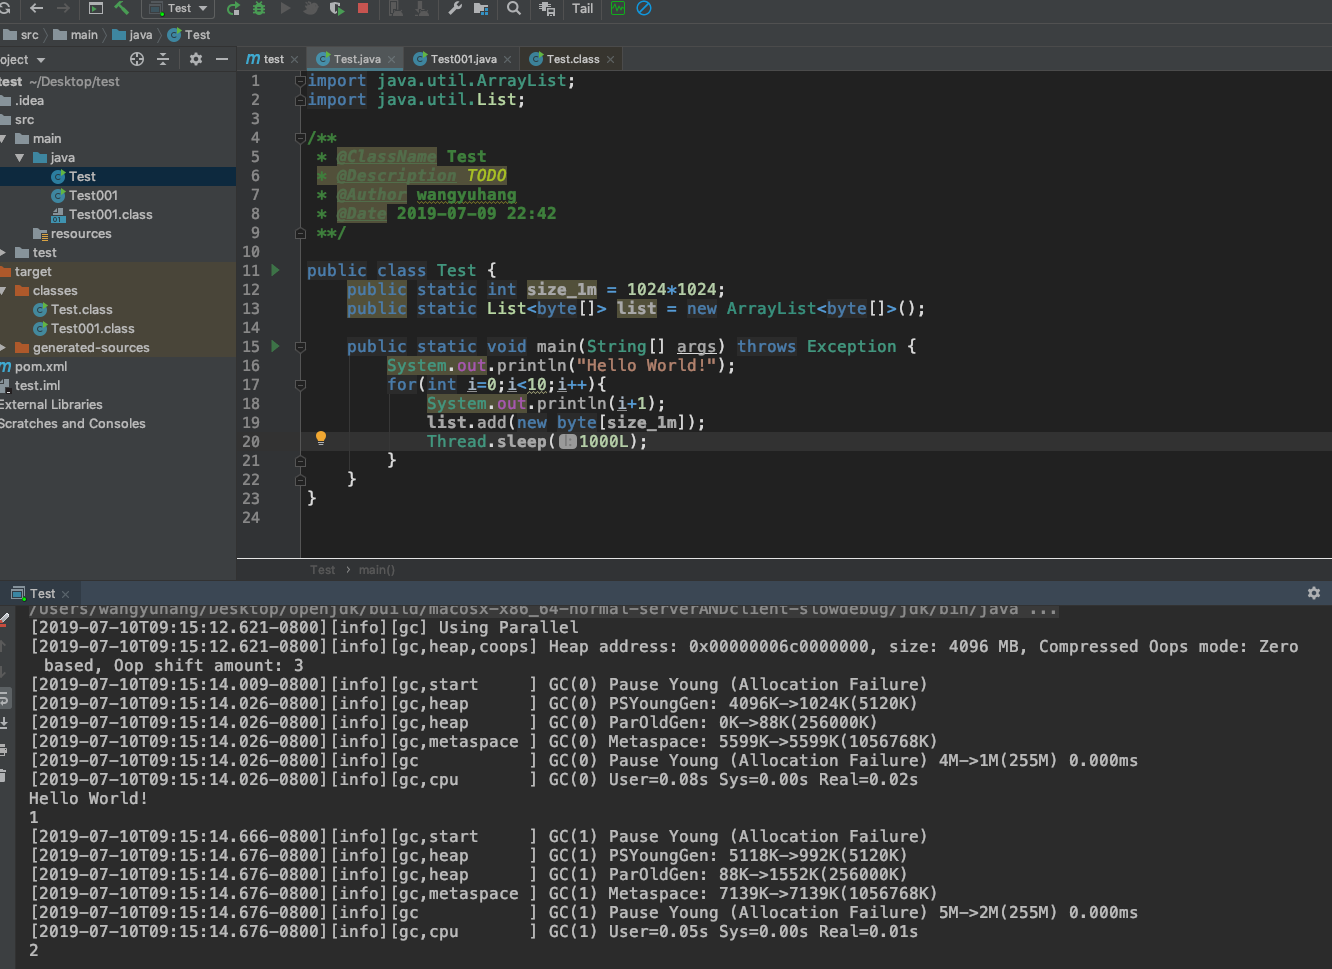
java代码:
public class Main { public static int size_1m = 1024*1024; public static List<byte[]> list = new ArrayList<>(); public static void main(String[] args) throws Exception { System.out.println("Hello World!"); for(int i=0;i<10;i++){ System.out.println(i+1); list.add(new byte[size_1m]); Thread.sleep(1000L); } } }
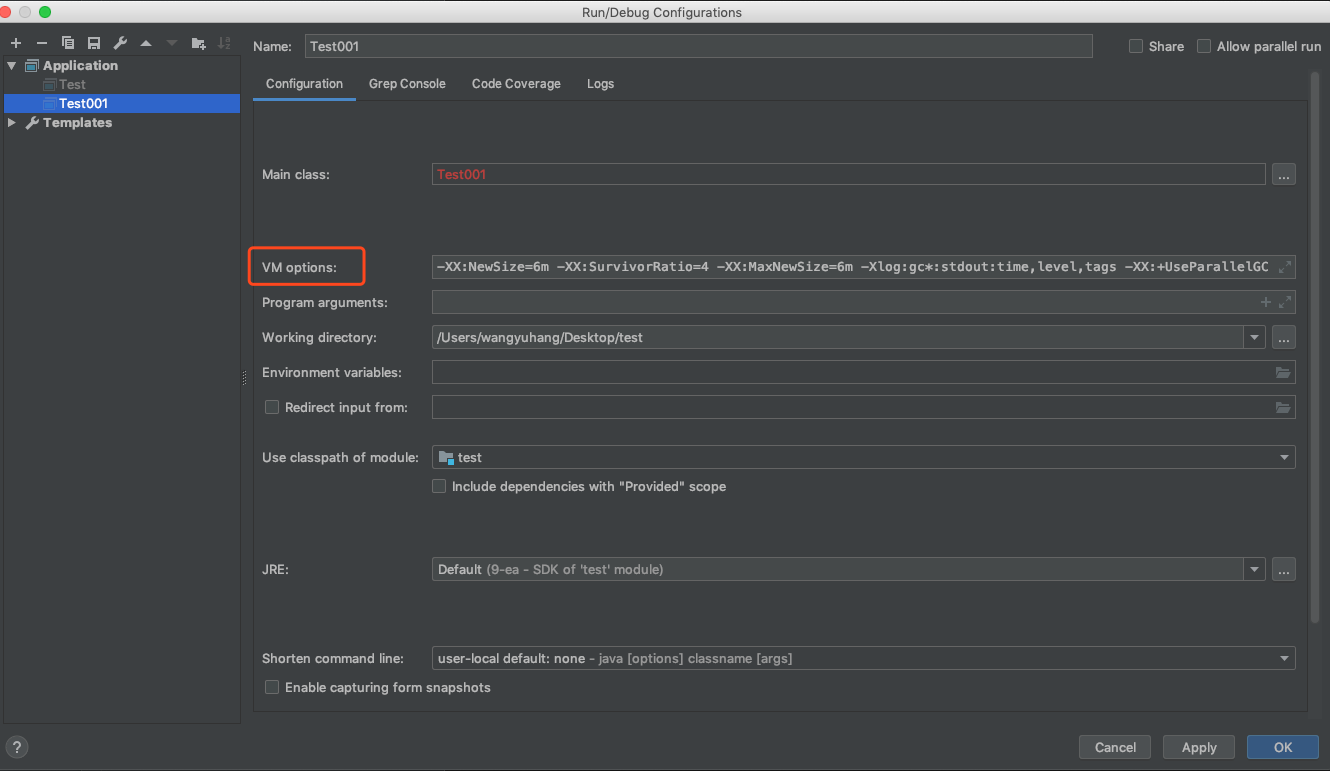
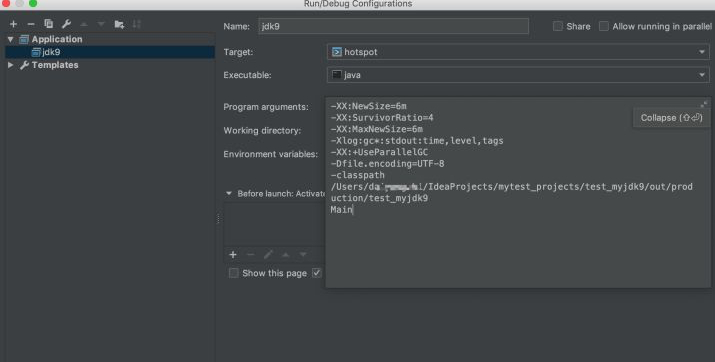
配置idea虚拟机参数:
-XX:NewSize=6m -XX:SurvivorRatio=4 -XX:MaxNewSize=6m -Xlog:gc*:stdout:time,level,tags -XX:+UseParallelGC
位置如下图所示:
然后运行:
2.通过运行Java程序调试openjdk:
将openjdk目录下的hotspot倒入到CLion
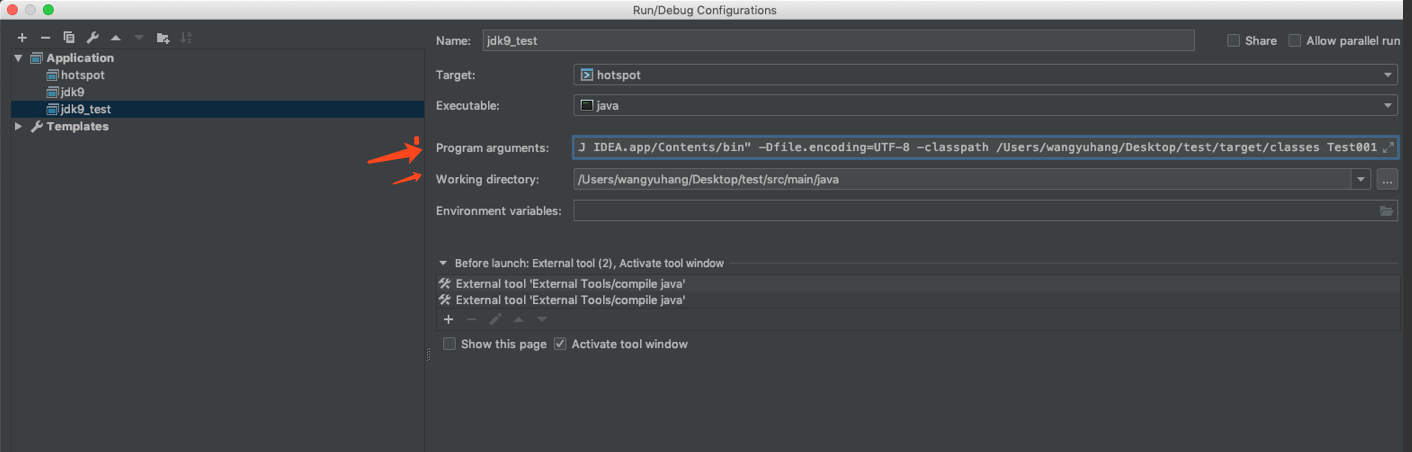
配置参数并运行:
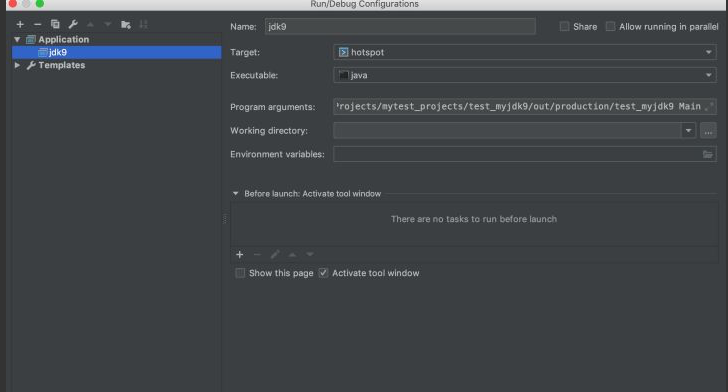
/Users/yourname/jvm/openjdk/build/macosx-x86_64-normal-serverANDclient-slowdebug/images/jdk/bin/java -XX:NewSize=6m -XX:SurvivorRatio=4 -XX:MaxNewSize=6m -Xlog:gc*:stdout:time,level,tags -XX:+UseParallelGC -Dfile.encoding=UTF-8 -classpath /Users/yourname/IdeaProjects/mytest_projects/test_myjdk9/out/production/test_myjdk9 Main
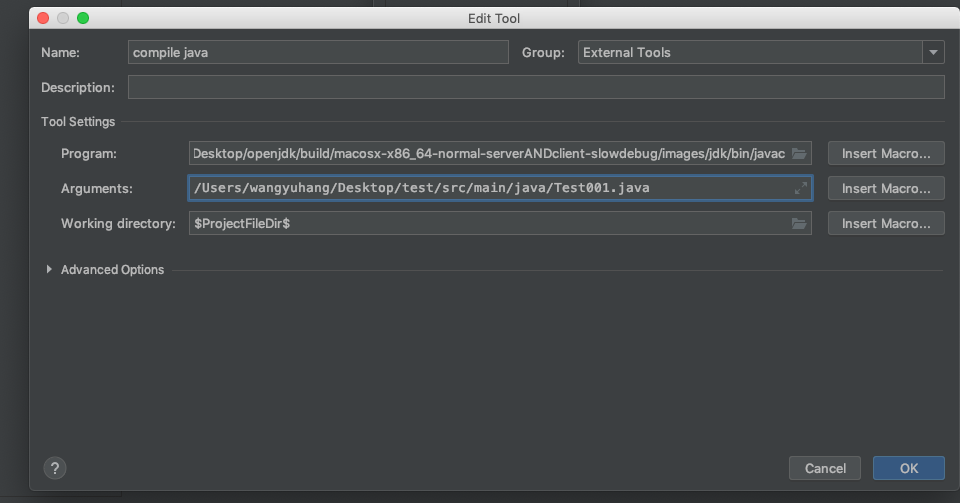
与java联调:
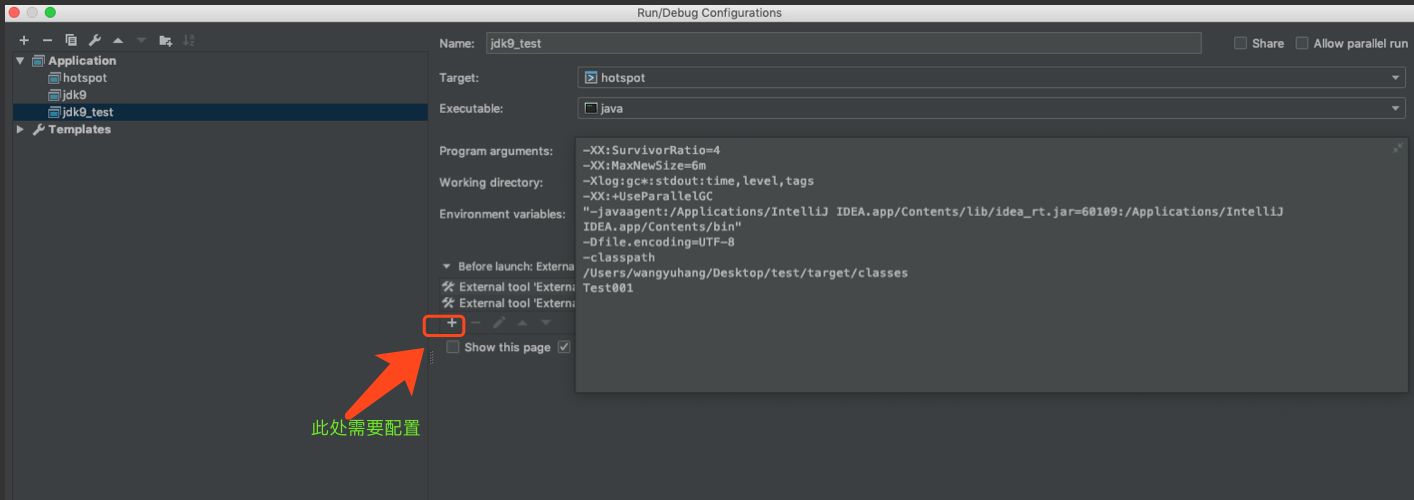
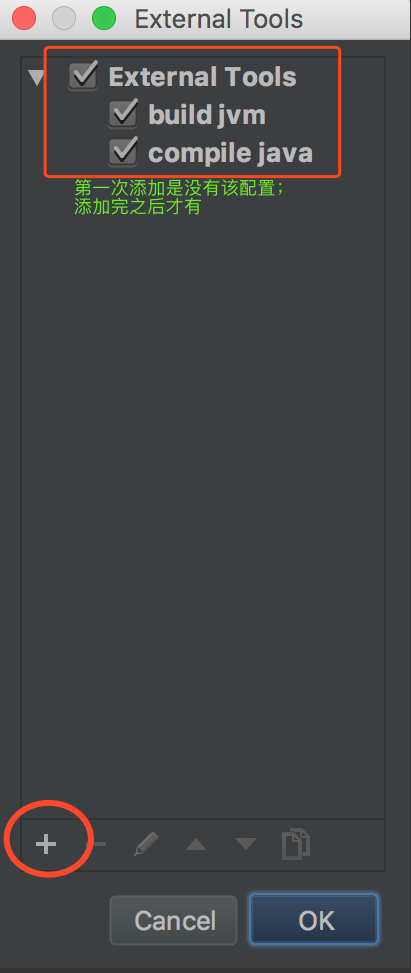
Compile java:
Build Jvm:
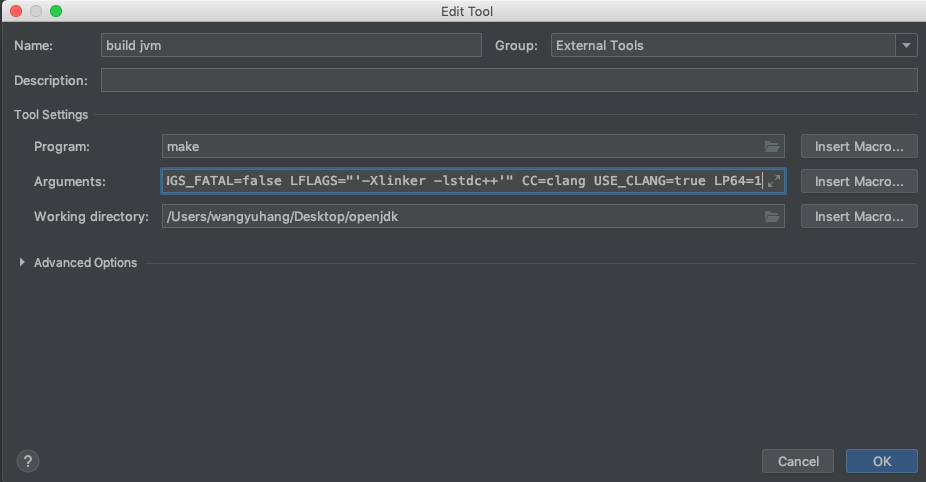
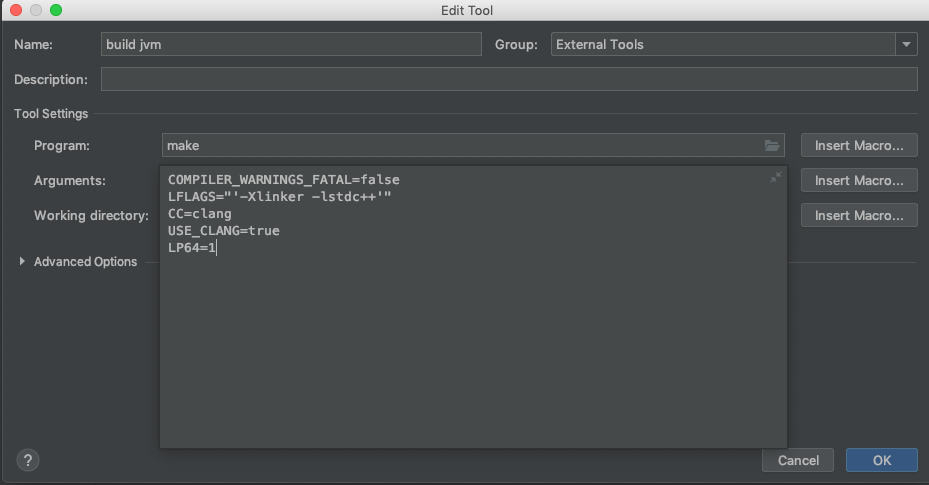
参数:
COMPILER_WARNINGS_FATAL=false LFLAGS="'-Xlinker -lstdc++'" CC=clang USE_CLANG=true LP64=1
随便修改源码方法,并在java源码调用(此处修改了openjdk源码的获取时间方法),展现效果如下:
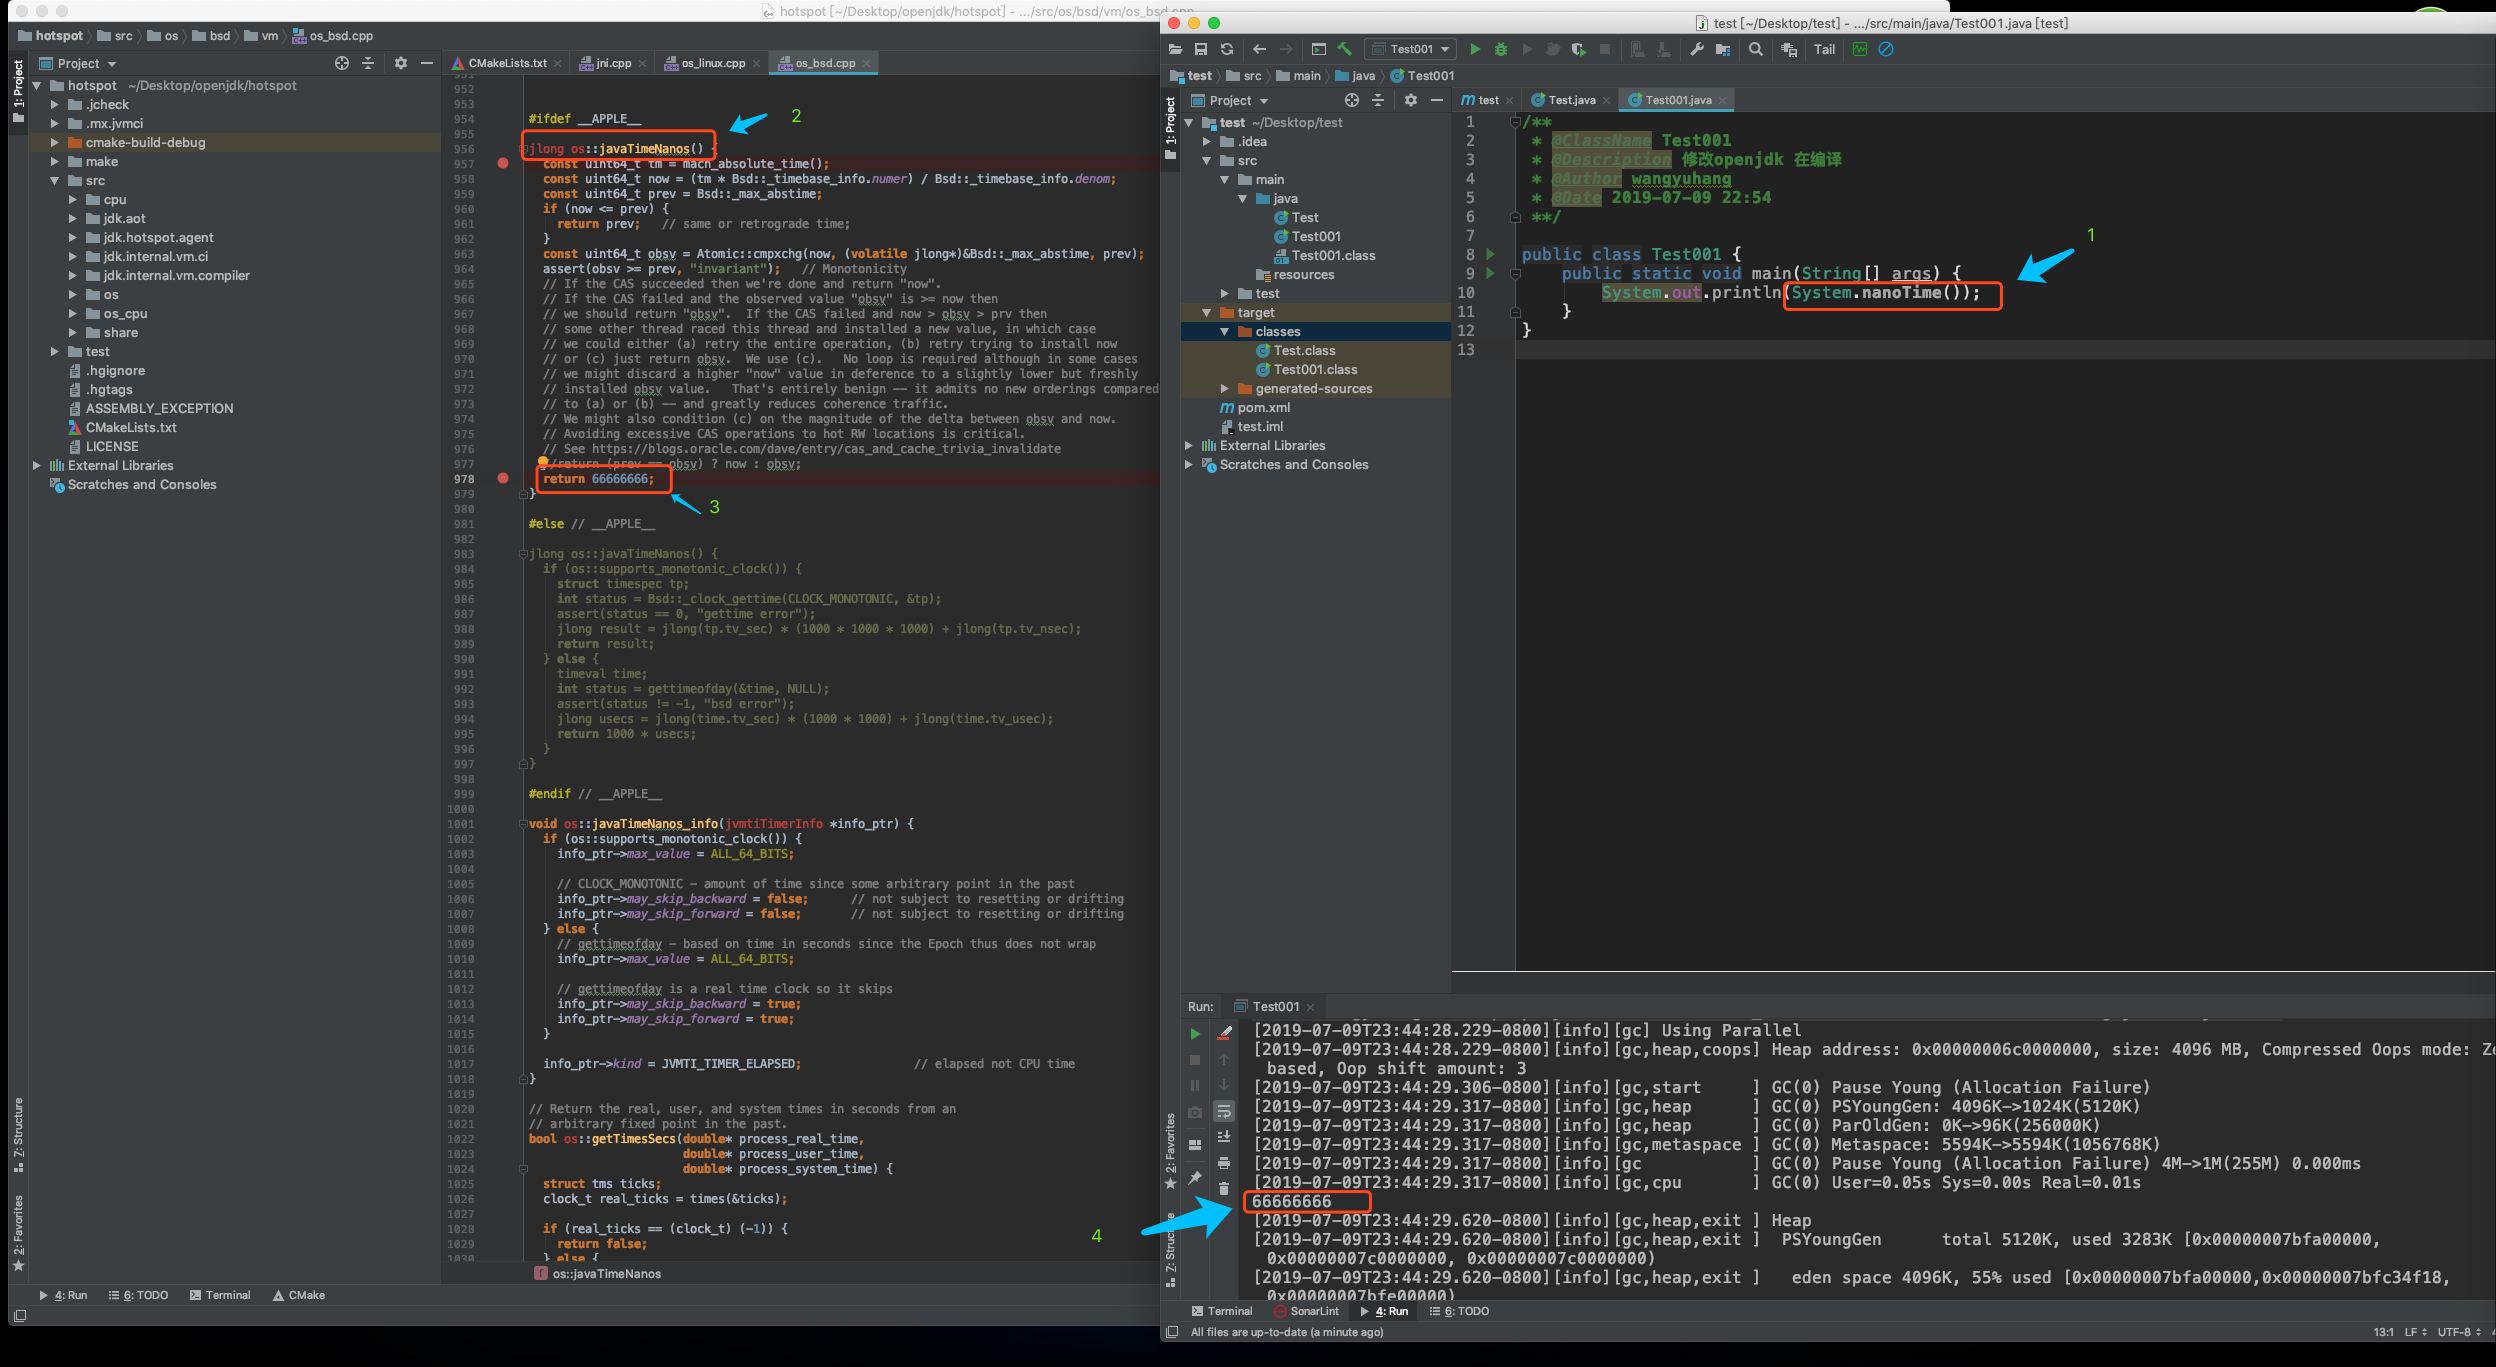
如上所示:整个编译了及联调完毕,可以进行对源码为所欲为了;
附赠:centOs下编译openjdk:(该方法由好友提供,本人未真正测试,仅供参考):
1、安装代码管理工具mercurial/获取自己获取代码包 2、安装插件: yum install alsa-lib-devel cups-devel libX* gcc gcc-c++ freetype-devel libstdc++-static ant make 3、查看当前路径 [***@VM_0_3_centos openjdk-jdk8u-jdk8u]$ pwd /home/liangding/openjdk-jdk8u-jdk8u [***@VM_0_3_centos openjdk-jdk8u-jdk8u]$ 4、修改参数配置 [***@VM_0_3_centos openjdk-jdk8u-jdk8u]$ chmod +x configure [***@VM_0_3_centos openjdk-jdk8u-jdk8u]$ ./configure —prefix=/home/liangding/jdk8u —enable-debug 5、编译 [***@VM_0_3_centos openjdk-jdk8u-jdk8u]$ make 看到以下信息表示编译成功 ## Finished jdk (build time 00:06:20) —— Build times ——— Start 2019-07-08 22:07:16 End 2019-07-08 22:36:47 00:00:52 corba 00:20:13 hotspot 00:00:33 jaxp 00:00:42 jaxws 00:06:20 jdk 00:00:51 langtools 00:29:31 TOTAL ———————————— 6、测试编译后生成jdk的路径 [***@VM_0_3_centos build]$ pwd /home/liangding/openjdk-jdk8u-jdk8u/build [***@VM_0_3_centos build]$ ls -lrt total 4 drwxrwxr-x 9 liangding liangding 4096 Jul 8 22:30 linux-x86_64-normal-server-fastdebug 7、写一个测试程序 [***@VM_0_3_centos ~]$ ls -lrt total 127804 -rw-rw-r———————————— 1 liangding liangding 130719042 Jul 8 21:09 jdk8u.zip drwxrwxr-x 2 liangding liangding 4096 Jul 8 21:48 jdk8u drwxrwxr-x 14 liangding liangding 4096 Jul 8 21:53 openjdk-jdk8u-jdk8u -rw-rw-r———————————— 1 liangding liangding 147 Jul 8 22:41 HelloWorld.java -rw-rw-r———————————— 1 liangding liangding 432 Jul 8 22:45 HelloWorld.class [***@VM_0_3_centos ~]$ cat HelloWorld.java public class HelloWorld { public static void main(String[] args) { System.out.println(“HelloWorld openJDK”); } } 8、测试 [***@VM_0_3_centos ~]$ ./openjdk-jdk8u-jdk8u/build/linux-x86_64-normal-server-fastdebug/jdk/bin/javac HelloWorld.java 9、运行 [***@VM_0_3_centos ~]$ ./openjdk-jdk8u-jdk8u/build/linux-x86_64-normal-server-fastdebug/jdk/bin/java HelloWorld HelloWorld openJDK [***@VM_0_3_centos ~]$
原创不易,转载请标明出处,谢谢
