[3]尝试用Unity3d制作一个王者荣耀(持续更新)->选择英雄-(中)
- 2019 年 10 月 3 日
- 筆記
如果已经看过本章节:目录传送门:这是目录鸭~
上节内容写了Actor管理器,那么这一节让我们先创建一个角色。(此章节开始加速…)
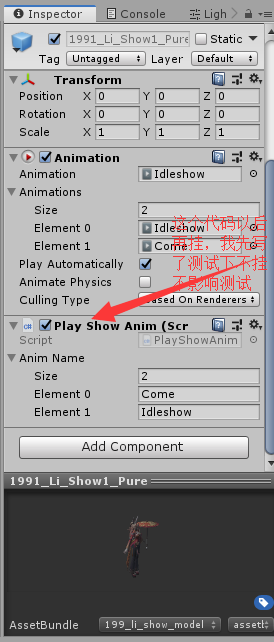
1.制作角色展示AssetBundle:
提取农药某个展示模型(Show)资源(这步具体去百度),然后再把模型制作成预制体,AssetBundle命名规则按照农药的(ID_游戏拼音_资源类型.assetbundle):
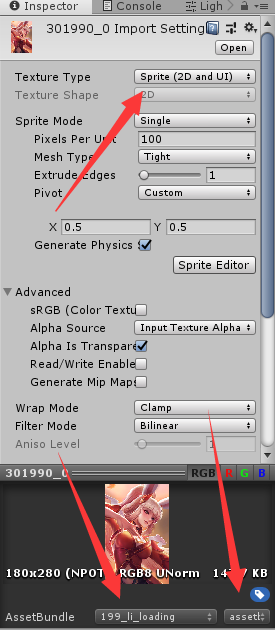
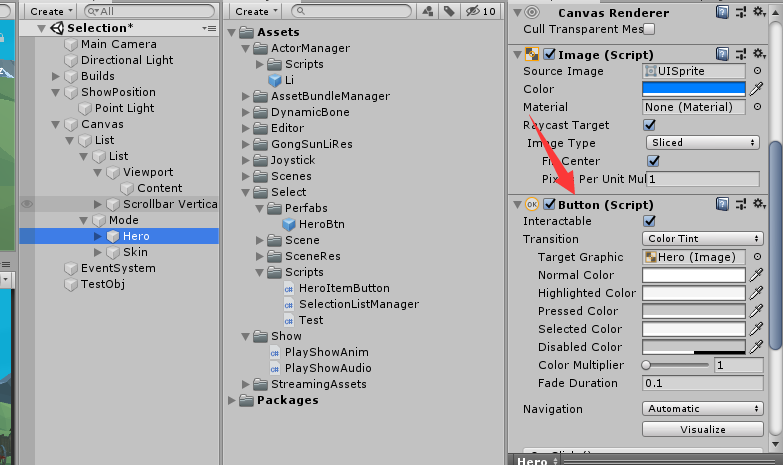
制作UI预制体,还是得提取或者去农药官网 pvp.qq.com 的壁纸中心下载原图截取(一个是图标一个是加载时候用到的):

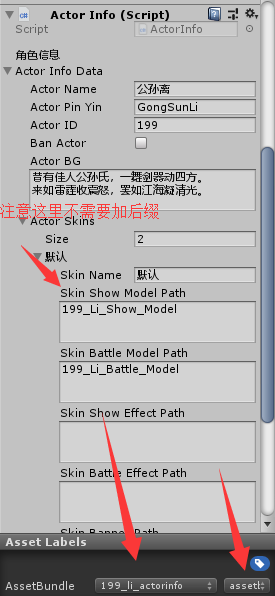
创建一个空物体,并挂上ActorInfo组件,制作成预制体并输入数据(虽然标签以及打包的文件都是小写的,但按照路径读取文件的时候不会区分大小写,为了好看于是可以大写):
到这步先不要打包,后面还有小部件需要打包的。
2.拼UI(最舒适的部分~):
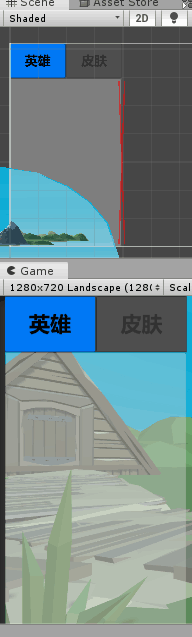
创建一个滚动视图,并且在Content位置增加自动布局组件,再创建空对象改名Mode,里面存放两个按钮用来切换皮肤和英雄选择,如图:


拉几下几下位置,最终效果:
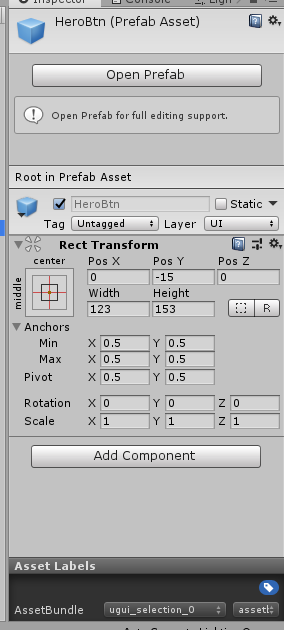
然后我们制作一个预制体,用于动态生成(结构是一个空物体里面有个按钮(已把里面文字删去)和一个 名字 的 文本显示组件):

把预制体粘贴到Content里面测试有没有问题(是否自动对齐):

测试放上去的内容记得删除,设置预制体标签:
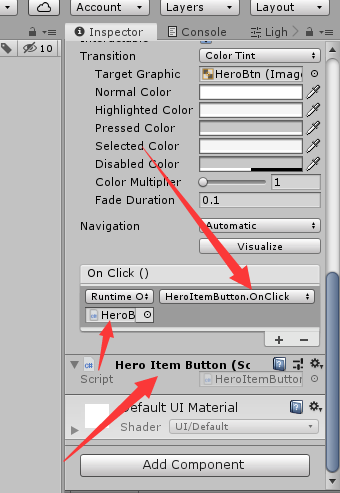
然后我们写一个代码用于管理选择英雄的UI响应的(前SelectionListManager)和 按钮回调的(后HeroItemButton):
1 /* 2 * 编辑者:Miku酱 3 * 版本:1 4 * 首次编写日期:2019/09/20 00:05 5 * 修改日期:2019/09/20 00:05 6 * 强行加一行~~~ 7 */ 8 using System.Collections; 9 using System.Collections.Generic; 10 using UnityEngine; 11 using LuoHao.Actor; 12 using UnityEngine.UI; 13 using LuoHao.AssetBundleManager; 14 15 namespace LuoHao.PVP.Selection 16 { 17 public class SelectionListManager : MonoBehaviour 18 { 19 public Transform testPos; 20 21 /// <summary> 22 /// 接口 23 /// </summary> 24 public static SelectionListManager selectionListManager; 25 26 /// <summary> 27 /// UI的AB包路径 28 /// </summary> 29 static string uiPath = "UGUI_Selection_0.assetbundle"; 30 [Header("父对象")] 31 public Transform UIparent; 32 /// <summary> 33 /// 当前选择的英雄ID 34 /// </summary> 35 private int nowSelectionID = -1; 36 37 GameObject testGM = null; 38 /// <summary> 39 /// 设置ID 40 /// </summary> 41 /// <param name="id">id</param> 42 public void SetSelectionID(int id) 43 { 44 if (nowSelectionID == id) return; 45 nowSelectionID = id; 46 if (testGM != null) Destroy(testGM); 47 Transform tr = Instantiate(AssetBundleManager.AssetBundleManager. 48 GetAssetBundle(ActorManager.allActor[id].actorSkins[0].skinShowModelPath+ ".assetbundle") 49 .GetAssetBundle().LoadAllAssets<GameObject>()[0],testPos).transform; 50 tr.localPosition = Vector3.zero; 51 } 52 53 public int GetSelectionID() 54 { 55 return nowSelectionID; 56 } 57 58 private void Awake() 59 { 60 selectionListManager = this; 61 nowSelectionID = -1;//重置ID 62 } 63 // Start is called before the first frame update 64 private void Start() 65 { 66 LoadList(); 67 } 68 69 // Update is called once per frame 70 private void Update() 71 { 72 73 } 74 75 private void LoadList() 76 { 77 //取得预制体 78 GameObject btn =AssetBundleManager.AssetBundleManager. 79 GetAssetBundle(uiPath).GetAssetBundle().LoadAsset<GameObject>("HeroBtn"); 80 List<ActorInfoData> infos = new List<ActorInfoData>(ActorManager.allActor.Values);//取得信息... 81 for(int i = 0; i < infos.Count; i++)//创建UI 82 { 83 PackageForAssetBundle sprite = AssetBundleManager.AssetBundleManager. 84 GetAssetBundle(infos[i].actorSkins[0].skinIconPath+".assetbundle"); 85 //取得图标资源 86 Transform tr = Instantiate(btn, UIparent).transform; 87 tr.GetComponentInChildren<Text>().text = infos[i].actorName;//设置名字 88 tr.GetComponentInChildren<Image>().sprite= sprite.GetAssetBundle().LoadAllAssets<Sprite>()[0]; //设置图标 89 tr.GetComponentInChildren<HeroItemButton>().heroID = infos[i].actorID;//设置ID 90 sprite.UnLoadAssetBundle(false);//卸载 91 } 92 } 93 } 94 }
1 /* 2 * 编辑者:Miku酱 3 * 版本:1 4 * 首次编写日期:2019/09/20 00:05 5 * 修改日期:2019/09/20 00:05 6 * 强行加一行~~~ 7 */ 8 using System.Collections; 9 using System.Collections.Generic; 10 using UnityEngine; 11 12 namespace LuoHao.PVP.Selection 13 { 14 public class HeroItemButton : MonoBehaviour 15 { 16 /// <summary> 17 /// 这个由代码来设置 18 /// </summary> 19 [HideInInspector] 20 21 public int heroID = 0; 22 public void OnClick() 23 { 24 SelectionListManager.selectionListManager.SetSelectionID(heroID);//调用更改ID 25 26 } 27 } 28 }
然后在回到按钮,挂上HeroItemButton并设置按钮回调OnClick:
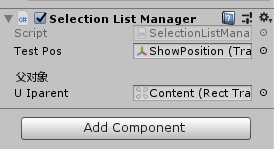
再再选择英雄的场景中创建一个空物体(SelectionListManager),拖入展示位置和滚动视图的Content:
3.试运行:
这时候我们点击一下AssetBundle打包,让程序飞一会~
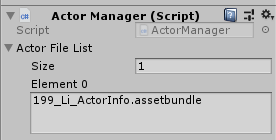
在一个用于测试的空对象(没有就创建)挂上ActorManager:
并输入刚刚创建的阿离的ActorInfo文件的位置(这里就要带后缀了,可以通过修改代码来免除加后缀):
然后运行:
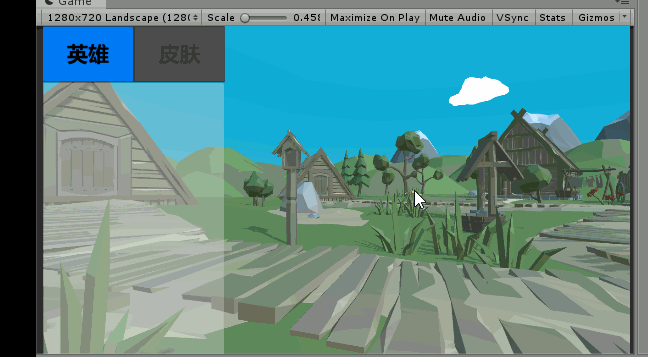
我这边因为临时写了个动画的管理的所以有出场动画展示,这个后面才讲。
出现了动图里面的效果就说明成功啦!
不早了( 2019/09/20 00:30),下一节再见。
如果已经看过本章节:目录传送门:这是目录鸭~
