【典型案例】用 TensorFlow 实现鸢尾花分类
- 2019 年 11 月 8 日
- 筆記
场景背景
智能钛机器学习平台的 Tensorflow 框架为用户提供了基于 Python API 的 Tensorflow 运行环境,用户可将编写好的脚本及依赖文件上传至框架进行算法训练。
本文以鸢尾花分类任务为例,向用户演示,如何利用智能钛机器学习平台的深度学习框架 TensorFlow 运行自定义代码,如何通过工作流页面向自定义代码传参,如何查看代码日志/报错信息等。整个工作流运行耗时仅几十秒,训练完成后您可进行模型服务部署和在线测试。
数据集介绍
本案例代码修改自 Tensorflow 官方项目。 本案例使用公共的鸢尾花(iris)数据集训练模型,该数据集包含四个特征,分别是花萼长度、花萼宽度、花瓣长度、花瓣宽度,我们根据这四个特征将鸢尾花分成三种物种。
CSV_COLUMN_NAMES = ['SepalLength', 'SepalWidth', 'PetalLength', 'PetalWidth', 'Species'] SPECIES = ['Setosa', 'Versicolor', 'Virginica']
整体流程
在智能钛机器学习平台运行用户自定义 TensorFlow 代码,主要包含以下步骤: 1.数据与代码准备。 2.利用 TensorFlow 框架搭建分类模型。 3.运行自定义代码及评估效果查看。 4.模型部署及在线测试。 工作流示意图如下:
详细流程
一、数据与代码准备
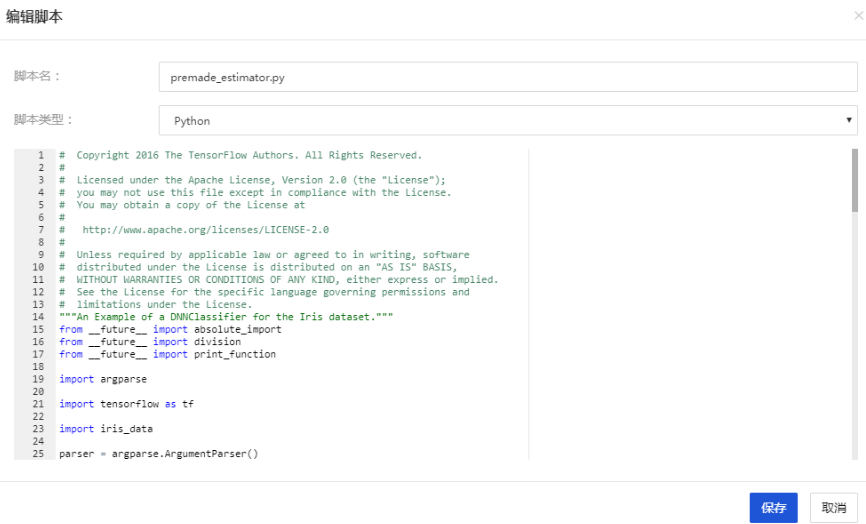
本案例代码取自 TensorFlow 官方项目 ,您可通过链接下载,或直接拷贝以下代码。
# Copyright 2016 The TensorFlow Authors. All Rights Reserved. # # Licensed under the Apache License, Version 2.0 (the "License"); # you may not use this file except in compliance with the License. # You may obtain a copy of the License at # # http://www.apache.org/licenses/LICENSE-2.0 # # Unless required by applicable law or agreed to in writing, software # distributed under the License is distributed on an "AS IS" BASIS, # WITHOUT WARRANTIES OR CONDITIONS OF ANY KIND, either express or implied. # See the License for the specific language governing permissions and # limitations under the License. """An Example of a DNNClassifier for the Iris dataset.""" from __future__ import absolute_import from __future__ import division from __future__ import print_function import argparse import tensorflow as tf import iris_data parser = argparse.ArgumentParser() parser.add_argument('--batch_size', default=100, type=int, help='batch size') parser.add_argument('--train_steps', default=1000, type=int, help='number of training steps') parser.add_argument('--train_path', type=str, help='path to the train data file.') parser.add_argument('--test_path', type=str, help='path to the test data file.') parser.add_argument('--export_dir', type=str, help='path to export the train model (.pb file)') def main(argv): args = parser.parse_args(argv[1:]) # Fetch the data (train_x, train_y), (test_x, test_y) = iris_data.load_data(args.train_path, args.test_path) # Feature columns describe how to use the input. my_feature_columns = [] for key in train_x.keys(): my_feature_columns.append(tf.feature_column.numeric_column(key=key)) # Build 2 hidden layer DNN with 10, 10 units respectively. classifier = tf.estimator.DNNClassifier( feature_columns=my_feature_columns, # Two hidden layers of 10 nodes each. hidden_units=[10, 10], # The model must choose between 3 classes. n_classes=3, ) # Train the Model. classifier.train( input_fn=lambda: iris_data.train_input_fn(train_x, train_y, args.batch_size), steps=args.train_steps) # Evaluate the model. eval_result = classifier.evaluate( input_fn=lambda: iris_data.eval_input_fn(test_x, test_y, args.batch_size)) def serving_input_receiver_fn(): input_placeholder = tf.placeholder(shape=[4], dtype=tf.string) sepal_length_placeholder = tf.strings.to_number(input_placeholder[0:1]) sepal_width_placeholder = tf.strings.to_number(input_placeholder[1:2]) petal_length_placeholder = tf.strings.to_number(input_placeholder[2:3]) petal_width_placeholder = tf.strings.to_number(input_placeholder[3:]) # How the input data is fed into model_fn. features = { "SepalLength": sepal_length_placeholder, "SepalWidth": sepal_width_placeholder, "PetalLength": petal_length_placeholder, "PetalWidth": petal_width_placeholder } return tf.estimator.export.ServingInputReceiver(features, input_placeholder) if not tf.gfile.Exists(args.export_dir): tf.gfile.MakeDirs(args.export_dir) classifier.export_saved_model( export_dir_base=args.export_dir, serving_input_receiver_fn=serving_input_receiver_fn) print('nTest set accuracy: {accuracy:0.3f}n'.format(**eval_result)) # Generate predictions from the model expected = ['Setosa', 'Versicolor', 'Virginica'] predict_x = { 'SepalLength': [5.1, 5.9, 6.9], 'SepalWidth': [3.3, 3.0, 3.1], 'PetalLength': [1.7, 4.2, 5.4], 'PetalWidth': [0.5, 1.5, 2.1], } predictions = classifier.predict( input_fn=lambda: iris_data.eval_input_fn(predict_x, labels=None, batch_size=args.batch_size)) template = 'nPrediction is "{}" ({:.1f}%), expected "{}"' for pred_dict, expec in zip(predictions, expected): class_id = pred_dict['class_ids'][0] probability = pred_dict['probabilities'][class_id] print(template.format(iris_data.SPECIES[class_id], 100 * probability, expec)) if __name__ == '__main__': tf.logging.set_verbosity(tf.logging.INFO) tf.app.run(main)
二、利用 TensorFlow 组件搭建分类模型
TensorFlow 是 Google 开源的一种深度学习系统,智能钛为用户提供了 GPU 集群平台,用户只需申请权限就可以简单配置深度学习任务。Tensorflow 组件中使用的 Python 版本和支持的第三方模块版本信息如下:
- Python 2.7/3.5
- SciPy 1.0.0
- NumPy 1.14.0
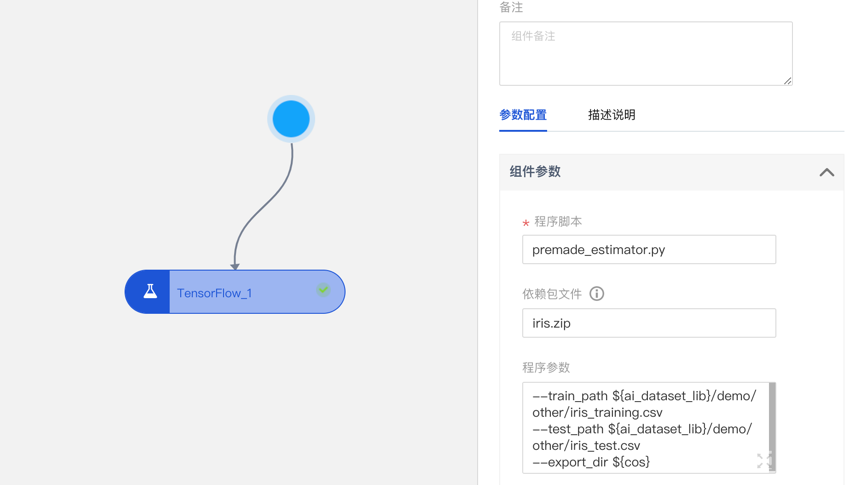
- 在智能钛控制台的左侧导航栏,选择【框架】>【深度学习】>【 TensorFlow】,并拖入画布中。

- 单击该组件,在右侧弹窗中配置组件参数和资源参数。
- 程序脚本:
- 单击此处上传用户的自定义代码。
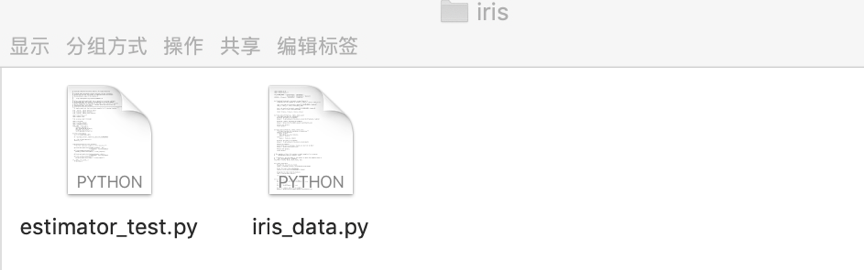
- 在本文中,内容为上文代码。您可以点击上传本地文件,或选择【新建脚本】,贴入上段代码,将其命名为premade_estimator.py
上传完成后如下图展示:
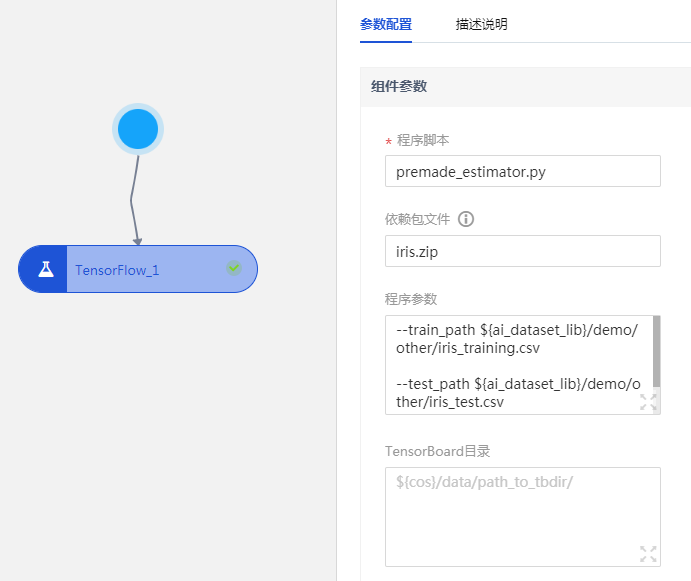
- 依赖包文件:
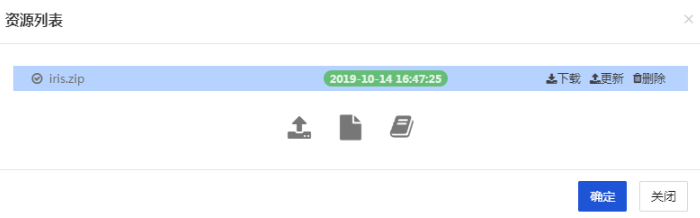
- 如果入口脚本需要 import 项目中的其它自己编写的模块,需要将其它模块的代码上传至此。多个.py文件需要压缩成 zip 包上传,该 zip 包会被添加到 Python 的 path 中。
- 在本文中,我们将 iris_data.py 和 estimator_test.py 两个文件压缩成 iris.zip,您可通过此 链接 下载文件,并上传至【依赖包文件】中。
上传完成后如下图展示:
- 程序参数:此处填入用户自定义参数,自定义参数将会传递给入口 py 文件。用户可以在自己的 COS 存储桶中先新建一个文件夹,命名为tf_model,模型将会存储至该路径中,以便后续导入模型时查找。
–train_path ${ai_dataset_lib}/demo/other/iris_training.csv –test_path ${ai_dataset_lib}/demo/other/iris_test.csv –export_dir ${cos}/tf_model
- TensorBoard 目录:指定 Tensorboard 保存路径。本案例此处无需填写。
- 程序依赖:指定存储于cos上的依赖文件的路径,指定内容将被拷贝到程序脚本同一级目录下。本案例此处无需填写。
- Python 版本:3.5
- GPUs:深度学习网络用到了 GPU 资源, 可以极大地提高训练速度。 单击该选项,在对话框中选择合适的显卡型号和数量,此处默认0。
- CPUs:1
- Memory(m):2560
三、运行调度及评估效果查看
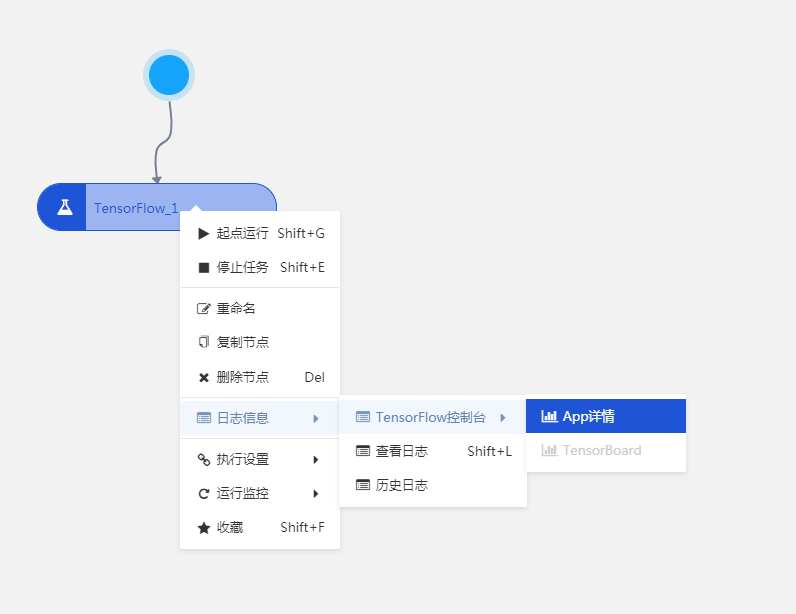
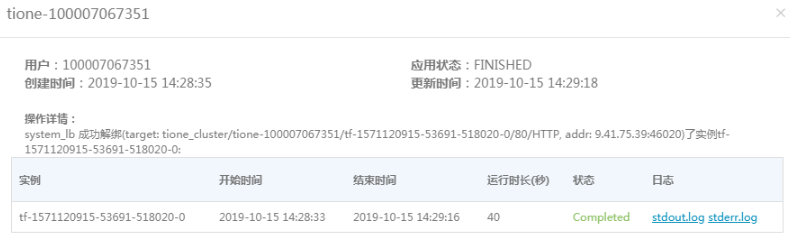
单击画布上方运行按钮可运行工作流,更多详情请参考 运行工作流。运行成功后在组件上右击,单击【日志信息】>【Tensorflow 控制台】>【App 详情】中查看 stdout.log 和 stderr.log 两个日志。
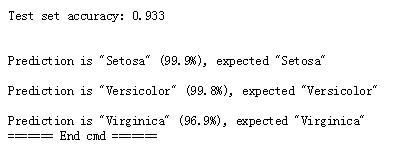
在 stdout.log 日志中我们可以看到模型效果。
模型效果如下图展示:
四、模型部署及在线预测
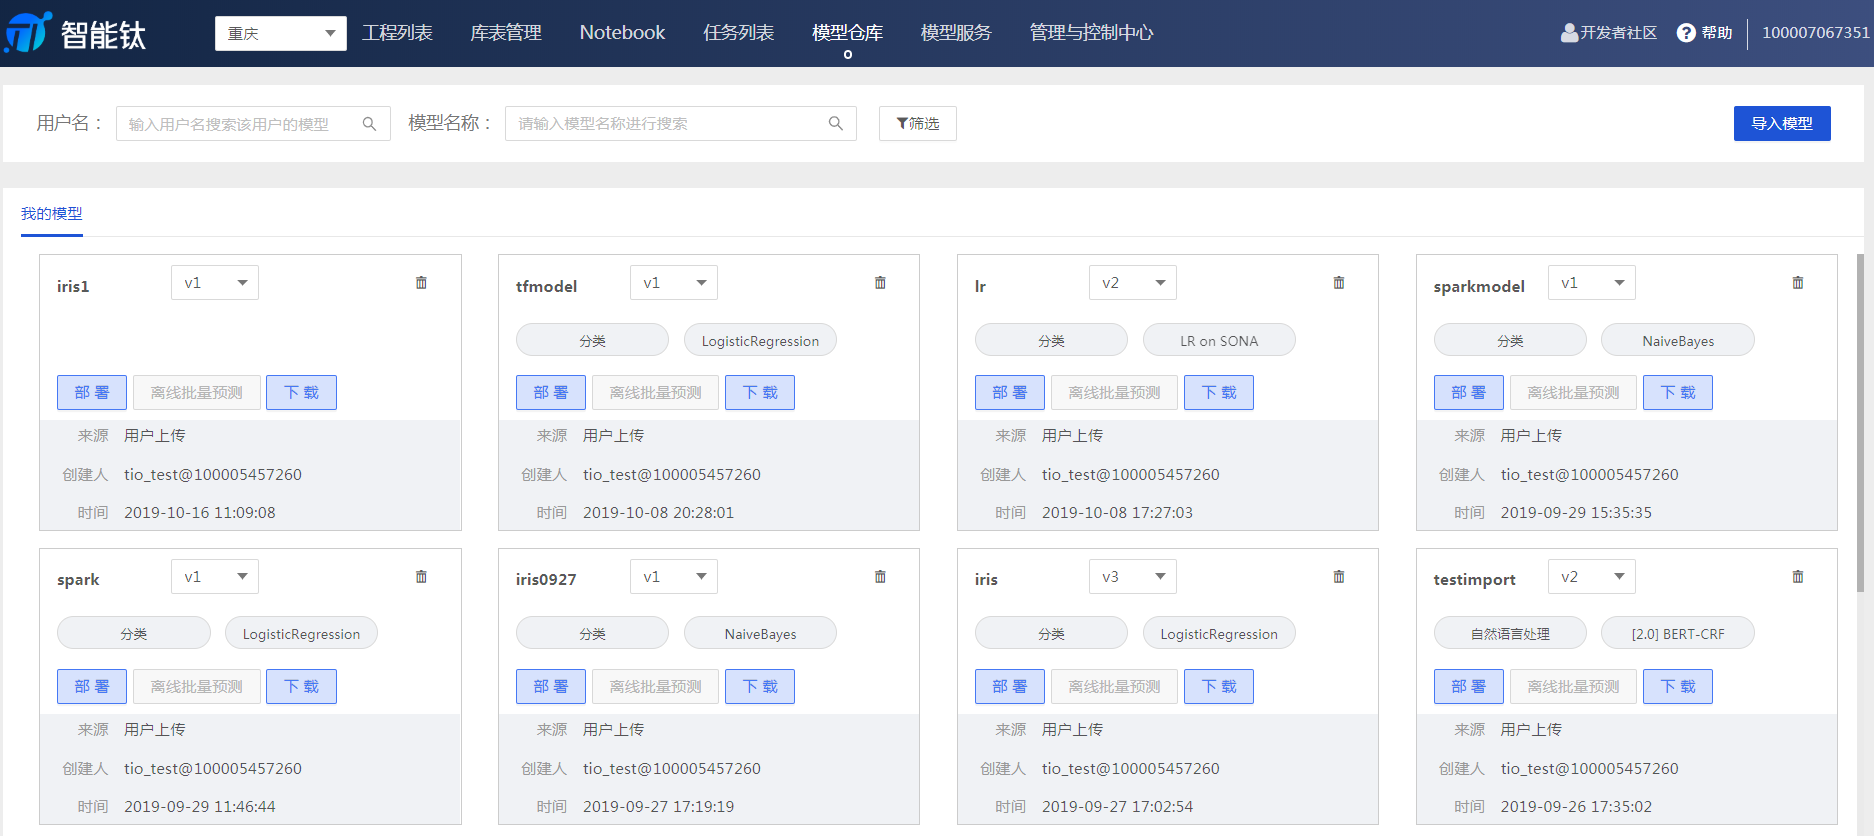
智能钛平台支持 TensorFlow 的模型部署,用户在 TensorFlow 代码中生成模型后,可在模型仓库页面进行部署。 1.模型导入 前往【模型仓库】页面,单击【导入模型】。
按照页面弹窗提示输入所需要的信息。
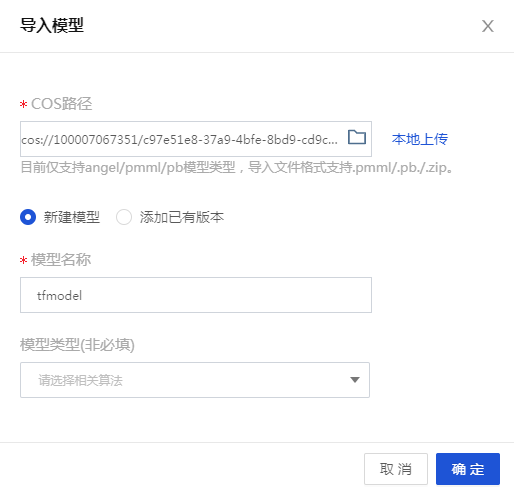
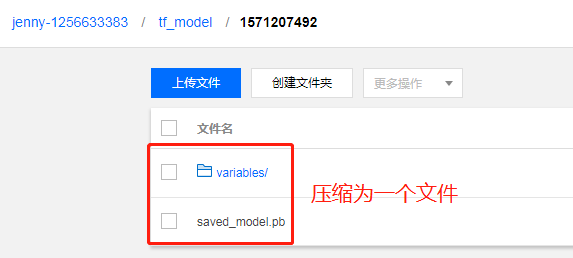
- COS 路径:模型导入需要上传 .pmml/.pb/.zip 格式的文件,TensorFlow 的模型文件储存在 COS 中,我们在 COS 存储桶中找到此前创建的【tf_model】文件夹,将其中的两个模型文件下载并压缩成 .zip 格式,单击【本地上传】。
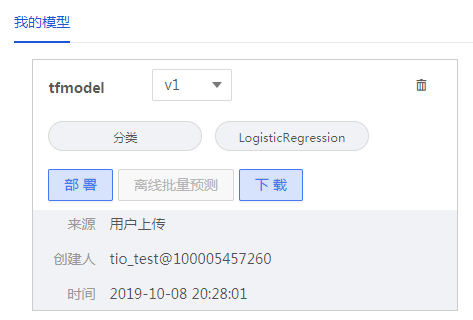
- 模型名称:tfmodel
成功导入后,模型将在【模型服务】中展示。
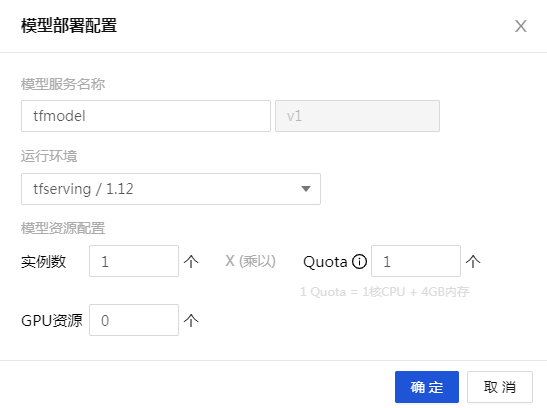
- 模型部署 进入 【模型仓库】页面,点击【部署】按钮。在弹框中进行模型部署设置。
模型部署配置如下:
- 模型服务名称:tfmodel
- 运行环境:tfserving/1.12
- 其他参数可默认
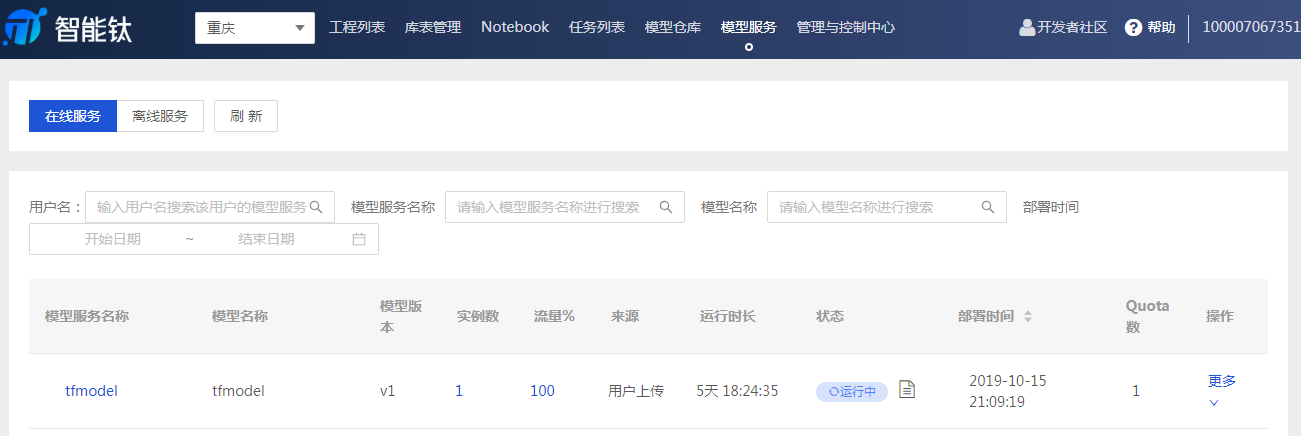
- 在线测试 模型部署完成后,可以在【模型服务】页面进行查看和在线测试。在此模型的【操作】栏中选择【更多】>【测试】。
测试方法选择【JSON】,输入符合规范的 json 代码即可在线预测。
我们已为您准备好了如下测试案例,输入鸢尾花的四个特征,预测该花朵属于哪一类别。将如下代码输入弹框中,单击【测试】,即可得到测试结果。
{"inputs": ["5.1", "3.3", "1.7", "0.5"]}
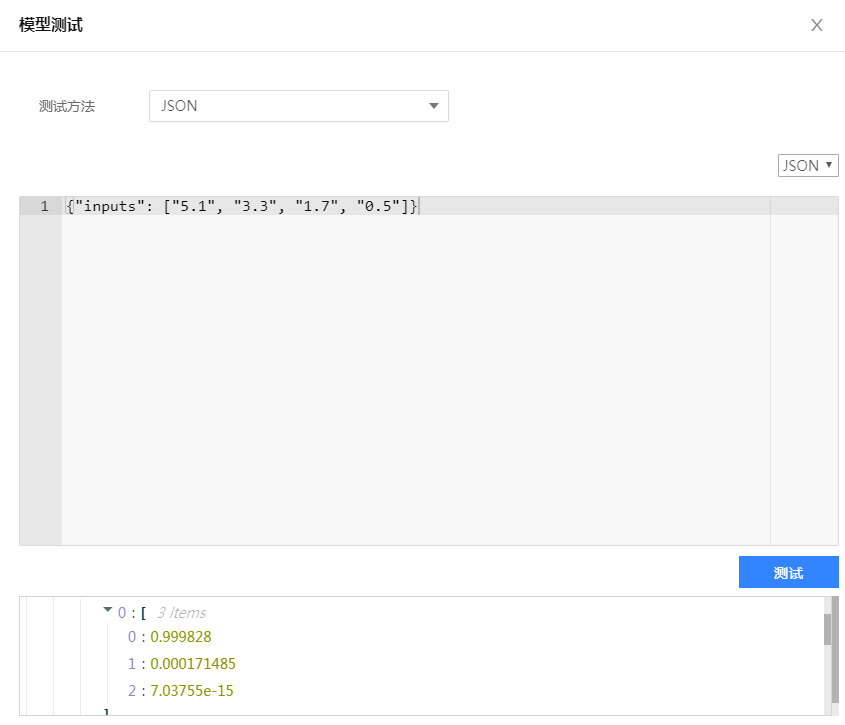
由上图可知,该鸢尾花分别属于三种类别的概率,以此判断该花朵的种类是 0,即 Setosa 。至此,我们完成了利用智能钛机器学习平台的深度学习框架 TensorFlow 运行自定义代码以及模型部署和在线预测的全部流程。
腾讯云一站式机器学习平台智能钛TI-ONE试运营阶段限时0折,欢迎大家积极试用。
https://cloud.tencent.com/product/tio
更多优质技术文章请关注官方知乎机构号:
https://www.zhihu.com/org/teng-xun-zhi-neng-tai-ji-qi-xue-xi-ping-tai/activities
更多优质技术文章请关注官方微信公众号:


