2流高手速成記(之五):Springboot整合Shiro實現安全管理
- 2022 年 10 月 29 日
- 筆記
- JAVA, Java/Spring, spring, Spring Boot
廢話不多說,咱們直接接上回
上一篇我們講了如何使用Springboot框架整合Nosql,並於文章最後部分引入了服務端Session的概念
而早在上上一篇中,我們則已經講到了如何使用Springboot框架整合Mybatis/MybatisPlus實現業務數據的持久化(寫入資料庫)
本篇我們把關注點放在一個於這兩部分有共同交集的內容——安全管理,並且引入我們今天的主角——Shiro框架
Apache Shiro是一個強大且易用的Java安全框架,執行身份驗證、授權、密碼和會話管理。使用Shiro的易於理解的API,您可以快速、輕鬆地獲得任何應用程式,從最小的移動應用程式到最大的網路和企業應用程式。
—— 來自百度百科
Shiro框架包含三個核心組件:
Subject —— 泛指當前與Shiro交互中的實體,可以是用戶或者某後台進程
SecurityManager —— Shiro的核心組件,對內管理各種組件實例,對外提供各種安全服務
Realm —— Shiro與安全數據之間的橋接器
Shiro框架還包含有其他諸多概念,為降低大家的心智負擔,這些我們暫且不談,文末會給大家推薦延展閱讀的相關文章
還是老規矩直接上乾貨,以完整的實例讓大家對【如何基於Shiro實現許可權的細粒度控制】有一個整體上的認知
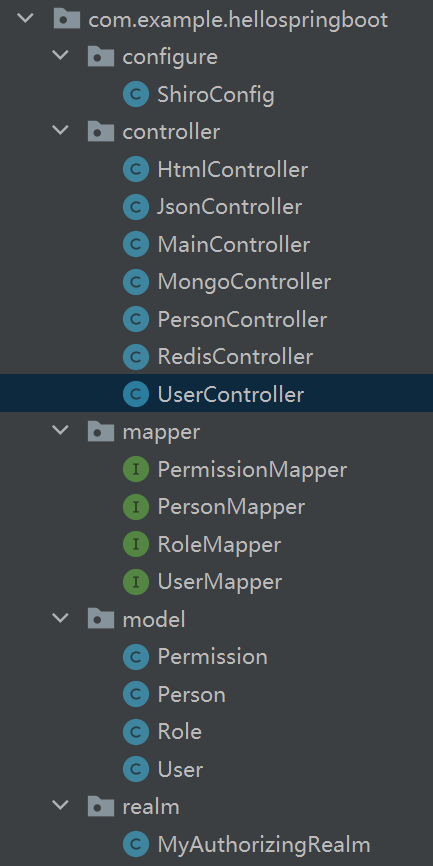
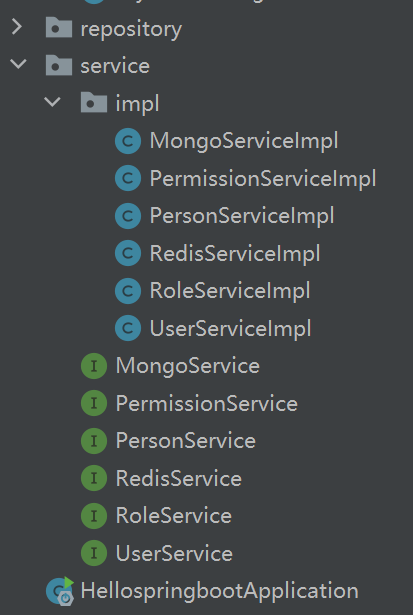
不知道大家會不會覺得項目結構突然變複雜?別擔心,接下來我會給大家逐一拆解
1. 創建數據表
首先是角色表——role
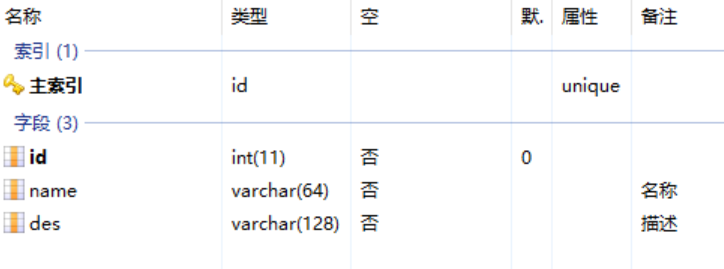

然後是用戶表——user


最後是許可權表——permission


2. 創建三個對應的Mapper
package com.example.hellospringboot.mapper;

import com.baomidou.mybatisplus.core.mapper.BaseMapper;
import com.example.hellospringboot.model.Role;
import org.apache.ibatis.annotations.Mapper;
import org.springframework.stereotype.Repository;

@Mapper
@Repository
public interface RoleMapper extends BaseMapper<Role> {
}
package com.example.hellospringboot.mapper;

import com.baomidou.mybatisplus.core.mapper.BaseMapper;
import com.example.hellospringboot.model.User;
import org.apache.ibatis.annotations.Mapper;
import org.springframework.stereotype.Repository;

@Mapper
@Repository
public interface UserMapper extends BaseMapper<User> {
}
package com.example.hellospringboot.mapper;

import com.baomidou.mybatisplus.core.mapper.BaseMapper;
import com.example.hellospringboot.model.Permission;
import org.apache.ibatis.annotations.Mapper;
import org.springframework.stereotype.Repository;

@Mapper
@Repository
public interface PermissionMapper extends BaseMapper<Permission> {
}
這裡我們用到了上上一節講到的內容
這裡的Mapper會輔助於後續的安全數據讀取
3. 接下來是Service及其實現類
package com.example.hellospringboot.service;

import com.example.hellospringboot.model.Role;

public interface RoleService {
    Role findRoleById(int id);
}
package com.example.hellospringboot.service.impl;

import com.example.hellospringboot.mapper.RoleMapper;
import com.example.hellospringboot.model.Role;
import com.example.hellospringboot.service.RoleService;
import org.springframework.beans.factory.annotation.Autowired;
import org.springframework.stereotype.Service;

@Service
public class RoleServiceImpl implements RoleService {

    @Autowired
    RoleMapper mapper;

    public Role findRoleById(int id){
        Role role = mapper.selectById(id);
        return role;
    }
}
package com.example.hellospringboot.service;

import com.example.hellospringboot.model.User;

public interface UserService {
    boolean checkUserByUsernameAndPassword(String userName, String passWord);
    User findUserByUserName(String userName);
}
package com.example.hellospringboot.service.impl;

import com.baomidou.mybatisplus.core.conditions.query.QueryWrapper;
import com.example.hellospringboot.mapper.UserMapper;
import com.example.hellospringboot.model.User;
import com.example.hellospringboot.service.UserService;
import org.springframework.beans.factory.annotation.Autowired;
import org.springframework.stereotype.Service;

import java.util.List;

@Service
public class UserServiceImpl implements UserService {

    @Autowired
    UserMapper mapper;

    public boolean checkUserByUsernameAndPassword(String userName, String passWord){
        QueryWrapper<User> wrapper = new QueryWrapper<User>();
        wrapper = wrapper.eq("user_name", userName).eq("pass_word",passWord);
        List<User> userList = mapper.selectList(wrapper);
        return userList.size() > 0;
    }

    public User findUserByUserName(String userName){
        QueryWrapper<User> wrapper = new QueryWrapper<User>();
        wrapper = wrapper.eq("user_name", userName);
        User user = mapper.selectOne(wrapper);
        return user;
    }

}
package com.example.hellospringboot.service;

import com.example.hellospringboot.model.Permission;

import java.util.List;

public interface PermissionService {
    List<Permission> findPermissionsByRoleId(int roleId);
}
package com.example.hellospringboot.service.impl;

import com.baomidou.mybatisplus.core.conditions.Wrapper;
import com.baomidou.mybatisplus.core.conditions.query.QueryWrapper;
import com.example.hellospringboot.mapper.PermissionMapper;
import com.example.hellospringboot.model.Permission;
import com.example.hellospringboot.service.PermissionService;
import org.springframework.beans.factory.annotation.Autowired;
import org.springframework.stereotype.Service;

import java.util.List;

@Service
public class PermissionServiceImpl implements PermissionService {

    @Autowired
    PermissionMapper mapper;

    public List<Permission> findPermissionsByRoleId(int roleId){
        QueryWrapper<Permission> wrapper = new QueryWrapper<>();
        wrapper = wrapper.eq("role_id", roleId);
        List<Permission> list = mapper.selectList(wrapper);
        return list;
    }

}
ok,我們已經準備好了所有的安全數據,及對應的讀取方法
到這裡,我們就算是做好了所有的準備工作
接下來看我們如何通過Shiro框架來運用這些已經裝配好的槍炮子彈
4. 引入Shiro框架相關依賴(pom.xml)
        <!-- 引入shiro框架依賴 -->
        <dependency>
            <groupId>org.apache.shiro</groupId>
            <artifactId>shiro-spring</artifactId>
            <version>1.10.0</version>
        </dependency>
這次pom.xml終於不是第一步了,哈哈哈。。。
5. 創建Realm嫁接Shiro框架及安全數據(realm/MyAuthorizingRealm)
package com.example.hellospringboot.realm;

import com.example.hellospringboot.model.Permission;
import com.example.hellospringboot.model.Role;
import com.example.hellospringboot.model.User;
import com.example.hellospringboot.service.PermissionService;
import com.example.hellospringboot.service.RoleService;
import com.example.hellospringboot.service.UserService;
import org.apache.shiro.authc.*;
import org.apache.shiro.authz.AuthorizationInfo;
import org.apache.shiro.authz.SimpleAuthorizationInfo;
import org.apache.shiro.realm.AuthorizingRealm;
import org.apache.shiro.subject.PrincipalCollection;
import org.springframework.beans.factory.annotation.Autowired;

import java.util.HashSet;
import java.util.List;
import java.util.Set;

public class MyAuthorizingRealm extends AuthorizingRealm {

    @Autowired
    UserService userService;

    @Autowired
    RoleService roleService;

    @Autowired
    PermissionService permissionService;

    @Override
    protected AuthenticationInfo doGetAuthenticationInfo(AuthenticationToken authenticationToken) {
        UsernamePasswordToken token = (UsernamePasswordToken) authenticationToken;
        String userName = token.getUsername();
        String passWord = String.valueOf(token.getPassword());
        if (!userService.checkUserByUsernameAndPassword(userName, passWord)) {//判斷用戶帳號是否正確
            throw new UnknownAccountException("用戶名或密碼錯誤!");
        }
        return new SimpleAuthenticationInfo(userName, passWord, getName());
    }

    @Override
    protected AuthorizationInfo doGetAuthorizationInfo(PrincipalCollection principalCollection) {
        SimpleAuthorizationInfo info = new SimpleAuthorizationInfo();
        String userName = principalCollection.getPrimaryPrincipal().toString();
        User user = userService.findUserByUserName(userName);
        if (user == null) {
            throw new UnknownAccountException("用戶名或密碼錯誤!");
        }
        List<Integer> rolesList = user.rolesList();
        Set<String> roles = new HashSet<>();
        Set<String> permissions = new HashSet<>();
        for (Integer roleId : rolesList) {
            Role role = roleService.findRoleById(roleId);
            roles.add(role.getName());
            List<Permission> permissionList = permissionService.findPermissionsByRoleId(roleId);
            for (Permission permission : permissionList) {
                permissions.add(permission.getName());
            }
        }
        info.setRoles(roles);
        info.setStringPermissions(permissions);
        return info;
    }
}
Realm的創建對於整個Shiro安全驗證體系搭建而言是至關重要的一步!
其中兩個抽象方法
doGetAuthenticationInfo —— 用於校驗用戶名及密碼的合法性
doGetAuthorizationInfo —— 用於賦予實體對應的角色及交互許可權
6. 測試用Controller創建
package com.example.hellospringboot.controller;

import org.apache.shiro.SecurityUtils;
import org.apache.shiro.authc.AuthenticationException;
import org.apache.shiro.authc.UsernamePasswordToken;
import org.apache.shiro.subject.Subject;
import org.springframework.web.bind.annotation.GetMapping;
import org.springframework.web.bind.annotation.PostMapping;
import org.springframework.web.bind.annotation.RequestMapping;
import org.springframework.web.bind.annotation.RestController;

@RequestMapping("/user")
@RestController
public class UserController {

    @PostMapping("/login")
    public String login(String user, String pass) {
        UsernamePasswordToken token = new UsernamePasswordToken(user, pass);
        Subject subject = SecurityUtils.getSubject();
        if(!subject.isAuthenticated()) {
            try {
                subject.login(token);
            } catch (AuthenticationException e) {
                return e.getMessage();
            }
        }
        return "ok";
    }

    @PostMapping("/logout")
    public String logout(){
        Subject subject = SecurityUtils.getSubject();
        if(subject.isAuthenticated()) {
            try {
                subject.logout();
            } catch (AuthenticationException e) {
                return e.getMessage();
            }
        }
        return "ok";
    }

    @GetMapping("/admin")
    public String admin() {
        return "admin";
    }

    @GetMapping("/user")
    public String user() {
        return "user";
    }

}
內容很簡單:
login——登錄方法
logout——登出方法
admin、user——兩個測試方法,用於測試不同角色對於不同方法可訪問的細粒度控制
7. ShiroConfig配置類創建,實現用戶訪問許可權的細粒度控制
package com.example.hellospringboot.configure;

import com.example.hellospringboot.realm.MyAuthorizingRealm;
import org.apache.shiro.mgt.SecurityManager;
import org.apache.shiro.realm.Realm;
import org.apache.shiro.spring.web.ShiroFilterFactoryBean;
import org.apache.shiro.web.mgt.DefaultWebSecurityManager;
import org.springframework.context.annotation.Bean;
import org.springframework.context.annotation.Configuration;

import java.util.LinkedHashMap;
import java.util.Map;

@Configuration
public class ShiroConfig {

    @Bean
    public SecurityManager securityManager(Realm realm) {
        DefaultWebSecurityManager securityManager = new DefaultWebSecurityManager();
        securityManager.setRealm(realm);
        return securityManager;
    }

    @Bean
    public MyAuthorizingRealm getRealm() {
        MyAuthorizingRealm realm = new MyAuthorizingRealm();
        return realm;
    }

    @Bean
    public ShiroFilterFactoryBean shiroFilterFactoryBean(SecurityManager securityManager) {
        ShiroFilterFactoryBean shiroFilter = new ShiroFilterFactoryBean();
        shiroFilter.setSecurityManager(securityManager);
        Map<String, String> filterChainMap = new LinkedHashMap<String, String>();
        filterChainMap.put("/user/login", "anon");
        filterChainMap.put("/user/logout", "anon");
        filterChainMap.put("/user/admin", "authc,roles[admin],perms[admin:read]");
        filterChainMap.put("/user/user", "authc,roles[user],perms[user:read]");
        shiroFilter.setFilterChainDefinitionMap(filterChainMap);
        return shiroFilter;
    }
}
securityManager 和 getRealm 顯示指定了Shiro兩大組件的實例聲明
shiroFilterFactoryBean 則是實現角色訪問許可權控制的重要方法
filterChainMap.put(“/user/login”, “anon”); // 代表login方法可以匿名訪問
filterChainMap.put(“/user/logout”, “anon”); // 代表logout方法可以匿名訪問
filterChainMap.put(“/user/admin”, “authc,roles[admin],perms[admin:read]”); // 代表admin方法需要用戶滿足admin角色,同時具備admin:read許可權
filterChainMap.put(“/user/user”, “authc,roles[user],perms[user:read]”); // 代表user方法需要用戶滿足user角色,同時具備user:read許可權
至此,整個接入流程便結束了
我們再次結合最開始我們配置的數據來對業務邏輯進行分析
用戶 admin,同時具備admin、user兩種角色
用戶 juste,僅具備user一種角色
角色 admin,同時具備admin:write、admin:read兩種許可權
角色 user,同時具備user:write、user:read兩種許可權
因此
用戶 admin,同時具備admin:write、admin:read、user:write、user:read 四種操作許可權
用戶 juste,同時具備user:write、user:read兩種操作許可權
大家理清楚這其中的關係了嗎?^ ^
8. 執行Postman驗證結果
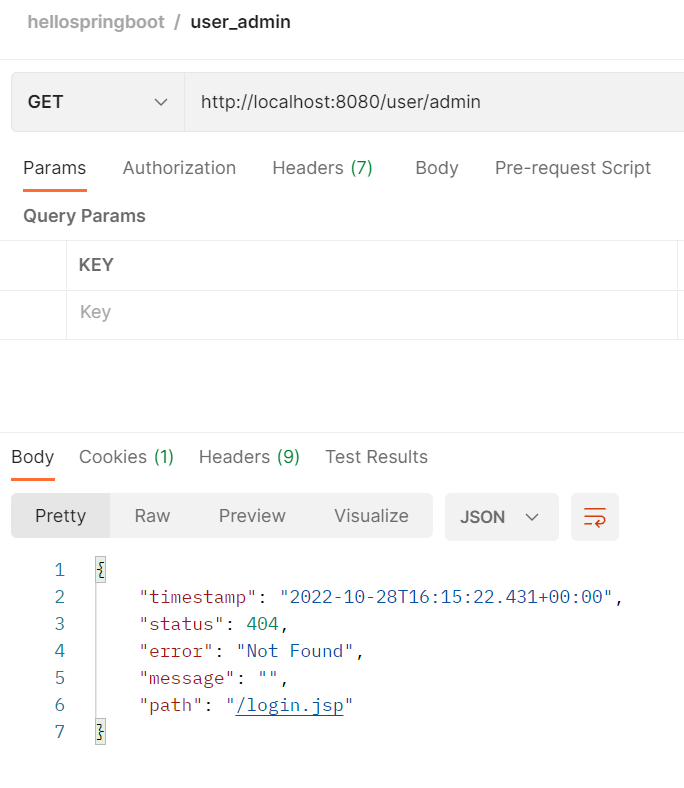
我們在執行login之前,admin方法無權訪問
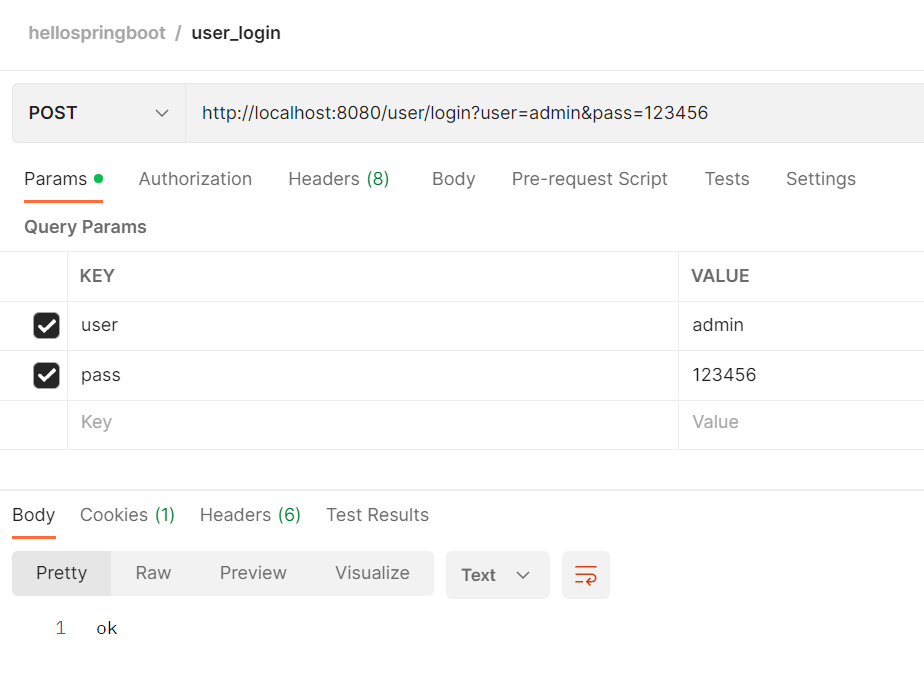

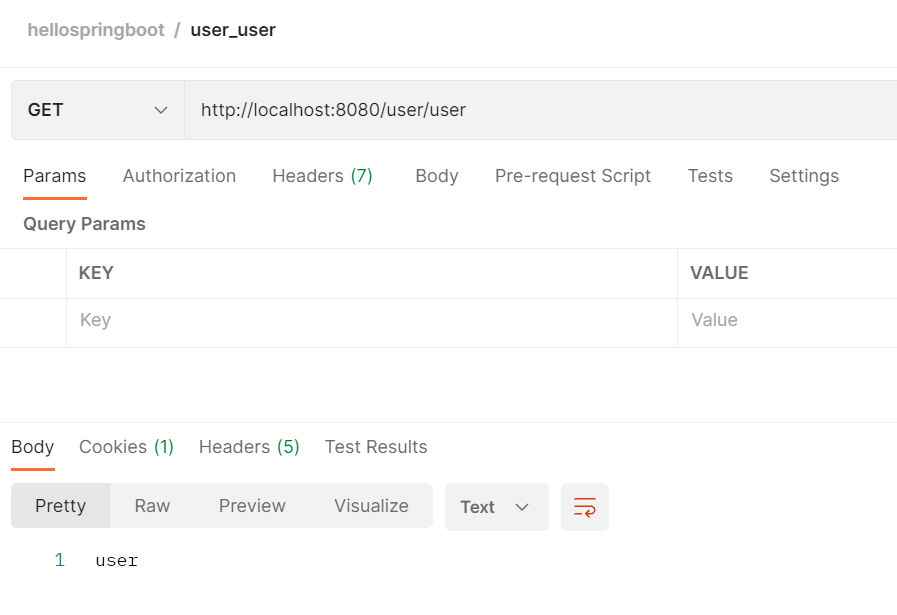
登錄admin之後,同時具備admin和user方法的訪問許可權
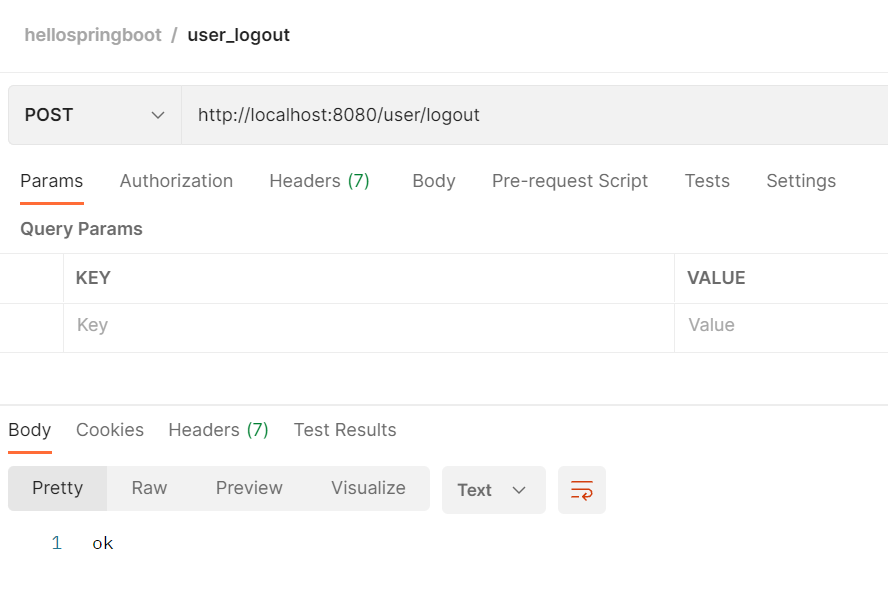
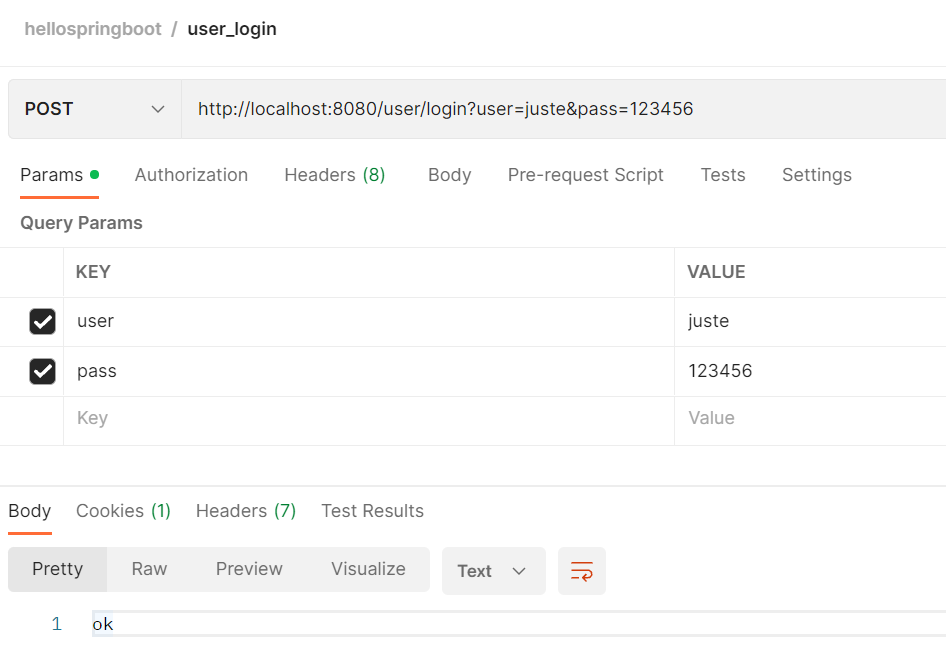

logout登出,然後login登錄普通用戶juste
會發現依然具備user方法的訪問許可權,但是失去了admin方法的訪問許可權
到此,驗證我們基於Shiro框架的細粒度許可權控制已經實現
除了Shiro框架,我們還有另一個選擇,那就是同樣可以通過集成Spring Security框架來達成相同的目的
關於更多Shiro框架的內容,及其和Spring Security之間的異同,大家感興趣可以參考這篇文章:
對於Spring Security框架,我們暫且留個懸念,以後會專門再給大家講解這部分內容
下一節,我們將把關注點投向微服務領域,SpringCloudAlibaba將會是接下來幾個章節的重頭戲,敬請期待~
MyAuthorizingRealm
