SpringMVC 01: SpringMVC + 第一個SpringMVC項目
SpringMVC
-
SpringMVC概述:
-
是基於MVC開發模式的框架,用來優化控制器
-
是Spring家族的一員,也具備IOC和AOP
-
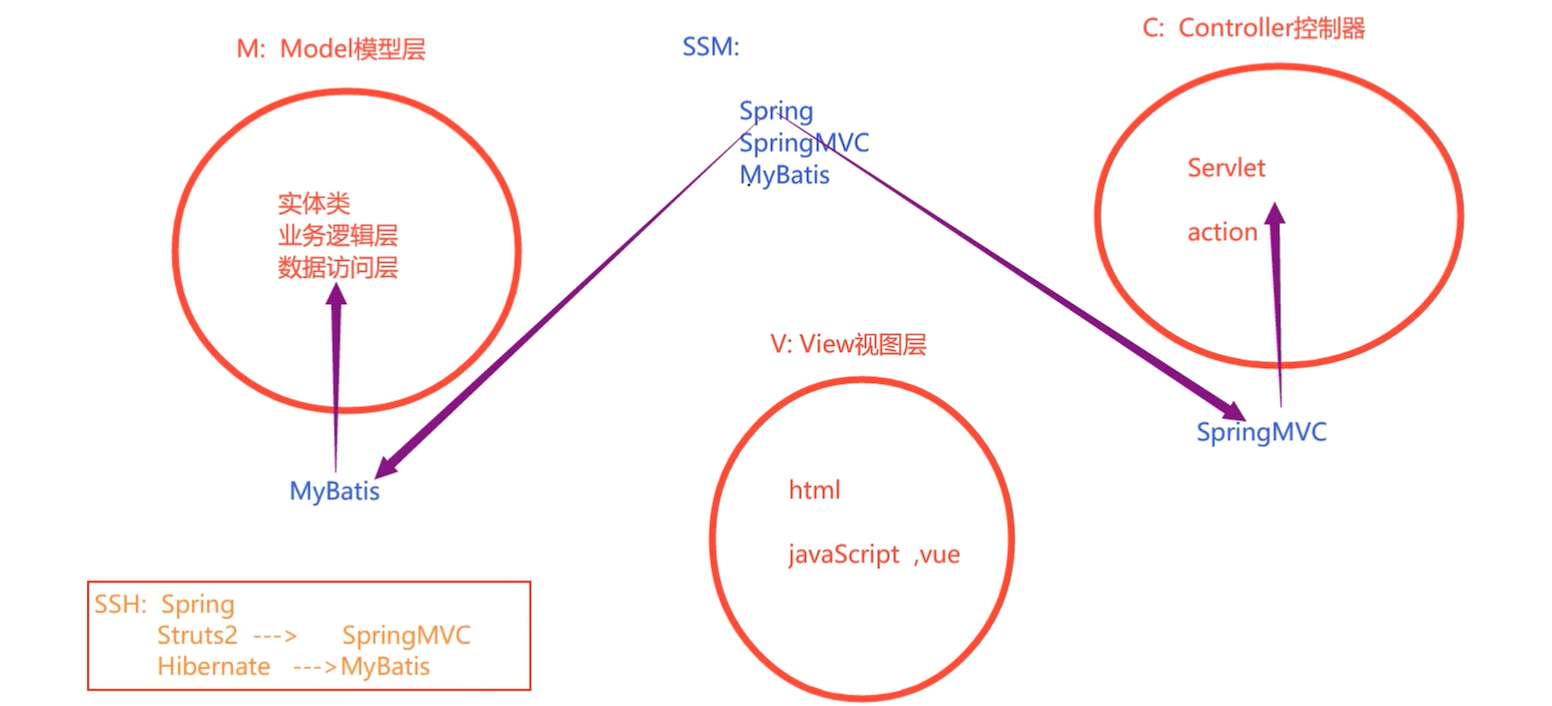
什麼是MVC:
-
它是一種開發模式,是模型視圖控制器的簡稱,所有的web應用都應當基於MVC模式開發
-
M:模型層,包含實體類,業務邏輯層,數據訪問層
-
V:視圖層,html,javaScript,vue等都是視圖層,用來顯示數據
-
C:控制器,它是用來接收客戶端的請求,並返迴響應到客戶端的組件,Servlet就是這樣的組件
SpringMVC框架的優點
- 優點:
- 輕量級,基於MVC開發模式的框架
- 易於上手,容易理解,功能強大
- 具備IOC和AOP
- 完全基於註解開發
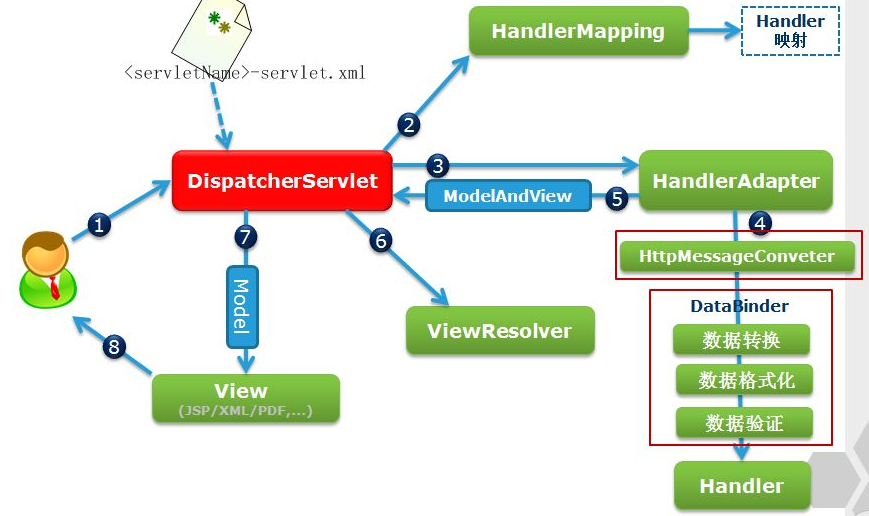
SpringMVC的執行流程
- 理解SpringMVC執行流程的一個方法:一個好漢,三個幫
- DispatcherServlet:是SpringMVC的核心處理器,也就是所謂的好漢
- HandlerMapping + HandlerAdapter + ViewResolver:三個負責完成SpringMVC主要功能的處理器,是核心處理器的三個幫手
- DispatcherServlet接受用戶請求,調用HandlerMapping,HandlerAdapter,ViewResolver三個小幫手來完成任務,最後再由DispatcherServlet將返回的數據響應到視圖,回饋給用戶
SSM框架的組成
-
組成:
-
SSM:Spring + SpringMVC + MyBatis
-
仨框架的分工:
-
MyBatis:增強數據訪問層
-
SpringMVC:增強控制器
-
Spring:整合MyBatis和SpringMVC框架,使得框架更加易用
-
了解SSH:
-
Spring + Struts2 + Hibernate:Struts2後來被SpringMVC取代,Hibernate後來被MyBatis取代
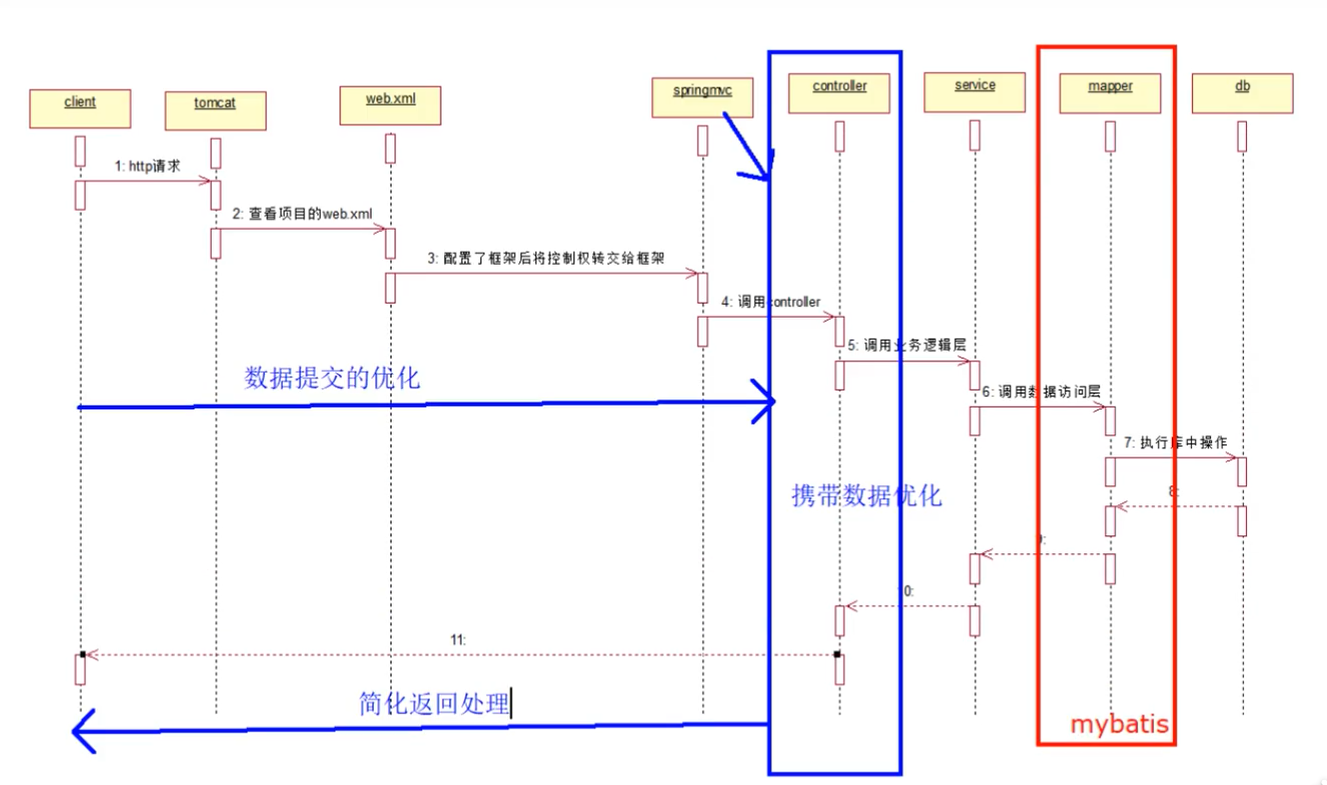
SSM框架下的web請求流程
- SpringMVC負責藍色矩形框中的業務處理:優化數據提交和數據返回
- MyBatis負責紅色矩形框中的業務處理:優化資料庫相關操作
基於註解的SpringMVC框架開發的步驟
- 第一個簡單SpringMVC項目的預期結構
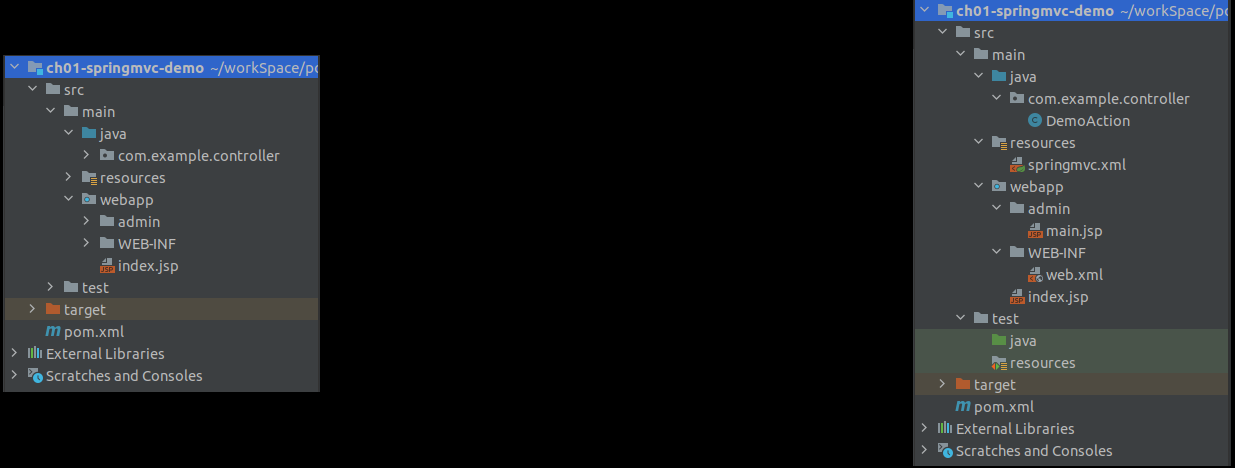
- 新建maven項目,選擇webapp模板
- 修改目錄結構,添加缺失的目錄,修改目錄屬性
- 修改pom.xml文件,添加SpringMVC依賴,添加Servlet的依賴
<?xml version="1.0" encoding="UTF-8"?>

<project xmlns="//maven.apache.org/POM/4.0.0" xmlns:xsi="//www.w3.org/2001/XMLSchema-instance"
  xsi:schemaLocation="//maven.apache.org/POM/4.0.0 //maven.apache.org/xsd/maven-4.0.0.xsd">
  <modelVersion>4.0.0</modelVersion>

  <groupId>com.example</groupId>
  <artifactId>ch01-springmvc-demo</artifactId>
  <version>1.0.0</version>
  <packaging>war</packaging>

  <properties>
    <project.build.sourceEncoding>UTF-8</project.build.sourceEncoding>
    <maven.compiler.source>1.8</maven.compiler.source>
    <maven.compiler.target>1.8</maven.compiler.target>
  </properties>

  <dependencies>
    <dependency>
      <!-- junit測試依賴 -->
      <groupId>junit</groupId>
      <artifactId>junit</artifactId>
      <version>4.13.2</version>
      <scope>test</scope>
    </dependency>

    <!-- 添加spring-webmvc的依賴 -->
    <dependency>
      <groupId>org.springframework</groupId>
      <artifactId>spring-webmvc</artifactId>
      <version>5.2.5.RELEASE</version>
    </dependency>

    <!-- 添加javax-servlet依賴-->
    <dependency>
      <groupId>javax.servlet</groupId>
      <artifactId>javax.servlet-api</artifactId>
      <version>4.0.0</version>
      <scope>provided</scope>
    </dependency>
  </dependencies>

  <build>
    <!-- 添加資源文件指定 -->
    <resources>
      <!-- 資源文件指定1 -->
      <resource>
        <directory>src/main/java</directory>
        <includes>
          <include>**/*.xml</include>
          <include>**/*.properties</include>
        </includes>
      </resource>

      <!-- 資源文件指定2 -->
      <resource>
        <directory>src/main/resources</directory>
        <includes>
          <include>**/*.xml</include>
          <include>**/*.properties</include>
        </includes>
      </resource>
    </resources>
  </build>
</project>
- 在src/main/resources/下添加springmvc.xml配置文件(SpringMVC的核心配置文件),指定包掃描,添加視圖解析器
- 包掃描:用於交給Spring容器來創建控制層對象
- 視圖解析器:根據控制器中的action方法返回的字元串,依據配置前綴和配置後綴拼接出需要跳轉的頁面路徑,本例為:/admin/main.jsp,添加完視圖解析器之後,只要返回”main”字元串即可,簡化了頁面跳轉和數據返回操作
<?xml version="1.0" encoding="UTF-8"?>
<beans xmlns="//www.springframework.org/schema/beans"
       xmlns:xsi="//www.w3.org/2001/XMLSchema-instance"
       xmlns:context="//www.springframework.org/schema/context"
       xsi:schemaLocation="//www.springframework.org/schema/beans //www.springframework.org/schema/beans/spring-beans.xsd //www.springframework.org/schema/context //www.springframework.org/schema/context/spring-context.xsd">

    <!-- 添加包掃描 -->
    <context:component-scan base-package="com.example.controller"/>

    <!-- 添加視圖解析器 -->
    <bean class="org.springframework.web.servlet.view.InternalResourceViewResolver">
        <!-- 配置前綴-->
        <property name="prefix" value="/admin/"/>
        <!-- 配置後綴-->
        <property name="suffix" value=".jsp"/>
    </bean>
</beans>
- 刪除web.xml文件(模板生成的web.xml文件的版本較低,不用),並新建web1.xml文件,將web1.xml改名為web.xml(又直接新建web.xml的話,生成的還是舊文件,不支援EL表達式,必須這麼折騰一下)
- 在項目結構管理中刪除和新建web.xml文件
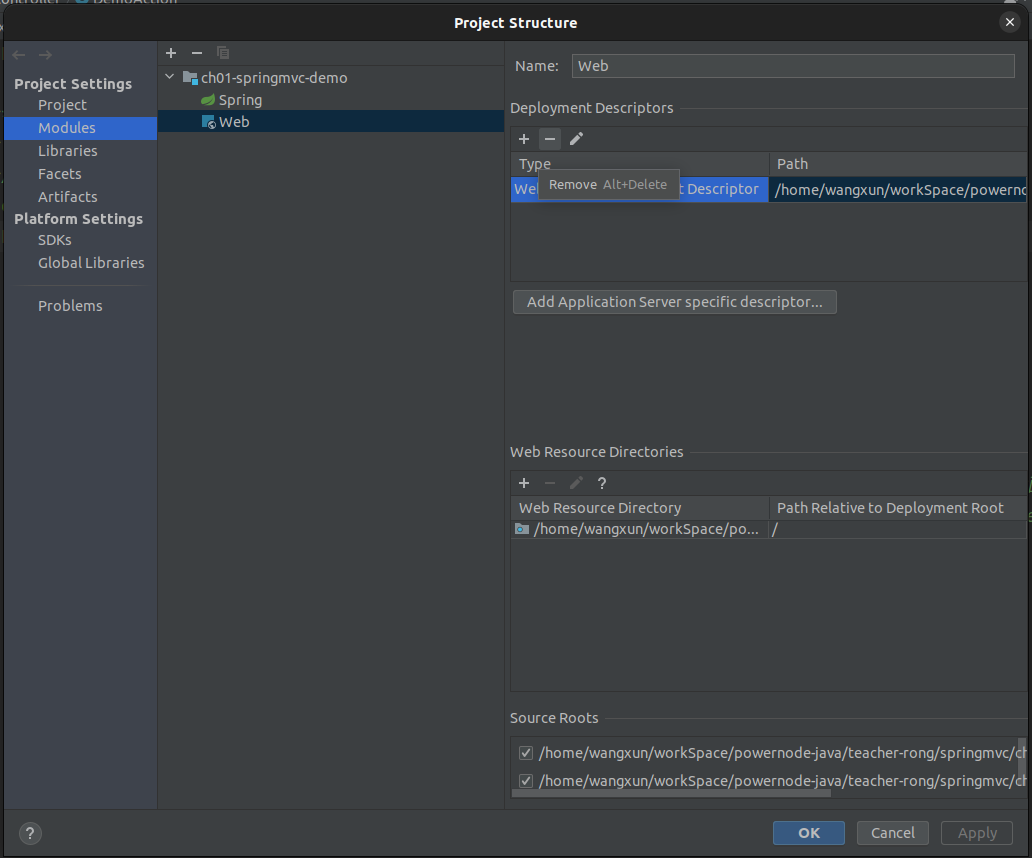
- 在web.xml文件中註冊springMVC框架(因為web請求都是基於servlet的,而SpringMVC控制器是普通的類和方法,必須註冊一個DispatcherServlet來完成請求的接收和響應,同時將web項目交給SpringMVC框架來管理)
<?xml version="1.0" encoding="UTF-8"?>
<web-app xmlns="//xmlns.jcp.org/xml/ns/javaee"
         xmlns:xsi="//www.w3.org/2001/XMLSchema-instance"
         xsi:schemaLocation="//xmlns.jcp.org/xml/ns/javaee //xmlns.jcp.org/xml/ns/javaee/web-app_4_0.xsd"
         version="4.0">

    <!-- 註冊SpringMVC框架 -->
    <servlet>
        <servlet-name>springmvc</servlet-name>
        <!-- 註冊底層使用的servlet -->
        <servlet-class>org.springframework.web.servlet.DispatcherServlet</servlet-class>

        <!-- 要讓SpringMVC的核心處理器知道SpringMVC的核心配置文件,相當於把web項目交給SpringMVC接管-->
        <init-param>
            <param-name>contextConfigLocation</param-name>
            <param-value>classpath:springmvc.xml</param-value>
        </init-param>
    </servlet>

    <servlet-mapping>
        <servlet-name>springmvc</servlet-name>
        <!-- 攔截處理所有以action為後綴名的請求 -->
        <url-pattern>*.action</url-pattern>
    </servlet-mapping>

</web-app>
- 在webapp目錄下新建admin目錄,在admin目錄下新建main.jsp頁面,刪除index.jsp並新建index.jsp(舊的index.jsp內容太少),向伺服器發送請求
<!-- index.jsp -->

<%--
  Created by IntelliJ IDEA.
  User: wangxun
  Date: 2022/8/30
  Time: 下午8:07
  To change this template use File | Settings | File Templates.
--%>
<%@ page contentType="text/html;charset=UTF-8" language="java" %>
<html>
<head>
    <title>index.jsp</title>
</head>
<body>
<a href="${pageContext.request.contextPath}/demo.action">訪問伺服器</a>
</body>
</html>
- 開發控制器(只是一個普通的類)
package com.example.controller;
import org.springframework.stereotype.Controller;
import org.springframework.web.bind.annotation.RequestMapping;
/**
* 業務管理器:包含很多完成具體需求的方法
*/
@Controller
public class DemoAction {
/**
* DemoAction中的所有功能實現都是由方法來完成的
* 這些方法的規範
* 1.訪問許可權:public
* 2.方法的返回值:任意
* 3.方法名稱:任意
* 4.方法參數:可以沒有,如果有可以是任意類型
* 5.註解:需要使用@RequestMapping註解來聲明一個訪問路徑(名稱),這裡不用再寫:demo.action項目請求路徑後面的後綴
* 因為該後綴是給web.xml中註冊的DispatcherServlet看的,起到攔截請求的作用,符合攔截要求的請求才交給底層servlet處理
*/
@RequestMapping("/demo")
public String demo(){
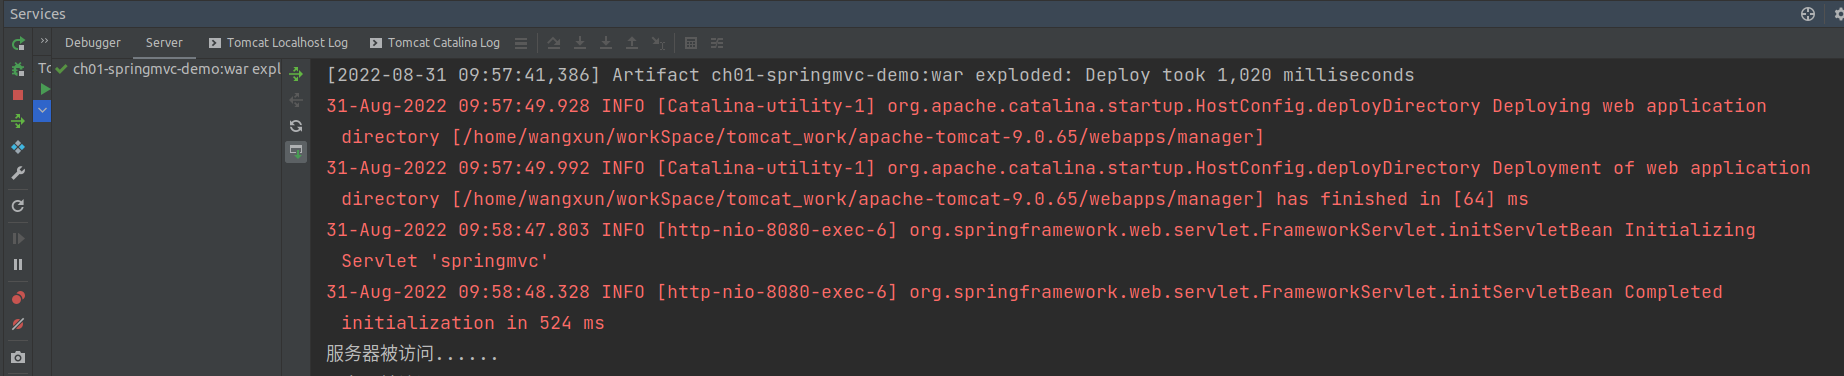
System.out.println("伺服器被訪問......");
return "main";
}
}
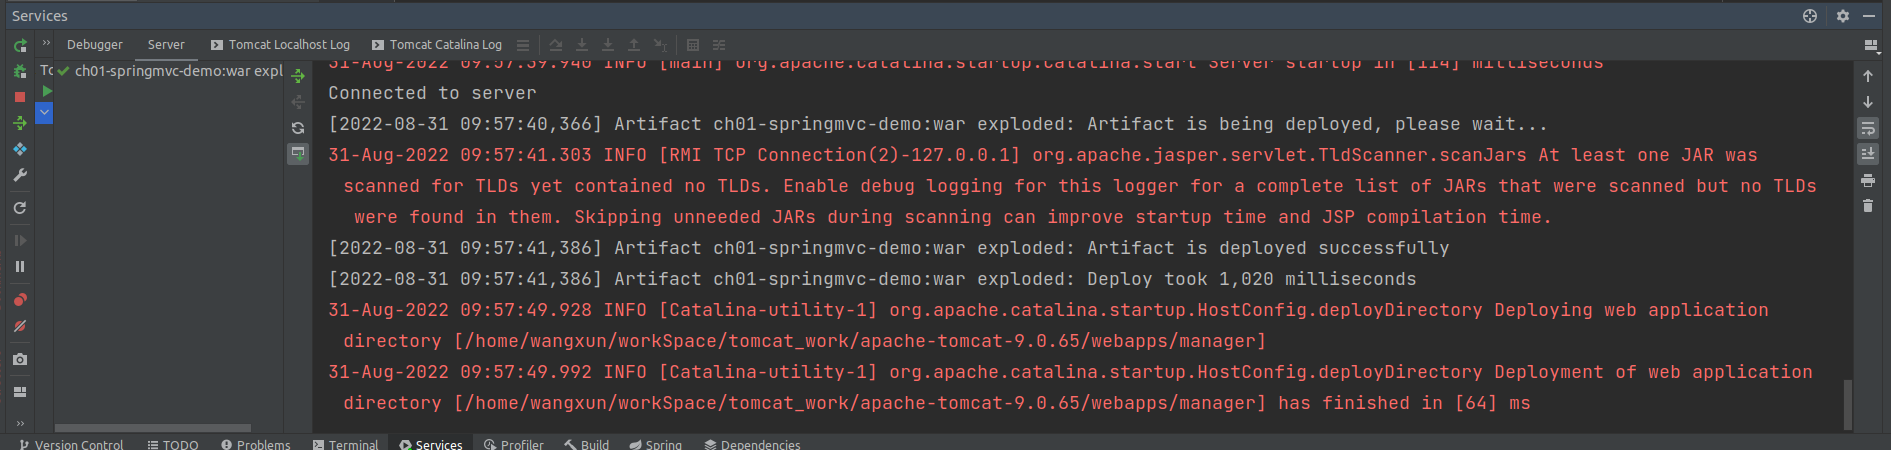
- 添加tomcat進行功能測試
- 啟動tomcat
- 網站首頁(left)以及請求結果(right)

- 控制台輸出
web請求分析
-
關於為什麼要在web.xml文件中註冊DispatcherServlet:
-
由於SpringMVC的控制器是一個普通的方法,而web請求都是基於servlet的,所以必須在web.xml文件中註冊SpringMVC框架
-
將註冊的DispatcherServlet作為SpringMVC的核心處理器,成為前端請求和SpringMVC控制器的溝通橋樑,完成前端請求和SpringMVC控制器的交互
-
而又由於我們無法直接通過類似@WebServlet這樣的註解獲得DispatcherServlet,所以要使用其所在的jar包註冊DispatcherServlet
-
上述案例中web請求的流程究竟是怎樣的:
-
將前端請求的路徑和web.xml中註冊的可以給予處理的請求路徑比對,如果請求路徑滿足請求的通配條件(先具有被處理的資格),請求被底層DispatcherServlet攔截處理。
-
由於註冊了SpringMVC框架,此時容器已經註冊生成了許多通過註解生成的SpringMVC的控制器對象
-
根據請求的具體路徑(根據需求,給予處理),將web請求交給SpringMVC的不同控制器中的不同action方法來解決
-
最終,SpringMVC的控制器將處理結果返回給DispatcherServlet,後者將結果返回給前端
註冊SpringMVC的核心處理器:DispatcherServlet

index.jsp <--------> DispatcherServlet <--------> SpringMVC的控制器是一個普通方法

one.jsp   <--------> DispatcherServlet <--------> SpringMVC的控制器是一個普通方法
@RequestMapping註解
- 該註解可以用在方法上,為此方法註冊一個可以訪問的名稱(路徑)
- 此註解可以加在類上,相當於包名(虛擬路徑),用於區別不同控制器中相同的action方法名稱
- 添加在類上做註解的演示:
- 修改index.jsp,變成兩個不同請求路徑下的請求,但這兩個請求的結尾都是demo.action
<%@ page contentType="text/html;charset=UTF-8" language="java" %>
<html>
<head>
    <title>index.jsp</title>
</head>
<body>
<a href="${pageContext.request.contextPath}/test01/demo.action">訪問伺服器test01</a><br>
<a href="${pageContext.request.contextPath}/test02/demo.action">訪問伺服器test02</a>
</body>
</html>
- 在admin目錄下新增main2.jsp
<%@ page contentType="text/html;charset=UTF-8" language="java" %>
<html>
<head>
    <title>main2.jsp</title>
</head>
<body>
<h2>main2......page.......</h2>
</body>
</html>
- 修改原有DemoAction,新增類上註解:@RequestMapping(“/test01”)
package com.example.controller;

import org.springframework.stereotype.Controller;
import org.springframework.web.bind.annotation.RequestMapping;

/**
 * 業務管理器:包含很多完成具體需求的方法
 */
@Controller
@RequestMapping("/test01")
public class DemoAction {
    /**
     * DemoAction中的所有功能實現都是由方法來完成的
     * 這些方法的規範
     *  1.訪問許可權:public
     *  2.方法的返回值:任意
     *  3.方法名稱:任意
     *  4.方法參數:可以沒有,如果有可以是任意類型
     *  5.註解:需要使用@RequestMapping註解來聲明一個訪問路徑(名稱),這裡不用再寫:demo.action項目請求路徑後面的後綴
     *  因為該後綴是給web.xml中註冊的DispatcherServlet看的,起到攔截請求的作用,符合攔截要求的請求才交給底層servlet處理
     */
    @RequestMapping("/demo")
    public String demo(){
        System.out.println("伺服器test01被訪問......");
        return "main";
    }
}
- 新增SpringMVC控制器:DemoAction2,同樣包含類上註解
package com.example.controller;

import org.springframework.stereotype.Controller;
import org.springframework.web.bind.annotation.RequestMapping;

/**
 * 業務管理器:包含很多完成具體需求的方法
 */
@Controller
@RequestMapping("/test02")
public class DemoAction2 {
    /**
     * DemoAction中的所有功能實現都是由方法來完成的
     * 這些方法的規範
     *  1.訪問許可權:public
     *  2.方法的返回值:任意
     *  3.方法名稱:任意
     *  4.方法參數:可以沒有,如果有可以是任意類型
     *  5.註解:需要使用@RequestMapping註解來聲明一個訪問路徑(名稱),這裡不用再寫:demo.action項目請求路徑後面的後綴
     *  因為該後綴是給web.xml中註冊的DispatcherServlet看的,起到攔截請求的作用,符合攔截要求的請求才交給底層servlet處理
     */
    @RequestMapping("/demo")
    public String demo(){
        System.out.println("伺服器test02被訪問......");
        return "main2";
    }
}
- 啟動tomcat測試
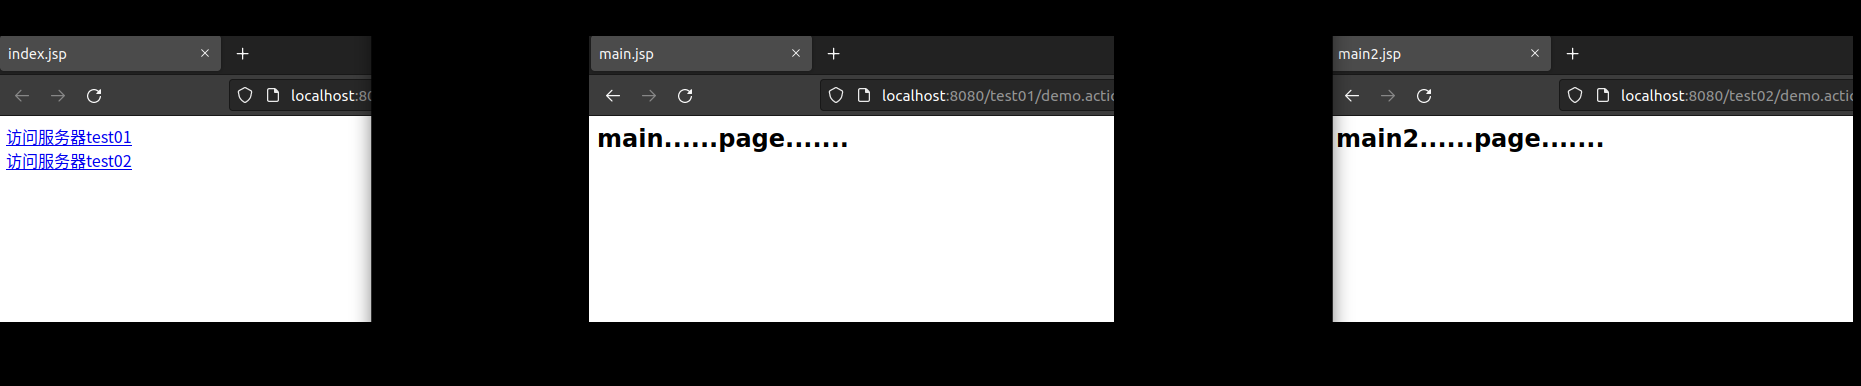
- 網站首頁和兩次訪問到的頁面
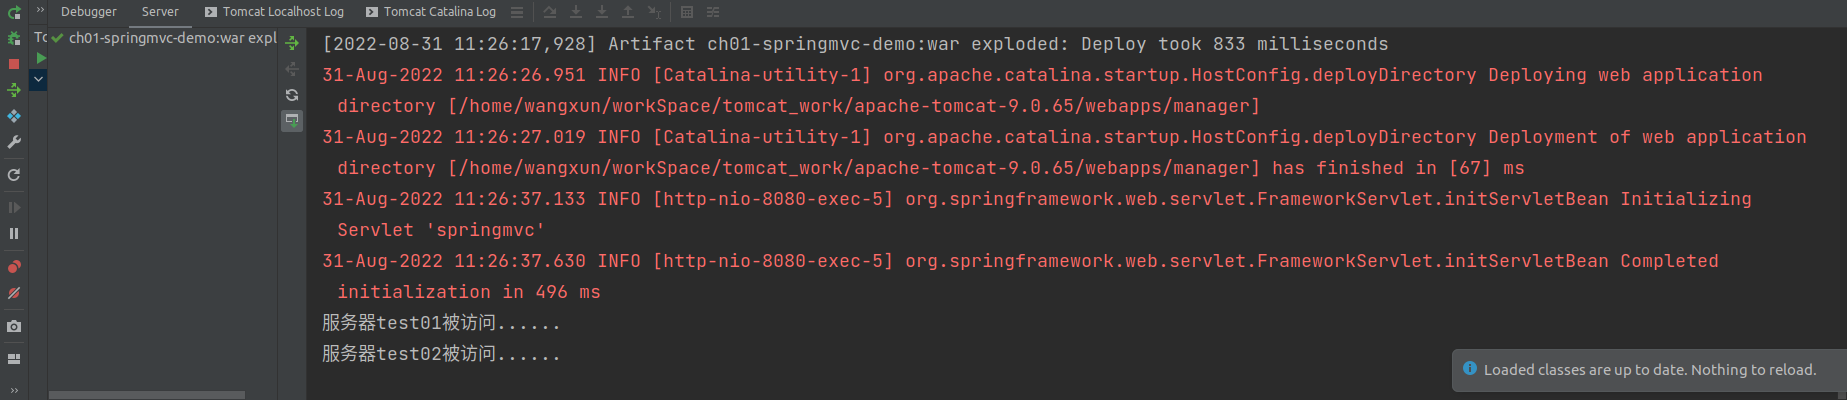
- 控制台輸出
- 以上web請求流程分析
- 兩次點擊超鏈接,訪問路徑的後半段分別為:/test01/demo.action 和 /test02/demo.action
- 兩次請求的後綴都為action,滿足web.xml中註冊的訪問請求的通配條件,有資格被處理
- SpringMVC框架通過註解生成了DemoAction和DemoAction2的控制器對象,由於這兩個控制器都添加了類上註解,所以相當於添加了一個路徑選擇條件
- /test01 與 /test02分別被這兩個控制器接收處理,又根據/test01/demo 和 /test02/demo分別被滿足各自控制器中的方法上的註解路徑條件的方法所處理
- 根據各自方法的返回值和視圖解析器的路徑拼接結果得到要訪問的頁面路徑並訪問
- 將訪問結果通過SpringMVC核心處理器返回到視圖層呈現


