selenium模組使用詳解、打碼平台使用、xpath使用、使用selenium爬取京東商品資訊、scrapy框架介紹與安裝
今日內容概要
- selenium的使用
- 打碼平台使用
- xpath使用
- 爬取京東商品資訊
- scrapy 介紹和安裝
內容詳細
1、selenium模組的使用
# 之前咱們學requests,可以發送http請求,但是有的頁面是由render+ajax渲染完的,如果只使用requestes,它只能執行render的請求,拿回數據,執行ajax的請求,需要你再去分析,再去發請求

# 使用selenium,控制瀏覽器,操作瀏覽器,完成人的行為-->自動化測試工具

# 本質是python通過程式碼,藉助於瀏覽器驅動,操作瀏覽器 真正的實現了,可見即可爬


# 下載模組:
	pip3 install selenium

# 下載相關瀏覽器驅動:IE,火狐,Google(推薦用)
# Google驅動:
	//registry.npmmirror.com/binary.html?path=chromedriver/
	跟瀏覽器版本一定要對應
	100.0.4896.127----》驅動也要對應//registry.npmmirror.com/binary.html?path=chromedriver/101.0.4951.41/
	如果沒有具體版本找一個最接近的
	把驅動放在項目下
1.0 基本使用
from selenium import webdriver
import time

# 用程式碼打開一個瀏覽器
# bro = webdriver.Chrome(executable_path='./chromedriver')  # mac  linux
bro = webdriver.Chrome(executable_path='chromedriver.exe')  # win

# 在地址欄輸入地址
bro.get('//www.baidu.com')

# 找到輸入框
search = bro.find_element_by_id('kw')

# 在輸入框輸入美女
search.send_keys("美女")

# 找到百度一下按鈕
button = bro.find_element_by_id('su')
# 點擊一下按鈕
button.click()

time.sleep(2)
print(bro.page_source)  # 當前頁面的html內容
with open('baidu.html', 'w', encoding='utf-8') as f:
    f.write(bro.page_source)  # 包含redner+ajax

bro.close()
1.1 無頭瀏覽器
# 做爬蟲,不希望顯示的打開瀏覽器,但是selenium必須要用瀏覽器,讓瀏覽器不顯示,後台運行,完成爬蟲
from selenium import webdriver

from selenium.webdriver.chrome.options import Options

# 得到一個配置對象
chrome_options = Options()
chrome_options.add_argument('window-size=1920x3000')  # 指定瀏覽器解析度
chrome_options.add_argument('--disable-gpu')  # Google文檔提到需要加上這個屬性來規避bug
chrome_options.add_argument('--hide-scrollbars')  # 隱藏滾動條, 應對一些特殊頁面
chrome_options.add_argument('blinfk-settings=imagesEnabled=alse')  # 不載入圖片, 提升速度
chrome_options.add_argument('--headless')  # 瀏覽器不提供可視化頁面. linux下如果系統不支援可視化不加這條會啟動失敗

bro = webdriver.Chrome(executable_path='./chromedriver', options=chrome_options)

bro.get('//www.cnblogs.com')

print(bro.page_source)
bro.close()
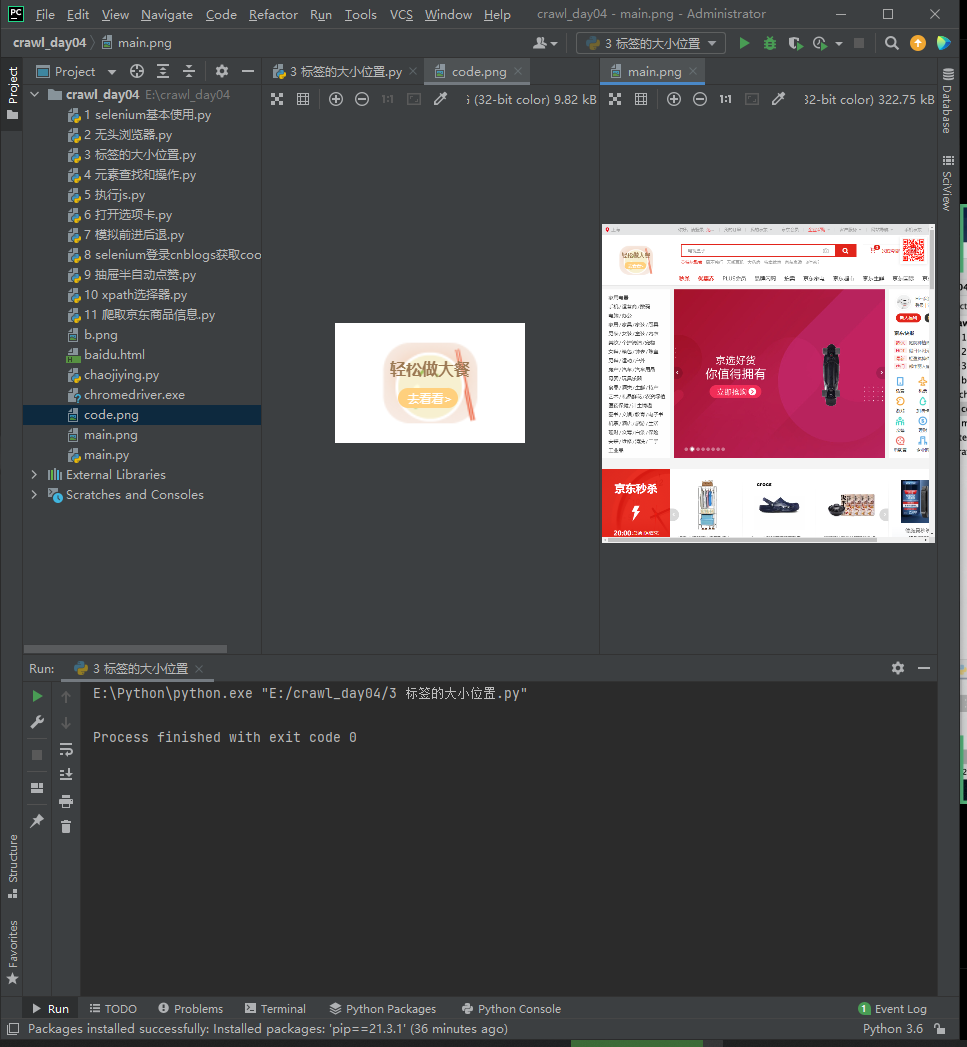
1.2 獲取元素位置,屬性,大小
# 一般驗證碼破解上
	補充:標籤位置和大小:size和location

# 一般用來扣驗證碼圖片:可能會由於解析度問題導致扣出的圖不一致---》通過修改解析度--》實現正確摳圖

# 驗證碼是img---》src--》自己載入就能拿到驗證碼,保存到本地即可(requests)-->更簡單


print(tag.id)        # id,但是不是標籤的id,selenium提供的一個id
print(tag.location)  # 位置
print(tag.tag_name)  # 標籤名
print(tag.size)      # 標籤的大小
from selenium import webdriver
import time
from PIL import Image

bro = webdriver.Chrome(executable_path='./chromedriver')  # mac  linux

# 在地址欄輸入地址
bro.get('//www.jd.com/')
bro.implicitly_wait(10)

# 找到圖片
img = bro.find_element_by_css_selector('a.logo_tit_lk')
# print(img.location)  # 圖片位置 {'x': 105, 'y': 41}
# print(img.size)  # 圖片大小  通過位置和大小可以唯一確定這張圖,通過截圖可以把圖截出來
# print(img.id)  # selenium提供的id號,忽略
# print(img.tag_name)  # a

location = img.location
size = img.size
bro.save_screenshot('./main.png')  # 把整個頁面保存成圖片

# pillow摳圖,把圖標摳出來
# 第一個參數 開始截圖的x坐標
# 第二個參數 開始截圖的y坐標
# 第三個參數 結束截圖的x坐標
# 第四個參數 結束截圖的y坐標
img_tu = (
int(location['x']), int(location['y']), int(location['x'] + size['width']), int(location['y'] + size['height']))

# # 使用pillow打開截圖
img = Image.open('./main.png')
# 從截圖中按照位置扣除驗證碼
code_img = img.crop(img_tu)
# 把扣出來的圖,保存到本地
code_img.save('./code.png')

# 參數說明
bro.close()

## 補充:標籤位置和大小:size和location
# 一般用來扣驗證碼圖片:可能會由於解析度問題導致扣出的圖不一致---》通過修改解析度--》實現正確摳圖
# 驗證碼是img---》src--》自己載入就能拿到驗證碼,保存到本地即可(requests)-->更簡單
1.3 等待元素被載入
# 程式碼操作,速度非常快,可能標籤還沒有載入出來,程式碼就去取標籤操作,所以找不到標籤,報錯

# 等待標籤載入完成再取
	顯示等待:每個標籤都要寫等待邏輯

	隱式等待:任何要取的標籤都遵循這個邏輯,只需要寫一次(推薦用)

	bro.implicitly_wait(10)  # 取這個標籤,如果取不到就等待,直到標籤載入完成或10s到了
1.4 元素操作
from selenium import webdriver
import time

bro = webdriver.Chrome(executable_path='./chromedriver')  # mac  linux

bro.get('//www.baidu.com/')
bro.implicitly_wait(10)  # 隱式等待

# 查找標籤的方式:# selenium:find_element_by_xx,find_elements_by_xx
# 1、find_element_by_id   # 通過id找
# 2、find_element_by_link_text # 通過a標籤文字
# 3、find_element_by_partial_link_text # 通過a標籤文字模糊找
# 4、find_element_by_tag_name  # 通過標籤名找
# 5、find_element_by_class_name # 通過類名找
# 6、find_element_by_name       # 通過name屬性找
# 7、find_element_by_css_selector # css選擇器
# 8、find_element_by_xpath        # xpath選擇器

# 查找a標籤文本內容是登陸的
login_a = bro.find_element_by_link_text('登錄')
# login_a = bro.find_element_by_link_id('s-top-loginbtn')
# 點擊a標籤
login_a.click()

## 找到帳號登陸,點擊
login_pwd_btn = bro.find_element_by_id('TANGRAM__PSP_11__changePwdCodeItem')
login_pwd_btn.click()

# 找到用戶名的輸入框和密碼的輸入框--》輸入用戶名密碼
username = bro.find_element_by_name('userName')
pwd = bro.find_element_by_css_selector('#TANGRAM__PSP_11__password')
username.send_keys("[email protected]")
pwd.send_keys('lqz12345678')
time.sleep(3)
username.clear()
username.send_keys("[email protected]")
submit = bro.find_element_by_id('TANGRAM__PSP_11__submit')
submit.click()
# 彈出驗證碼識別--》可以手動點擊

# 登陸成功
time.sleep(5)

bro.close()

# 登陸越來越難自動登陸---》明白登陸的目的是什麼?---》
# 拿到cookie發送請求,水軍自動回復,投票,點贊,評論--》半自動登陸後--》
# 取到cookie,搭建cookie池--》每次使用requests發送請求,自動評論,投票,攜帶cookie


# send_keys   click  clear
# 查找方法
1.5 執行js
# 普遍常用,在本地頁面中直接執行js程式碼
# 第一種情況,控制操作頁面滑動
# 第二種情況:使用當前頁面中的一些變數,執行頁面中的函數
from selenium import webdriver
import time

bro = webdriver.Chrome(executable_path='./chromedriver')  # mac  linux

bro.get('//www.pearvideo.com/category_9')
bro.implicitly_wait(10)  # 隱式等待

# bro.execute_script("alert('hello')")

# 第一種情況,控制操作頁面滑動
# bro.execute_script('window.scrollBy(0, document.body.scrollHeight)')
# time.sleep(1)
# bro.execute_script('window.scrollBy(0, document.body.scrollHeight)')
# time.sleep(1)
# bro.execute_script('window.scrollBy(0, document.body.scrollHeight)')

# 第二種情況:使用當前頁面中的一些變數,執行頁面中的函數
# bro.execute_script('alert(md5_vm_test())')
# bro.execute_script('alert(urlMap)')


time.sleep(5)

bro.close()  # 控制瀏覽器打開後5秒關閉
1.6 切換選項卡
import time
from selenium import webdriver

browser = webdriver.Chrome(executable_path='./chromedriver')
browser.get('//www.baidu.com')

# 打開選項卡
browser.execute_script('window.open()')

print(browser.window_handles)  # 獲取所有的選項卡
browser.switch_to.window(browser.window_handles[1])
browser.get('//www.taobao.com')
time.sleep(2)
browser.switch_to.window(browser.window_handles[0])
browser.get('//www.sina.com.cn')
browser.close()  # 關閉當前選項卡
browser.quit()  # 退出瀏覽器
1.7 模擬前進後退
import time
from selenium import webdriver

browser = webdriver.Chrome(executable_path='./chromedriver')
browser.get('//www.baidu.com')
browser.get('//www.taobao.com')
browser.get('//www.sina.com.cn/')

browser.back()
time.sleep(2)
browser.forward()
browser.close()
1.8 異常處理
from selenium import webdriver
from selenium.common.exceptions import TimeoutException, NoSuchElementException, NoSuchFrameException

try:
    browser = webdriver.Chrome()
    browser.get('//www.runoob.com/try/try.php?filename=jqueryui-api-droppable')
    browser.switch_to.frame('iframssseResult')

except TimeoutException as e:
    print(e)
except NoSuchFrameException as e:
    print(e)
finally:
    browser.close()
1.9 selenium登錄cnblogs獲取cookie
# 先使用selenium 半自動登錄到cnblogs----》取出cookie存到本地

# 下次使用selenium 訪問cnblogs--》載入之前的cookie---》變成了登陸狀態
from selenium import webdriver
import json
import time

bro = webdriver.Chrome(executable_path='./chromedriver')

# 登陸取cookie的過程
# try:
#     bro.get('//www.cnblogs.com')
#     bro.implicitly_wait(10)
#     submit_a=bro.find_element_by_link_text('登錄')
#     submit_a.click()
#     username=bro.find_element_by_id('mat-input-0')
#     password=bro.find_element_by_id('mat-input-1')
#     username.send_keys('[email protected]')
#     password.send_keys('lqz123') # 手動輸入
#
#
#
#     # submit=bro.find_element_by_class_name('mat-button-wrapper')
#     # submit.click()
#     input()  # 手動輸入密碼,點擊登錄,驗證碼通過,再敲回車,繼續往下走
#     # 彈出驗證碼---》不好破--->手動操作---》
#     # 登陸成功了
#     # 把cookie保存到本地
#     # print(bro.get_cookies())
#
#     with open('cnblogs.json','w',encoding='utf-8') as f:
#         json.dump(bro.get_cookies(),f)
#
#
# except Exception as e:
#     print(e)
# finally:
#     bro.close()


# 訪問寫入cookie
try:
    bro.get('//www.cnblogs.com')
    bro.implicitly_wait(10)
    # 寫入本地的cookie
    with open('cnblogs.json', 'r', encoding='utf-8') as f:
        cookie_dic = json.load(f)

    # 寫入到瀏覽器
    # bro.add_cookie(cookie_dic)
    for item in cookie_dic:  # 設置cookie必須用字典,cookie的json文件是列表,所以用循環往裡放
        bro.add_cookie(item)

    bro.refresh()  # 刷新一下瀏覽器
    time.sleep(2)

except Exception as e:
    print(e)
finally:
    bro.close()
1.10 抽屜半自動點贊
# (純自動登陸,不好登)使用selenium半自動登陸---》可以登陸上很多小號---》拿到cookie保存到redis(保存到本地)

# 再使用requests+cookie池中的某個cookie---》刷評論,刷贊
from selenium import webdriver
import time
import json

# # 1 先登陸進去,取到cookie, 存到本地
# bro = webdriver.Chrome(executable_path='./chromedriver')
# try:
#     bro.get('//dig.chouti.com/')
#     submit_btn = bro.find_element_by_id('login_btn')
#     submit_btn.click()  # 如果報錯,用下面這句
#     # bro.execute_script('arguments[0].click();', submit_btn) # 使用js點擊
#
#     username = bro.find_element_by_name('phone')
#     pwd = bro.find_element_by_name('password')
#     username.send_keys('18953675221')
#     pwd.send_keys('lqz123----')
#
#     submit = bro.find_element_by_css_selector(
#         'body > div.login-dialog.dialog.animated2.scaleIn > div > div.login-footer > div:nth-child(4) > button')
#
#     time.sleep(2)
#     submit.click()
#     # 出驗證碼
#     input()
#
#     with open('chouti.json', 'w', encoding='utf-8') as f:
#         json.dump(bro.get_cookies(), f)
#
#     time.sleep(3)
#
# except Exception as e:
#     print(e)
# finally:
#     bro.close()


# # 2 使用requests自動點贊---》requests可以多執行緒,速度快的一批,如果使用selenium操作瀏覽器,沒法多執行緒,吃記憶體很大
import requests
from bs4 import BeautifulSoup

header = {
    'User-Agent': 'Mozilla/5.0 (Macintosh; Intel Mac OS X 10_15_7) AppleWebKit/537.36 (KHTML, like Gecko) Chrome/101.0.4951.54 Safari/537.36'
}
res = requests.get('//dig.chouti.com/', headers=header)
# print(res.text)
soup = BeautifulSoup(res.text, 'lxml')
div_list = soup.find_all(class_='link-item')
for div in div_list:
    article_id = div.attrs.get('data-id')
    print(article_id)
    if article_id:
        data = {
            'linkId': article_id
        }

        # cookie 寫入
        cookie = {}
        with open('chouti.json', 'r') as f:
            res = json.load(f)
        for item in res:
            # selenium的cookie和requests模組使用的cookie不太一樣,requests只要name和value
            cookie[item['name']] = item['value']
        res = requests.post('//dig.chouti.com/link/vote', headers=header, data=data, cookies=cookie)
        print(res.text)


# data = {
#     'linkId': '34976644'
# }
# res = requests.post('//dig.chouti.com/link/vote', headers=header, data=data)
# print(res)
2、打碼平台使用
# 第三方平台破解驗證碼---》花錢買服務,把圖片給人家,人家幫你解開,返回來
# 雲打碼,超級鷹

# 超級鷹
	開發文檔:python示例程式碼
	應用案例:爬蟲採集技術,自動智慧化、人工化(大媽破解--》傳給你)多種模式兼備
	價格體系:1元=1000分
import requests
from hashlib import md5
class ChaojiyingClient():
def __init__(self, username, password, soft_id):
self.username = username
password = password.encode('utf8')
self.password = md5(password).hexdigest()
self.soft_id = soft_id
self.base_params = {
'user': self.username,
'pass2': self.password,
'softid': self.soft_id,
}
self.headers = {
'Connection': 'Keep-Alive',
'User-Agent': 'Mozilla/4.0 (compatible; MSIE 8.0; Windows NT 5.1; Trident/4.0)',
}
def PostPic(self, im, codetype):
"""
im: 圖片位元組
codetype: 題目類型 參考 //www.chaojiying.com/price.html
"""
params = {
'codetype': codetype,
}
params.update(self.base_params)
files = {'userfile': ('ccc.jpg', im)}
r = requests.post('//upload.chaojiying.net/Upload/Processing.php', data=params, files=files,
headers=self.headers)
return r.json()
def PostPic_base64(self, base64_str, codetype):
"""
im: 圖片位元組
codetype: 題目類型 參考 //www.chaojiying.com/price.html
"""
params = {
'codetype': codetype,
'file_base64': base64_str
}
params.update(self.base_params)
r = requests.post('//upload.chaojiying.net/Upload/Processing.php', data=params, headers=self.headers)
return r.json()
def ReportError(self, im_id):
"""
im_id:報錯題目的圖片ID
"""
params = {
'id': im_id,
}
params.update(self.base_params)
r = requests.post('//upload.chaojiying.net/Upload/ReportError.php', data=params, headers=self.headers)
return r.json()
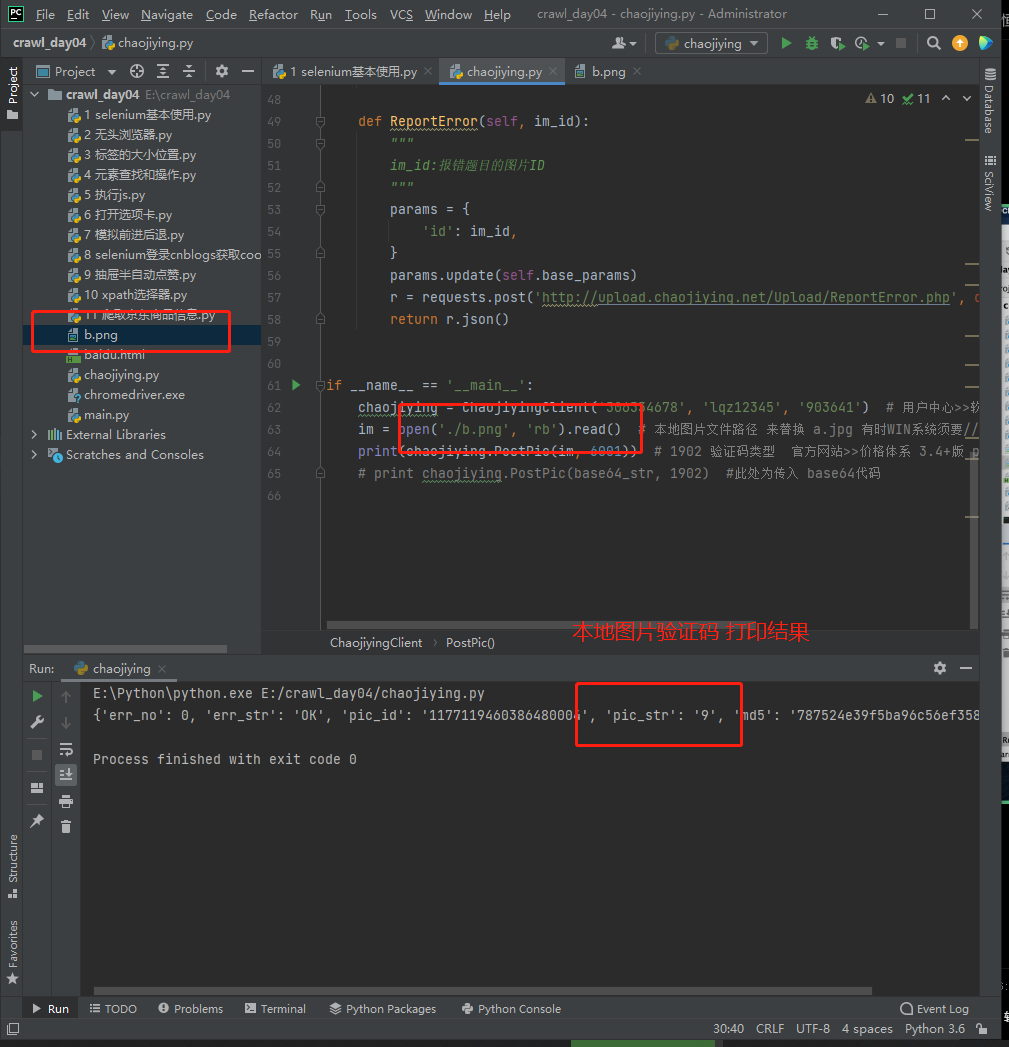
if __name__ == '__main__':
chaojiying = ChaojiyingClient('306334678', 'lqz12345', '903641') # 用戶中心>>軟體ID 生成一個替換 96001
im = open('./b.png', 'rb').read() # 本地圖片文件路徑 來替換 a.jpg 有時WIN系統須要//
print(chaojiying.PostPic(im, 6001)) # 1902 驗證碼類型 官方網站>>價格體系 3.4+版 print 後要加()
# print chaojiying.PostPic(base64_str, 1902) #此處為傳入 base64程式碼
3、xpath使用
# css 和 xpath 和自己的
# xpath:XML路徑語言(XML Path Language),它是一種用來確定XML文檔中某部分位置的語言


.  # 選取當前節點
..  # 選取當前節點的父節點
/  # 表示當前路徑
//  # 表示任意路徑,子子孫孫
nodename  # a  img   p  節點名字

## 舉例
// div  # //div 在當前html的任意路徑下找div
/ div  # 只找本層的div

*  # 任意標籤
@href  # 取這個標籤的屬性
/ text()  # 獲取標籤的文本
doc = '''
<html>
 <head>
  <base href='//example.com/' />
  <title>Example website</title>
 </head>
 <body>
  <div id='images'>
   <a href='image1.html' id='id_a'>Name: My image 1 <br /><img src='image1_thumb.jpg' /></a>
   <a href='image2.html'>Name: My image 2 <br /><img src='image2_thumb.jpg' /></a>
   <a href='image3.html'>Name: My image 3 <br /><img src='image3_thumb.jpg' /></a>
   <a href='image4.html'>Name: My image 4 <br /><img src='image4_thumb.jpg' /></a>
   <a href='image5.html' class='li li-item' name='items'>Name: My image 5 <br /><img src='image5_thumb.jpg' /></a>
   <a href='image6.html' name='items'><span><h5>test</h5></span>Name: My image 6 <br /><img src='image6_thumb.jpg' /></a>
  </div>
 </body>
</html>
'''

# pip3 install lxml
from lxml import etree

html = etree.HTML(doc)
# html=etree.parse('search.html',etree.HTMLParser())


### 案例
# 1 所有節點
a = html.xpath('//*')

# 2 指定節點(結果為列表)
a = html.xpath('//head')

# 3 子節點,子孫節點
# a = html.xpath('//div/a')
# a = html.xpath('//body/a')  # 無數據
a = html.xpath('//body//a')

# 4 父節點    [@href="image1.html"] 屬性匹配
# a = html.xpath('//body//a[@href="image1.html"]/..')
# a = html.xpath('//body//a[1]/..')
# 也可以這樣
# a = html.xpath('//body//a[1]/parent::*')
a = html.xpath('//body//a[1]/parent::body')  # 無

# 5 屬性匹配
a = html.xpath('//body//a[@href="image1.html"]')

# 6 文本獲取
a = html.xpath('//body//a[@href="image1.html"]/text()')

# 7 屬性獲取
# a = html.xpath('//body//a/@href')
# # 注意從1 開始取(不是從0)
a = html.xpath('//body//a[1]/@href')

# 8 屬性多值匹配
#  a 標籤有多個class類,直接匹配就不可以了,需要用contains
# a = html.xpath('//body//a[@class="li"]')  # 找不到,因為a有多個類
# a = html.xpath('//body//a[contains(@class,"li")]')
a = html.xpath('//body//a[contains(@class,"li")]/text()')

# 9 多屬性匹配
# a = html.xpath('//body//a[contains(@class,"li") or @name="items"]')
# a = html.xpath('//body//a[contains(@class,"li") and @name="items"]/text()')
a = html.xpath('//body//a[contains(@class,"li")]/text()')

# 10 按序選擇
# a = html.xpath('//a[2]/text()')
# a = html.xpath('//a[2]/@href')
# 取最後一個
# a = html.xpath('//a[last()]/@href')
# 位置小於3的
# a = html.xpath('//a[position()<3]/@href')
# 倒數第二個
a = html.xpath('//a[last()-2]/@href')

# 11 節點軸選擇
# ancestor:祖先節點
# 使用了* 獲取所有祖先節點
# a = html.xpath('//a/ancestor::*')
# # 獲取祖先節點中的div
# a = html.xpath('//a/ancestor::div')
# attribute:屬性值
# a = html.xpath('//a[1]/attribute::id')
# child:直接子節點
# a = html.xpath('//a[1]/child::*')
# descendant:所有子孫節點
a = html.xpath('//a[6]/descendant::*')

# # following:當前節點之後所有節點
# a = html.xpath('//a[1]/following::*')
# a = html.xpath('//a[1]/following::*[1]/@href')
# # following-sibling:當前節點之後同級節點
# a = html.xpath('//a[1]/following-sibling::*')
# a = html.xpath('//a[1]/following-sibling::a')
# a = html.xpath('//a[1]/following-sibling::*[2]')
a = html.xpath('//a[1]/following-sibling::*[2]/@href')


# 終極大招---》複製
# //*[@id="maincontent"]/div[5]/table/tbody/tr[2]/td[2]

print(a)
4、使用selenium爬取京東商品資訊
from selenium import webdriver
from selenium.webdriver.common.keys import Keys  # 鍵盤按鍵操作
import time


def get_goods(driver):
    try:
        # 找到所有類名叫gl-item的標籤
        goods = driver.find_elements_by_class_name('gl-item')
        for good in goods:
            detail_url = good.find_element_by_tag_name('a').get_attribute('href')
            p_name = good.find_element_by_css_selector('.p-name em').text.replace('\n', '')
            price = good.find_element_by_css_selector('.p-price i').text
            p_commit = good.find_element_by_css_selector('.p-commit a').text
            img = good.find_element_by_css_selector('div.p-img img').get_attribute('src')
            if not img:
                img = 'http:' + good.find_element_by_css_selector('div.p-img img').get_attribute('data-lazy-img')
            msg = '''
                商品 : %s
                鏈接 : %s
                圖片 : %s
                價錢 :%s
                評論 :%s
                ''' % (p_name, detail_url, img, price, p_commit)

            print(msg, end='\n\n')

        button = driver.find_element_by_partial_link_text('下一頁')
        button.click()
        time.sleep(1)
        get_goods(driver)
    except Exception:
        pass


def spider(url, keyword):
    driver = webdriver.Chrome(executable_path='./chromedriver')
    driver.get(url)
    driver.implicitly_wait(3)  # 使用隱式等待
    try:
        input_tag = driver.find_element_by_id('key')
        input_tag.send_keys(keyword)
        input_tag.send_keys(Keys.ENTER)  # 敲回車
        get_goods(driver)
    finally:
        driver.close()


if __name__ == '__main__':
    spider('//www.jd.com/', keyword='精品內衣')
5、scrapy框架 介紹和安裝
# 之前學的 requests,bs4,selenium  都叫模組

# scrapy :
	框架  類似於djagno框架,在固定的位置寫固定的程式碼即可

# 基於這個框架寫一個爬蟲項目
# 安裝:
	pip3 install scrapy   # mac  linux 上沒問題
	win上可能裝不上(90%都能裝上)---》其實是因為twisted裝不上

# 如果win裝不上 按照以下步驟:
	1、pip3 install wheel   # 裝了它,以後支援直接使用whl文件安裝
	#安裝後,便支援通過wheel文件安裝軟體,wheel文件官網://www.lfd.uci.edu/~gohlke/pythonlibs
	2、pip3 install lxml
	3、pip3 install pyopenssl
	4、下載並安裝pywin32://sourceforge.net/projects/pywin32/files/pywin32/
	5、下載twisted的wheel文件://www.lfd.uci.edu/~gohlke/pythonlibs/#twisted
	6、執行pip3 install 下載目錄\Twisted-17.9.0-cp36-cp36m-win_amd64.whl
	7、pip3 install scrapy

# 裝完後,就會有個scrapy 可執行文件 等同於django-admin
# 創建scrapy項目   等同於django-admin
	可以到cmd窗口下執行
	scrapy startproject myfirst
	使用pycharm打開

# 創建爬蟲   等同於django 創建app
	scrapy genspider  爬蟲名  爬蟲地址
	scrapy genspider cnblogs www.cnblogs.com


# 運行爬蟲
 	scrapy crawl cnblogs


