簡訊登錄與註冊介面、前端所有方式登錄註冊頁面、redis資料庫介紹與安裝
- 2022 年 4 月 26 日
- 筆記
今日內容概要
- 簡訊登陸介面
- 簡訊註冊介面
- 登陸註冊前端
- redis介紹和安裝
內容詳細
1、簡訊登陸介面
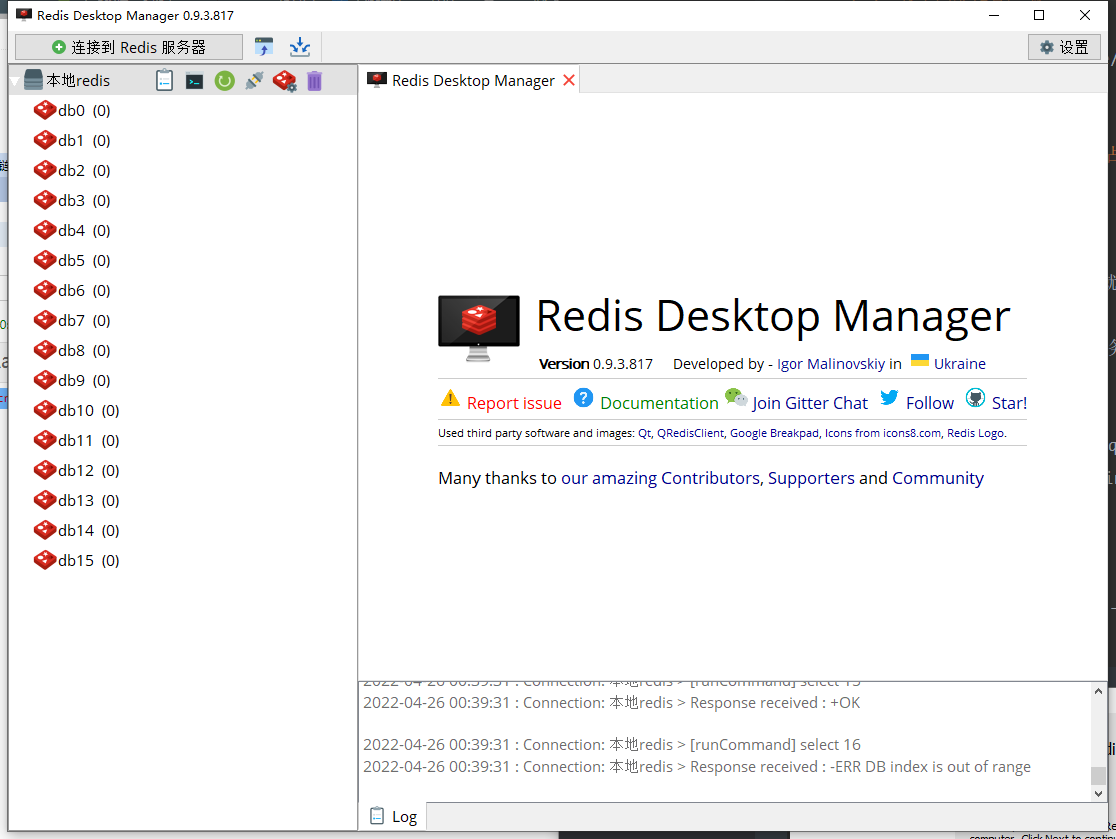
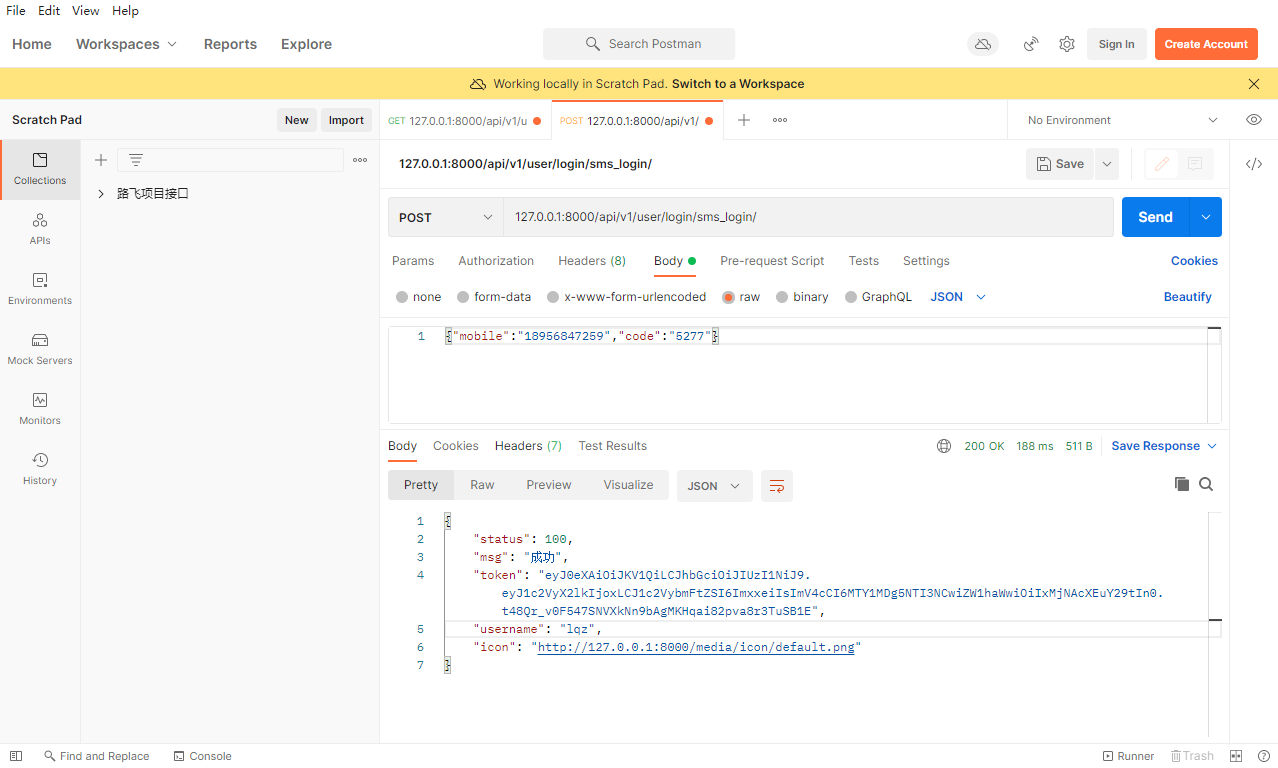
在視圖類 user/views.py中修改並添加:
from .serializer import MulLoginSerializer, SmsLoginSerializer # RegisterSerializer


class LoginView(GenericViewSet):
    serializer_class = MulLoginSerializer
    queryset = User

    # 兩個登陸方式都寫在這裡面(多方式,一個是驗證碼登陸)
    # login不是保存,但是用post,咱們的想法是把驗證邏輯寫到序列化類中
    @action(methods=["post"], detail=False)
    def mul_login(self, request):
        return self._common_login(request)

        # 127.0.0.1:8000/api/v1/user/login/sms_login

    @action(methods=["post"], detail=False)
    def sms_login(self, request):
        # 默認情況下使用的序列化類使用的是MulLoginSerializer---》多方式登陸的邏輯-->不符合簡訊登陸邏輯
        # 再新寫一個序列化類,給簡訊登陸用
        return self._common_login(request)

    def get_serializer_class(self):
        # 方式一:
        # if 'mul_login' in self.request.path:
        #     return self.serializer_class
        # else:
        #     return SmsLoginSerializer

        # 方式二
        if self.action == 'mul_login':
            return self.serializer_class
        else:
            return SmsLoginSerializer

    def _common_login(self, request):
        try:
            # 序列化類在變
            ser = self.get_serializer(data=request.data, context={'request': request})
            ser.is_valid(raise_exception=True)  # 如果校驗失敗,直接拋異常,不需要加if判斷了
            token = ser.context.get('token')
            username = ser.context.get('username')
            icon = ser.context.get('icon')
            return APIResponse(token=token, username=username, icon=icon)  # {code:100,msg:成功,token:dsadsf,username:lqz}
        except Exception as e:
            raise APIException(str(e))


from libs import tencent_sms_v3
from django.core.cache import cache


class SendSmsView(ViewSet):
    @action(methods=['GET'], detail=False)
    def send_message(self, request):
        try:
            phone = request.query_params.get('phone')
            # 生成驗證碼
            code = tencent_sms_v3.get_code()
            print(code)
            # code要保存,否則後面沒法驗證
            # sms_cache_%s格式化的字元串可以放到配置文件中---》用戶自定義配置
            cache.set('sms_cache_%s' % phone, code, 60)  # 設置值,key value形式,key應該唯一,使用手機號
            # cache.get() # 取值,根據key取

            # 同步操作---》後期可以使用非同步操作---》開一個執行緒調用
            res = tencent_sms_v3.send_sms(phone, code)
            if res:
                return APIResponse(msg='簡訊發送成功')
            else:
                raise APIException("簡訊發送失敗")
        except Exception as e:
            raise APIException(str(e))
修改序列化類 user/serializer.py:
from .models import User
from rest_framework import serializers
from rest_framework.exceptions import ValidationError
from django.core.cache import cache


# 這個序列化類,只用來做反序列化,數據校驗,最後不保存,不用來做序列化
class MulLoginSerializer(serializers.ModelSerializer):
    # 一定要重寫username這個欄位,因為username這個欄位校驗規則是從User表映射過來的,
    # username是唯一,假設資料庫中存在lqz這個用戶,傳入lqz,欄位自己的校驗規則就會校驗失敗,失敗原因是資料庫存在一個lqz用戶了
    # 所以需要重寫這個欄位,取消 掉它的unique
    username = serializers.CharField(max_length=18, min_length=3)  # 一定要重寫,不重寫,欄位自己的校驗過不去,就到不了全局鉤子

    class Meta:
        model = User
        fields = ['username', 'password']

    def validate(self, attrs):
        # 在這裡面完成校驗,如果校驗失敗,直接拋異常
        # 1 多方式得到user
        user = self._get_user(attrs)
        # 2  user簽發token
        token = self._get_token(user)
        # 3  把token,username,icon放到context中
        self.context['token'] = token
        self.context['username'] = user.username
        # self.context['icon'] = '//127.0.0.1:8000/media/'+str(user.icon)  # 對象ImageField的對象
        # self.context['icon'] = '//127.0.0.1:8000/media/'+str(user.icon)  # 對象ImageField的對象
        request = self.context['request']
        # request.META['HTTP_HOST']取出服務端的ip地址
        icon = '//%s/media/%s' % (request.META['HTTP_HOST'], str(user.icon))
        self.context['icon'] = icon
        return attrs

    # 意思是該方法只在類內部用,但是外部也可以用,如果寫成__就只能再內部用了
    def _get_user(self, attrs):
        import re
        username = attrs.get('username')
        if re.match(r'^1[3-9][0-9]{9}$', username):
            user = User.objects.filter(mobile=username).first()
        elif re.match(r'^.+@.+$', username):
            user = User.objects.filter(email=username).first()
        else:
            user = User.objects.filter(username=username).first()

        if not user:
            # raise ValidationError('用戶不存在')
            raise ValidationError('用戶名或密碼錯誤')

        # 取出前端傳入的密碼
        password = attrs.get('password')
        if not user.check_password(password):  # 學auth時講的,通過明文校驗密碼
            raise ValidationError("用戶名或密碼錯誤")

        return user

    def _get_token(self, user):
        # jwt模組中提供的
        from rest_framework_jwt.serializers import jwt_payload_handler, jwt_encode_handler
        payload = jwt_payload_handler(user)
        token = jwt_encode_handler(payload)
        return token


# 只用來做反序列化,簡訊登陸
class SmsLoginSerializer(serializers.ModelSerializer):
    code = serializers.CharField(max_length=4, min_length=4)  # 欄位自己的規則
    mobile = serializers.CharField(max_length=11, min_length=11)  # 一定要重寫,不重寫,欄位自己的校驗過不去,就到不了全局鉤子

    class Meta:
        model = User
        fields = ['mobile', 'code']  # code不在表中,它是驗證碼,要重新

    def validate(self, attrs):
        # 1 驗證手機號是否和合法 驗證code是否合法---》去快取中取出來判斷
        self._check_code(attrs)
        # 2 根據手機號獲取用戶---》需要密碼嗎?不需要
        user = self._get_user(attrs)
        # 3 簽發token
        token = self._get_token(user)
        # 4 把token,username,icon放到context中
        request = self.context['request']
        self.context['token'] = token
        self.context['username'] = user.username
        self.context['icon'] = '//%s/media/%s' % (request.META['HTTP_HOST'], str(user.icon))
        return attrs

    def _check_code(self, attrs):
        mobile = attrs.get('mobile')
        new_code = attrs.get('code')
        if mobile:
            # 驗證驗證碼是否正確
            old_code = cache.get('sms_cache_%s' % mobile)
            # 置空
            if new_code != old_code:
                raise ValidationError('驗證碼錯誤')

        else:
            raise ValidationError('手機號沒有帶')

    def _get_user(self, attrs):
        mobile = attrs.get('mobile')
        # return User.objects.get(mobile=mobile)
        user = User.objects.filter(mobile=mobile).first()
        if user:
            return user
        else:
            raise ValidationError("該用戶不存在")

    def _get_token(self, user):
        # jwt模組中提供的
        from rest_framework_jwt.serializers import jwt_payload_handler, jwt_encode_handler
        payload = jwt_payload_handler(user)
        token = jwt_encode_handler(payload)
        return token
2、簡訊註冊介面
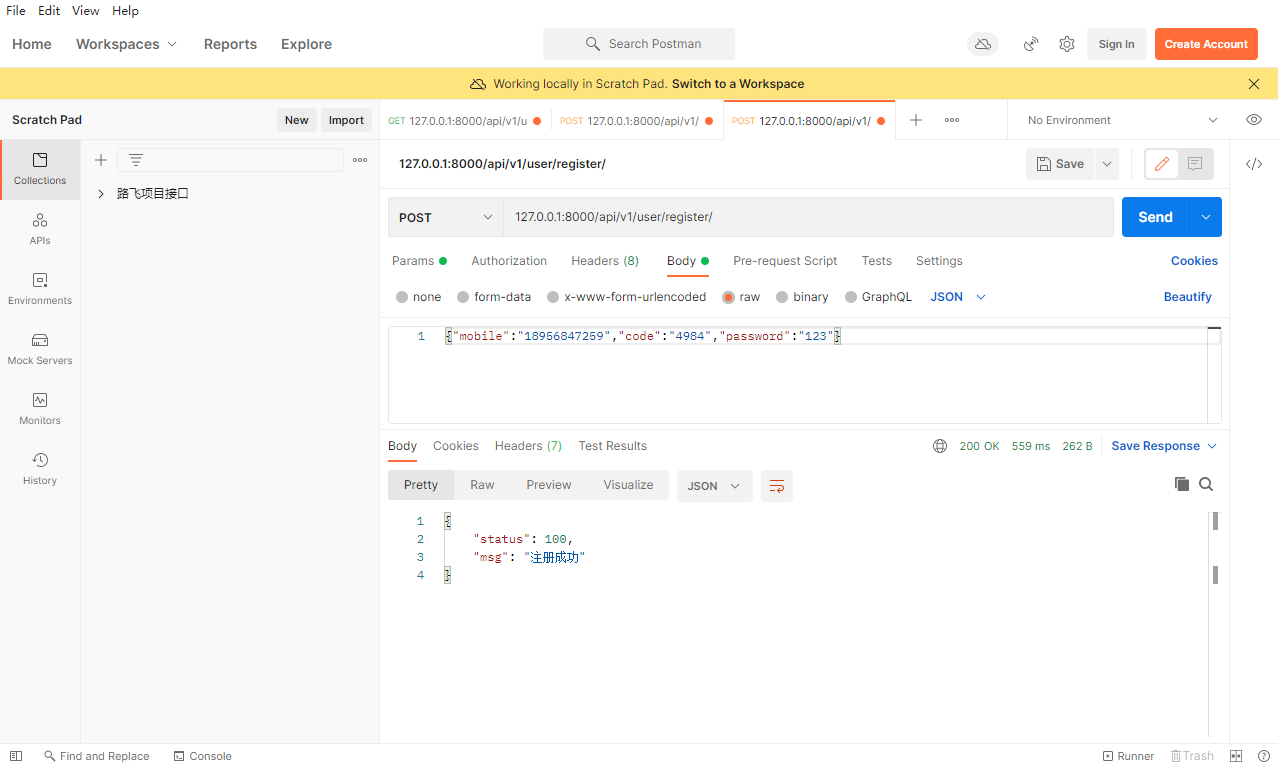
在user/urls.py中添加路由:
# 127.0.0.1:8000/api/v1/user/register --- >post請求
router.register('register', RegisterView, 'register')
在視圖類 user/views.py中添加:
from rest_framework.mixins import CreateModelMixin


class RegisterView(GenericViewSet, CreateModelMixin):
    serializer_class = RegisterSerializer
    queryset = User.objects.all()

    def create(self, request, *args, **kwargs):
        # 方式一:
        super().create(request, *args, **kwargs)  # 小問題,code不是表的欄位,需要用write_only

        # 方式二:
        # serializer = self.get_serializer(data=request.data)
        # serializer.is_valid(raise_exception=True)
        # # self.perform_create(serializer)
        # serializer.save()

        return APIResponse(msg='註冊成功')
在序列化類 user/serializer.py 中添加:
# 主要用來做反序列化,數據校驗----》其實序列化是用不到的,但是create源碼中只要寫了serializer.data,就會用序列化
class RegisterSerializer(serializers.ModelSerializer):
    code = serializers.CharField(max_length=4, min_length=4, write_only=True)

    class Meta:
        model = User
        fields = ['mobile', 'code', 'password']
        extra_kwargs = {
            'password': {'write_only': True},
        }

    def validate(self, attrs):
        # 1 校驗手機號和驗證碼
        self._check_code(attrs)
        # 2 就可以新增了---》User中欄位很多,現在只帶了倆欄位,
        #   username必填隨機生成,code不存表,剔除,
        #  存user表,不能使用默認的create,一定要重寫create方法
        self._per_save(attrs)
        return attrs

    # 校驗手機號
    def validate_mobile(self, value):  # 局部鉤子
        if not re.match(r'^1[3-9][0-9]{9}$', value):
            raise ValidationError('手機號不合法')
        return value

    # 入庫前準備
    def _per_save(self, attrs):
        # 剔除code,
        attrs.pop('code')
        # 新增username-->用手機號作為用戶名
        attrs['username'] = attrs.get('mobile')

    # 寫成公共函數,傳入手機號,就校驗驗證碼
    # 經常公司中為了省簡訊,回留萬能驗證碼,8888
    def _check_code(self, attrs):
        # 校驗code
        new_code = attrs.get('code')
        mobile = attrs.get('mobile')
        old_code = cache.get('sms_cache_%s' % mobile)
        if new_code != old_code:
            raise ValidationError("驗證碼錯誤")

    def create(self, validated_data):
        # 如果補充些,密碼不是密文
        user = User.objects.create_user(**validated_data)
        return user
3、登陸註冊前端
# 打開前端luffycity項目

# 前端可以存數據的地方
	存到cookie中,js操作,在vue中可以藉助vue-cookies第三方插件
		npm install vue-cookies -S
		在main.js中加入:
			import cookies from 'vue-cookies'
			Vue.prototype.$cookies = cookies;
	以後用
		this.$cookies.set()
		this.$cookies.get()

	localStorage,永久存儲
		localStorage.setItem('key', 'value');
		localStorage.key = "value"
		localStorage["key"] = "value"

	sessionStorage,臨時存儲,關閉瀏覽器就沒了
		sessionStorage.setItem("age",'19')
修改src/components/Login.vue:
<template>
  <div class="login">
    <div class="box">
      <i class="el-icon-close" @click="close_login"></i>
      <div class="content">
        <div class="nav">
                    <span :class="{active: login_method === 'is_pwd'}"
                          @click="change_login_method('is_pwd')">密碼登錄</span>
          <span :class="{active: login_method === 'is_sms'}"
                @click="change_login_method('is_sms')">簡訊登錄</span>
        </div>
        <el-form v-if="login_method === 'is_pwd'">
          <el-input
              placeholder="用戶名/手機號/郵箱"
              prefix-icon="el-icon-user"
              v-model="username"
              clearable>
          </el-input>
          <el-input
              placeholder="密碼"
              prefix-icon="el-icon-key"
              v-model="password"
              clearable
              show-password>
          </el-input>
          <el-button type="primary" @click="handlePasswordLogin">登錄</el-button>
        </el-form>
        <el-form v-if="login_method === 'is_sms'">
          <el-input
              placeholder="手機號"
              prefix-icon="el-icon-phone-outline"
              v-model="mobile"
              clearable
              @blur="check_mobile">
          </el-input>
          <el-input
              placeholder="驗證碼"
              prefix-icon="el-icon-chat-line-round"
              v-model="sms"
              clearable>
            <template slot="append">
              <span class="sms" @click="send_sms">{{ sms_interval }}</span>
            </template>
          </el-input>
          <el-button type="primary" @click="handleMobileLogin">登錄</el-button>
        </el-form>
        <div class="foot">
          <span @click="go_register">立即註冊</span>
        </div>
      </div>
    </div>
  </div>
</template>

<script>
export default {
  name: "Login",
  data() {
    return {
      username: '',
      password: '',
      mobile: '',
      sms: '',
      login_method: 'is_pwd',
      sms_interval: '獲取驗證碼',
      is_send: false,
    }
  },
  methods: {
    close_login() {
      this.$emit('close')
    },
    go_register() {
      this.$emit('go')
    },
    change_login_method(method) {
      this.login_method = method;
    },
    check_mobile() {
      if (!this.mobile) return;
      if (!this.mobile.match(/^1[3-9][0-9]{9}$/)) {
        this.$message({
          message: '手機號有誤',
          type: 'warning',
          duration: 1000,
          onClose: () => {
            this.mobile = '';
          }
        });
        return false;
      }
      this.is_send = true;
    },
    send_sms() {
      if (!this.is_send) return;
      this.is_send = false;
      let sms_interval_time = 60;
      this.sms_interval = "發送中...";
      let timer = setInterval(() => {
        if (sms_interval_time <= 1) {
          clearInterval(timer);
          this.sms_interval = "獲取驗證碼";
          this.is_send = true; // 重新回復點擊發送功能的條件
        } else {
          sms_interval_time -= 1;
          this.sms_interval = `${sms_interval_time}秒後再發`;
        }
      }, 1000);
      // 發送簡訊 驗證碼
      this.$axios.get(this.$settings.base_url + 'user/send/send_message/?phone=' + this.mobile).then(res => {
        if (res.data.status == 100) {
          this.$message({
            message: '恭喜你,驗證碼發送成功',
            type: 'success'
          });
        } else {
          this.$message({
            message: '驗證碼發送失敗,請稍後再試',
            type: 'warning'
          });
        }
      })
    },
    handlePasswordLogin() {
      // 用戶名和密碼是否填入了
      if (this.username && this.password) {
        this.$axios.post(this.$settings.base_url + 'user/login/mul_login/',
            {
              username: this.username,
              password: this.password
            }).then(res => {
          if (res.data.status == 100) {
            console.log(res.data)

            // 1 把token,和usernanme存到--cookie中
            // localStorage.setItem("name",'lqz')
            // sessionStorage.setItem("age",'19')
            this.$cookies.set("username", res.data.username, '7d')
            this.$cookies.set("token", res.data.token, '7d')
            this.$cookies.set("icon", res.data.icon, '7d')
            //2 關閉登陸框
            this.close_login()
          } else {
            this.$message.error(res.data.msg);
          }
        })
      } else {
        this.$message.error('用戶名密碼必填');
      }
    },
    handleMobileLogin() {
      if (this.mobile && this.sms) {
        this.$axios.post(this.$settings.base_url + 'user/login/sms_login/',
            {
              mobile: this.mobile,
              code: this.sms
            }).then(res => {
          if (res.data.status == 100) {
            console.log(res.data)
            // 1 把token,和usernanme存到--cookie中
            // localStorage.setItem("name",'lqz')
            // sessionStorage.setItem("age",'19')
            this.$cookies.set("username", res.data.username)
            this.$cookies.set("token", res.data.token)
            this.$cookies.set("icon", res.data.icon)
            //2 關閉登陸框
            this.close_login()
          } else {
            this.$message.error(res.data.msg);
          }
        })
      } else {
        this.$message.error('用戶名密碼必填');
      }
    }
  }
}
</script>

<style scoped>
.login {
  width: 100vw;
  height: 100vh;
  position: fixed;
  top: 0;
  left: 0;
  z-index: 10;
  background-color: rgba(0, 0, 0, 0.3);
}

.box {
  width: 400px;
  height: 420px;
  background-color: white;
  border-radius: 10px;
  position: relative;
  top: calc(50vh - 210px);
  left: calc(50vw - 200px);
}

.el-icon-close {
  position: absolute;
  font-weight: bold;
  font-size: 20px;
  top: 10px;
  right: 10px;
  cursor: pointer;
}

.el-icon-close:hover {
  color: darkred;
}

.content {
  position: absolute;
  top: 40px;
  width: 280px;
  left: 60px;
}

.nav {
  font-size: 20px;
  height: 38px;
  border-bottom: 2px solid darkgrey;
}

.nav > span {
  margin: 0 20px 0 35px;
  color: darkgrey;
  user-select: none;
  cursor: pointer;
  padding-bottom: 10px;
  border-bottom: 2px solid darkgrey;
}

.nav > span.active {
  color: black;
  border-bottom: 3px solid black;
  padding-bottom: 9px;
}

.el-input, .el-button {
  margin-top: 40px;
}

.el-button {
  width: 100%;
  font-size: 18px;
}

.foot > span {
  float: right;
  margin-top: 20px;
  color: orange;
  cursor: pointer;
}

.sms {
  color: orange;
  cursor: pointer;
  display: inline-block;
  width: 70px;
  text-align: center;
  user-select: none;
}
</style>
修改src/components/Register.vue:
<template>
  <div class="register">
    <div class="box">
      <i class="el-icon-close" @click="close_register"></i>
      <div class="content">
        <div class="nav">
          <span class="active">新用戶註冊</span>
        </div>
        <el-form>
          <el-input
              placeholder="手機號"
              prefix-icon="el-icon-phone-outline"
              v-model="mobile"
              clearable
              @blur="check_mobile">
          </el-input>
          <el-input
              placeholder="密碼"
              prefix-icon="el-icon-key"
              v-model="password"
              clearable
              show-password>
          </el-input>
          <el-input
              placeholder="驗證碼"
              prefix-icon="el-icon-chat-line-round"
              v-model="sms"
              clearable>
            <template slot="append">
              <span class="sms" @click="send_sms">{{ sms_interval }}</span>
            </template>
          </el-input>
          <el-button type="primary" @click="handleRegister">註冊</el-button>
        </el-form>

        <div class="foot">
          <span @click="go_login">立即登錄</span>
        </div>

      </div>
    </div>
  </div>
</template>

<script>
export default {
  name: "Register",
  data() {
    return {
      mobile: '',
      password: '',
      sms: '',
      sms_interval: '獲取驗證碼',
      is_send: false,
    }
  },
  methods: {
    close_register() {
      this.$emit('close', false)
    },
    go_login() {
      this.$emit('go')
    },
    check_mobile() {
      if (!this.mobile) return;
      if (!this.mobile.match(/^1[3-9][0-9]{9}$/)) {
        this.$message({
          message: '手機號有誤',
          type: 'warning',
          duration: 1000,
          onClose: () => {
            this.mobile = '';
          }
        });
        return false;
      }
      // 加一個校驗手機號是否存在的功能
      this.is_send = true;
    },
    send_sms() {
      if (!this.is_send) return;
      this.is_send = false;
      let sms_interval_time = 60;
      this.sms_interval = "發送中...";
      let timer = setInterval(() => {
        if (sms_interval_time <= 1) {
          clearInterval(timer);
          this.sms_interval = "獲取驗證碼";
          this.is_send = true; // 重新回復點擊發送功能的條件
        } else {
          sms_interval_time -= 1;
          this.sms_interval = `${sms_interval_time}秒後再發`;
        }
      }, 1000);
      // 發送簡訊 驗證碼
      this.$axios.get(this.$settings.base_url + 'user/send/send_message/?phone=' + this.mobile).then(res => {
        if (res.data.status == 100) {
          this.$message({
            message: '恭喜你,驗證碼發送成功',
            type: 'success'
          });
        } else {
          this.$message({
            message: '驗證碼發送失敗,請稍後再試',
            type: 'warning'
          });
        }
      })

    },

    handleRegister() {
      if (this.mobile && this.sms && this.password) {
        this.$axios.post(this.$settings.base_url + 'user/register/',
            {
              mobile: this.mobile,
              code: this.sms,
              password: this.password
            }).then(res => {
          if (res.data.status == 100) {
            console.log(res.data)
            this.$message('恭喜您,註冊成功');
            //2 關閉註冊框
            this.close_register()
          } else {
            this.$message.error(res.data.msg);
          }
        })

      } else {
        this.$message.error('用戶名密碼必填');
      }
    }
  }
}
</script>

<style scoped>
.register {
  width: 100vw;
  height: 100vh;
  position: fixed;
  top: 0;
  left: 0;
  z-index: 10;
  background-color: rgba(0, 0, 0, 0.3);
}

.box {
  width: 400px;
  height: 480px;
  background-color: white;
  border-radius: 10px;
  position: relative;
  top: calc(50vh - 240px);
  left: calc(50vw - 200px);
}

.el-icon-close {
  position: absolute;
  font-weight: bold;
  font-size: 20px;
  top: 10px;
  right: 10px;
  cursor: pointer;
}

.el-icon-close:hover {
  color: darkred;
}

.content {
  position: absolute;
  top: 40px;
  width: 280px;
  left: 60px;
}

.nav {
  font-size: 20px;
  height: 38px;
  border-bottom: 2px solid darkgrey;
}

.nav > span {
  margin-left: 90px;
  color: darkgrey;
  user-select: none;
  cursor: pointer;
  padding-bottom: 10px;
  border-bottom: 2px solid darkgrey;
}

.nav > span.active {
  color: black;
  border-bottom: 3px solid black;
  padding-bottom: 9px;
}

.el-input, .el-button {
  margin-top: 40px;
}

.el-button {
  width: 100%;
  font-size: 18px;
}

.foot > span {
  float: right;
  margin-top: 20px;
  color: orange;
  cursor: pointer;
}

.sms {
  color: orange;
  cursor: pointer;
  display: inline-block;
  width: 70px;
  text-align: center;
  user-select: none;
}
</style>
修改src/components/Header.vue:
<template>
  <div class="header">
    <div class="slogan">
      <p>老男孩IT教育 | 幫助有志向的年輕人通過努力學習獲得體面的工作和生活</p>
    </div>
    <div class="nav">
      <ul class="left-part">
        <li class="logo">
          <router-link to="/">
            <img src="../assets/img/head-logo.svg" alt="">
          </router-link>
        </li>
        <li class="ele">
          <span @click="goPage('/free-course')" :class="{active: url_path === '/free-course'}">免費課</span>
        </li>
        <li class="ele">
          <span @click="goPage('/actual-course')" :class="{active: url_path === '/actual-course'}">實戰課</span>
        </li>
        <li class="ele">
          <span @click="goPage('/light-course')" :class="{active: url_path === '/light-course'}">輕課</span>
        </li>
      </ul>

      <div class="right-part">
        <div v-if="username">
          <span style="margin-right: 10px"><img :src="icon" alt="" width="35px" height="35px"></span>
          <span>{{ username }}</span>
          <span class="line">|</span>
          <span @click="handleLogout">退出</span>
        </div>
        <div v-else>
          <span @click="put_login">登錄</span>
          <span class="line">|</span>
          <span @click="put_register">註冊</span>
        </div>
      </div>
      <Login v-if="is_login" @close="close_login" @go="put_register"/>
      <Register v-if="is_register" @close="close_register" @go="put_login"/>
    </div>
  </div>
</template>

<script>
import Login from "@/components/Login";
import Register from "@/components/Register";

export default {
  name: "Header",
  data() {
    return {
      url_path: sessionStorage.url_path || '/',
      is_login: false,
      is_register: false,
      username: '',
      icon: ''

    }
  },

  methods: {
    goPage(url_path) {
      // 已經是當前路由就沒有必要重新跳轉
      if (this.url_path !== url_path) {
        this.$router.push(url_path);
      }
      sessionStorage.url_path = url_path;
    },
    close_login() {
      this.is_login = false
      // 登陸了,從cookie去取出username,
      this.username = this.$cookies.get('username')
      this.icon = this.$cookies.get('icon')
    },
    close_register() {
      this.is_register = false
    },
    put_register() {
      this.is_register = true
      this.is_login = false
    },
    put_login() {
      this.is_register = false
      this.is_login = true
    },
    handleLogout() {
      // cookie中的數據刪除就退出了
      this.$cookies.set('username', '')
      this.$cookies.set('token', '')
      this.$cookies.set('icon', '')
      this.username = ''
      this.icon = ''
    }

  },

  created() {
    sessionStorage.url_path = this.$route.path;
    this.url_path = this.$route.path;
    // 登陸了,從cookie去取出username,
    this.username = this.$cookies.get('username')
    this.icon = this.$cookies.get('icon')
  },
  components: {
    Login, Register
  }
}
</script>

<style scoped>
.header {
  background-color: white;
  box-shadow: 0 0 5px 0 #aaa;
}

.header:after {
  content: "";
  display: block;
  clear: both;
}

.slogan {
  background-color: #eee;
  height: 40px;
}

.slogan p {
  width: 1200px;
  margin: 0 auto;
  color: #aaa;
  font-size: 13px;
  line-height: 40px;
}

.nav {
  background-color: white;
  user-select: none;
  width: 1200px;
  margin: 0 auto;

}

.nav ul {
  padding: 15px 0;
  float: left;
}

.nav ul:after {
  clear: both;
  content: '';
  display: block;
}

.nav ul li {
  float: left;
}

.logo {
  margin-right: 20px;
}

.ele {
  margin: 0 20px;
}

.ele span {
  display: block;
  font: 15px/36px '微軟雅黑';
  border-bottom: 2px solid transparent;
  cursor: pointer;
}

.ele span:hover {
  border-bottom-color: orange;
}

.ele span.active {
  color: orange;
  border-bottom-color: orange;
}

.right-part {
  float: right;
}

.right-part .line {
  margin: 0 10px;
}

.right-part span {
  line-height: 68px;
  cursor: pointer;
}
</style>
4、redis介紹和安裝
# 1 redis
	是一個非關係型資料庫(區別於mysql關係型資料庫,關聯關係,外鍵,表),nosql資料庫(not only sql:不僅僅是SQL),數據完全記憶體存儲(速度非常快)

# 2 redis就是一個存數據的地方

# 3 redis是
	key --value  存儲形式---》value類型有5大數據類型---》字元串,列表,hash(字典),集合,有序集合

# java:hashMap  存key-value形式
# go:maps      存key-value形式
# 4 redis的好處
	(1) 速度快,因為數據存在記憶體中,類似於字典,字典的優勢就是查找和操作的時間複雜度都是O(1)

	(2) 支援豐富數據類型,支援string,list,set,sorted set,hash

	(3) 支援事務,操作都是原子性,所謂的原子性就是對數據的更改要麼全部執行,要麼全部不執行

	(4) 豐富的特性:可用於快取,消息,按key設置過期時間,過期後將會自動刪除

# 5 redis 最適合的場景---》主要做快取---》它又叫快取資料庫
	(1) 會話快取(Session Cache)---》存session---》速度快
	(2) 介面,頁面快取---》把介面數據,存在redis中
	(3) 隊列--->celery使用
	(4) 排行榜/計數器--->個人頁面訪問量
	(5) 發布/訂閱


# 6 安裝---》c語言寫的開源軟體---》官方提供源碼
	如果是在mac或linux上需要 編譯,安裝

	redis最新穩定版版本6.x

	win:作者不支援windwos,本質原因:redis很快,使用了io多路復用中的epoll的網路模型,這個模型不支援win,所以不支援(看到高性能的伺服器基本上都是基於io多路復用中的epoll的網路模型,nginx),微軟基於redis源碼,自己做了個redis安裝包,但是這個安裝包最新只到3.x,又有第三方組織做到最新5.x的安裝包
	安裝包---》編譯完成的可執行文件---》下一步安裝
	linux--》make成可執行文件---》make install 安裝
	linux,mac平台安裝


# 7 win下載地址
	最新5.x版本: //github.com/tporadowski/redis/releases/
	最新3.x版本: //github.com/microsoftarchive/redis/releases
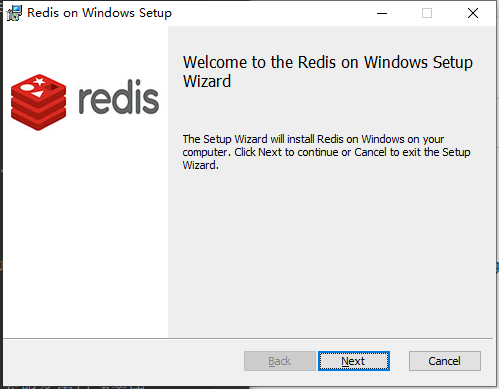
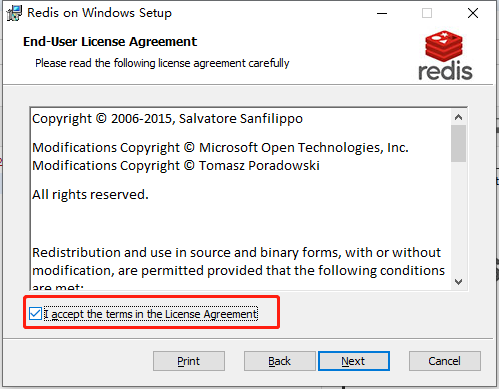
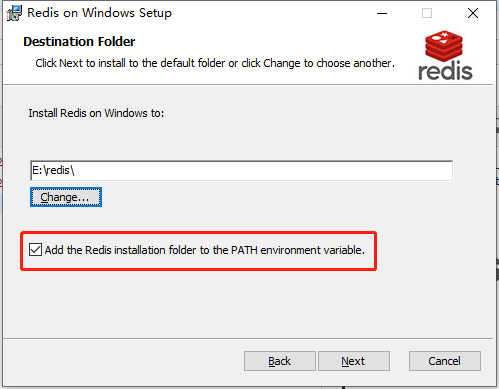
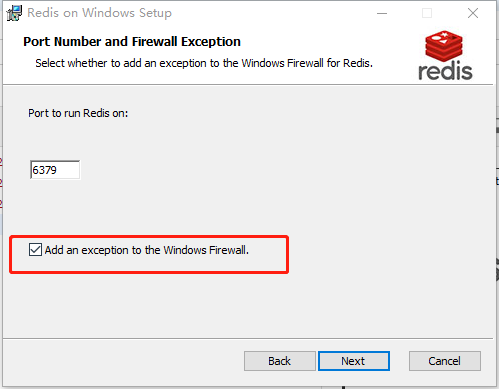
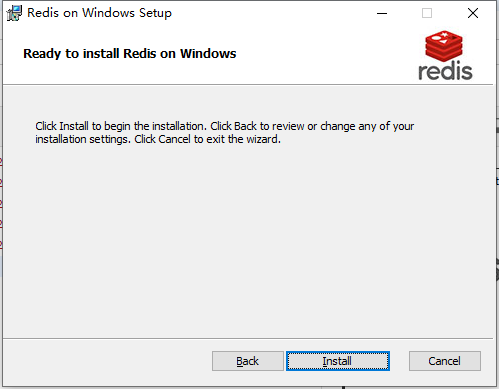
	一路直接下一步安裝

# mysql 有個圖形化客戶端-Navicat很好用
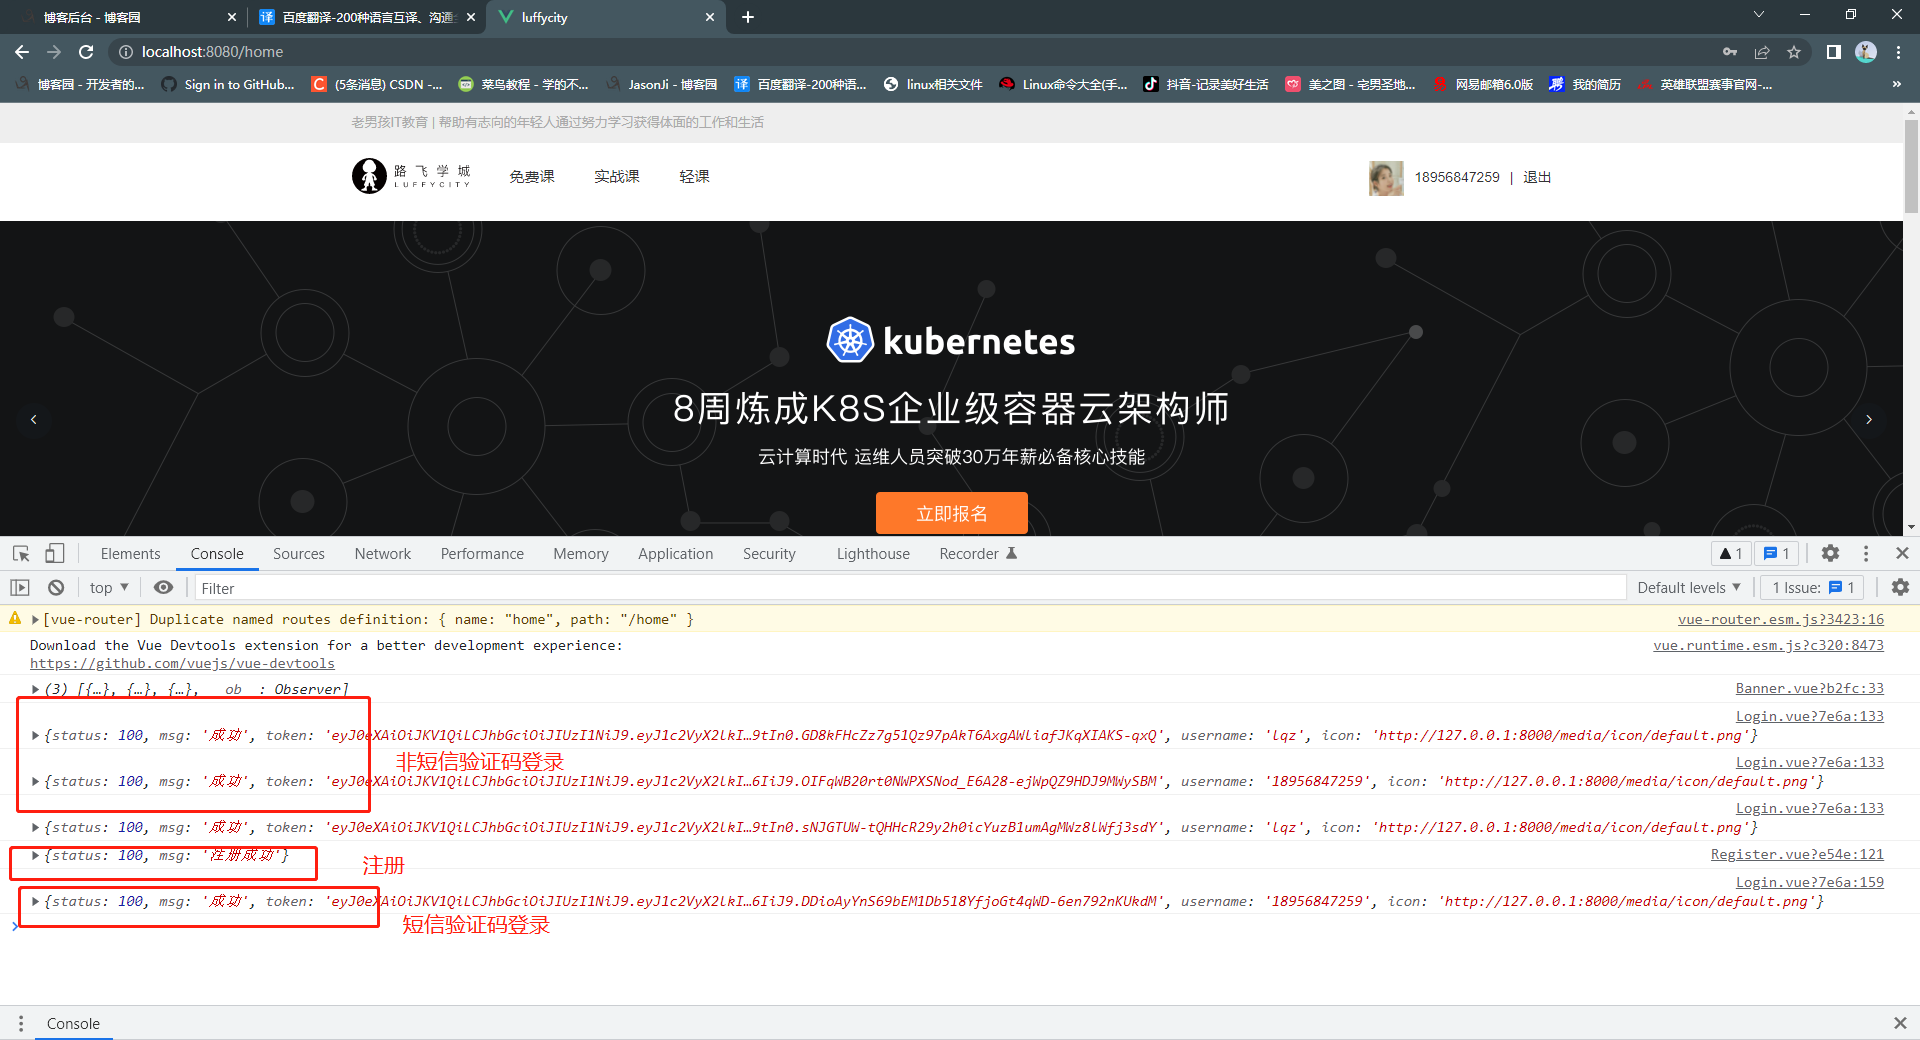
# redis 也有很多,推薦你用rdb
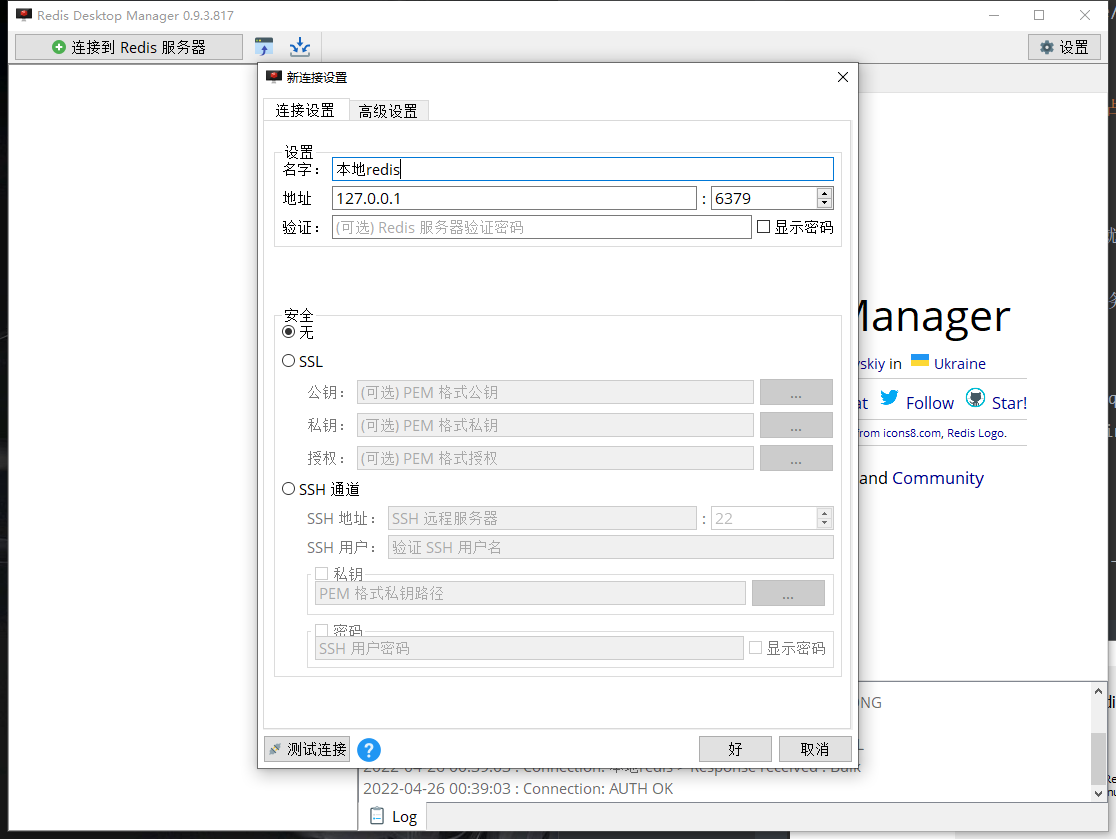
	//github.com/uglide/RedisDesktopManager/releases  收費,99元永久,白嫖

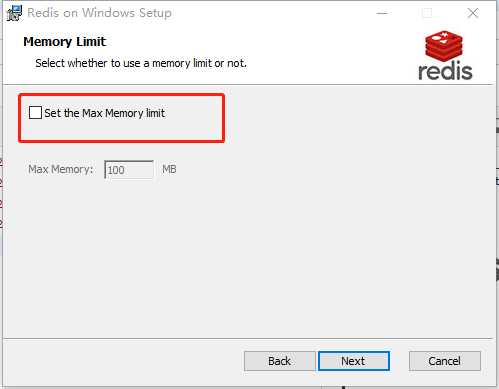
# redis純記憶體操作,有可能把記憶體佔滿了,這個配置是最多使用多少記憶體


# redis服務的啟動與關閉
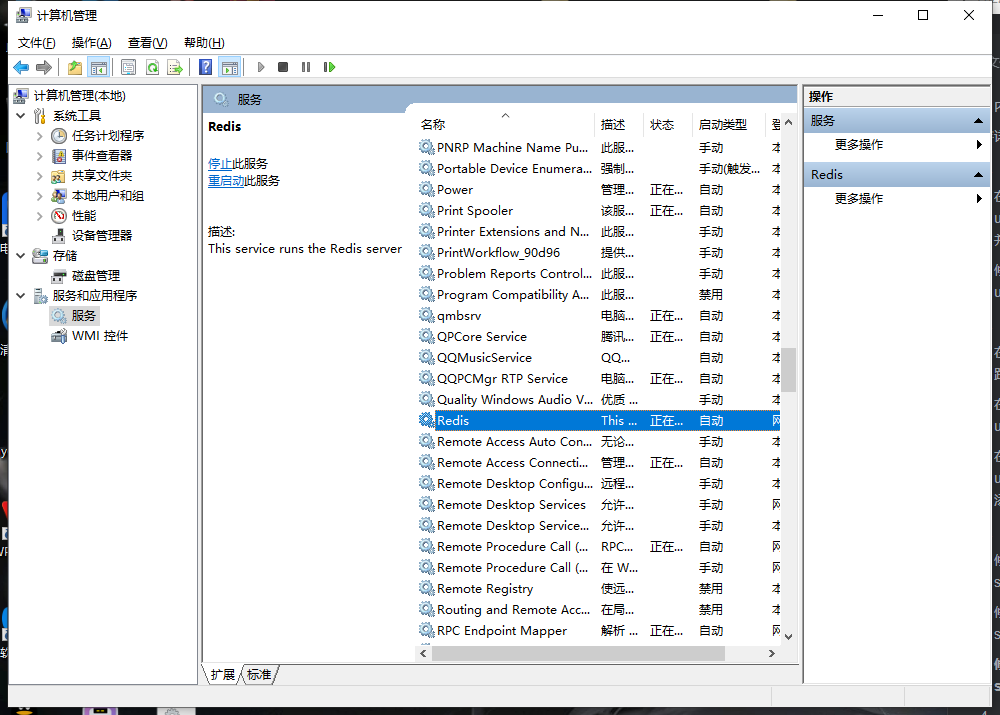
	方式一:安裝完成後 win上,就在服務中了,把服務開啟即可,在服務中啟動關閉
		右鍵我的電腦--管理--服務和應用程式--服務--找到redis--右鍵屬性--啟動類型為:自動

	方式二:命令啟動,等同於mysqld
		redis-server redis.windows-service.conf


# redis連接
	命令行:redis-cli -p 埠 -h 地址
	客戶端 :rdb直接連接
