『現學現忘』Git基礎 — 12、Git用戶簽名(補充)
- 2022 年 4 月 20 日
- 筆記
1、修改用戶簽名
其實很簡單,就是重新執行git config命令,換個用戶名和郵箱地址就可以了,新配置的內容會覆蓋之前配置的內容,達到了用戶簽名的修改。
以系統用戶為例:
# 查看系統級別的用戶配置
L@DESKTOP-T2AI2SU MINGW64 /j/git-repository/learngit (master)
$ git config --list --system
diff.astextplain.textconv=astextplain
filter.lfs.clean=git-lfs clean -- %f
filter.lfs.smudge=git-lfs smudge -- %f
filter.lfs.process=git-lfs filter-process
filter.lfs.required=true
http.sslbackend=openssl
http.sslcainfo=F:/DevInstall/Git/GitforWindows/mingw64/ssl/certs/ca-bundle.crt
core.autocrlf=true
core.fscache=true
core.symlinks=false
credential.helper=manager
user.name=tang_s  # 這裡是tang_s
[email protected]

# 修改系統用戶配置
L@DESKTOP-T2AI2SU MINGW64 /j/git-repository/learngit (master)
$ git config --system user.name 'zhu_bj'

# 查看系統級別的用戶配置
L@DESKTOP-T2AI2SU MINGW64 /j/git-repository/learngit (master)
$ git config --list --system
diff.astextplain.textconv=astextplain
filter.lfs.clean=git-lfs clean -- %f
filter.lfs.smudge=git-lfs smudge -- %f
filter.lfs.process=git-lfs filter-process
filter.lfs.required=true
http.sslbackend=openssl
http.sslcainfo=F:/DevInstall/Git/GitforWindows/mingw64/ssl/certs/ca-bundle.crt
core.autocrlf=true
core.fscache=true
core.symlinks=false
credential.helper=manager
user.name=zhu_bj	# 這裡是zhu_bj
[email protected]
提示:
- 系統級別的配置對應的是所有作業系統的用戶,全局配置對應的是單個系統用戶對所有Git倉庫的配置,本地配置是對單個Git倉庫的配置。
- 所以綜上所述,在一台電腦中,系統用戶只能有一個,全局用戶是每一個用戶可以設置一個,本地用戶可以設置多個(一個本地版本庫對應一個)。
2、取消用戶簽名
語法:
git config --配置文件範圍 --unset user.name
git config --配置文件範圍 --unset user.email
示例:取消系統用戶的用戶名和郵箱設置:
# 取消系統用戶的用戶名和郵箱設置
L@DESKTOP-T2AI2SU MINGW64 /j/git-repository/learngit (master)
$ git config --system --unset user.name

L@DESKTOP-T2AI2SU MINGW64 /j/git-repository/learngit (master)
$ git config --system --unset user.email

# 查看系統級別的用戶配置,可以看到沒有系統用戶的配置了。
L@DESKTOP-T2AI2SU MINGW64 /j/git-repository/learngit (master)
$ git config --list --system
diff.astextplain.textconv=astextplain
filter.lfs.clean=git-lfs clean -- %f
filter.lfs.smudge=git-lfs smudge -- %f
filter.lfs.process=git-lfs filter-process
filter.lfs.required=true
http.sslbackend=openssl
http.sslcainfo=F:/DevInstall/Git/GitforWindows/mingw64/ssl/certs/ca-bundle.crt
core.autocrlf=true
core.fscache=true
core.symlinks=false
credential.helper=manager
提示:全局用戶同理,本地用戶需要到倉庫中執行命令,也是同理的。
3、用戶簽名的優先順序
之前我們講過執行git config命令有三個作用域,分別是local、global、system。
接下來,要探討的是,這三個配置作用域的優先順序。
(1)先查看本機Git用戶簽名配置
# 查看系統用戶簽名
L@DESKTOP-T2AI2SU MINGW64 /j/git-repository/learngit (master)
$ git config --list --system
diff.astextplain.textconv=astextplain
filter.lfs.clean=git-lfs clean -- %f
filter.lfs.smudge=git-lfs smudge -- %f
filter.lfs.process=git-lfs filter-process
filter.lfs.required=true
http.sslbackend=openssl
http.sslcainfo=F:/DevInstall/Git/GitforWindows/mingw64/ssl/certs/ca-bundle.crt
core.autocrlf=true
core.fscache=true
core.symlinks=false
credential.helper=manager
user.name=tang_s
[email protected]

# 查看全局用戶簽名
L@DESKTOP-T2AI2SU MINGW64 /j/git-repository/learngit (master)
$ git config --list --global
user.name=sun_wk
[email protected]

# 查看本地用戶簽名
L@DESKTOP-T2AI2SU MINGW64 /j/git-repository/learngit (master)
$ git config --list --local
core.repositoryformatversion=0
core.filemode=false
core.bare=false
core.logallrefupdates=true
core.symlinks=false
core.ignorecase=true
user.name=sha_hs
[email protected]
可以看到:
- 系統用戶簽名:
tang_s - 全局用戶簽名:
sun_wk - 本地用戶簽名:
sha_hs
(2)創建一個文件,提交到本地版本庫中。
1)在倉庫中創建一個文本。
L@DESKTOP-T2AI2SU MINGW64 /j/git-repository/learngit (master)
$ touch test.java

L@DESKTOP-T2AI2SU MINGW64 /j/git-repository/learngit (master)
$ ll
total 0
-rw-r--r-- 1 L 197121 0  4月  3 10:54 test.java
2)提交這個文本到本地Git倉庫中。
# 1.查看工作目錄和暫存區中文件的狀態,
# 發現工作區中有一個test.java未被git管理
L@DESKTOP-T2AI2SU MINGW64 /j/git-repository/learngit (master)
$ git status
On branch master

No commits yet

Untracked files:
  (use "git add <file>..." to include in what will be committed)
        test.java

nothing added to commit but untracked files present (use "git add" to track)

# 2.把test.java添加到暫存區,被git納入管理
L@DESKTOP-T2AI2SU MINGW64 /j/git-repository/learngit (master)
$ git add test.java

# 3.再次查看工作目錄和暫存區中文件的狀態,
# 可以看到test.java文件被git管理
L@DESKTOP-T2AI2SU MINGW64 /j/git-repository/learngit (master)
$ git status
On branch master

No commits yet

Changes to be committed:
  (use "git rm --cached <file>..." to unstage)
        new file:   test.java

# 4.把test.java提交到本地版本庫中
L@DESKTOP-T2AI2SU MINGW64 /j/git-repository/learngit (master)
$ git commit -m 'add test.java'
[master (root-commit) e85b3b2] add test.java
 1 file changed, 0 insertions(+), 0 deletions(-)
 create mode 100644 test.java
說明上邊的一些列操作:這裡簡單解釋一下,之後會詳細說明。
使用Git的好處之一就是,如果出錯了,它的提示資訊是非常詳細的,認真的耐心的看一看,就能夠解決。
- 執行
$ git status命令:用於顯示工作目錄和暫存區中文件的狀態。
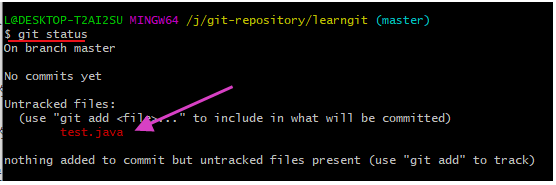
文件是紅色的,意思是test.java文件還沒有被Git管控,這個時候直接使用git commit命令是不能生效的。 - 將文件加入Git的暫存區。
這時就要對新加入的文件執行git add + 文件名,讓Git對該文件進行管控,在看一下Git的狀態。
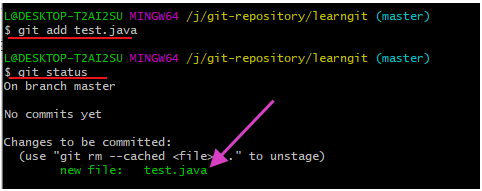
綠色表示該文件已經被Git管理了,該文件已經在Git的暫存區當中了(stage)。 - 此時便可以對test.java文件生成一個正式的
commit了。
執行$ git commit -m 'add Test_text'
-m :就是說你這此變更的理由或者原因是什麼。

提示master分支根部的commit已經創建出來了。


(3)查看Git日誌。
執行git log命令,查看Git日誌。
L@DESKTOP-T2AI2SU MINGW64 /j/git-repository/learngit (master)
$ git log
commit e85b3b21a4b296acacf34bf9caeeaa75544a2f2b (HEAD -> master)
Author: sha_hs <[email protected]>
Date:   Sat Apr 3 10:55:55 2021 +0800

    add test.java
我們可以看到,在system、global、local這三個用戶簽名都存在的情況下,是通過本地用戶進行的提交,所以說明本地用戶sha_hs的優先順序最高。
提示:
- 黃顏色的一串數字是本次
commit的id號。Author表示完成這一次提交的作者。
(4)配置文件級別的優先順序總結。
- 就近原則:
項目(本地)級別優先於用戶(全局)級別,用戶級別優先於系統級別。
三者都有時採用項目級別的簽名。 - 如果只有用戶級別的簽名,就以用戶級別的簽名為準。
- 三者都沒有簽名,不允許,無法提交變更到本地版本庫。
4、總結本文用到的Git命令
| 序號 | Git命令 | 說明 |
|---|---|---|
| 1 | $ git status |
查看當前工作區和暫存區文件的狀態 |
| 2 | $ git add |
可以將跟蹤到的更新放到暫存區(更新包括新增、修改、刪除等操作) |
| 3 | $ git commit -m 'add Test_text' |
提交更新 |
| 4 | $ git log |
查看提交歷史 |
注意:
執行
git status命令後,出現「Changed but not updated」t提示,說明已跟蹤文件的內容發生了變化,但還沒有放到暫存區。

