Vue+element搭建後台管理系統-二、安裝插件
我們繼續上一章的內容,上一章講到我們已經能將項目成功跑起來了,那麼我們接下來把項目必用的東西完善一下。
一、安裝elementUI
終於到了我們的男二了,繼續在VSCode中新建一個終端,然後通過這個命令來安裝:
npm i element-ui -S
至於為什麼要-S呢?即–save(保存)包名會被註冊在package.json的dependencies裡面,在生產環境下這個包的依賴依然存在。
安裝完成之後呢,我們要通過導入才能在項目中使用,可以在main.js中做全局引用:
import Vue from 'vue'
import App from './App.vue'
//引入elementUI
import ElementUI from 'element-ui';
import 'element-ui/lib/theme-chalk/index.css'; //樣式文件一定要引入

Vue.config.productionTip = false

Vue.use(ElementUI)
new Vue({
  render: h => h(App),
}).$mount('#app')
這樣就可以做到全局引入,如果在實際開發中用到UI框架的插件沒有很多,也是可以通過按需引入的,下面來說說如何按需引入:
import { Message} from 'element-ui';
Vue.use(Message)
上面就是引入一個Message彈窗的功能,也就是element中的內容只有這個可以用,還是覺得挺麻煩的哈。
好了,導入和裝載完畢之後,我們測試一下看看有沒有成功。
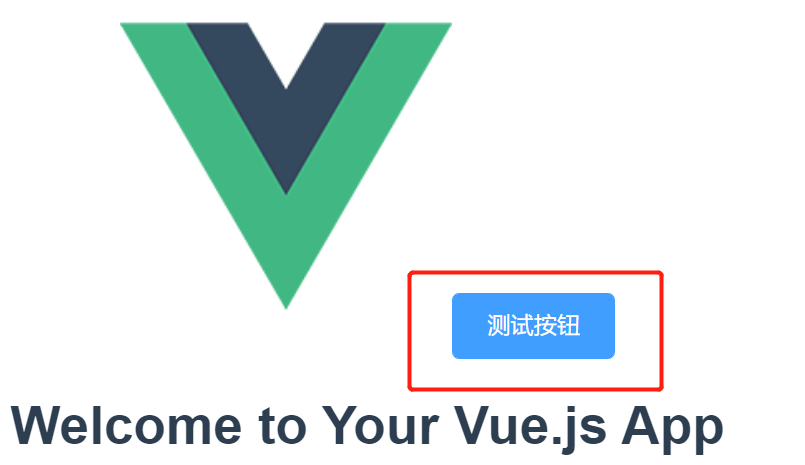
在App.vue文件中加入button組件,然後保存查看,可以看到網頁中已經成功渲染按鈕組件了。
<template>
  <div id="app">
    <img alt="Vue logo" src="./assets/logo.png">
    <el-button type="primary">測試按鈕</el-button>
    <HelloWorld msg="Welcome to Your Vue.js App"/>
  </div>
</template>
二、安裝路由
由於Vue在開發時對路由支援的不足,於是官方補充了vue-router插件。
Vue的單頁面應用是基於路由和組件的,路由用於設定訪問路徑,並將路徑和組件映射起來。
在終端中通過這個命令安裝:
npm install vue-router -S
安裝完成之後,同樣在main.js中掛載它。我們項目src的目錄下創建一個router文件夾,用於存放路由映射文件。
在router文件夾下創建index.js和routers.js,分別用於初始化路由和配置路由映射。程式碼如下:
index.js:
import Vue from 'vue';
import Router from 'vue-router';
import constantRoutes from './routers';


const originalPush = Router.prototype.push;
Router.prototype.push = function (location) {
    return originalPush.call(this, location).catch(err => err);
};

Vue.use(Router);

const createRouter = () => new Router({
    scrollBehavior: () => ({ y: 0 }),
    routes: constantRoutes
})

const router = createRouter()


export function resetRouter() {
    const newRouter = createRouter()
    router.matcher = newRouter.matcher
}

/**
 * 全局前置守衛
 * @func beforeEach
 * @param {object} to 即將要進入的目標 路由對象
 * @param {object} form 當前導航正要離開的路由
 * @func next 進行管道中的下一個鉤子
 */
router.beforeEach(async (to, form, next) => {

});


/**
 * 全局後置鉤子
 * @func afterEach
 * @param {object} to 即將要進入的目標 路由對象
 * @param {object} form 當前導航正要離開的路由
 */
router.afterEach((to, form) => { });


export default router;
routers.js:
/**
 * 逐個導出模組
 */
export const constantRoutes = [
    {
        path: '/',
        redirect: '/home'
    },
]

export default [
    ...constantRoutes,
];
然後在main.js中做好配置:
import Vue from 'vue'
import App from './App.vue'
//引入elementUI
import ElementUI from 'element-ui';
import 'element-ui/lib/theme-chalk/index.css'; //樣式文件一定要引入

//載入路由
import router from './router/index.js';

Vue.config.productionTip = false

Vue.use(ElementUI)
new Vue({
    router,
    render: h => h(App),
}).$mount('#app')
保存之後,可能會報ESLint校驗規則的錯:
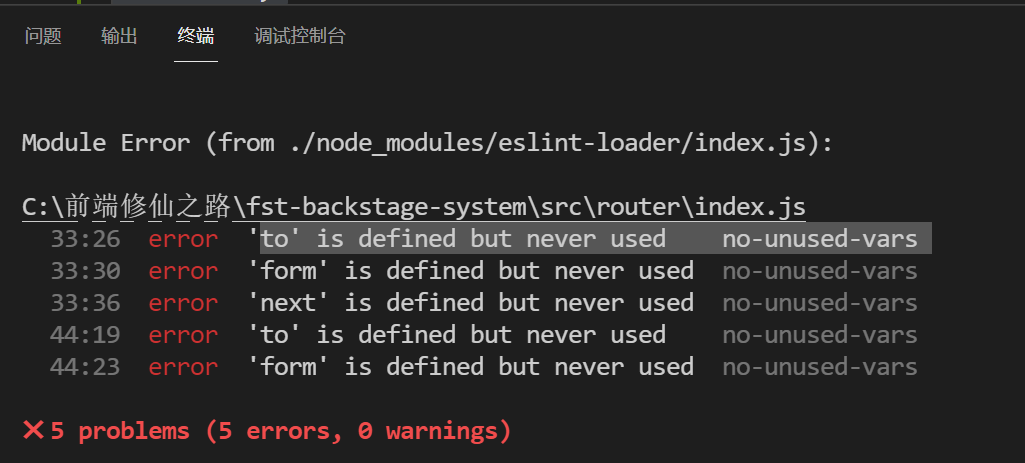
我們先不配置程式碼校驗規則先,後面我們再單獨講程式碼編寫規範。
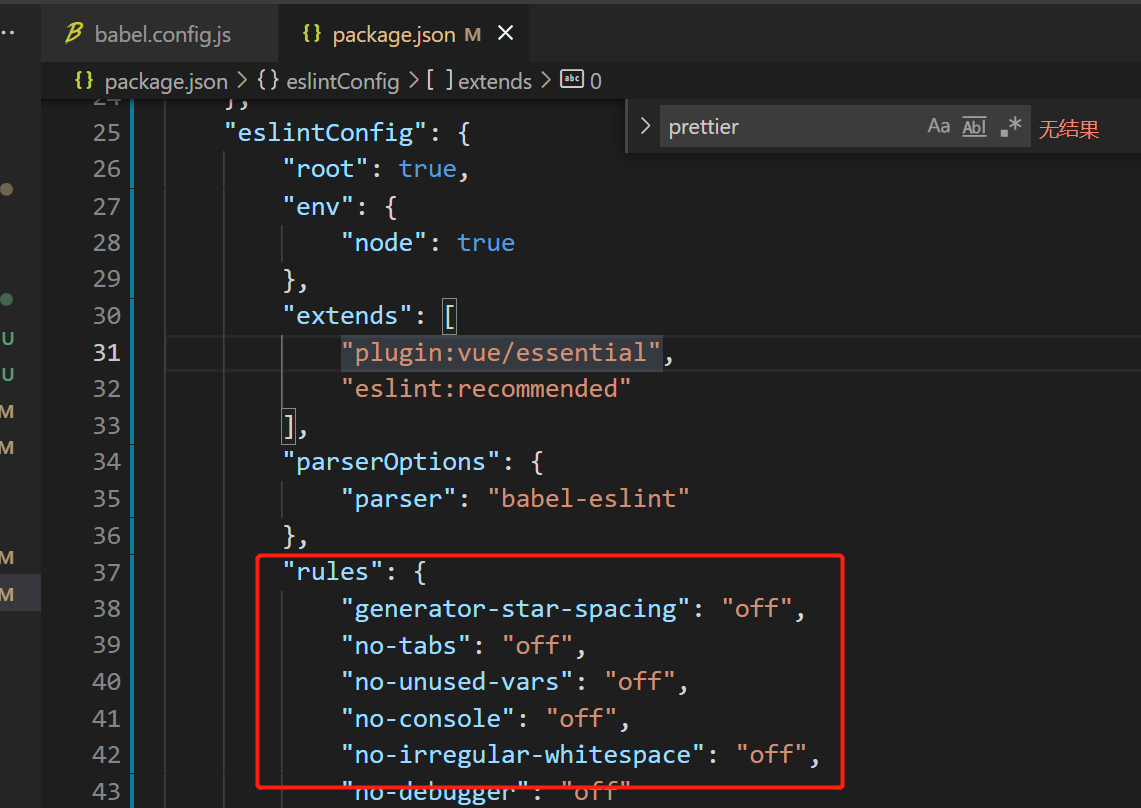
去掉程式碼校驗的話,在package.json文件的eslintConfig欄位中,加入這些程式碼,然後重啟項目,就可以了。
"rules": {
            "generator-star-spacing": "off",
            "no-tabs": "off",
            "no-unused-vars": "off",
            "no-console": "off",
            "no-irregular-whitespace": "off",
            "no-debugger": "off"
        }
然後我們的路由安裝就算完成了。
三、安裝Vuex
在開發大型項目的過程中,還是會常常用到vuex的,關於vuex官方的解釋是:vuex是專門用來管理vue.js應用程式中狀態的一個插件。他的作用是將應用中的所有狀態都放在一起,集中式來管理。描述可能會有些晦澀難懂,不理解的同學,我們邊用邊學。
在終端中通過這個命令來安裝:
npm install vuex --S
靜靜等待安裝完成後,我們將它裝載在Vue中,步驟跟裝載路由差不多,現在src目錄下創建store文件夾,然後創建index.js
import Vue from 'vue';
import Vuex from 'vuex';


const modulesFiles = require.context('./modules', true, /\.js$/)
const modules = modulesFiles.keys().reduce((modules, modulePath) => {
    const moduleName = modulePath.replace(/^\.\/(.*)\.\w+$/, '$1')
    const value = modulesFiles(modulePath)
    modules[moduleName] = value.default
    return modules
}, {})


Vue.use(Vuex);
export default new Vuex.Store({
    modules: modules
});
再在store文件夾下創建modules文件夾,主要用於存放狀態數據模組文件的,先不用創建文件:
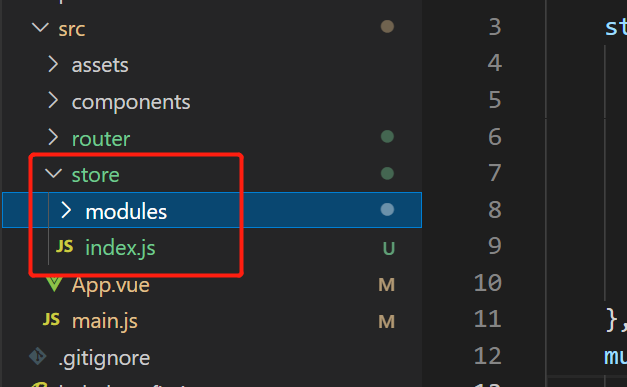
然後就是在main.js中裝載vuex,
import Vue from 'vue'
import App from './App.vue'
//引入elementUI
import ElementUI from 'element-ui';
import 'element-ui/lib/theme-chalk/index.css'; //樣式文件一定要引入

//載入路由
import router from './router/index.js';

//載入vuex
import store from './store/index.js'

Vue.config.productionTip = false

Vue.use(ElementUI)
new Vue({
    store,
    router,
    render: h => h(App),
}).$mount('#app')
裝載好之後,如果沒報錯的話,那麼對於必要的三件套已經是安裝完成了。
其實還有一個插件是必用的,就是關於網路請求的,但這篇內容已經很多了,後面用單獨一章來幫助大家了解怎麼封裝網路請求和裝哪個網路請求的插件。
好了,這章的內容就先到這了,下一章說一下完善項目的架構。
