帶你入門SpringCloud 之 通過SpringCloud Bus 自動更新配置
- 2019 年 10 月 4 日
- 筆記
前言
在《帶你入門SpringCloud統一配置 | SpringCloud Config》中通過 SpringCloud Config 完成了統一配置基礎環境搭建,但是並沒有實現配置修改自動更新的操作(GitHub 或Gitee 修改配置後,需要重啟配置服務才能更新配置)。
本文是《帶你入門SpringCloud統一配置 | SpringCloud Config》的續篇,通過 SpringCloud Bus 完成配置修改自動更新的操作介紹。
閱讀本文前需要你先移步《帶你入門SpringCloud統一配置 | SpringCloud Config》因為本文是在其基礎上進行講解的。
另外需要你熟悉 SpringBoot 項目的基本使用即可,還有一點需要注意的是在操作過程中盡量和我本地環境一致,因為環境不一致可能會帶來一些問題。我本地環境如下:
- SpringBoot Version: 2.1.0.RELEASE
- SpringCloud Version: Greenwich.RELEASE
- Apache Maven Version: 3.6.0
- Java Version: 1.8.0_144
- IDEA:Spring Tools Suite (STS)
接下來就開始 SpringCloud Bus 環境搭建操作介紹!
SpringCloud Bus 環境搭建
第一步:安裝並啟用 RabbitMQ,這裡就不做詳細介紹了。可以查看之前的總結:Windows 環境安裝 RabbitMQ
如果你的 RabbitMQ和 Config Server 端不在一台機器上,或者埠、用戶名、密碼不是使用的默認配置,那麼你需要進行如下配置在 Config Server 端 application.properties 中
spring.rabbitmq.host=rabbitmq 服務IP地址
spring.rabbitmq.port=rabbitmq 服務埠號
spring.rabbitmq.username=rabbitmq 服務用戶名
spring.rabbitmq.password=rabbitmq 服務密碼
第二步:在 Config Server 端端和客戶端都引入 spring-cloud-starter-bus-amqp 依賴。具體程式碼如下:
<dependency> <groupId>org.springframework.cloud</groupId> <artifactId>spring-cloud-starter-bus-amqp</artifactId> </dependency>第三步:在Config Server 端的 application.properties 中需要添加如下配置,目的是把刷新配置介面暴露出來,具體配置如下:
management.endpoints.web.exposure.include= *第四步:Config Client 端引入openfeign starter 依賴,具體程式碼如下:
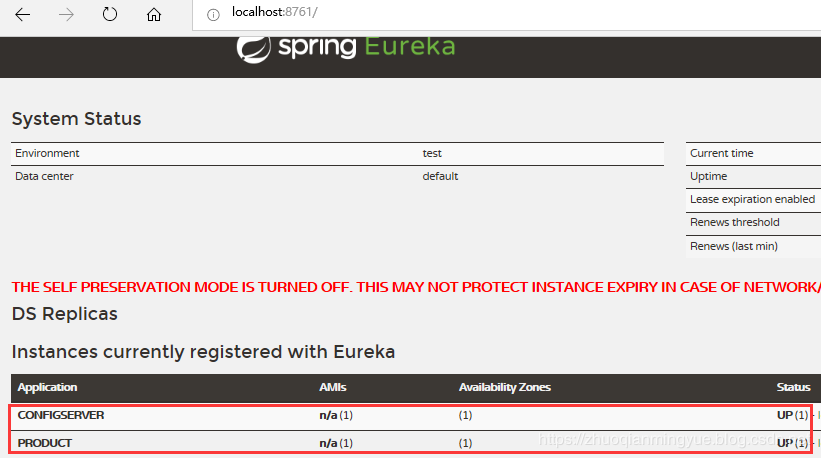
<dependency> <groupId>org.springframework.cloud</groupId> <artifactId>spring-cloud-starter-openfeign</artifactId> </dependency>第五步:驗證 Config Server 端和 Config Client 端是否在 RabbitMQ 註冊隊列和是否註冊到 Eureka Server 端上。如下圖所示:
需要先啟動 Eureka Server 服務端,然後在依次啟動 Config Server端和Config Client端。

第六步:Config Client 端上訪問配置的 Controller 聲明刷新配置作用域@RefreshScope。具體程式碼如下:
@RestController @RefreshScope public class EvnController { @Value("${env}") private String env; @RequestMapping("/env") public String evn() { return this.env; } }不添加 @RefreshScope註解,配置更新後不會生效。
如果是自定義前綴配置需要在@ConfigurationProperties下添加 @RefreshScope即可,
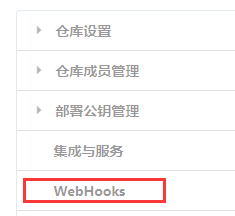
最七步在 Gitee 上配置 WebHooks,具體操作方式如下圖所示:
進入Gitee 點擊管理,然後點擊 WebHooks。

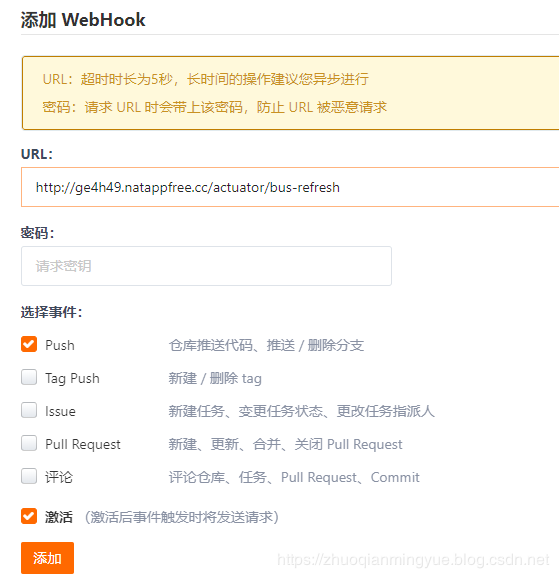
點擊添加按鈕添加新的 WebHooks 設置。

輸入本地映射外網訪問域名+/actuator/bus-refresh,自己測試可以使用 NATAPP 進行內網穿穿透配置。具體配置請查看 https://natapp.cn/。
測試
手動訪問更新鏈接進行測試
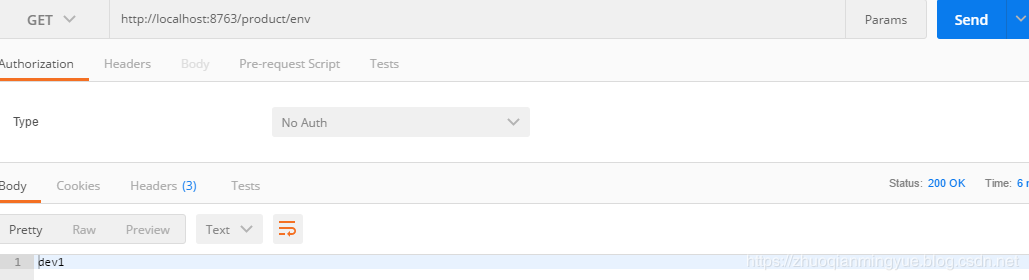
修改配置在碼雲遠程倉庫上,然後使用 PostMan 訪問:http://localhost:8080/actuator/bus-refresh ,如下圖所示:
這裡演示直接是在碼雲上操作,相當於執行 git push 操作。
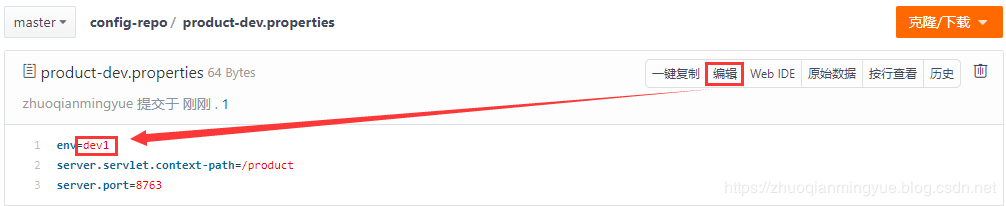

然後在查看商品服務(Config Client端)配置是否生效。如下圖所示自動更新成功!
WebHooks 測試
進入 WebHooks 設置,然後點擊測試。會報如下圖所示錯誤:

解決方案:
參考來CSDN 作者 tinysakurac 解決方案。
文章:《解決使用spring cloud config bus使用webhook自動刷新出現的400問題》 (https://blog.csdn.net/m0_37556444/article/details/82812816)
問題產生原因:GitHub在進行 POST 請求的同時默認會在 Body 加上這麼一串載荷(payload),而 /actuator/bus-refresh 介面沒有進行接受這些資訊處理,所以就報錯了。
解決問題思路:通過攔截器攔截 bus-refresh請求,然後在 HttpServletRequestMapper 包裝類將 Request中 Body 內容置空。具體程式碼如下:
攔截 bus-refresh請求Filter 類。
public class BusRefreshFilter implements Filter{ @Override public void doFilter(ServletRequest request, ServletResponse response, FilterChain chain) throws IOException, ServletException { HttpServletRequest httpServletRequest = (HttpServletRequest)request; String url = new String(httpServletRequest.getRequestURI()); //只過濾/actuator/bus-refresh請求 if (!url.endsWith("/bus-refresh")) { chain.doFilter(request, response); return; } //使用HttpServletRequest包裝原始請求達到修改post請求中body內容的目的 CustometRequestWrapper requestWrapper = new CustometRequestWrapper(httpServletRequest); chain.doFilter(requestWrapper, response); } }自定義 HttpServletRequestWrapper 類
public class CustometRequestWrapper extends HttpServletRequestWrapper{ public CustometRequestWrapper(HttpServletRequest request) { super(request); } @Override public ServletInputStream getInputStream() throws IOException { byte[] bytes = new byte[0]; ByteArrayInputStream byteArrayInputStream = new ByteArrayInputStream(bytes); return new ServletInputStream() { @Override public boolean isFinished() { return byteArrayInputStream.read() == -1 ? true:false; } @Override public boolean isReady() { return false; } @Override public void setReadListener(ReadListener readListener) { } @Override public int read() throws IOException { return byteArrayInputStream.read(); } }; } }將攔截 bus-refresh請求Filter 添加到 Spring 上下文中配置類。
@Configuration public class FilterConfig { @Bean public FilterRegistrationBean<BusRefreshFilter> filterRegistration() { FilterRegistrationBean<BusRefreshFilter> registration = new FilterRegistrationBean<BusRefreshFilter>(); registration.setFilter(new BusRefreshFilter()); List<String> urlList = new ArrayList<String>(); urlList.add("/*"); registration.setUrlPatterns(urlList); registration.setName("BusRefreshFilter"); registration.setOrder(1); return registration; } }
然後修改Gitee 上的配置資訊後就可以自動更新了,這裡就不在進行演示操作來。
還有一種方式是通過訪問 Config Server端域名/monitor 來取代 Config Server端域名//actuator/bus-refresh。本方式個人嘗試沒有成功!具體配置官網介紹如下:
Many source code repository providers (such as Github, Gitlab, Gitea, Gitee, Gogs, or Bitbucket) notify you of changes in a repository through a webhook. You can configure the webhook through the provider』s user interface as a URL and a set of events in which you are interested. For instance, Github uses a POST to the webhook with a JSON body containing a list of commits and a header (X-Github-Event) set to push. If you add a dependency on the spring-cloud-config-monitor library and activate the Spring Cloud Bus in your Config Server, then a /monitor endpoint is enabled.
在Config Server 添加 spring-cloud-config-monitor 依賴
<dependency> <groupId>org.springframework.cloud</groupId> <artifactId>spring-cloud-config-monitor</artifactId> </dependency>然後在Config Client 添加如下配置:
參考:https://github.com/spring-cloud/spring-cloud-bus/issues/124
spring.cloud.bus.id=${vcap.application.name:${spring.application.name:application}}:${vcap.application.instance_index:${spring.profiles.active:${local.server.port:${server.port:0}}}}:${vcap.application.instance_id:${random.value}}小結
當將遠程倉庫配置文件修改後,通過GitHub 或者 Gitee 的 WebHooks 配置自動訪問介面bus-refresh 來通知Config Server 端。
Config Server 端收到請求後將配置 clone 下來,然後通過消息隊列(默認是RabbitMQ)將修改後的配置發送給 Config Client 端。Config Client 端收到消息後重新從Config Server 端獲取最新的配置資訊。
而WebHooks 配置請求介面 bus-refresh 和消息隊列發送配置給 Config Client 端都是 SpringCloud Bus 幫助我們完成的。
程式碼示例
如果你按照上述方式搭建並未成功,可以參考我在GitHub 項目 spring-cloud-get-started 倉庫中模組名為:
spring-cloud-config-eureka-service
spring-cloud-config-server
spring-cloud-config-product-service
進行對比查看是否配置有誤。
spring-cloud-get-started 項目地址:https://github.com/zhuoqianmingyue/spring-cloud-get-started
參考文獻
https://blog.csdn.net/m0_37556444/article/details/82812816 By tinysakurac
https://cloud.spring.io/spring-cloud-config/reference/html/
