wait()與notify()
- 2019 年 10 月 3 日
- 筆記
一,前言
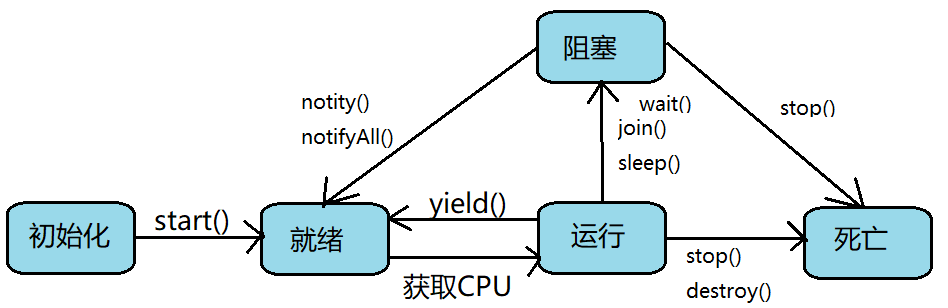
簡單畫了一下執行緒的流程圖,只是一個大概。如圖所示,執行緒有多種狀態,那麼不同狀態之間是如何切換的,下面主要總結關於wait()和notify()的使用。
二,wait()
wait()和notify()都是定義在Object類中,為什麼如此設計。因為synchronized中的這把鎖可以是任意對象,所以任意對象都可以調用wait()和notify(),並且只有同一把鎖才能對執行緒進行操作,不同鎖之間是不可以相互操作的,所以wait和notify屬於Object。請看如下API文檔說明。

wait()提供三種構造方法,但前兩種最為常用,wait()是讓執行緒一直處於等待狀態,直到手動喚醒,而wait(long timeout)可以指定等待時間,之後會自動喚醒。
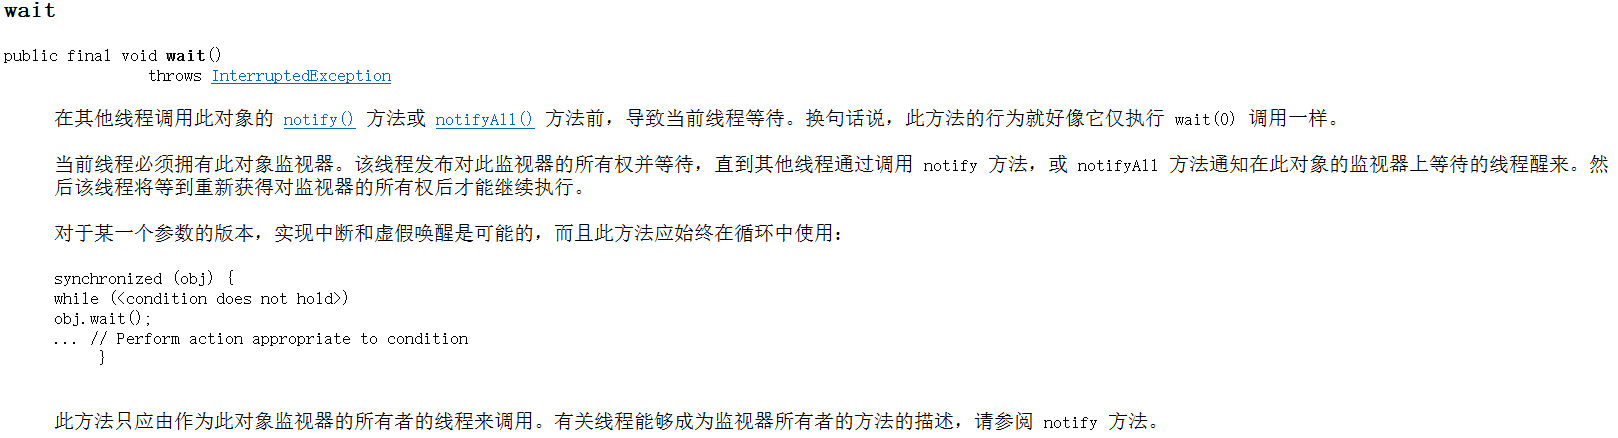
調用wait方法可以讓當前執行緒進入等待喚醒狀態,該執行緒會處於等待喚醒狀態直到另一個執行緒調用了object對象的notify方法或者notifyAll方法。
三,notify()

notify()喚醒等待的執行緒,如果監視器種只有一個等待執行緒,使用notify()可以喚醒。但是如果有多條執行緒notify()是隨機喚醒其中一條執行緒,與之對應的就是notifyAll()就是喚醒所有等待的執行緒,請看下面實例程式碼。
案例:定義兩條執行緒,分別讓其執行緒等待,及執行緒喚醒。
1,定義執行緒。
public class SetTarget implements Runnable{ private Demo demo; public SetTarget(Demo demo) { this.demo = demo; } @Override public void run() { demo.set(); } }public class GetTarget implements Runnable { private Demo demo; public GetTarget(Demo demo) { this.demo = demo; } @Override public void run() { demo.get(); } } 2,編寫main方法。
public class Demo { // 定義一個訊號量 private volatile int signal; public static void main(String[] args) { Demo demo = new Demo(); SetTarget set = new SetTarget(demo); GetTarget get = new GetTarget(demo); // 開啟執行緒, new Thread(get).start(); new Thread(get).start(); new Thread(get).start(); new Thread(get).start(); try { TimeUnit.SECONDS.sleep(1); } catch (InterruptedException e) { e.printStackTrace(); } new Thread(set).start(); } // set方法喚醒執行緒 public synchronized void set() { signal = 1; // notify方法會隨機叫醒一個處於wait狀態的執行緒 notify(); // notifyAll叫醒所有的處於wait執行緒,爭奪到時間片的執行緒只有一個 //notifyAll(); System.out.println("叫醒執行緒叫醒之後休眠開始..."); try { Thread.sleep(3000); } catch (InterruptedException e) { e.printStackTrace(); } } // get方法使執行緒進入等待狀態 public synchronized int get() { System.out.println(Thread.currentThread().getName() + " 方法執行了..."); if (signal != 1) { try { wait(); System.out.println("叫醒之後"); } catch (InterruptedException e) { e.printStackTrace(); } } System.out.println(Thread.currentThread().getName() + " 方法執行完畢..."); return signal; } } 3,運行結果。
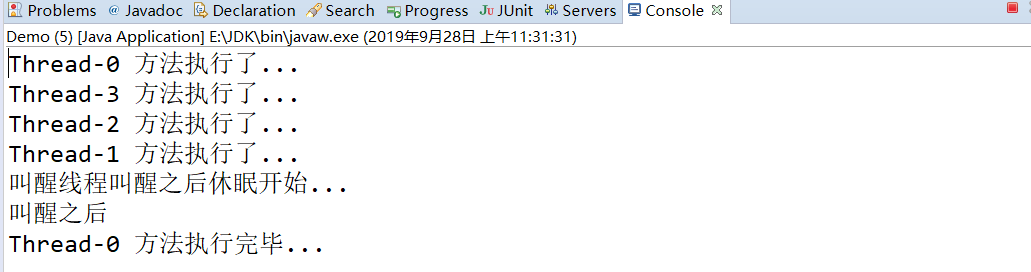
分析:一共開啟了4個執行緒,當全部進入等待狀態時,調用notify()方法喚醒執行緒,但很明顯只喚醒了其中一條執行緒。右上角顯示程式並沒有停止,原因就是其他3條執行緒仍在處於等待狀態。
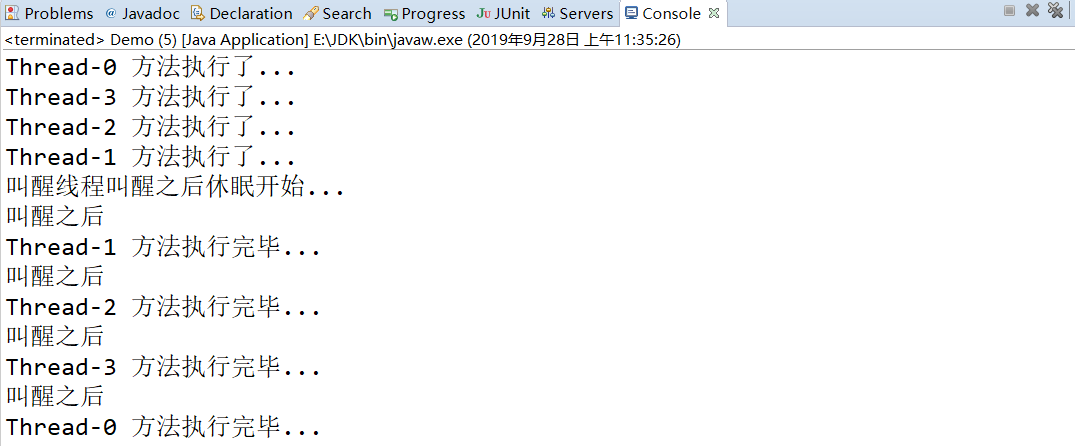
使用notifyAll()喚醒執行緒:
四,生產者-消費者模式
生產者-消費者模式,生產者生產商品,然後通知消費者進行消費。
1,定義生產者
public class Vendor { // 定義庫存數量 private int count; // 定義最大庫存 private final int MAX_COUNT = 10; public synchronized void production() { while (count >= MAX_COUNT) { try { System.out.println(Thread.currentThread().getName() + "庫存數量達到最大值,停止生產。"); // 此時生產執行緒全部進入等待狀態 wait(); } catch (InterruptedException e) { e.printStackTrace(); } } // 否則生產商品 count++; System.out.println(Thread.currentThread().getName() + "正在生產商品,當前庫存為:" + count); notifyAll(); } public synchronized void consumers() { while (count <= 0) { try { System.out.println(Thread.currentThread().getName() + "沒有商品了,消費者處於等待狀態..."); wait(); } catch (InterruptedException e) { e.printStackTrace(); } } count--; System.out.println(Thread.currentThread().getName() + "正在消費,當前庫存為:" + count); notifyAll(); } } 2,分別定義兩條執行緒。
public class SetTarget implements Runnable { private Vendor vendor; public SetTarget(Vendor vendor) { this.vendor = vendor; } @Override public void run() { while(true){ vendor.production(); try { Thread.sleep(1000); } catch (InterruptedException e) { // TODO Auto-generated catch block e.printStackTrace(); } } } }public class GetTarget implements Runnable { private Vendor vendor; public GetTarget(Vendor vendor) { this.vendor = vendor; } @Override public void run() { while(true){ vendor.consumers(); try { Thread.sleep(1000); } catch (InterruptedException e) { // TODO Auto-generated catch block e.printStackTrace(); } } } } 3,主方法。
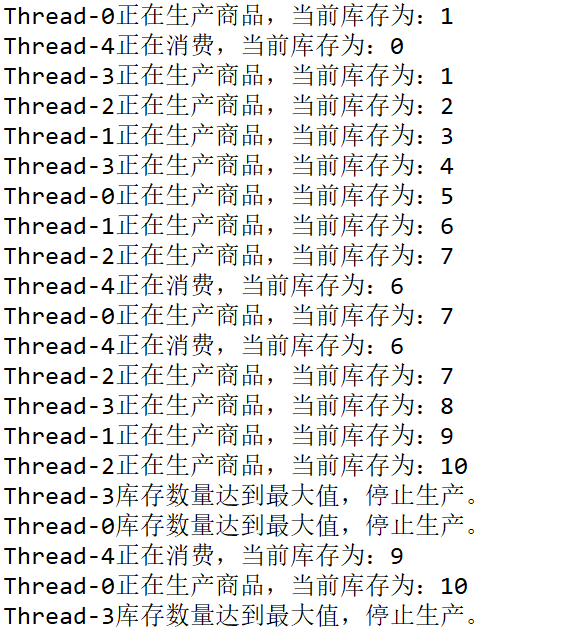
public class Demo { public static void main(String[] args) { Vendor vendor = new Vendor(); SetTarget set = new SetTarget(vendor); GetTarget get = new GetTarget(vendor); // 開啟執行緒生產商品 new Thread(set).start(); new Thread(set).start(); new Thread(set).start(); new Thread(set).start(); // 開啟消費者執行緒 new Thread(get).start(); } } 4,運行結果。
五,總結
執行緒之間通訊就做這麼一個簡單的總結,以上內容如有錯誤,歡迎留言指正。
感謝閱讀!
