Spring Boot(二) 配置文件
- 2019 年 10 月 3 日
- 筆記
文章導航-readme
一、配置Spring Boot熱部署
技術的發展總是因為人們想偷懶的心理,如果我們不想每次修改了程式碼,都必須重啟一下伺服器,並重新運行程式碼。那麼可以配置一下熱部署。有了它之後,修改了程式碼只需要重新build一下,就可以看到效果了,不需要重啟伺服器。
1.配置熱部署
- pom.xml文件中添加如下依賴:
<dependency> <groupId>org.springframework.boot</groupId> <artifactId>spring-boot-devtools</artifactId> <optional>true</optional> </dependency>- 修改pom.xml文件
<build> <plugins> <plugin> <groupId>org.springframework.boot</groupId> <artifactId>spring-boot-maven-plugin</artifactId> <configuration> <!--開啟熱部署--> <fork>true</fork> </configuration> </plugin> </plugins> </build>修改pom.xml文件後,idea會彈出一個讓你自動導入包的文件,點擊Import Changes。就會自動將jar包下載到依賴庫中。
如此,就實現了Spring Boot的熱部署,此時修改我們的程式碼,只需重新Build一下就可以了。
2. 配置自動build
當然,如果你更懶的話,練build都不想做,也可以在Idea中配置自動Build(自動Build僅支援Spring Boot項目)。
- 打開Idea->File->Settings…可以看到如下介面
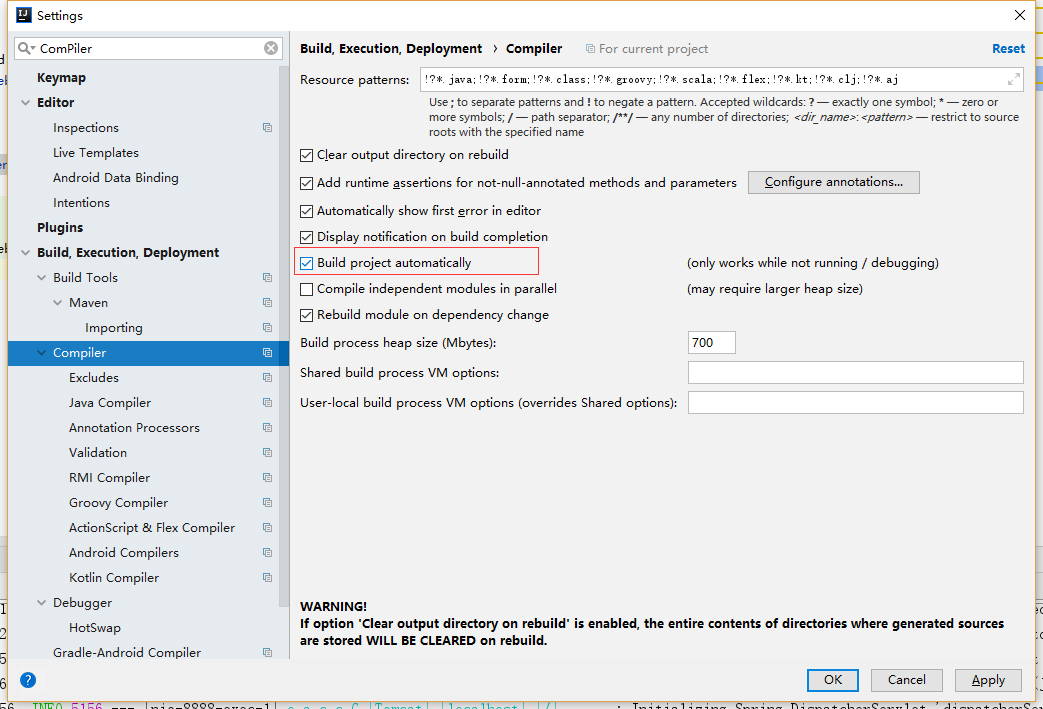
選中上圖中的Build Project automatical
- 按組合鍵
Shift+ALT+Ctrl+/選擇Registry可以看到如下介面
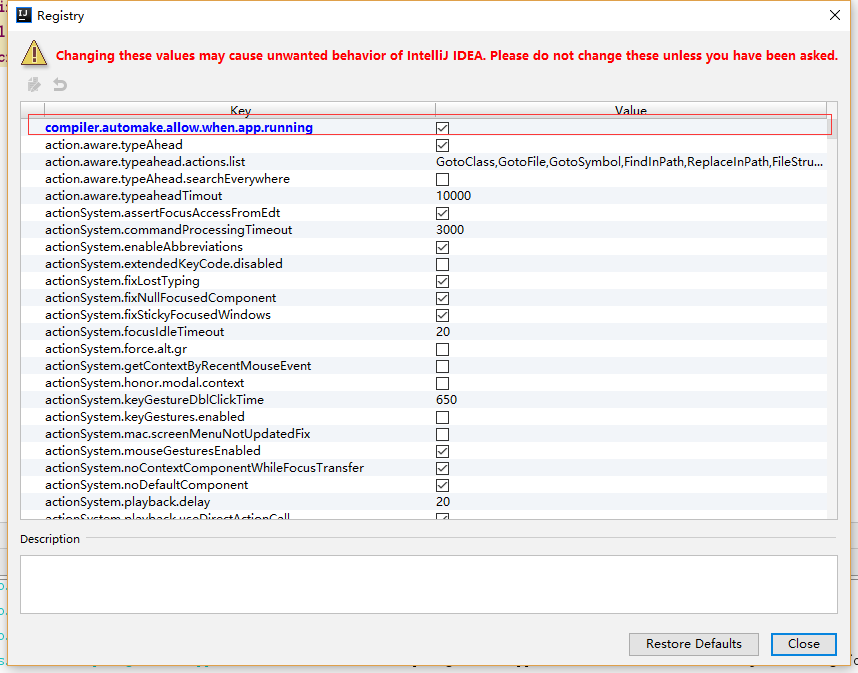
選中上圖中的complier.automake.allow.when.app.running
如此,修改我們的程式碼後,無需重新build也無需重新重啟。
二、Spring Boot讀取配置文件
- 修改我們的配置文件
application.properties
server.port=8888 <!--網站配置--> website.name=Loading website.domin=www.loading.ink website.title=我的部落格網站 website.description=分享我的生活和技術- 新建配置文件類
WebSiteConfig
package spring.boot.web.config; import org.springframework.beans.factory.annotation.Value; import org.springframework.boot.context.properties.ConfigurationProperties; import org.springframework.context.annotation.Configuration; import org.springframework.context.annotation.PropertySource; import java.text.MessageFormat; @Configuration //@ConfigurationProperties(prefix = "website") //要讀取的配置文件地址 @PropertySource(value = "classpath:application.properties") public class WebSiteConfig { @Value("${website.title}") private String title; @Value("${website.domain}") private String domain; @Value("${website.description}") private String description; public String getTitle() { return title; } public void setTitle(String title) { this.title = title; } public String getDomain() { return domain; } public void setDomain(String domain) { this.domain = domain; } public String getDescription() { return description; } public void setDescription(String description) { this.description = description; } @Override public String toString() { return MessageFormat.format("Title:{0} Domin:{1} Description:{2}", title, domain, description); } } 讀取配置文件中的配置有兩種方式
1.@ConfigurationProperties(prefix = "website")用於綁定屬性,其中prefix表示所綁定的屬性的前綴。如果配置文件中的配置和屬性名一致可以用此種方式
2.@Value("${website.title}") 綁定配置文件中的屬性
注意:
註解@Configuration用於定義配置類
註解@PropertySource(value = "classpath:application.properties")代表要讀取配置文件的路徑當配置文件是application.properties時,這個註解可以省略不寫
- 新建
WebSiteController
package spring.boot.web.controller; import org.springframework.beans.factory.annotation.Autowired; import org.springframework.web.bind.annotation.RequestMapping; import org.springframework.web.bind.annotation.RequestMethod; import org.springframework.web.bind.annotation.RestController; import spring.boot.web.config.WebSiteConfig; @RequestMapping("/website") @RestController public class WebSiteController { //通過@Autowired註解注入bean @Autowired private WebSiteConfig webSiteConfig; @RequestMapping(method = RequestMethod.GET) public String get() { return webSiteConfig.toString(); } } - 測試運行
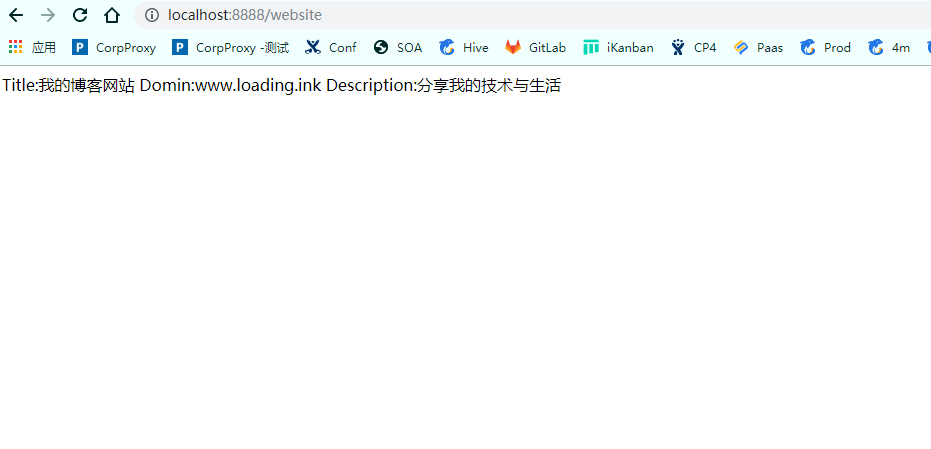
- 注意,如果第一次運行時遇到讀取配置文件里的中文亂碼的問題。其主要原因可能是因為配置文件的格式並不是utf-8的格式。此時可在idea中進行設置。
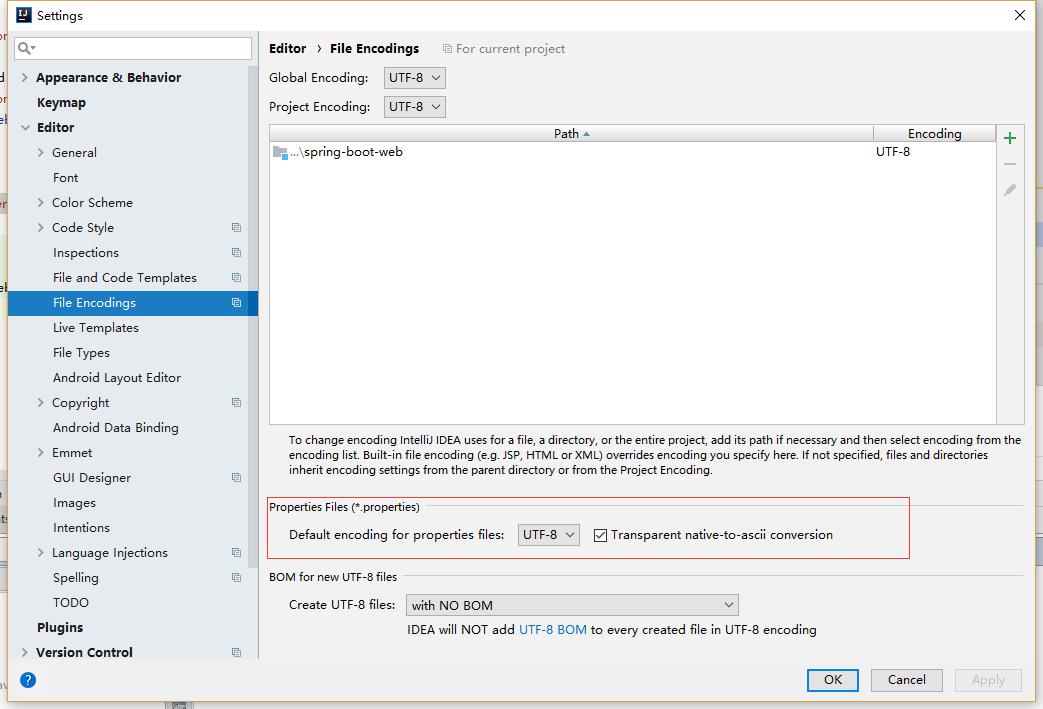
如上圖所示更改為uft-8,注意後面的一定要勾選上。
通過上面配置後如果還不行,可以將配置文件刪除後重新建一個,問題就可以解決!
三、Spring Boot Profile
Spring Boot 使用一個全局的配置文件 application.properties ,Spring Boot 的全局配置文件的作用是對一些默認配置的配置值進行修改。
在日常開發中,我們常常會遇到一個問題。就是在不同的環境使用不同的配置。比如生產、開發、測試三個不同的環境,我們的配置肯定不一樣。這時,我們就要用到Profile。
Profile 是 Spring 用來針對不同的環境對不同的配置提供支援的,全局 Profile 配置使用 application-{profile}.properties(如 application-dev.properties)。通過在 application.properties 中設置 spring.profiles.active = dev 來指定活動的 Profile。
- 依次再目錄下面新建三個配置文件,
application-dev.properties、application-test.properties、application-prod.properties。它們分別代表開發環境、測試環境、生產環境的配置文件。
server.port=8887 website.title=我的部落格網站--Dev website.domain=www.loading.ink website.description=分享我的技術與生活server.port=8886 website.title=我的部落格網站--test website.domain=www.loading.ink website.description=分享我的技術與生活server.port=8885 website.title=我的部落格網站--prod website.domain=www.loading.ink website.description=分享我的技術與生活- 接下來修改
application.properties:表示,將採用application-dev.properties這個配置文件。
spring.profiles.active=dev 測試運行我們可以看到會啟動開發環境配置文件的埠8887
注意:配置文件會優先獲取Profile中的配置,如果Profile中沒有的配置項, 那麼會直接取application.properties中的配置
