ZooKeeper單機客戶端的啟動流程源碼閱讀
- 2019 年 10 月 3 日
- 筆記
客戶端的啟動流程

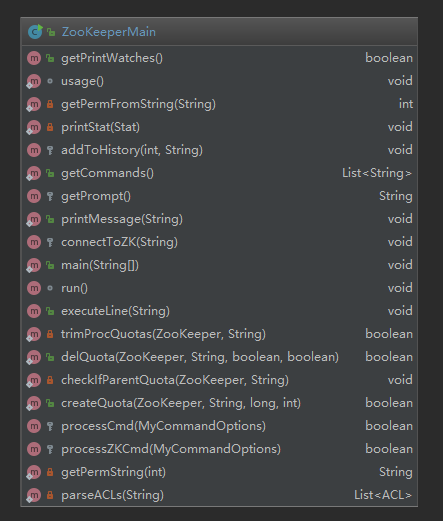
看上面的客戶端啟動的腳本圖,可以看到,zookeeper客戶端腳本運行的入口ZookeeperMain.java的main()方法, 關於這個類可以理解成它是程式啟動的輔助類,由它提供開始的位置,進而載入出zk client的上下文
創建ZooKeeperMain對象
// todo zookeeper的入口方法 public static void main(String args[]) throws KeeperException, IOException, InterruptedException { // todo new ZK客戶端 ZooKeeperMain main = new ZooKeeperMain(args); // todo run方法的實現在下面 main.run(); }跟蹤
ZooKeeperMain main = new ZooKeeperMain(args);能往下追很長的程式碼,提前說main.run()的作用,就是對用戶輸入的命令進行下一步處理
如上是入口函數的位置,跟進這兩個函數,可以找到我們在client端的命令行中可以輸入命令和zookeeper服務端進行通訊的原因(開起了新的執行緒),以及zookeeper的客戶端所依賴的其他類
跟進ZooKeeperMain main = new ZooKeeperMain(args);
public ZooKeeperMain(String args[]) throws IOException, InterruptedException { cl.parseOptions(args); System.out.println("Connecting to " + cl.getOption("server")); // todo 連接到客戶端 connectToZK(cl.getOption("server")); }我們在命令行啟動客戶端時,輸入命令zkCli.sh -server localhost:2181,其中的args數組, 就是我們在啟動就是我們輸入的參數,
構建zookeeperMain對象時,上面主要做了兩件事
- 解析args參數數組
- 連接客戶端
解析參數數組的邏輯就在下面, 很熟悉,就是我們在命令行啟動zookeeper時輸入的命令可選項
public boolean parseOptions(String[] args) { List<String> argList = Arrays.asList(args); Iterator<String> it = argList.iterator(); while (it.hasNext()) { String opt = it.next(); try { if (opt.equals("-server")) { options.put("server", it.next()); } else if (opt.equals("-timeout")) { options.put("timeout", it.next()); } else if (opt.equals("-r")) { options.put("readonly", "true"); } } catch (NoSuchElementException e) { System.err.println("Error: no argument found for option " + opt); return false; } if (!opt.startsWith("-")) { command = opt; cmdArgs = new ArrayList<String>(); cmdArgs.add(command); while (it.hasNext()) { cmdArgs.add(it.next()); } return true; } } return true; }創建ZooKeeper客戶端的對象
接著看如果連接客戶端, connectToZK(String newHost) 同樣是本類方法,源碼如下:
// todo 來到這裡 protected void connectToZK(String newHost) throws InterruptedException, IOException { if (zk != null && zk.getState().isAlive()) { zk.close(); } //todo 命令行中的server 後面跟著 host主機地址 host = newHost; boolean readOnly = cl.getOption("readonly") != null; // todo 創建zookeeper的實例 zk = new ZooKeeper(host, Integer.parseInt(cl.getOption("timeout")), new MyWatcher(), readOnly); }到這裡算是個小高潮吧,畢竟看到了zookeeper client的封裝類ZooKeeper, 這個類上的註解大概是這麼介紹這個類的
- 它是個Zookeeper 客戶端的封裝類, 它的第一個參數是
host:port,host:port,host:port這種格式的字元串,逗號左右都是一個不同步的服務端的地址 - 會非同步的創建session,通常這個session在構造函數執行完之間就已經創建完成了
- watcher 是監聽者,它被通知的時刻不確定,可能是構造方法執行完成前,也可能在這之後
- 只要沒有連接成功, zookeeper客戶端,會一直嘗試從提供的服務地址串中選擇出一個嘗試鏈接
跟進ZooKeeper的構造方法
public ZooKeeper(String connectString, int sessionTimeout, Watcher watcher,boolean canBeReadOnly) throws IOException{ LOG.info("Initiating client connection, connectString=" + connectString + " sessionTimeout=" + sessionTimeout + " watcher=" + watcher); watchManager.defaultWatcher = watcher; // todo 包裝服務端的地址 ConnectStringParser connectStringParser = new ConnectStringParser( connectString); //todo 將服務端的地址封裝進 StaticHostProvider -> HostProvider中 HostProvider hostProvider = new StaticHostProvider(connectStringParser.getServerAddresses()); // todo 創建客戶端的上下文, 這個上下文對象的亮點就是它維護了一個客戶端的socket cnxn = new ClientCnxn(connectStringParser.getChrootPath(), hostProvider, sessionTimeout, this, watchManager, // todo 跟進這個方法,getClientCnxnSocket, 獲取出客戶端上下文中的socket getClientCnxnSocket(), canBeReadOnly); // todo 啟動客戶端 cnxn.start(); }主要做了這麼幾件事
- 將服務端的地址解析封裝進了
StaticHostProvider類中, 可以把這個類理解成專門存放服務端地址的set 集合 - 創建出了客戶端的上下文對象: ClientCnxn, 當然在這之前,入參位置還有一個
getClientCnxnSocket()這個函數可以創建出客戶端的NIO Socket -
然後調用
cnxn.start()其實就是啟動了客戶端的另外兩條執行緒sendThread和eventThread下面會詳細說創建客戶端的 NioSocket
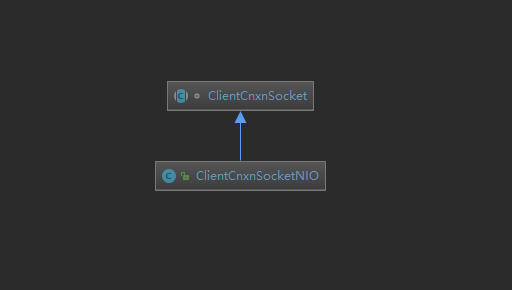
繼續跟進源碼getClientCnxnSocket()通過反射,zk客戶端使用的socket對象是ClientCnxnSocketNIO
//todo 通過反射創建出客戶端上下文中的 socket , 實際的ClientCnxnSocketNIO 是 ClientCnxnSocket的子類 // todo ---> zookeeper 封裝的 NIO的邏輯都在 實際的ClientCnxnSocketNIO private static ClientCnxnSocket getClientCnxnSocket() throws IOException { // todo zookeeper.clientCnxnSocket String clientCnxnSocketName = System.getProperty(ZOOKEEPER_CLIENT_CNXN_SOCKET); if (clientCnxnSocketName == null) { // todo 上面String其實就是這個類的name, 根進去看一下它的屬性 // todo 這個類維護了NioSocket使用到的 selector 選擇器 , 已經發生的感興趣的事件SelectionKey clientCnxnSocketName = ClientCnxnSocketNIO.class.getName(); } try { // todo 可以看到客戶端使用的 NioSocket return (ClientCnxnSocket) Class.forName(clientCnxnSocketName).getDeclaredConstructor() .newInstance(); } catch (Exception e) { IOException ioe = new IOException("Couldn't instantiate " + clientCnxnSocketName); ioe.initCause(e); throw ioe; } }創建 ClientCnxn客戶端的上下文
創建上下文,構造函數中的諸多屬性都是在前面讀取配置文件或是新添加進來的,重點是最後兩行,它創建了兩條執行緒類,和zk客戶端的IO息息相關
public ClientCnxn(String chrootPath, HostProvider hostProvider, int sessionTimeout, ZooKeeper zooKeeper, ClientWatchManager watcher, ClientCnxnSocket clientCnxnSocket, long sessionId, byte[] sessionPasswd, boolean canBeReadOnly) { this.zooKeeper = zooKeeper; this.watcher = watcher; this.sessionId = sessionId; // todo 剛才傳遞過來的值為0 this.sessionPasswd = sessionPasswd; this.sessionTimeout = sessionTimeout; this.hostProvider = hostProvider; this.chrootPath = chrootPath; connectTimeout = sessionTimeout / hostProvider.size(); // todo 添加read的超時時間 readTimeout = sessionTimeout * 2 / 3; readOnly = canBeReadOnly; // todo 創建了一個seadThread 執行緒 sendThread = new SendThread(clientCnxnSocket); eventThread = new EventThread(); }創建SendThread

sendThred是一個客戶端的執行緒類,什麼時候開啟? 其實就在上面,當創建了ClientCnxn後,調用的cnxn.start()就是在開啟它的run() , 它有什麼作用? 它的run()是一個無限循環,除非運到了close的條件,否則他就會一直循環下去, 比如向服務端發送心跳,或者向服務端發送我們在控制台輸入的數據以及接受服務端發送過來的響應
這是他的構造方法,可以看到它還是一個守護執行緒,並擁有客戶端socket的應用,有了NIO Socket相關技能
//todo SendThread(ClientCnxnSocket clientCnxnSocket) { super(makeThreadName("-SendThread()")); // todo 設置狀態 Connecting state = States.CONNECTING; // todo 就是在 Zookeeper new ClientCnxn 時, 在倒數第二個位置使傳遞進去一個函數實際的 this.clientCnxnSocket = clientCnxnSocket; // todo 設置成守護執行緒 setDaemon(true); }它的Run方法, 真的是好長啊, 比我上面寫的部分內容還長(大概兩百行了), 大概它的流程 ,每次循環:
- 檢查一下客戶端的socket有沒有和服務端的socket建立連接
- 沒有建立連接
- 嘗試選出其他的server地址進行連接
- 如果滿足close的條件,直接break 跳出整個while循環
- 如果已經建立了連接
- 計算 to = 讀取的超時時間 – 服務端的響應時間
- 未連接的狀態
- 計算 to = 連接超時時間 – 服務端的響應時間
- 上面的兩個to, 如果小於0, 說明客戶端和服務端通訊出現了異常, 很可能是server的session time out,於是拋出異常
- 如果連接狀態是健康的,向服務端發送心跳
clientCnxnSocket.doTransport(to, pendingQueue, outgoingQueue, ClientCnxn.this);向服務端發送數據
- 沒有建立連接
在這個負責和服務端進行IO操作的執行緒中,只要不是close等重大的一般可以預知的異常都有try起來,然後記錄日誌,並沒有其他操作,循環還是會進行
// todo introduce 介紹 clientCnxnSocket.introduce(this,sessionId); // todo this,sessionId == 0 clientCnxnSocket.updateNow(); clientCnxnSocket.updateLastSendAndHeard(); int to; long lastPingRwServer = Time.currentElapsedTime(); final int MAX_SEND_PING_INTERVAL = 10000; //10 seconds InetSocketAddress serverAddress = null; // todo 這個while循環中存在建立連接的過程, 已經連接建立失敗後不斷重試的過程 //todo state.isAlive() 默認是 NOT_CONNECTED while (state.isAlive()) { try { //todo 1111 如果socket還沒有連接 ///////////////////////////////////////////////////////////////////////////////////////////////////////// //todo 如果socket還沒有連接 if (!clientCnxnSocket.isConnected()) { // todo 判斷是不是第一次連接, 如果不是第一次進入下面try程式碼塊, 隨機產生一個小於一秒的時間 if(!isFirstConnect){ try { Thread.sleep(r.nextInt(1000)); } catch (InterruptedException e) { LOG.warn("Unexpected exception", e); } } // don't re-establish connection if we are closing // todo 如果是closing 或者 已經關閉了, 直接退出這個循環 if (closing || !state.isAlive()) { break; } if (rwServerAddress != null) { serverAddress = rwServerAddress; rwServerAddress = null; } else { // todo 連接失敗時,來這裡重試連接 // todo 從我們傳遞進來的host地址中選擇一個地址 serverAddress = hostProvider.next(1000); } // todo client和server進行socket連接 // todo 跟進去 ,實現邏輯在上面 // todo 這個方法開始建立連接,並將 isFasterConnect改成了 false startConnect(serverAddress); clientCnxnSocket.updateLastSendAndHeard(); } //todo 2222 如果socket處於連接狀態 ///////////////////////////////////////////////////////////////////////////////////////////////////////// // todo 下面的連接狀態 if (state.isConnected()) { // determine whether we need to send an AuthFailed event. if (zooKeeperSaslClient != null) { boolean sendAuthEvent = false; if (zooKeeperSaslClient.getSaslState() == ZooKeeperSaslClient.SaslState.INITIAL) { try { zooKeeperSaslClient.initialize(ClientCnxn.this); } catch (SaslException e) { LOG.error("SASL authentication with Zookeeper Quorum member failed: " + e); state = States.AUTH_FAILED; sendAuthEvent = true; } } KeeperState authState = zooKeeperSaslClient.getKeeperState(); if (authState != null) { if (authState == KeeperState.AuthFailed) { // An authentication error occurred during authentication with the Zookeeper Server. state = States.AUTH_FAILED; sendAuthEvent = true; } else { if (authState == KeeperState.SaslAuthenticated) { sendAuthEvent = true; } } } if (sendAuthEvent == true) { eventThread.queueEvent(new WatchedEvent( Watcher.Event.EventType.None, authState,null)); } } // todo 連接成功的話執行to 為下面值 // todo to = 讀取的超時時間 - 上一次的讀取時間 // todo 如果預訂的超時時間 - 上次讀的時間 <= 0 說明超時了 to = readTimeout - clientCnxnSocket.getIdleRecv(); } else { // todo 如果沒有連接成功, 就會來到這裡, 給 to 賦值 to = connectTimeout - clientCnxnSocket.getIdleRecv(); } //todo 3333 異常處理 ///////////////////////////////////////////////////////////////////////////////////////////////////////// // todo 下面拋出來了異常 if (to <= 0) { String warnInfo; warnInfo = "Client session timed out, have not heard from server in " + clientCnxnSocket.getIdleRecv() + "ms" + " for sessionid 0x" + Long.toHexString(sessionId); LOG.warn(warnInfo); // todo 這裡拋出來了異常, 下面的try 就會把它抓住 throw new SessionTimeoutException(warnInfo); } //todo 44444 連接成功執行的邏輯 ///////////////////////////////////////////////////////////////////////////////////////////////////////// // todo 下面的是連接成功執行的邏輯 if (state.isConnected()) { // todo 為了防止競爭狀態丟失發送第二個ping, 同時也避免出現很多的ping //1000(1 second) is to prevent(阻止) race condition missing to send the second ping //also make sure not to send too many pings when readTimeout is small int timeToNextPing = readTimeout / 2 - clientCnxnSocket.getIdleSend() - ((clientCnxnSocket.getIdleSend() > 1000) ? 1000 : 0); //send a ping request either time is due or no packet sent out within MAX_SEND_PING_INTERVAL if (timeToNextPing <= 0 || clientCnxnSocket.getIdleSend() > MAX_SEND_PING_INTERVAL) { // todo 客戶端一直在這裡循環, 如果連接成功的話, 每次循環都來到這個邏輯這裡發送 ping sendPing(); clientCnxnSocket.updateLastSend(); } else { if (timeToNextPing < to) { to = timeToNextPing; } } } //todo 55555 ///////////////////////////////////////////////////////////////////////////////////////////////////////// // If we are in read-only mode, seek for read/write server // todo 只讀狀態 相關邏輯 if (state == States.CONNECTEDREADONLY) { long now = Time.currentElapsedTime(); int idlePingRwServer = (int) (now - lastPingRwServer); if (idlePingRwServer >= pingRwTimeout) { lastPingRwServer = now; idlePingRwServer = 0; pingRwTimeout = Math.min(2*pingRwTimeout, maxPingRwTimeout); pingRwServer(); } to = Math.min(to, pingRwTimeout - idlePingRwServer); } //todo 66666 ///////////////////////////////////////////////////////////////////////////////////////////////////////// // todo 消費outgoingqueue, 完成向服務端的發送發送 // todo doTransport 是 ClientCnxnSocket 的抽象方法, 實現類clientCnxnSocketNio clientCnxnSocket.doTransport(to, pendingQueue, outgoingQueue, ClientCnxn.this); } catch (Throwable e) { // todo 在這個try中處理裡面的拋出來的異常 if (closing) { // todo 如果是請求關閉, 直接退出 break 出while循環 if (LOG.isDebugEnabled()) { // closing so this is expected LOG.debug("An exception was thrown while closing send thread for session 0x" + Long.toHexString(getSessionId()) + " : " + e.getMessage()); } break; } else { // todo 只要不是退出異常, 下面的異常都是僅僅列印了一下出現了什麼異常 // this is ugly, you have a better way speak up if (e instanceof SessionExpiredException) { LOG.info(e.getMessage() + ", closing socket connection"); } else if (e instanceof SessionTimeoutException) { LOG.info(e.getMessage() + RETRY_CONN_MSG); } else if (e instanceof EndOfStreamException) { LOG.info(e.getMessage() + RETRY_CONN_MSG); } else if (e instanceof RWServerFoundException) { LOG.info(e.getMessage()); } else if (e instanceof SocketException) { LOG.info("Socket error occurred: {}: {}", serverAddress, e.getMessage()); } else { LOG.warn("Session 0x{} for server {}, unexpected error{}", Long.toHexString(getSessionId()), serverAddress, RETRY_CONN_MSG, e); } // todo 這個方法中, isFirstConnect = true cleanup(); if (state.isAlive()) { eventThread.queueEvent(new WatchedEvent( Event.EventType.None, Event.KeeperState.Disconnected, null)); } clientCnxnSocket.updateNow(); clientCnxnSocket.updateLastSendAndHeard(); } } } // todo while循環的結束符號 , 這是個while循環, 除了上面的close其他異常都會繼續循環, 接著上去再看一遍 cleanup(); clientCnxnSocket.close(); if (state.isAlive()) { eventThread.queueEvent(new WatchedEvent(Event.EventType.None, Event.KeeperState.Disconnected, null)); } ZooTrace.logTraceMessage(LOG, ZooTrace.getTextTraceLevel(), "SendThread exited loop for session: 0x" + Long.toHexString(getSessionId())); } 在上面這個200行的Run方法中比較值得注意的幾個方法如下
- 如果做到下次選出一個非當前server的地址
針對下標運行,對數組的size取模, 再賦值給自己,所以就實現了從0 – array.size()的循環
public InetSocketAddress next(long spinDelay) { currentIndex = ++currentIndex % serverAddresses.size(); if (currentIndex == lastIndex && spinDelay > 0) { try { Thread.sleep(spinDelay); } catch (InterruptedException e) { LOG.warn("Unexpected exception", e); } } else if (lastIndex == -1) { // We don't want to sleep on the first ever connect attempt. lastIndex = 0; }- 如果檢查到了沒有連接的話,就是用clientCnxnSocket進行連接
這個函數中,將標記是否是第一次連接的標記置為了flase, 並且拿到了sessionid
// todo 保證連接的邏輯 void primeConnection() throws IOException { LOG.info("Socket connection established to " + clientCnxnSocket.getRemoteSocketAddress() + ", initiating session"); isFirstConnect = false; //todo 創建了一個建立連接的request, 並且在下面將它添加進來 outgoingqueue long sessId = (seenRwServerBefore) ? sessionId : 0; ConnectRequest conReq = new ConnectRequest(0, lastZxid, sessionTimeout, sessId, sessionPasswd); synchronized (outgoingQueue) { ... 如watcher 相關的邏輯SendThread 和 服務端的IO溝通
跟進上面Run方法的如下方法,doTranprot
clientCnxnSocket.doTransport(to, pendingQueue, outgoingQueue, ClientCnxn.this);他是本類的抽象方法,具體的實現類是clientCnxnSocketNIO
跟進這個方法,其中有一步跟重要doIO(pendingQueue, outgoingQueue, cnxn);
for (SelectionKey k : selected) { SocketChannel sc = ((SocketChannel) k.channel()); // todo 建立連接的邏輯 if ((k.readyOps() & SelectionKey.OP_CONNECT) != 0) { if (sc.finishConnect()) { updateLastSendAndHeard(); sendThread.primeConnection(); } } else if ((k.readyOps() & (SelectionKey.OP_READ | SelectionKey.OP_WRITE)) != 0) { // todo 往服務端發送數據的邏輯 , 方法在上面的64行 doIO(pendingQueue, outgoingQueue, cnxn); } }- DoIo的源碼如下
它分成了兩大模組
- 讀就緒, 讀取服務端發送過來的數據
- 寫就緒, 往客戶端發送用戶在控制台輸入的命令
void doIO(List<Packet> pendingQueue, LinkedList<Packet> outgoingQueue, ClientCnxn cnxn) throws InterruptedException, IOException { // todo 通過key獲取服務端的channel SocketChannel sock = (SocketChannel) sockKey.channel(); if (sock == null) { throw new IOException("Socket is null!"); } // TODO 讀就緒 if (sockKey.isReadable()) { int rc = sock.read(incomingBuffer); if (rc < 0) { throw new EndOfStreamException( "Unable to read additional data from server sessionid 0x" + Long.toHexString(sessionId) + ", likely server has closed socket"); } if (!incomingBuffer.hasRemaining()) { // todo 返回buffer incomingBuffer.flip(); if (incomingBuffer == lenBuffer) { recvCount++; readLength(); } else if (!initialized) { //todo 連接有沒有初始化, 來這之前被改成了 flase ,現在 // todo 讀取服務端發給我的連接請求的結果 readConnectResult(); // primeConnection() enableRead(); if (findSendablePacket(outgoingQueue, cnxn.sendThread.clientTunneledAuthenticationInProgress()) != null) { // Since SASL authentication has completed (if client is configured to do so), // outgoing packets waiting in the outgoingQueue can now be sent. enableWrite(); } lenBuffer.clear(); incomingBuffer = lenBuffer; updateLastHeard(); initialized = true; } else { //todo 如果已經初始化了, 就來這裡讀取響應, 跟進去 sendThread.readResponse(incomingBuffer); lenBuffer.clear(); incomingBuffer = lenBuffer; updateLastHeard(); } } } //todo 寫就緒 if (sockKey.isWritable()) { synchronized(outgoingQueue) { // todo 查詢出可發送的packet Packet p = findSendablePacket(outgoingQueue, cnxn.sendThread.clientTunneledAuthenticationInProgress()); if (p != null) { updateLastSend(); // If we already started writing p, p.bb will already exist if (p.bb == null) { if ((p.requestHeader != null) && (p.requestHeader.getType() != OpCode.ping) && (p.requestHeader.getType() != OpCode.auth)) { p.requestHeader.setXid(cnxn.getXid()); } p.createBB(); } // todo 往服務端發送數據 packet.ByteBuf sock.write(p.bb); // 發送服務端 if (!p.bb.hasRemaining()) { //todo !hasRemaining 沒有剩餘的數據 sentCount++; // todo 將發送過的packet從outgoingqueue移除 outgoingQueue.removeFirstOccurrence(p); if (p.requestHeader != null && p.requestHeader.getType() != OpCode.ping && p.requestHeader.getType() != OpCode.auth) { synchronized (pendingQueue) { // todo 如果剛才的請求頭的類型不是null , 不是ping ,不是許可權驗證 就把packet添加到 pendingQueue /** * These are the packets that have been sent and are waiting for a response. * todo 這個penddingQueue 存放的是已經發送的 和 等待伺服器響應的packet */ pendingQueue.add(p); } } } } if (outgoingQueue.isEmpty()) { disableWrite(); } else if (!initialized && p != null && !p.bb.hasRemaining()) { e.html disableWrite(); } else { // Just in case enableWrite(); } } } }思考:
雖然找到了客戶端往服務端發送數據的程式碼, 但是問題來了, 它發送的什麼數據啊? 在上面可以看到,它每次發送的數據都被包裝車成了packet類型,並且,繼續往下跟進可以看到這個packet來自於一個叫outgoingqueue的隊列中
client想往服務端發送什麼?其實發送就是我們手動輸入的命令,只不過他把我們的命令解析出來並且進行了封裝,進行了哪些封裝? String-> request -> packet -> socket ,這個packet就在上面的部分被消費
到目前為止,算上一開始的主執行緒,其實已經有3條執行緒了, 分別是主執行緒,SendThread和eventThread
程式碼讀到這裡,sendThread部分其實已經結束了,我們直到了它正在消費outgoingqueue中的內容,接下來的任務返回回去,從新回到 ZooKeeperMain中,看一開始主執行緒時如何處理用戶在命令行的輸入的
// todo zookeeper的入口方法 public static void main(String args[]) throws KeeperException, IOException, InterruptedException { // todo new ZK客戶端 ZooKeeperMain main = new ZooKeeperMain(args); // todo run方法的實現在下面 main.run(); }跟進 main.run(), 主要做了如下幾件事
- 通過反射創建出可以獲取控制台輸入的對象
jline.ConsoleReader - 通過反射創建出可以解析鍵盤錄入的對象
- 開啟while循環,等待用戶的輸入,處理用戶的輸入
executeLine(line);
@SuppressWarnings("unchecked") void run() throws KeeperException, IOException, InterruptedException { if (cl.getCommand() == null) { System.out.println("Welcome to ZooKeeper!"); boolean jlinemissing = false; // only use jline if it's in the classpath try { // todo jline.ConsoleReader是java命令行的實現類, 獲取可從控制台接受輸入的對象 Class<?> consoleC = Class.forName("jline.ConsoleReader"); Class<?> completorC = Class.forName("org.apache.zookeeper.JLineZNodeCompletor"); System.out.println("JLine support is enabled"); // todo 使用反射獲取實例 Object console = consoleC.getConstructor().newInstance(); Object completor = completorC.getConstructor(ZooKeeper.class).newInstance(zk); // todo 通過反射獲取某指定類的指定方法 Completor Method addCompletor = consoleC.getMethod("addCompletor", Class.forName("jline.Completor")); addCompletor.invoke(console, completor); String line; Method readLine = consoleC.getMethod("readLine", String.class); // todo 我們在命令行中輸入的那些命令最終都會來到這裡執行 // todo getPrompt() 方法 就是在控制台上列印出了命令行的前綴--- [zk: " + host + "("+zk.getState()+")" + " " + commandCount + "] " while ((line = (String) readLine.invoke(console, getPrompt())) != null) { // todo 執行命令行的輸入 executeLine(line); } } catch (ClassNotFoundException e) { LOG.debug("Unable to start jline", e); jlinemissing = true; } catch (NoSuchMethodException e) { LOG.debug("Unable to start jline", e); jlinemissing = true; } catch (InvocationTargetException e) { LOG.debug("Unable to start jline", e); jlinemissing = true; } catch (IllegalAccessException e) { LOG.debug("Unable to start jline", e); jlinemissing = true; } catch (InstantiationException e) { LOG.debug("Unable to start jline", e); jlinemissing = true; } if (jlinemissing) { System.out.println("JLine support is disabled"); BufferedReader br = new BufferedReader(new InputStreamReader(System.in)); String line; while ((line = br.readLine()) != null) { executeLine(line); } } } else { // Command line args non-null. Run what was passed. processCmd(cl); } }繼續跟進 executeLine(line);,做了如下幾件事
- 處理用戶輸入
- 將命令添加到歷史命令
- 處理命令
- 命令數+1
public void executeLine(String line) throws InterruptedException, IOException, KeeperException { if (!line.equals("")) { cl.parseCommand(line); // todo 添加到歷史命令 addToHistory(commandCount, line); // todo 具體處理命令 processCmd(cl); // todo 命令次數+1 commandCount++; } }處理命令的邏輯如下:
將命令解析出來,通過if分支語句,判斷用戶輸入的什麼命令, 然後再進一步處理
// todo zookeeper客戶端, 處理用戶輸入命令的具體邏輯 // todo 用大白話講,下面其實就是把 從控制台獲取的用戶的輸入資訊轉換成指定的字元, 然後發送到服務端 // todo MyCommandOptions 是處理命令行選項和shell腳本的工具類 protected boolean processZKCmd(MyCommandOptions co) throws KeeperException, IOException, InterruptedException { // todo 在這個方法中可以看到很多的命令行所支援的命令 Stat stat = new Stat(); // todo 獲取命令行輸入中 0 1 2 3 ... 位置的內容, 比如 0 位置是命令 1 2 3 位置可能就是不同的參數 String[] args = co.getArgArray(); String cmd = co.getCommand(); if (args.length < 1) { usage(); return false; } if (!commandMap.containsKey(cmd)) { usage(); return false; } boolean watch = args.length > 2; String path = null; List<ACL> acl = Ids.OPEN_ACL_UNSAFE; LOG.debug("Processing " + cmd); ... // todo 看看這個create命令的實現, 如果是-e 就是很 CreateMode= ephemeral sequential 時序的 if (cmd.equals("create") && args.length >= 3) { int first = 0; CreateMode flags = CreateMode.PERSISTENT; if ((args[1].equals("-e") && args[2].equals("-s")) || (args[1]).equals("-s") && (args[2].equals("-e"))) { first += 2; flags = CreateMode.EPHEMERAL_SEQUENTIAL; } else if (args[1].equals("-e")) { first++; flags = CreateMode.EPHEMERAL; } else if (args[1].equals("-s")) { first++; flags = CreateMode.PERSISTENT_SEQUENTIAL; } ...比如,用戶輸入的是創建新節點的命令create /path, 就會有下面的函數處理
// todo 調用Zookeeper的 create方法, String newPath = zk.create(path, args[first + 2].getBytes(), acl, flags);跟進這個方法 , 主要做了下面幾件事
- 校驗合法性
- 封裝進 request
- 添加acl
- 提交submitRequest(),他是個重要的阻塞方法,每次執行都會阻塞等待服務端的響應
- 等待響應結果
public String create(final String path, byte data[], List<ACL> acl, CreateMode createMode) throws KeeperException, InterruptedException { final String clientPath = path; // todo 驗證,path string 的合法性, 根據去查看 PathUtils.validatePath(clientPath, createMode.isSequential()); final String serverPath = prependChroot(clientPath); // todo 創建請求頭, 不同的操作有不同的頭標記 RequestHeader h = new RequestHeader(); h.setType(ZooDefs.OpCode.create); CreateRequest request = new CreateRequest(); CreateResponse response = new CreateResponse(); // todo 將命令行裡面的內容嵌入到request request.setData(data); request.setFlags(createMode.toFlag()); request.setPath(serverPath); if (acl != null && acl.size() == 0) { throw new KeeperException.InvalidACLException(); } // todo 添加許可權 request.setAcl(acl); // todo 通過上下文, 將包裝後的用戶的request 提交到socket 傳遞到server , 跟進去看看 ReplyHeader r =submitRequest // todo 判斷是否出錯了 if (r.getErr() != 0) { throw KeeperException.create(KeeperException.Code.get(r.getErr()), clientPath); } if (cnxn.chrootPath == null) { return response.getPath(); } else { return response.getPath().substring(cnxn.chrootPath.length()); } }客戶端的阻塞式等待
跟進submitRequest()
// todo 這是ClientCnxn的類, 提交請求, 最終將我們的請求傳遞到socket // todo 返回一個header, 因為根據它判斷是否是否出錯了 public ReplyHeader submitRequest(RequestHeader h, Record request, Record response, WatchRegistration watchRegistration) throws InterruptedException { ReplyHeader r = new ReplyHeader(); // todo 來到這個 queuePacket() 方法在下面, 這個方法就是將 用戶輸入-> string ->>> request ->>> packet 的過程 Packet packet = queuePacket(h, r, request, response, null, null, null, null, watchRegistration); // todo 使用同步程式碼塊,在下面的進行 同步阻塞等待, 直到有了Response響應才會跳出這個循環, 這個finished狀態就是在客戶端接受到服務端的 // todo 的響應後, 將服務端的響應解析出來,然後放置到 pendingqueue里時,設置上去的 synchronized (packet) { while (!packet.finished) { // todo 這個等待是需要喚醒的 packet.wait(); } } // todo 直到上面的程式碼塊被喚醒,才會這個方法才會返回 return r; }在上面的程式碼中,可以看到可以他是使用一個while(!packet,finishes){} 來阻塞程式的, 剛看看到用戶的命令被封裝進了request, 接下來, 在queuePacket(h, r, request, response, null, null, null, null, watchRegistration);中,可以看到他被封裝進packet,然後添加到outgoingqueue隊列中,源碼如下
// todo Packet queuePacket(RequestHeader h, ReplyHeader r, Record request, Record response, AsyncCallback cb, String clientPath, String serverPath, Object ctx, WatchRegistration watchRegistration) { Packet packet = null; // Note that we do not generate the Xid for the packet yet. // todo 它會為我們的沒有 Xid 的packet生成 Xid // It is generated later at send-time, by an implementation of ClientCnxnSocket::doIO(), // todo 她會在ClientCnxnSocket::doIO()之後生成 // where the packet is actually sent. // todo packet實際生成的位置 synchronized (outgoingQueue) { // todo 將用戶傳遞過來的資訊包裝成 Packet packet = new Packet(h, r, request, response, watchRegistration); packet.cb = cb; packet.ctx = ctx; packet.clientPath = clientPath; packet.serverPath = serverPath; if (!state.isAlive() || closing) { conLossPacket(packet); } else { // If the client is asking to close the session then // mark as closing // todo 如果客戶端正在發送關閉session的請求, 就標記成 closing = true if (h.getType() == OpCode.closeSession) { closing = true; } // todo 將packet 添加到隊列裡面 // todo 這個什麼時候會被消費呢? 是在sendthread的無限循環中被消費的, 因為那是第二條執行緒 outgoingQueue.add(packet); } } // todo getClientCnxnSocket() 獲取ClientCnxnSocket對象 // todo wakeupCnxn() 是 ClientCnxnSocket對象 中的抽象方法, 實現類是 ClientCnxnSocket的實現類ClientCnxnSocketNio // 喚醒阻塞在selector.select上的執行緒,讓該執行緒及時去處理其他事情,比如這裡的讓sendThread 乾淨去消費packet sendThread.getClientCnxnSocket().wakeupCnxn(); return packet; }在這個方法的最後一行,點睛,selector.wakeup(); 就是通知選擇器,別再阻塞select了,趕緊去做其他工作
因為選擇器在sendThread的doTransport()方法中,有阻塞的操作,我重新把程式碼貼出來如下
服務端的NIOSocket -> ClientCnxnSocket 都是ClientCnxn上下文的封裝類的,SendThread同樣也是,它可以使用
現在再看,喚醒selector 讓他去做其他事 ,其實即使doIO(),這個方法程式碼其實我在上面貼出來過,就是分成兩大部分,讀就緒與寫就緒
// todo 往服務端發送 packet //todo 下面就是NIO 網路編程的邏輯了 @Override void doTransport(int waitTimeOut, List<Packet> pendingQueue, LinkedList<Packet> outgoingQueue, ClientCnxn cnxn) throws IOException, InterruptedException { // todo 選擇器在waitTimeOut時間內阻塞輪詢== 上一次計算的 to時間 selector.select(waitTimeOut); Set<SelectionKey> selected; // todo 獲取channel註冊進selector時返回的key synchronized (this) { selected = selector.selectedKeys(); } // Everything below and until we get back to the select is non blocking, // so time is effectively a constant. That is Why we just have to do this once, here // todo 直到我們重新回到select之前, 下面的全部操作都是非阻塞的 // todo 因此時間只是一個常數, 那就是為什麼我們在這裡用下面的函數 updateNow(); // for (SelectionKey k : selected) { SocketChannel sc = ((SocketChannel) k.channel()); // todo 建立連接的邏輯 if ((k.readyOps() & SelectionKey.OP_CONNECT) != 0) { if (sc.finishConnect()) { updateLastSendAndHeard(); sendThread.primeConnection(); } } else if ((k.readyOps() & (SelectionKey.OP_READ | SelectionKey.OP_WRITE)) != 0) { // todo 往服務端發送數據的邏輯 , 方法在上面的64行 doIO(pendingQueue, outgoingQueue, cnxn); } }寫到這裡其實已經把整個過程順下來了,下面再重新看看,sendThread是如果消費packet並且修改然後得到服務端的響應,修改pakcet.finished屬性的, 因為現在主線的submitRequest還在阻塞呢
往服務端寫
客戶端的socket的實現類是ClientCnxnSocketNio, 它往服務端寫的邏輯如下, 不難看出使用的java原生的sock.write(p.bb); // 發送服務端 , 亮點是後面的操作pendingQueue.add(p);被寫過的packet被添加到了pengingqueue中
if (sockKey.isWritable()) { synchronized(outgoingQueue) { // todo 查詢出可發送的packet Packet p = findSendablePacket(outgoingQueue, cnxn.sendThread.clientTunneledAuthenticationInProgress()); if (p != null) { updateLastSend(); // If we already started writing p, p.bb will already exist if (p.bb == null) { if ((p.requestHeader != null) && (p.requestHeader.getType() != OpCode.ping) && (p.requestHeader.getType() != OpCode.auth)) { p.requestHeader.setXid(cnxn.getXid()); } p.createBB(); } // todo 往服務端發送數據 packet.ByteBuf sock.write(p.bb); // 發送服務端 if (!p.bb.hasRemaining()) { //todo !hasRemaining 沒有剩餘的數據 sentCount++; // todo 將發送過的packet從outgoingqueue移除 outgoingQueue.removeFirstOccurrence(p); if (p.requestHeader != null && p.requestHeader.getType() != OpCode.ping && p.requestHeader.getType() != OpCode.auth) { synchronized (pendingQueue) { // todo 如果剛才的請求頭的類型不是null , 不是ping ,不是許可權驗證 就把packet添加到 pendingQueue /** * These are the packets that have been sent and are waiting for a response. * todo 這個penddingQueue 存放的是已經發送的 和 等待伺服器響應的packet */ pendingQueue.add(p); } } }上面說了, 為啥被使用過的pakcet還要保留一份呢? 還是那個原因,主執行緒還因為pakcet的finish狀態未被該變而阻塞呢, 那什麼時候改變呢? 答案是受到服務端的響應之後改變,在哪裡收到呢? 就是DoIo()的讀就緒模組,下面附上源碼,它的解析我寫在這段程式碼下面
從服務端讀
if (sockKey.isReadable()) { int rc = sock.read(incomingBuffer); if (rc < 0) { throw new EndOfStreamException( "Unable to read additional data from server sessionid 0x" + Long.toHexString(sessionId) + ", likely server has closed socket"); } if (!incomingBuffer.hasRemaining()) { // todo 返回buffer incomingBuffer.flip(); if (incomingBuffer == lenBuffer) { recvCount++; readLength(); } else if (!initialized) { //todo 連接有沒有初始化, 來這之前被改成了 flase ,現在 // todo 讀取服務端發給我的連接請求的結果 readConnectResult(); // primeConnection() enableRead(); if (findSendablePacket(outgoingQueue, cnxn.sendThread.clientTunneledAuthenticationInProgress()) != null) { // Since SASL authentication has completed (if client is configured to do so), // outgoing packets waiting in the outgoingQueue can now be sent. enableWrite(); } lenBuffer.clear(); incomingBuffer = lenBuffer; updateLastHeard(); initialized = true; } else { //todo 如果已經初始化了, 就來這裡讀取響應, 跟進去 sendThread.readResponse(incomingBuffer); lenBuffer.clear(); incomingBuffer = lenBuffer; updateLastHeard(); }如上程式碼的最後部分,sendThread.readResponse(incomingBuffer); 下面是它的源碼,它首先是從buffer中讀取出服務端的發送的數據,然後一通解析,封裝進pendingqueue的packet中,並且在方法的最後部分終於完成了狀態的修改
// todo 同樣是 sendThread的方法, 讀取響應 // todo 是經過flip 反轉後的 可讀的buffer void readResponse(ByteBuffer incomingBuffer) throws IOException { // todo --------------------- 從服務端寫回來的buffer中解析封裝成 ReplyHeader ---------------------------- ByteBufferInputStream bbis = new ByteBufferInputStream( incomingBuffer); BinaryInputArchive bbia = BinaryInputArchive.getArchive(bbis); ReplyHeader replyHdr = new ReplyHeader(); replyHdr.deserialize(bbia, "header"); // todo --------------------------------------------------------------------- // todo 下面根據 ReplyHeader 的 xid 判斷響應的結果類型 if (replyHdr.getXid() == -2) { // -2 is the xid for pings if (LOG.isDebugEnabled()) { LOG.debug("Got ping response for sessionid: 0x" + Long.toHexString(sessionId) + " after " + ((System.nanoTime() - lastPingSentNs) / 1000000) + "ms"); } return; } if (replyHdr.getXid() == -4) { // -4 is the xid for AuthPacket if(replyHdr.getErr() == KeeperException.Code.AUTHFAILED.intValue()) { state = States.AUTH_FAILED; eventThread.queueEvent( new WatchedEvent(Watcher.Event.EventType.None, Watcher.Event.KeeperState.AuthFailed, null) ); } if (LOG.isDebugEnabled()) { LOG.debug("Got auth sessionid:0x" + Long.toHexString(sessionId)); } return; } if (replyHdr.getXid() == -1) { // -1 means notification if (LOG.isDebugEnabled()) { LOG.debug("Got notification sessionid:0x" + Long.toHexString(sessionId)); } WatcherEvent event = new WatcherEvent(); event.deserialize(bbia, "response"); // convert from a server path to a client path if (chrootPath != null) { String serverPath = event.getPath(); if(serverPath.compareTo(chrootPath)==0) event.setPath("/"); else if (serverPath.length() > chrootPath.length()) event.setPath(serverPath.substring(chrootPath.length())); else { LOG.warn("Got server path " + event.getPath() + " which is too short for chroot path " + chrootPath); } } WatchedEvent we = new WatchedEvent(event); if (LOG.isDebugEnabled()) { LOG.debug("Got " + we + " for sessionid 0x" + Long.toHexString(sessionId)); } eventThread.queueEvent( we ); return; } // If SASL authentication is currently in progress, construct and // send a response packet immediately, rather than queuing a // response as with other packets. if (clientTunneledAuthenticationInProgress()) { GetSASLRequest request = new GetSASLRequest(); request.deserialize(bbia,"token"); zooKeeperSaslClient.respondToServer(request.getToken(), ClientCnxn.this); return; } Packet packet; synchronized (pendingQueue) { if (pendingQueue.size() == 0) { throw new IOException("Nothing in the queue, but got " + replyHdr.getXid()); } // todo 從pendingQueue 中取出第一個packet packet = pendingQueue.remove(); } /* * Since requests are processed in order, we better get a response to the first request! * // todo 因為請求存在隊列中,是有順序的, 因此我們最好對第一個做出相應 */ try { if (packet.requestHeader.getXid() != replyHdr.getXid()) { packet.replyHeader.setErr( KeeperException.Code.CONNECTIONLOSS.intValue()); throw new IOException("Xid out of order. Got Xid " + replyHdr.getXid() + " with err " + + replyHdr.getErr() + " expected Xid " + packet.requestHeader.getXid() + " for a packet with details: " + packet ); } // todo 把todo 從服務端解析出來的結果賦值給 pendingQueue 中的packet packet.replyHeader.setXid(replyHdr.getXid()); packet.replyHeader.setErr(replyHdr.getErr()); packet.replyHeader.setZxid(replyHdr.getZxid()); if (replyHdr.getZxid() > 0) { lastZxid = replyHdr.getZxid(); } if (packet.response != null && replyHdr.getErr() == 0) { packet.response.deserialize(bbia, "response"); } if (LOG.isDebugEnabled()) { LOG.debug("Reading reply sessionid:0x" + Long.toHexString(sessionId) + ", packet:: " + packet); } } finally { // todo 跟進這個方法 finishPacket(packet); } }解開客戶端的阻塞狀態
進入finishPacket(packet)
// todo ClientCnxn 也就是本類中, 在根據用戶的輸入向服務端提交命令後的那個 wait喚醒了, finished=true,使得原來的while循環退出了 private void finishPacket(Packet p) { if (p.watchRegistration != null) { p.watchRegistration.register(p.replyHeader.getErr()); } // todo 喚醒 Zookeeper中 submitRequest() 提交請求後的阻塞操作, 現在拿到請求後進行喚醒 if (p.cb == null) { synchronized (p) { //todo 將這個finish 改成true, 在 p.finished = true; p.notifyAll(); } } else { p.finished = true; eventThread.queuePacket(p); } }