[3]嘗試用Unity3d製作一個王者榮耀(持續更新)->選擇英雄-(中)
- 2019 年 10 月 3 日
- 筆記
如果已經看過本章節:目錄傳送門:這是目錄鴨~
上節內容寫了Actor管理器,那麼這一節讓我們先創建一個角色。(此章節開始加速…)
1.製作角色展示AssetBundle:
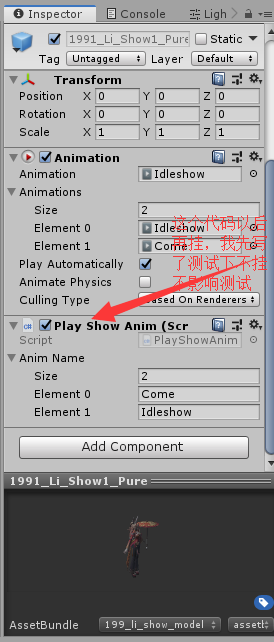
提取農藥某個展示模型(Show)資源(這步具體去百度),然後再把模型製作成預製體,AssetBundle命名規則按照農藥的(ID_遊戲拼音_資源類型.assetbundle):
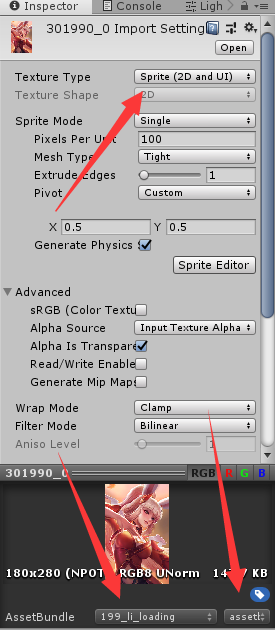
製作UI預製體,還是得提取或者去農藥官網 pvp.qq.com 的壁紙中心下載原圖截取(一個是圖標一個是載入時候用到的):

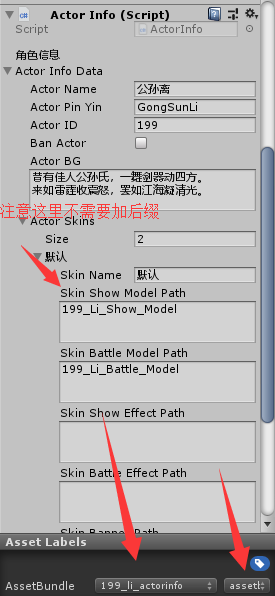
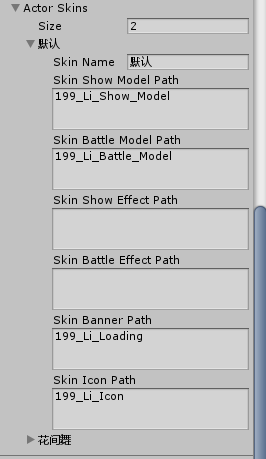
創建一個空物體,並掛上ActorInfo組件,製作成預製體並輸入數據(雖然標籤以及打包的文件都是小寫的,但按照路徑讀取文件的時候不會區分大小寫,為了好看於是可以大寫):
到這步先不要打包,後面還有小部件需要打包的。
2.拼UI(最舒適的部分~):
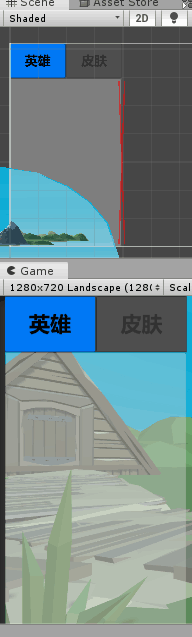
創建一個滾動視圖,並且在Content位置增加自動布局組件,再創建空對象改名Mode,裡面存放兩個按鈕用來切換皮膚和英雄選擇,如圖:


拉幾下幾下位置,最終效果:
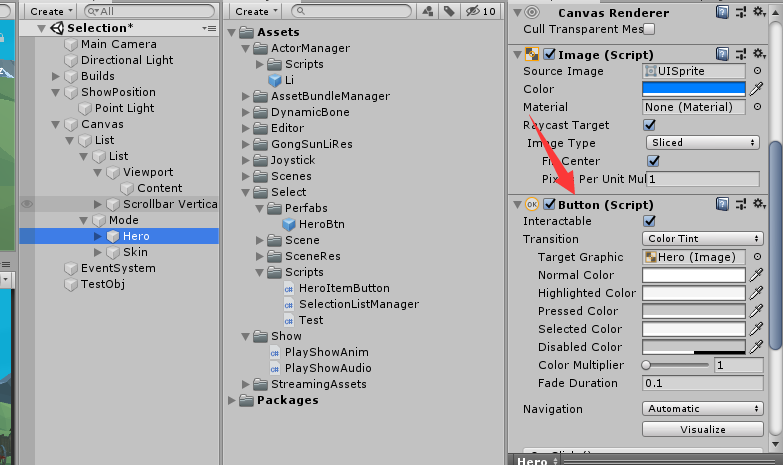
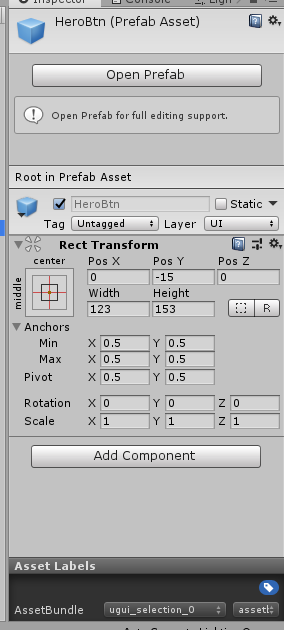
然後我們製作一個預製體,用於動態生成(結構是一個空物體裡面有個按鈕(已把裡面文字刪去)和一個 名字 的 文本顯示組件):

把預製體粘貼到Content裡面測試有沒有問題(是否自動對齊):

測試放上去的內容記得刪除,設置預製體標籤:
然後我們寫一個程式碼用於管理選擇英雄的UI響應的(前SelectionListManager)和 按鈕回調的(後HeroItemButton):
1 /* 2 * 編輯者:Miku醬 3 * 版本:1 4 * 首次編寫日期:2019/09/20 00:05 5 * 修改日期:2019/09/20 00:05 6 * 強行加一行~~~ 7 */ 8 using System.Collections; 9 using System.Collections.Generic; 10 using UnityEngine; 11 using LuoHao.Actor; 12 using UnityEngine.UI; 13 using LuoHao.AssetBundleManager; 14 15 namespace LuoHao.PVP.Selection 16 { 17 public class SelectionListManager : MonoBehaviour 18 { 19 public Transform testPos; 20 21 /// <summary> 22 /// 介面 23 /// </summary> 24 public static SelectionListManager selectionListManager; 25 26 /// <summary> 27 /// UI的AB包路徑 28 /// </summary> 29 static string uiPath = "UGUI_Selection_0.assetbundle"; 30 [Header("父對象")] 31 public Transform UIparent; 32 /// <summary> 33 /// 當前選擇的英雄ID 34 /// </summary> 35 private int nowSelectionID = -1; 36 37 GameObject testGM = null; 38 /// <summary> 39 /// 設置ID 40 /// </summary> 41 /// <param name="id">id</param> 42 public void SetSelectionID(int id) 43 { 44 if (nowSelectionID == id) return; 45 nowSelectionID = id; 46 if (testGM != null) Destroy(testGM); 47 Transform tr = Instantiate(AssetBundleManager.AssetBundleManager. 48 GetAssetBundle(ActorManager.allActor[id].actorSkins[0].skinShowModelPath+ ".assetbundle") 49 .GetAssetBundle().LoadAllAssets<GameObject>()[0],testPos).transform; 50 tr.localPosition = Vector3.zero; 51 } 52 53 public int GetSelectionID() 54 { 55 return nowSelectionID; 56 } 57 58 private void Awake() 59 { 60 selectionListManager = this; 61 nowSelectionID = -1;//重置ID 62 } 63 // Start is called before the first frame update 64 private void Start() 65 { 66 LoadList(); 67 } 68 69 // Update is called once per frame 70 private void Update() 71 { 72 73 } 74 75 private void LoadList() 76 { 77 //取得預製體 78 GameObject btn =AssetBundleManager.AssetBundleManager. 79 GetAssetBundle(uiPath).GetAssetBundle().LoadAsset<GameObject>("HeroBtn"); 80 List<ActorInfoData> infos = new List<ActorInfoData>(ActorManager.allActor.Values);//取得資訊... 81 for(int i = 0; i < infos.Count; i++)//創建UI 82 { 83 PackageForAssetBundle sprite = AssetBundleManager.AssetBundleManager. 84 GetAssetBundle(infos[i].actorSkins[0].skinIconPath+".assetbundle"); 85 //取得圖標資源 86 Transform tr = Instantiate(btn, UIparent).transform; 87 tr.GetComponentInChildren<Text>().text = infos[i].actorName;//設置名字 88 tr.GetComponentInChildren<Image>().sprite= sprite.GetAssetBundle().LoadAllAssets<Sprite>()[0]; //設置圖標 89 tr.GetComponentInChildren<HeroItemButton>().heroID = infos[i].actorID;//設置ID 90 sprite.UnLoadAssetBundle(false);//卸載 91 } 92 } 93 } 94 }
1 /* 2 * 編輯者:Miku醬 3 * 版本:1 4 * 首次編寫日期:2019/09/20 00:05 5 * 修改日期:2019/09/20 00:05 6 * 強行加一行~~~ 7 */ 8 using System.Collections; 9 using System.Collections.Generic; 10 using UnityEngine; 11 12 namespace LuoHao.PVP.Selection 13 { 14 public class HeroItemButton : MonoBehaviour 15 { 16 /// <summary> 17 /// 這個由程式碼來設置 18 /// </summary> 19 [HideInInspector] 20 21 public int heroID = 0; 22 public void OnClick() 23 { 24 SelectionListManager.selectionListManager.SetSelectionID(heroID);//調用更改ID 25 26 } 27 } 28 }
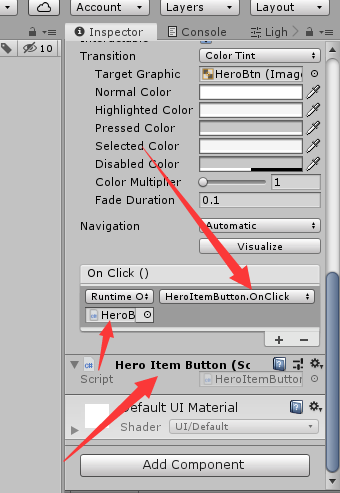
然後在回到按鈕,掛上HeroItemButton並設置按鈕回調OnClick:
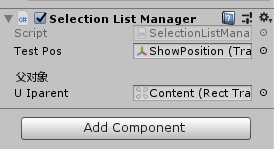
再再選擇英雄的場景中創建一個空物體(SelectionListManager),拖入展示位置和滾動視圖的Content:
3.試運行:
這時候我們點擊一下AssetBundle打包,讓程式飛一會~
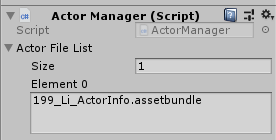
在一個用於測試的空對象(沒有就創建)掛上ActorManager:
並輸入剛剛創建的阿離的ActorInfo文件的位置(這裡就要帶後綴了,可以通過修改程式碼來免除加後綴):
然後運行:
我這邊因為臨時寫了個動畫的管理的所以有出場動畫展示,這個後面才講。
出現了動圖裡面的效果就說明成功啦!
不早了( 2019/09/20 00:30),下一節再見。
如果已經看過本章節:目錄傳送門:這是目錄鴨~
