NetCore 中 後台任務利器之Hangfire 的使用
- 2021 年 3 月 10 日
- 筆記
- 04 ASP.Net Core, 07 第三方組件
什麼是Hangfire
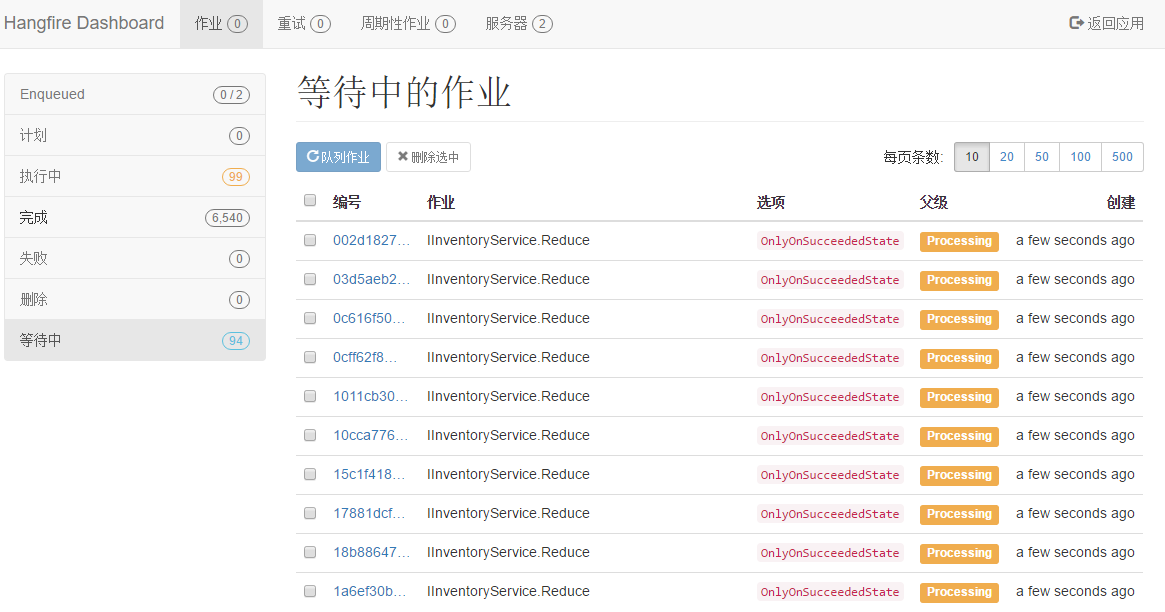
Hangfire 是一個開源的.NET任務調度框架,目前1.6+版本已支援.NET Core。它最大特點在於內置提供集成化的控制台,方便後台查看及監控:

另外,Hangfire包含三大核心組件:客戶端、持久化存儲、服務端,官方的流程介紹圖如下:

從圖中可以看出,這三個核心組件是可以分離出來單獨部署的,例如可以部署多台Hangfire服務,提高處理後台任務的吞吐量。關於任務持久化存儲,支援Sqlserver,MongoDb,Mysql或是Redis等等。
Hangfire可視化介面
1. 新建一個net5 項目,添加nuget 中對hangfire的依賴包

    <PackageReference Include="Hangfire" Version="1.7.18" />
    <PackageReference Include="Hangfire.AspNetCore" Version="1.7.18" />
    <PackageReference Include="Hangfire.Console" Version="1.4.2" />
    <PackageReference Include="Hangfire.Dashboard.BasicAuthorization" Version="1.0.2" />
    <PackageReference Include="Hangfire.HttpJob" Version="3.5.3" />
    <PackageReference Include="Hangfire.SqlServer" Version="1.7.18" />
    <PackageReference Include="Hangfire.Tags.SqlServer" Version="1.7.0" />
2. 在Startup.cs 配置服務及中間件
ConfigureServices方法
 services.AddHangfire(configura =>
            {
                //指定存儲介質
                configura.UseSqlServerStorage("Data Source=ZXL; Database=Hangfire.Sample; User ID=sa; Password=123456; Integrated Security=True;", new SqlServerStorageOptions() //Nuget引入:
                {
                    CommandBatchMaxTimeout = TimeSpan.FromMinutes(5),
                    SlidingInvisibilityTimeout = TimeSpan.FromMinutes(5),
                    QueuePollInterval = TimeSpan.Zero,
                    UseRecommendedIsolationLevel = true,
                    UsePageLocksOnDequeue = true,
                    DisableGlobalLocks = true
                }).UseTagsWithSql()//nuget引入Hangfire.Tags.SqlServer
            .UseConsole(new ConsoleOptions()
            {
                BackgroundColor = "#000079"
            }).UseHangfireHttpJob();

            });
Data Source 電腦機器名
Database 要先去建一個空的Hangfire.Sample的資料庫
Configure方法
 app.UseHangfireServer();//啟動HangfireServer
            app.UseHangfireDashboard("/hangfire"
            );   //支援可視化介面 ---任何一個用戶都能夠來訪問;所以需要加一道屏障
注釋掉
            //app.UseEndpoints(endpoints =>
            //{
            //    endpoints.MapGet("/", async context =>
            //    {
            //        await context.Response.WriteAsync("Hello World!");
            //    });
            //});
4. 在根目錄 cmd dotnet run

5. 在網頁url上打開 監聽埠+/hangfire
//localhost:5000/hangfire

這時打開了 hangfire的可視化介面

在持久化上,對應的資料庫生成了 DB表。——這也表示Hangfire 可以把任務數據持久化到DB上。

Hangfire添加任務
1.這裡假設 我們要在Hangfire的可視化頁面上,執行一個web任務 (這裡是拿我的上一篇建的webapi項目來用)
//localhost:52216/api/V1/First

2. 在Hangfire的可視化頁面上,我們按以下步驟操作,進入到第4步時。

我們修改裡面的參數值,像JobName、Url、Method等等一些參數,然後提交即可

任務完成後,它會出現在「完成」, 點擊 藍色的編號,比如 #3、#2、#1,我們可以看到任務執行的一些資訊


Hangfire安全性配置:添加登錄
 app.UseHangfireDashboard("/hangfire", new DashboardOptions()
            {
                Authorization = new BasicAuthAuthorizationFilter[] {
                      new BasicAuthAuthorizationFilter(new BasicAuthAuthorizationFilterOptions(){
                           SslRedirect=false,
                            RequireSsl=false,
                             Users=new BasicAuthAuthorizationUser[]{
                                  new BasicAuthAuthorizationUser(){
                                      Login="admin",
                                      PasswordClear="test"
                                  }
                             }
                      })
                }

            });  //支援可視化介面 ---任何一個用戶都能夠來訪問;所以需要加一道屏障


