SpringBoot + Security學習筆記
- 2021 年 2 月 19 日
- 筆記
- JAVA, springboot
SpringSecurity學習筆記
本以為是總結,最後寫成了筆記,所以還是需要更加的努力啊。
開始的時候看了一遍官方文檔,然後只看懂了加密器。
然後又學了一個尚矽谷的影片,雖然這個教程是在講一個項目,但我沒有聽懂(應該是我自己的問題)
程式碼 //gitee.com/pilearn/learning-spring-security
中文版文檔 //www.springcloud.cc/spring-security.html
尚矽谷影片鏈接 //www.bilibili.com/video/BV15a411A7kP
什麼是SpringSecurity
Security是Spring全家桶中一個安全框架,他的擴展能力非常的強,底層是一條過濾器鏈。通過簡單的配置就可以使用,但通過自己的DIY,可以把每個許可權細化到每個鏈接上去。
shiro沒有學,但只推薦學一個安全框架
這裡搭建的學習項目都是使用SpringBoot
獲取SpringSecurity
你可以在maven官網獲取最新版本
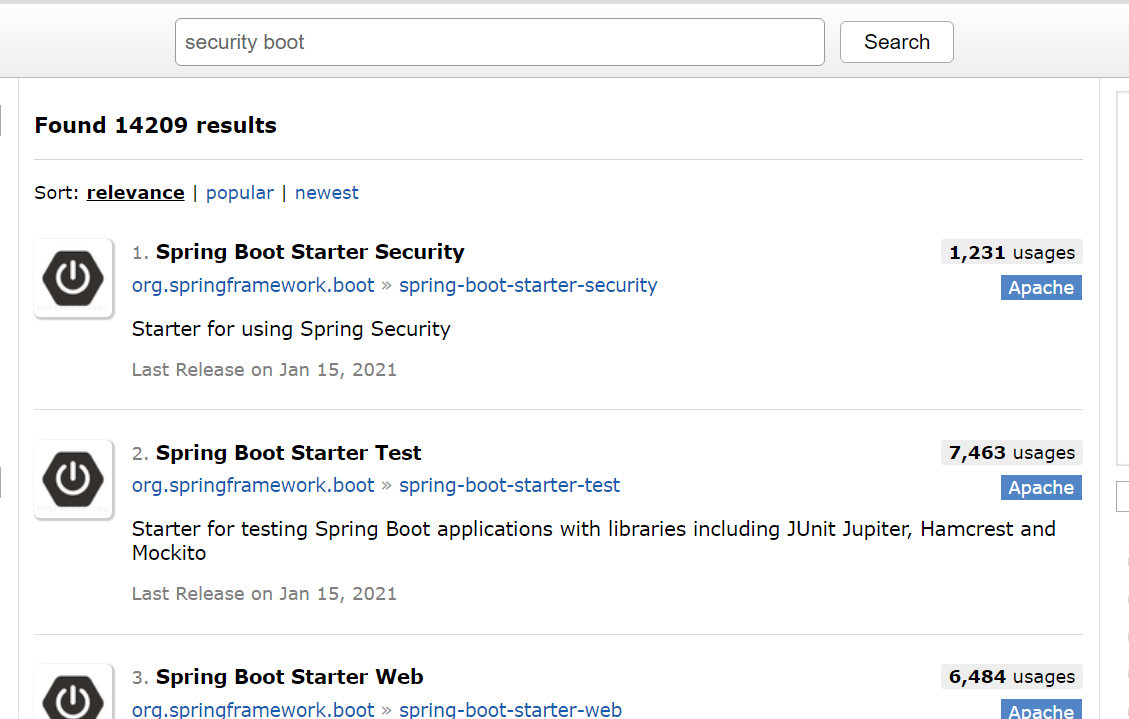
<dependency>
    <groupId>org.springframework.boot</groupId>
    <artifactId>spring-boot-starter-security</artifactId>
    <version>2.4.2</version>
</dependency>
開始一個SpringBoot項目
<?xml version="1.0" encoding="UTF-8"?>
<project xmlns="//maven.apache.org/POM/4.0.0" xmlns:xsi="//www.w3.org/2001/XMLSchema-instance"
         xsi:schemaLocation="//maven.apache.org/POM/4.0.0 //maven.apache.org/xsd/maven-4.0.0.xsd">
    <modelVersion>4.0.0</modelVersion>
    <parent>
        <groupId>org.springframework.boot</groupId>
        <artifactId>spring-boot-starter-parent</artifactId>
        <version>2.4.2</version>
        <relativePath/> <!-- lookup parent from repository -->
    </parent>
    <groupId>com.pipihao</groupId>
    <artifactId>securitylearn</artifactId>
    <version>0.0.1-SNAPSHOT</version>
    <name>securitylearn</name>
    <description>Demo project for Spring Boot</description>
    <properties>
        <java.version>1.8</java.version>
    </properties>
    <dependencies>
        <dependency>
            <groupId>com.alibaba</groupId>
            <artifactId>druid</artifactId>
            <version>1.1.21</version>
        </dependency>
        <dependency>
            <groupId>org.springframework.boot</groupId>
            <artifactId>spring-boot-starter-thymeleaf</artifactId>
        </dependency>
        <dependency>
            <groupId>org.springframework.boot</groupId>
            <artifactId>spring-boot-starter-security</artifactId>
        </dependency>
        <dependency>
            <groupId>org.springframework.boot</groupId>
            <artifactId>spring-boot-starter-web</artifactId>
        </dependency>
        <dependency>
            <groupId>org.mybatis.spring.boot</groupId>
            <artifactId>mybatis-spring-boot-starter</artifactId>
            <version>2.1.4</version>
        </dependency>
        <dependency>
            <groupId>mysql</groupId>
            <artifactId>mysql-connector-java</artifactId>
            <scope>runtime</scope>
        </dependency>
        <dependency>
            <groupId>org.projectlombok</groupId>
            <artifactId>lombok</artifactId>
            <optional>true</optional>
        </dependency>
        <dependency>
            <groupId>org.springframework.boot</groupId>
            <artifactId>spring-boot-starter-test</artifactId>
            <scope>test</scope>
        </dependency>
        <dependency>
            <groupId>org.springframework.security</groupId>
            <artifactId>spring-security-test</artifactId>
            <scope>test</scope>
        </dependency>
    </dependencies>

    <build>
        <plugins>
            <plugin>
                <groupId>org.springframework.boot</groupId>
                <artifactId>spring-boot-maven-plugin</artifactId>
                <configuration>
                    <excludes>
                        <exclude>
                            <groupId>org.projectlombok</groupId>
                            <artifactId>lombok</artifactId>
                        </exclude>
                    </excludes>
                </configuration>
            </plugin>
        </plugins>
    </build>
</project>
項目配置文件
server:
  port: 8001

spring:
  datasource:
    url: jdbc:mysql://localhost:3306/demo?serverTimezone=Asia/Shanghai
    username: root
    password: root
    driver-class-name: com.mysql.cj.jdbc.Driver
  thymeleaf:
    cache: false
    # 因為Thymeleaf很多有默認配置,所以只關了這個快取,方便刷新
資料庫文件
資料庫版本為 8.0
運行項目
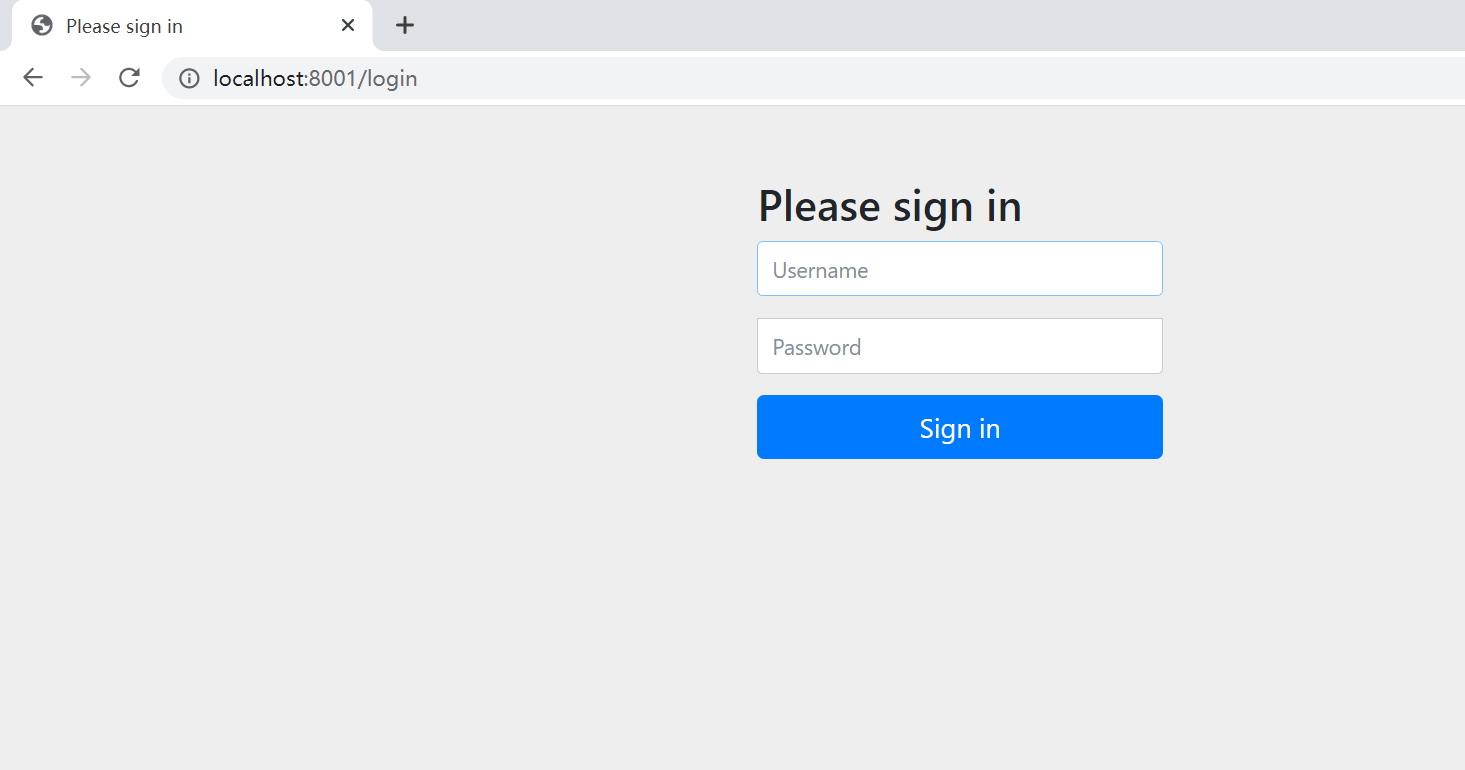

登錄
用戶名:user
密碼:控制台輸出的這密碼
配置Security
方法一:通過配置文件修改登錄帳號密碼
spring:
  security:
  	user:
  	  name: xx
  	  password: xx
方法二:通過自定義配置SecurityConfig配置類
WebSecurityConfigurerAdapter 類是是Security內置提供了一個默認身份驗證的抽象類,繼承此抽象類實現configure方法則可以對驗證操作實現DIY。[於官方文檔 6.3 標題可見]
UserDetailsService介面:查詢資料庫用戶名和密碼過程
- 創建類繼承UsernamePasswordAuthenticationFilter,重寫三個方法
* - 創建類實現UserDetailService,編寫查詢數據過程,返回User對象,這個User對象是安全框架提供對象。
- PasswordEncoder: 數據加密介面,用於返回User對象裡面的密碼加密
方法三:自定義配置類UserDetailsService
定義不驗證鏈接
@Override
protected void configure(HttpSecurity http) throws Exception {
    /*
        使用and()方法表示關閉XML標記的Java配置,它允許我們繼續配置父標記。如果您閱讀程式碼,它也是有道理的。我想配置授權請求並配置表單登錄並配置HTTP基本身份驗證。
         */
    http
        .authorizeRequests()
        .antMatchers("/","/no").permitAll() //可以直接訪問的路徑
        .anyRequest().authenticated()
        .and()
        .formLogin()
        .loginPage("/login.html") //配置登錄路徑
        .loginProcessingUrl("/doLogin")
        .defaultSuccessUrl("/hallo")
        .permitAll()
        ; //設置 登錄的網頁

    http.csrf().disable(); //如果注釋了這一行,全部要用_csrf的對象來驗證了
}
配置訪問許可權/角色
如果是配置訪問角色則使用是hasRole與hasAnyRole
這裡非常建議點一下看一下hasRole的源碼 使用Role的時候,User的許可權列表是需要加ROLE_前綴的
這裡直接使用的是hasAnyAuthority,還有一個方法是hasAuthority
前者可以配置多個許可權,而後者只能配置一個許可權
介面只是顯示一個字元串
@GetMapping("test")
public String sayTest(){
    return "Test";
}
SecurityConfig程式碼
@Override
protected void configure(HttpSecurity http) throws Exception {
    /*
        使用and()方法表示關閉XML標記的Java配置,它允許我們繼續配置父標記。如果您閱讀程式碼,它也是有道理的。我想配置授權請求並配置表單登錄並配置HTTP基本身份驗證。
         */
    http
        .authorizeRequests()
        .antMatchers("/","/no").permitAll() //可以直接訪問的路徑
        .antMatchers("/test").hasAnyAuthority("admin") // 訪問許可權
        .anyRequest().authenticated()
        .and()
        .formLogin()
        .loginPage("/login.html") //配置登錄路徑
        .loginProcessingUrl("/doLogin")
        .defaultSuccessUrl("/hallo")
        .permitAll()
        ; //設置 登錄的網頁

    http.csrf().disable(); //如果注釋了這一行,全部要用_csrf的對象來驗證了
}
UserDetailsImpl程式碼
@Override
public UserDetails loadUserByUsername(String username) throws UsernameNotFoundException {
    if(StringUtils.isEmpty(username)){
        throw new RuntimeException("用戶名不能為空");
    }
    IUser iUser= userMapper.getUserByUsername(username);
    if(iUser == null){
        throw new UsernameNotFoundException("無此用戶");
    }
    /*此處查詢用戶角色*/

    List<GrantedAuthority> grantedAuthorityList =
        AuthorityUtils.createAuthorityList("admin"); // 許可權的列表

    return new User(iUser.getUsername(),bCryptPasswordEncoder.encode(iUser.getPassword()),grantedAuthorityList);
}
自定義403介面
// 在此方法內加上一行  protected void configure(HttpSecurity http)
http.exceptionHandling().accessDeniedPage("/unauth.html");
許可權註解
@Secured
判斷是否有角色,這裡匹配的角色需要加前綴ROLE_
@GetMapping("update")
@Secured({"ROLE_manager"})
public String update(){
    return "update";
}
使用其功能時需要在application類上開起
@SpringBootApplication
@MapperScan("com.pipihao.securitylearn.mapper")
@EnableGlobalMethodSecurity(securedEnabled = true)
public class SecuritylearnApplication {
    public static void main(String[] args) {
        SpringApplication.run(SecuritylearnApplication.class, args);
    }
}
UserDetailsServiceImpl
List<GrantedAuthority> grantedAuthorityList =
    AuthorityUtils.createAuthorityList("admin","ROLE_manager");
@PreAuthorize & @PostAuthorize
此註解即有許可權驗證功能,又有角色驗證功能
@GetMapping("pre1")
@PreAuthorize("hasAnyRole('ROLE_manager')")
public String prePost1(){
    return "prePost1";
}

@GetMapping("pre2")
@PreAuthorize("hasAnyAuthority('admin')")
public String prePost2(){
    return "prePost2";
}
@SpringBootApplication
@EnableGlobalMethodSecurity(prePostEnabled = true)
public class SecuritylearnApplication {
    public static void main(String[] args) {
        SpringApplication.run(SecuritylearnApplication.class, args);
    }
}
@PostAuthorize 與@PreAuthorize的區別就是,Pre會先攔截後執行,而PostAuthorize是先執行,後攔截
所以我例子中沒有過多的講
@PreFilter & @PostFilter
Pre是過濾上傳的數據,Post過濾返回的數據
@GetMapping("list")
@PostFilter("filterObject.username != 'admin' ")
public List<IUser> list(){
    List<IUser> iUsers = new ArrayList<>();
    iUsers.add(new IUser(1,"admin","123"));
    iUsers.add(new IUser(2,"user","123"));
    return iUsers;
}

// Applicationo類上還是要加上下面這個註解,並設置屬性值
@EnableGlobalMethodSecurity(prePostEnabled = true)
效果圖

上傳則是同理,通過註解寫好判斷,然後測試即可,註:PreFilter過濾的也只是集合和數組
用戶註銷
/*配置退出登錄*/
http.logout().logoutUrl("/logout").logoutSuccessUrl("no").permitAll();
登錄後,直接通過瀏覽器,訪問此路徑即可(是的,就是如此)
location.href='/logout';
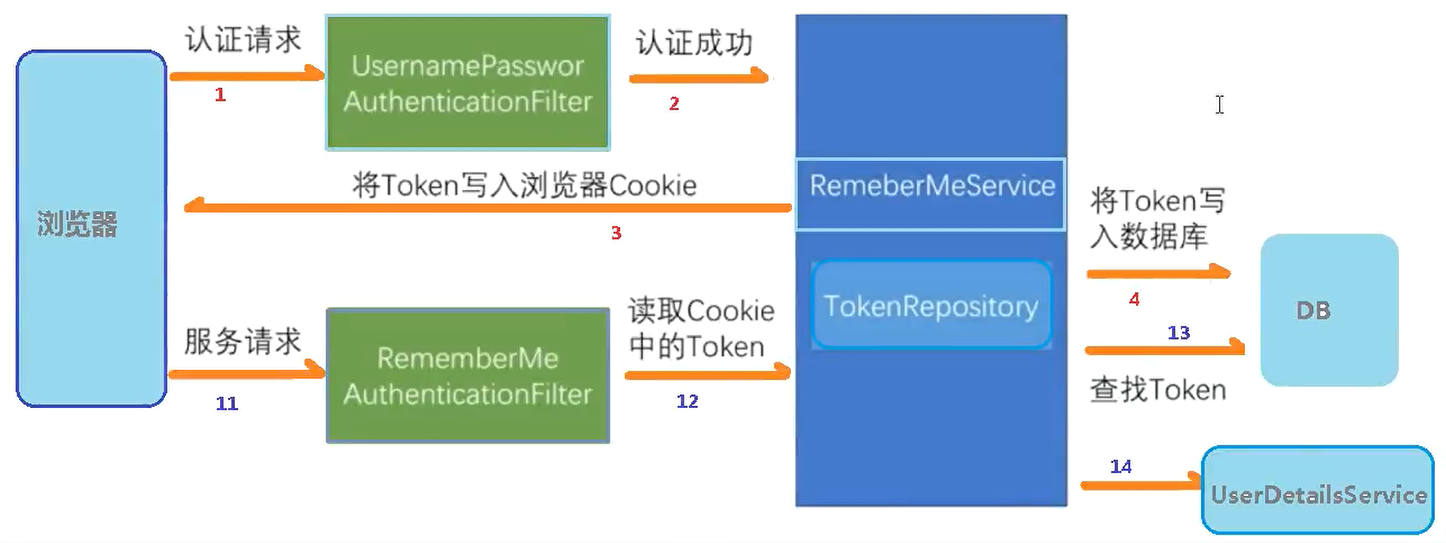
自動登錄
下面是尚矽谷老師寫的原理圖和執行流程
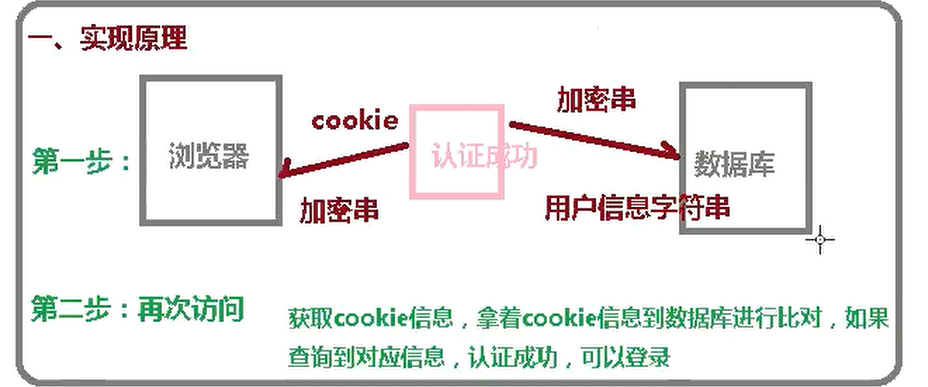
如果是微服務,則把資料庫改成redis,把cookie改成jwt生成的token
Security 中的一個類內JdbcTokenRepositoryImpl
的常量CREATE_TABLE_SQL
create table persistent_logins (username varchar(64) not null, series varchar(64) primary key, token varchar(64) not null, last_used timestamp not null)
有興趣的可以看看源碼 沒興趣的直接在你使用的資料庫內執行上面這行sql創建一個保存登錄資訊的表

JdbcTokenRepositoryImpl 是PersistentTokenRepository實現類
下面這種寫那麼應該是多態了
@Autowired
private DataSource dataSource;

@Bean
public PersistentTokenRepository persistentTokenRepository(){
    JdbcTokenRepositoryImpl jdbcTokenRepository = new JdbcTokenRepositoryImpl();
    jdbcTokenRepository.setDataSource(dataSource);
    //jdbcTokenRepository.setCreateTableOnStartup(true); 設置啟動時創建自動登錄表
    return jdbcTokenRepository;
}
SecurityConfig的方法
@Override
protected void configure(HttpSecurity http) throws Exception {
    /*自定義403鏈接*/
    http.exceptionHandling().accessDeniedPage("/unauth.html");
    /*配置退出登錄*/
    http.logout().logoutUrl("/logout").logoutSuccessUrl("/no").permitAll();
    /*
        使用and()方法表示關閉XML標記的Java配置,它允許我們繼續配置父標記。如果您閱讀程式碼,它也是有道理的。我想配置授權請求並配置表單登錄並配置HTTP基本身份驗證。
         */
    http
        .authorizeRequests()
        .antMatchers("/","/no").permitAll() //可以直接訪問的路徑
        .antMatchers("/test").hasAnyAuthority("admin")
        .antMatchers("/unauth").hasAnyAuthority("xxx")
        .anyRequest().authenticated()
        .and()
        .formLogin()
        .loginPage("/login.html") //配置登錄路徑
        .loginProcessingUrl("/doLogin")
        .defaultSuccessUrl("/hallo")
        .permitAll()

        // -------------------就是下面這坨
        .and()
        .rememberMe().tokenRepository(persistentTokenRepository())
        .tokenValiditySeconds(60) // 自動保存的時間,秒為單位
        .userDetailsService(userDetailsService)
        ; //設置 登錄的網頁

    http.csrf().disable(); //如果注釋了這一行,全部要用_csrf的對象來驗證了
}
下面是登錄介面
<form action="/doLogin" method="POST">
    user:<input type="text" name="username"><br>
    pswd:<input type="text" name="password"><br>
    <!--必須name=remember-me不然,是無法接收到是否自動登錄的資訊的-->
    自動登錄 <input type="checkbox" name="remember-me"><br>
    <input type="submit">
</form>
然後在登錄的時候打個勾,就可以自動登錄了
在DB中會出現如下的資訊

CSRF指令認證
第一步 把下面這一行注釋了就開啟了,也就是說他其實是默認開啟的
如果沒有關閉,則會NullPointerException
//http.csrf().disable();
Spring Security CSRF 會針對Patch,Post,Put,Delete方法進行防護。(都是一些要更改數據的方法)
系統默認提供了一個csrfToken對象放在HttpSession中,也就是我們所見到了_csrf對象
此對象可以直接使用
開啟CSRF後,則登錄的時【POST】,也需要驗證CSRF,而使用HttpSession則需要使用模板引擎,這裡我們使用的是Thymeleaf而非JSP。(大同小異)
註:使用Thymeleaf的時候,類上的Controller註解不能寫成RestController,不然無法生效的
@Controller
public class LoginController {

    @GetMapping("login")
    public String login(){
        return "login";
    }
}
<!doctype html>
<html xmlns:th="//www.thymeleaf.org">
<head>
    <meta charset="UTF-8">
    <meta name="viewport"
          content="width=device-width, user-scalable=no, initial-scale=1.0, maximum-scale=1.0, minimum-scale=1.0">
    <meta http-equiv="X-UA-Compatible" content="ie=edge">
    <title>登錄</title>
</head>
<body>
<!--沒加th:則不會有隱藏域自動生成-->
<form th:action="'/doLogin'" method="POST">
    user:<input type="text" name="username"><br>
    pswd:<input type="text" name="password"><br>
    <!--必須name=remember-me不然,是無法接收到是否自動登錄的資訊的-->
    自動登錄 <input type="checkbox" name="remember-me"><br>
    <input type="submit">
</form>
</body>
</html>
切記,默認開了CSRF,則每個表單中應當手動添加一個隱藏域
當Thymeleaf因為你使用了th,則自動給你生成了。
所以 th:action="'/doLogin'" 這樣寫可以省事
如下圖

總結
本是總結,誰知還是變成了學習筆記。總結代表著會,筆記代表著只能用,說不出什麼名堂。這是看第二遍,當然,這也會像我用正則一樣,每次用正則的時候,都要學一遍正則。
或許SpringSecurity並不難,難的只是步驟有點多。
老師講的很不錯,多聽幾遍就會了。
關於提高技術,應該看文檔,把他提供的API都自己看懂。像用Redist代替DB,這樣的微服務中,使用,很有效率。
接下來,我還會繼續學習Security,並出些新筆記,這最多算是一個聽課筆記。


