Spring Boot2 系列教程(一)純 Java 搭建 SSM 項目
- 2019 年 10 月 3 日
- 筆記
在 Spring Boot 項目中,正常來說是不存在 XML 配置,這是因為 Spring Boot 不推薦使用 XML ,注意,並非不支援,Spring Boot 推薦開發者使用 Java 配置來搭建框架,Spring Boot 中,大量的自動化配置都是通過 Java 配置來實現的,這一套實現方案,我們也可以自己做,即自己也可以使用純 Java 來搭建一個 SSM 環境,即在項目中,不存在任何 XML 配置,包括 web.xml 。
環境要求:
- 使用純 Java 來搭建 SSM 環境,要求 Tomcat 的版本必須在 7 以上。
快速體驗
1 創建工程
創建一個普通的 Maven 工程(注意,這裡可以不必創建 Web 工程),並添加 SpringMVC 的依賴,同時,這裡環境的搭建需要用到 Servlet ,所以我們還需要引入 Servlet 的依賴(一定不能使用低版本的 Servlet),最終的 pom.xml 文件如下:
<dependency> <groupId>org.springframework</groupId> <artifactId>spring-webmvc</artifactId> <version>5.1.6.RELEASE</version> </dependency> <dependency> <groupId>javax.servlet</groupId> <artifactId>javax.servlet-api</artifactId> <version>4.0.1</version> <scope>provided</scope> </dependency>2 添加 Spring 配置
工程創建成功之後,首先添加 Spring 的配置文件,如下:
@Configuration @ComponentScan(basePackages = "org.javaboy", useDefaultFilters = true, excludeFilters = {@ComponentScan.Filter(type = FilterType.ANNOTATION, classes = Controller.class)}) public class SpringConfig { }關於這個配置,我說如下幾點:
- @Configuration 註解表示這是一個配置類,在我們這裡,這個配置的作用類似於 applicationContext.xml
- @ComponentScan 註解表示配置包掃描,裡邊的屬性和 xml 配置中的屬性都是一一對應的,useDefaultFilters 表示使用默認的過濾器,然後又除去 Controller 註解,即在 Spring 容器中掃描除了 Controller 之外的其他所有 Bean 。
3 添加 SpringMVC 配置
接下來再來創建 springmvc 的配置文件:
@Configuration @ComponentScan(basePackages = "org.javaboy",useDefaultFilters = false,includeFilters = {@ComponentScan.Filter(type = FilterType.ANNOTATION,classes = Controller.class)}) public class SpringMVCConfig { }注意,如果不需要在 SpringMVC 中添加其他的額外配置,這樣就可以了。即 視圖解析器、JSON 解析、文件上傳……等等,如果都不需要配置的話,這樣就可以了。
4 配置 web.xml
此時,我們並沒有 web.xml 文件,這時,我們可以使用 Java 程式碼去代替 web.xml 文件,這裡會用到 WebApplicationInitializer ,具體定義如下:
public class WebInit implements WebApplicationInitializer { public void onStartup(ServletContext servletContext) throws ServletException { //首先來載入 SpringMVC 的配置文件 AnnotationConfigWebApplicationContext ctx = new AnnotationConfigWebApplicationContext(); ctx.register(SpringMVCConfig.class); // 添加 DispatcherServlet ServletRegistration.Dynamic springmvc = servletContext.addServlet("springmvc", new DispatcherServlet(ctx)); // 給 DispatcherServlet 添加路徑映射 springmvc.addMapping("/"); // 給 DispatcherServlet 添加啟動時機 springmvc.setLoadOnStartup(1); } }WebInit 的作用類似於 web.xml,這個類需要實現 WebApplicationInitializer 介面,並實現介面中的方法,當項目啟動時,onStartup 方法會被自動執行,我們可以在這個方法中做一些項目初始化操作,例如載入 SpringMVC 容器,添加過濾器,添加 Listener、添加 Servlet 等。
注意:
由於我們在 WebInit 中只是添加了 SpringMVC 的配置,這樣項目在啟動時只會去載入 SpringMVC 容器,而不會去載入 Spring 容器,如果一定要載入 Spring 容器,需要我們修改 SpringMVC 的配置,在 SpringMVC 配置的包掃描中也去掃描 @Configuration 註解,進而載入 Spring 容器,還有一種方案可以解決這個問題,就是直接在項目中捨棄 Spring 配置,直接將所有配置放到 SpringMVC 的配置中來完成,這個在 SSM 整合時是沒有問題的,在實際開發中,較多採用第二種方案,第二種方案,SpringMVC 的配置如下:
@Configuration @ComponentScan(basePackages = "org.javaboy") public class SpringMVCConfig { }這種方案中,所有的註解都在 SpringMVC 中掃描,採用這種方案的話,則 Spring 的配置文件就可以刪除了。
5 測試
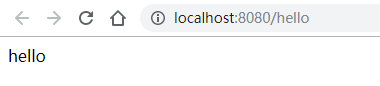
最後,添加一個 HelloController ,然後啟動項目進行測試:
@RestController public class HelloController { @GetMapping("/hello") public String hello() { return "hello"; } }啟動項目,訪問介面,結果如下:
6 其他配置
6.1 靜態資源過濾
靜態資源過濾在 SpringMVC 的 XML 中的配置如下:
<mvc:resources mapping="/**" location="/"/>在 Java 配置的 SSM 環境中,如果要配置靜態資源過濾,需要讓 SpringMVC 的配置繼承 WebMvcConfigurationSupport ,進而重寫 WebMvcConfigurationSupport 中的方法,如下:
@Configuration @ComponentScan(basePackages = "org.javaboy") public class SpringMVCConfig extends WebMvcConfigurationSupport { @Override protected void addResourceHandlers(ResourceHandlerRegistry registry) { registry.addResourceHandler("/js/**").addResourceLocations("classpath:/"); } }重寫 addResourceHandlers 方法,在這個方法中配置靜態資源過濾,這裡我將靜態資源放在 resources 目錄下,所以資源位置是 classpath:/ ,當然,資源也可以放在 webapp 目錄下,此時只需要修改配置中的資源位置即可。如果採用 Java 來配置 SSM 環境,一般來說,可以不必使用 webapp 目錄,除非要使用 JSP 做頁面模板,否則可以忽略 webapp 目錄。
6.2 視圖解析器
在 XML 文件中,通過如下方式配置視圖解析器:
<bean class="org.springframework.web.servlet.view.InternalResourceViewResolver"> <property name="prefix" value="/WEB-INF/jsp/"/> <property name="suffix" value=".jsp"/> </bean>如果通過 Java 類,一樣也可以實現類似功能。
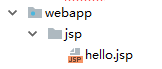
首先為我們的項目添加 webapp 目錄,webapp 目錄中添加一個 jsp 目錄,jsp 目錄中添加 jsp 文件:
然後引入 JSP 的依賴:
<dependency> <groupId>javax.servlet.jsp</groupId> <artifactId>javax.servlet.jsp-api</artifactId> <version>2.3.1</version> </dependency>然後,在配置類中,繼續重寫方法:
@Configuration @ComponentScan(basePackages = "org.javaboy") public class SpringMVCConfig extends WebMvcConfigurationSupport { @Override protected void configureViewResolvers(ViewResolverRegistry registry) { registry.jsp("/jsp/", ".jsp"); } }接下來,在 Controller 中添加控制器即可訪問 JSP 頁面:
@Controller public class HelloController2 { @GetMapping("/hello2") public String hello() { return "hello"; } }6.3 路徑映射
有的時候,我們的控制器的作用僅僅只是一個跳轉,就像上面小節中的控制器,裡邊沒有任何業務邏輯,像這種情況,可以不用定義方法,可以直接通過路徑映射來實現頁面訪問。如果在 XML 中配置路徑映射,如下:
<mvc:view-controller path="/hello" view-name="hello" status-code="200"/>這行配置,表示如果用戶訪問 /hello 這個路徑,則直接將名為 hello 的視圖返回給用戶,並且響應碼為 200,這個配置就可以替代 Controller 中的方法。
相同的需求,如果在 Java 程式碼中,寫法如下:
@Configuration @ComponentScan(basePackages = "org.javaboy") public class SpringMVCConfig extends WebMvcConfigurationSupport { @Override protected void addViewControllers(ViewControllerRegistry registry) { registry.addViewController("/hello3").setViewName("hello"); } }此時,用戶訪問 /hello3 介面,就能看到名為 hello 的視圖文件。
6.4 JSON 配置
SpringMVC 可以接收JSON 參數,也可以返回 JSON 參數,這一切依賴於 HttpMessageConverter。
HttpMessageConverter 可以將一個 JSON 字元串轉為 對象,也可以將一個對象轉為 JSON 字元串,實際上它的底層還是依賴於具體的 JSON 庫。
所有的 JSON 庫要在 SpringMVC 中自動返回或者接收 JSON,都必須提供和自己相關的 HttpMessageConverter 。
SpringMVC 中,默認提供了 Jackson 和 gson 的 HttpMessageConverter ,分別是:MappingJackson2HttpMessageConverter 和 GsonHttpMessageConverter 。
正因為如此,我們在 SpringMVC 中,如果要使用 JSON ,對於 jackson 和 gson 我們只需要添加依賴,加完依賴就可以直接使用了。具體的配置是在 AllEncompassingFormHttpMessageConverter 類中完成的。
如果開發者使用了 fastjson,那麼默認情況下,SpringMVC 並沒有提供 fastjson 的 HttpMessageConverter ,這個需要我們自己提供,如果是在 XML 配置中,fastjson 除了加依賴,還要顯式配置 HttpMessageConverter,如下:
<mvc:annotation-driven> <mvc:message-converters> <bean class="com.alibaba.fastjson.support.spring.FastJsonHttpMessageConverter"> </bean> </mvc:message-converters> </mvc:annotation-driven>在 Java 配置的 SSM 中,我們一樣也可以添加這樣的配置:
@Configuration @ComponentScan(basePackages = "org.javaboy") public class SpringMVCConfig extends WebMvcConfigurationSupport { @Override protected void configureMessageConverters(List<HttpMessageConverter<?>> converters) { FastJsonHttpMessageConverter converter = new FastJsonHttpMessageConverter(); converter.setDefaultCharset(Charset.forName("UTF-8")); FastJsonConfig fastJsonConfig = new FastJsonConfig(); fastJsonConfig.setCharset(Charset.forName("UTF-8")); converter.setFastJsonConfig(fastJsonConfig); converters.add(converter); } }然後,就可以在介面中直接返回 JSON 了,此時的 JSON 數據將通過 fastjson 生成。
總結
好了,本文通過一個簡單的例子向讀者展示了使用 Java 來配置 Spring+SpringMVC 環境,事實上,只要這兩個配置 OK ,再加入 MyBatis 就是非常容易的事了,本文相關的案例松哥已經上傳到 GitHub 上了:https://github.com/lenve/javaboy-code-samples。
關於本文,有問題歡迎留言討論。