pixi.js 自定義游標樣式
pixi 介紹
Pixi是一個超快的2D渲染引擎,通過Javascript和Html技術創建動畫或管理互動式影像,從而製作遊戲或應用。
項目地址://github.com/pixijs/pixi.js
API 地址://pixijs.download/dev/docs/index.html
中文教程地址://github.com/Zainking/learningPixi
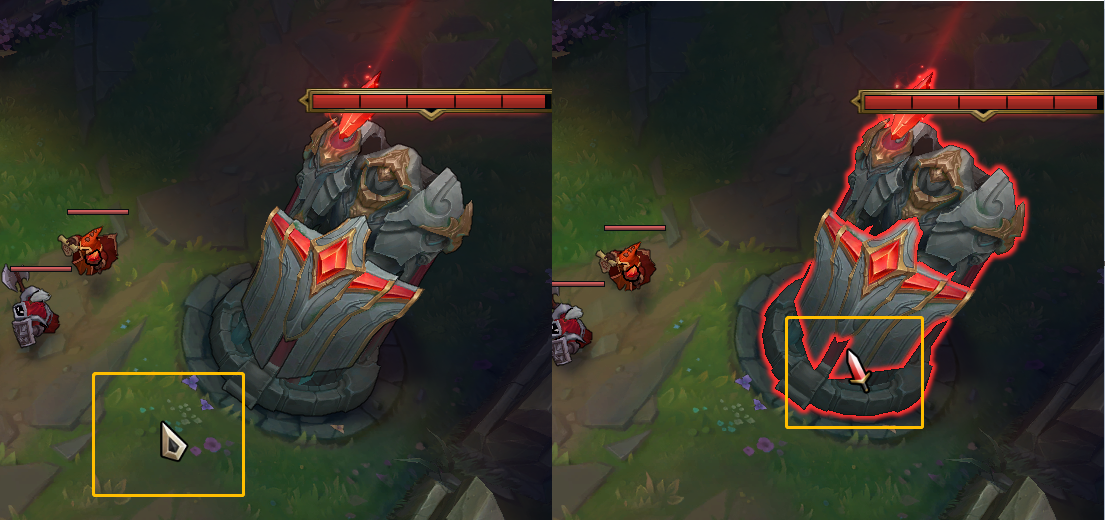
遊戲中都會做一些跟整個遊戲畫面風格相符的訂製游標,比如英雄聯盟中的棱形游標。在游標移動到敵對單位(交互對象)上時,會變成一把小🗡,釋放技能時又變成了另外的形狀。ps:為了找素材我特意打了一局遊戲(手動狗頭).
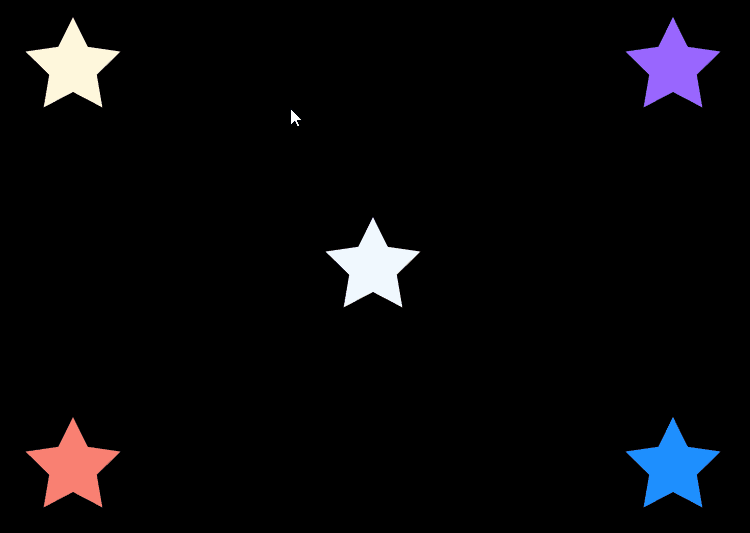
首先,我們需要創建一個可交互的區域。
const star = new PIXI.Graphics();
star.beginFill(0xfff8dc);
star.drawStar(200, 200, 5, 50);
star.endFill();

star.interactive = true;//啟用交互響應
star.buttonMode = true;//設置交互時游標樣式為 pointer 等同於 star.cursor = 'pointer'


app.stage.addChild(star);
在之前的文章中,我們提到過,可交互的關鍵就在於需要設置DisplayObject的交互屬性interactive。只有當interactive=true時,觸摸、點擊、滑鼠等事件才能被該對象捕獲到。(對於交互對象,原本的交互範圍只是元素本身的位置範圍,但是還可以通過設置hitArea來定義更大的交互範圍。)
cursor : This defines what cursor mode is used when the mouse cursor is hovered over the displayObject.
buttonMode: Setting this changes the ‘cursor’ property to
'pointer'.
CSS cursor 樣式
在我們看到的html中,所有的pixi繪製都是基於一個canvas實現的。也就是說,游標的變化其實都是相當於修改了canvas的cursor樣式。
cursor: [ [ <uri> [<x> <y>]?,]* [ auto | default | none | context-menu | help | pointer |
     progress | wait |cell | crosshair | text | vertical-text | alias | copy | move |
     no-drop | not-allowed | e-resize | n-resize | ne-resize | nw-resize | s-resize |
     se-resize | sw-resize | w-resize | ew-resize | ns-resize | nesw-resize | nwse-resize |
     col-resize | row-resize | all-scroll | zoom-in | zoom-out | grab | grabbing ] ];
1、cursor屬性適用於所有元素;
2、cursor屬性僅對具有指針設備(如滑鼠)的設備有效;它對觸控設備沒有任何影響。
3、並非所有瀏覽器都支援cursor屬性的所有屬性值,且所有屬性值在所有瀏覽器和作業系統中顯示的效果不一定相同。
通過給不同的五角星設置不同的cursor屬性,就可以實現這樣的效果。
注意:buttonMode和cursor的值會互相覆蓋,以最後設置的為準。
全局自定義cursor樣式
千呼萬喚始出來直接上程式碼:
const defaultIcon = "url('imgs/bunny.png'),auto";
const hoverIcon = "url('imgs/bunny_saturated.png'),auto";

app.renderer.plugins.interaction.cursorStyles.default = defaultIcon;
app.renderer.plugins.interaction.cursorStyles.pointer = hoverIcon;
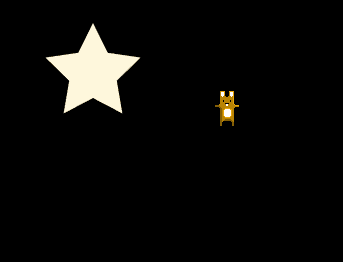
cursorStyles(傳送門)是一個Object<string, Object>類型的鍵值對,string字元串是用於設置cursor的值,object為對應cursor的具體樣式內容。
這個解釋起來比較拗口,看個樣例就明白了。
const hoverIcon = "url('imgs/bunny_saturated.png'),auto";
//定義一個名為mycursor的游標樣式並綁定具體css
app.renderer.plugins.interaction.cursorStyles.mycursor = hoverIcon;

//添加一個新的交互對象並將其cursor設置為mycursor
const star = new PIXI.Graphics();
star.interactive = true;
star.cursor = 'mycursor';
...
總結
本文介紹了pixi中設置DisplayObject觸發交互的方式、buttonMode和cursor之間的關係以及CSS cursor,通過對全局cursorStyles的設置實現了全局的自定義游標。


