Salesforce LWC學習(五) LDS & Wire Service 實現和後台數據交互 & meta xml配置
- 2019 年 10 月 3 日
- 筆記
之前的幾節都是基於前台變數進行相關的操作和學習,我們在項目中不可避免的需要獲取數據以及進行DML操作。之前的內容中也有提到wire註解,今天就詳細的介紹一下對數據進行查詢以及DML操作以及Wire Service相關的知識。
一. LDS
學習LDS以前可以先看一下aura中LDS的概念salesforce lightning零基礎學習(六)Lightning Data Service(LDS)。針對LWC中的LDS和aura中的功能原理很像,區別可能是語法和標籤的區別。所以這裡對LDS不做過多的描述,直接展開標籤的用法。
LWC 封裝了3個最基礎的組件去和數據進行交互。分別是lightning-record-form / lightning-record-edit-form / lightning-record-view-form。和aura的用法也類似,lightning-record-form可以作為view/edit視圖使用,lightning-record-edit-form針對edit視圖使用並可以進行最大可能的自定義UI,lightning-record-view-form針對view視圖使用並可以進行最大可能的自定義UI。
他們可以實現最基礎的交互,如果他們標準功能滿足不了,我們需要更加的自定義的功能,需要使用@wire 去指定LDS 的wire adapter。(封裝在lightning/ui*Api中)
1. lightning-record-form
當我們只有ID,希望根據當前的用戶顯示當前用戶對應的page layout布局的內容。我們便可以使用 lightning-record-form標籤了,此標籤遵循著FLS關係,用戶只能看到自己可見的欄位。此標籤有三個模式:
view: 以output field展示,針對有許可權編輯的欄位,會顯示編輯的按鈕,當編輯某個值以後會顯示save/cancel 按鈕。
read-only:和上面區別為不顯示可編輯按鈕。
edit:以輸入框進行展示,然後顯示save/cancel按鈕。
myComponentWithRecord 展示了 lightning:record-form的view的demo。
myComponentWithRecord.html:使用lightning-record-form展示account的detail數據,layout-type選擇的是compact,mode為view。
1 <template> 2 <lightning-record-form 3 record-id={recordId} 4 object-api-name="Account" 5 layout-type="Compact" 6 mode="view"> 7 </lightning-record-form> 8 </template>
myComponentWithRecord.js:聲明一個public的變數,名稱固定為recordId。
1 // myComponent.js 2 import { LightningElement, api } from 'lwc'; 3 export default class MyComponent extends LightningElement { 4 @api recordId; 5 }
myComponentWithRecord.js-meta.xml:配置當前component只允許用到record page中,並且只有account的record page可以選擇此component。下面的內容我們會詳細的講解如何配置此xml文件,以及各個標籤的作用。
1 <?xml version="1.0" encoding="UTF-8"?> 2 <LightningComponentBundle xmlns="http://soap.sforce.com/2006/04/metadata" fqn="myComponentWithRecord"> 3 <apiVersion>46.0</apiVersion> 4 <isExposed>true</isExposed> 5 <targets> 6 <target>lightning__RecordPage</target> 7 </targets> 8 <targetConfigs> 9 <targetConfig targets="lightning__RecordPage"> 10 <property name="recordId" type="String"></property> 11 <objects> 12 <object>Account</object> 13 </objects> 14 </targetConfig> 15 </targetConfigs> 16 </LightningComponentBundle>
配置完以後我們只需要找到一個account,更改page layout或者app builder中針對account的lightning record page拖拽此component即可顯示。
上面的demo中,我們在lightning-record-form中聲明了一些簡單的屬性,除了上述的屬性以外,此標籤還有很多可選擇的屬性。所有屬性如下:
- record-type-id: record type的ID,此屬性用於當前的object有多個record type並且我們不想創建default的record type情況,這時我們需要傳遞 record type id;
- mode: view/edit/readonly。當我們沒有指定ID的情況下,則這個類型默認是edit,即要創建一個object的記錄;當有id情況下,默認是view。
- layout-type: Compact / Full. 用來指定當前的layout展現的形式。當我們新建記錄時,即record id為空的情況下,layout-type只能渲染成Full.
- record-id: 需要展示/操作的記錄ID,如果此屬性為空,則代表要新建一條記錄;
- object-api-name: 當前想要操作的object的API name,此屬性是必填屬性;
- columns: 表單中的列數,通常lightning:record-form不需要設置;
- fields: 如果我們不想通過layout-type展示,我們可以設置此fields選項,去按照我們的要求顯示指定的欄位資訊。當然lightning:record-form不建議使用此屬性,如果想要自定義顯示欄位,我們可以考慮用lightning:record-view-form以及lightning:record-edit-form去實現read/edit模式。
- density:設置label以及field在表單中的排列樣式。有三個值: compact / comfy / auto.其中auto是default的值。
除了上述的屬性以外,因為lightning-record-form有edit mode,所以它還擁有一些方法(以下僅用於edit mode,readonly不可用):
- load:當LDS載入數據完成後會調用此事件,此事件有一個返回的參數是detail,我們可以通過event.detail獲取相關的內容;
- submit:當form表單提交了改變了的data時會自動觸發此事件,此事件有一個可傳入的參數fields,此參數用來指定要操作的欄位集合;
- success:當form表單提交執行成功以後會自動觸發此事件,此事件有一個返回的參數是detail;
- error:當form表單提交執行失敗以後會自動觸發此事件,返回的參數有detail;
- cancel:當form表單沒有提交點擊cancel以後會自動觸發此事件。
這幾個事件在某種情況下還是有一定聯繫的。
- 當我們執行submit事件以後,在沒有錯誤的情況下,會先執行load事件,執行成功以後會執行success事件,當執行完success事件以後會再一次load事件。 submit -> load -> success -> load。
- 當我們執行submit事件以後,如果有錯誤會執行error事件。 submit -> error。
- 當我們執行cancel事件以後,將會執行load事件。cancel -> load。
- 當我們執行完cancel事件以後,頁面的cancel/submit按鈕會隱藏,可編輯欄位會展示編輯的圖標,當我們對某個欄位進行編輯時,會執行load事件。
下面通過一個demo更好的了解edit功能。
myComponentWithRecordEdit.html:展示一個edit模式的lightning-record-form,並針對這些標準的事件設置相關的handler。
1 <template> 2 <lightning-record-form 3 record-id={recordId} 4 object-api-name={objectApiName} 5 fields={fields} 6 columns="2" 7 mode="edit" 8 onsubmit={handleSubmit} 9 onsuccess={handleSuccess} 10 onerror={handleError} 11 oncancel={handleCancel} 12 onload={handleLoad} 13 > 14 </lightning-record-form> 15 </template>
myComponentWithRecordEdit.js:設置相關的handler邏輯,頭部我們可以看到import salesforce/lightning相關的內容。這個我們在後續會以refrence內容詳細說明。這裡還有event.preventDefault()方法。當我們捕獲submit 事件並以編程方式提交表單,這種情況我們需要使用event.preventDefault方法去取消事件的默認行為,否則會進行重複的表單提交。
1 /* eslint-disable no-console */ 2 import { LightningElement, api } from 'lwc'; 3 import { ShowToastEvent } from 'lightning/platformShowToastEvent'; 4 5 import NAME_FIELD from '@salesforce/schema/Account.Name'; 6 import REVENUE_FIELD from '@salesforce/schema/Account.AnnualRevenue'; 7 import INDUSTRY_FIELD from '@salesforce/schema/Account.Industry'; 8 9 export default class MyComponentWithRecordEdit extends LightningElement { 10 // The record page provides recordId and objectApiName 11 @api recordId; 12 @api objectApiName; 13 14 fields = [NAME_FIELD, REVENUE_FIELD, INDUSTRY_FIELD]; 15 16 handleLoad(event) { 17 console.log('execute handle load'); 18 } 19 20 handleSubmit(event){ 21 console.log('execute handle submit'); 22 event.preventDefault(); // stop the form from submitting 23 const fields = event.detail.fields; 24 fields.LastName = 'My Custom Last Name'; // modify a field 25 this.template.querySelector('lightning-record-form').submit(fields); 26 } 27 28 handleSuccess(event) { 29 console.log('execute handle success'); 30 const evt = new ShowToastEvent({ 31 title: "Account Operated", 32 message: "Record ID: " + event.detail.id, 33 variant: "success" 34 }); 35 this.dispatchEvent(evt); 36 } 37 38 handleError(event) { 39 console.log('execute handle error'); 40 const evt = new ShowToastEvent({ 41 title: "Account Operated", 42 message: event.detail.message, 43 variant: "error" 44 }); 45 this.dispatchEvent(evt); 46 } 47 48 handleCancel(event) { 49 console.log('execute handle cancel') 50 const evt = new ShowToastEvent({ 51 title: "Account canceled", 52 variant: "cancel" 53 }); 54 this.dispatchEvent(evt); 55 } 56 }
效果展示:
1) 點擊Save更新數據操作
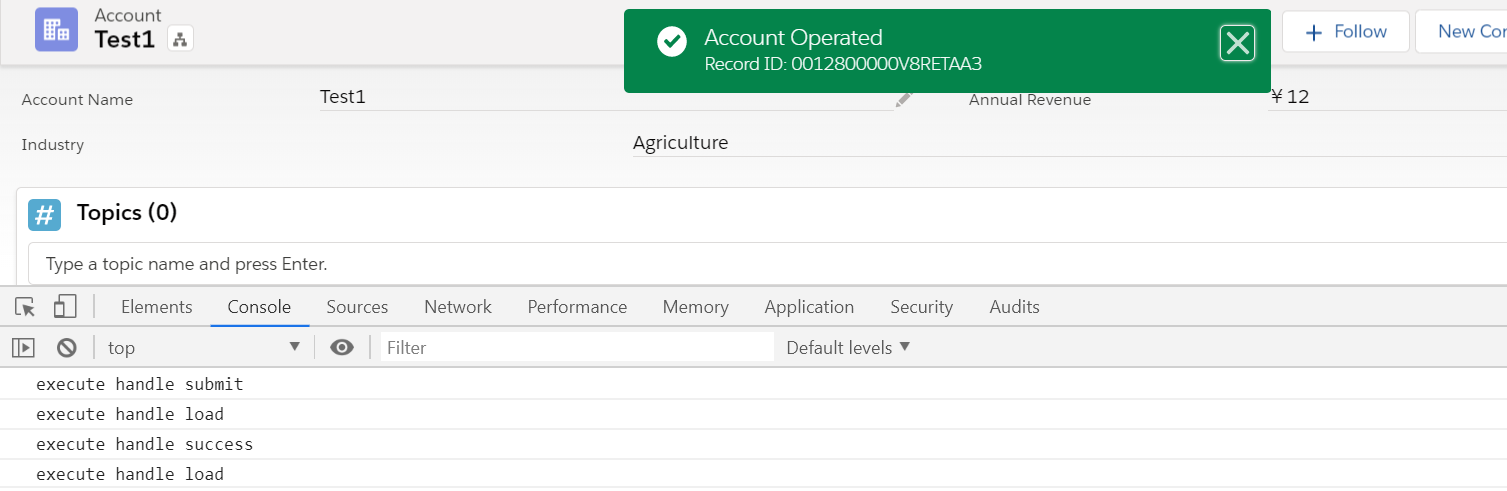
2) 當Save後有error情況

2. lightning-record-view-form
lightning-record-form功能確實比較好用,但是如果用戶想要顯示指定的欄位並且希望欄位以指定的順序進行顯示只讀的pagelayout時,使用lightning-record-form便無法實現了,這個時候我們需要使用lightning-record-view-form搭配lightning-output-field用來實現按照自己的要求展示一個或者多個欄位。顯示時,我們通常搭配grid一起使用按需展現多行多列效果。grid使用可以參考:https://www.lightningdesignsystem.com/utilities/grid/
此組件有以下的屬性可供選擇:
- record-id:當前要顯示記錄的記錄ID,此欄位必填;
- object-api-name: 當前object的API 名稱,此欄位必填;
- density:設置label以及field在表單中的排列樣式。
除上述屬性以外,lightning-record-view-form支援load事件,可用參數為data,存儲的是記錄的數據。詳見上面的demo。下面的demo為使用此標籤實現只讀的數據。
myComponentWithRecordView.html:通過引入lightning-record-view-form,然後配合lightning-output-field展示資訊,這裡展示的是一行四列的內容布局。
1 <template> 2 <lightning-record-view-form 3 record-id={recordId} 4 object-api-name="Account"> 5 <div class="slds-grid"> 6 <div class="slds-col"> 7 <lightning-output-field field-name="Name"></lightning-output-field> 8 </div> 9 <div class="slds-col"> 10 <lightning-output-field field-name="Phone"></lightning-output-field> 11 </div> 12 <div class="slds-col"> 13 <lightning-output-field field-name="AnnualRevenue"></lightning-output-field> 14 </div> 15 <div class="slds-col"> 16 <lightning-output-field field-name="Industry"></lightning-output-field> 17 18 </div> 19 </div> 20 </lightning-record-view-form> 21 </template>
myComponentWithRecordView.js
1 import { LightningElement, api } from 'lwc'; 2 3 export default class MyComponentWithRecordView extends LightningElement { 4 @api recordId; 5 }
顯示效果:

3. lightning-record-edit-form
lightning-record-form可以實現create/edit功能,和view的情況一樣,當用戶想要深度自定義時,lightning-record-form顯然達不到需求,這個時候我們就需要 lightning-record-edit-form。
此組件通常和lightning-input-field一起用,用來顯示需要編輯的欄位。我們針對布局中偶爾可能需要顯示只讀欄位,我們可以使用lightning-output-field以及lightning-formatted-name一起搭配使用。
此組件支援的方法和lightning-record-form基於edit模式下差不太多,同lightning-record-form一樣,如果想要創建記錄,只需要record-id為空即可。
lightning-record-form與lightning-record-edit-form使用不同的地方可以整理兩點:
1) lightning-record-form有cancel事件,lightning-record-edit-form沒有,需要使用lightning-button展示。針對cancel按鈕的默認處理方式也不同,針對lightning-record-form點擊cancel以後會默認恢復view的狀態,針對lightning-record-edit-form不可以,我們需要針對欄位調用reset方法才可以;
2) lightning-record-edit-form 需要使用lightning-button並且type為submit才可以正常提交表單,lightning-record-form不需要。
下面通過一個demo進行更好的了解。
recordEditFormSample.html
1 <template> 2 <lightning-record-edit-form 3 record-id={recordId} 4 object-api-name={objectApiName} 5 onsubmit={handleSubmit} 6 onload={handleLoad} 7 onsuccess={handleSuccess} 8 onerror={handleError} 9 > 10 <lightning-messages></lightning-messages> 11 <lightning-input-field field-name="Name"></lightning-input-field> 12 <lightning-input-field field-name="Industry"></lightning-input-field> 13 <lightning-input-field field-name="AnnualRevenue"></lightning-input-field> 14 <div class="slds-m-top_medium"> 15 <lightning-button class="slds-m-top_small" label="Cancel" onclick={handleReset}></lightning-button> 16 <lightning-button class="slds-m-top_small" type="submit" label="Save Record"></lightning-button> 17 </div> 18 </lightning-record-edit-form> 19 </template>
recordEditFormSample.js
1 /* eslint-disable no-console */ 2 import { LightningElement, api } from 'lwc'; 3 import { ShowToastEvent } from 'lightning/platformShowToastEvent'; 4 export default class RecordEditFormSample extends LightningElement { 5 6 @api recordId; 7 @api objectApiName; 8 9 handleSubmit(event) { 10 event.preventDefault(); // stop the form from submitting 11 const fields = event.detail.fields; 12 if(fields.Industry === null || fields.Industry === '') { 13 const evt = new ShowToastEvent({ 14 title: "Account Operated Failed", 15 message: "Account Industry cannot be blank", 16 variant: "error" 17 }); 18 this.dispatchEvent(evt); 19 return; 20 } 21 this.template.querySelector('lightning-record-edit-form').submit(fields); 22 } 23 24 handleLoad(event) { 25 console.log('execute load'); 26 } 27 28 handleSuccess(event) { 29 const evt = new ShowToastEvent({ 30 title: "Account Operated Success", 31 message: "Record is :" + event.detail.id, 32 variant: "success" 33 }); 34 this.dispatchEvent(evt); 35 } 36 37 handleError(event) { 38 const evt = new ShowToastEvent({ 39 title: "Account Operated Failed", 40 message: event.detail.message, 41 variant: "error" 42 }); 43 this.dispatchEvent(evt); 44 } 45 46 handleReset(event) { 47 const inputFields = this.template.querySelectorAll( 48 'lightning-input-field' 49 ); 50 if (inputFields) { 51 inputFields.forEach(field => { 52 field.reset(); 53 }); 54 } 55 } 56 }
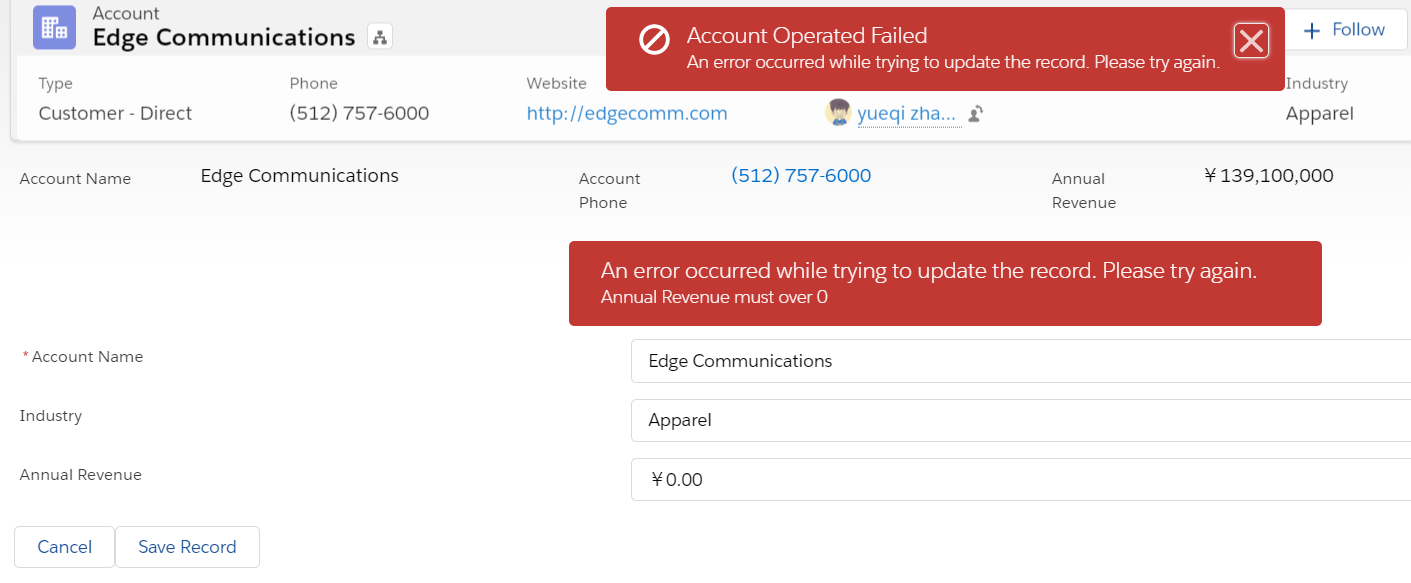
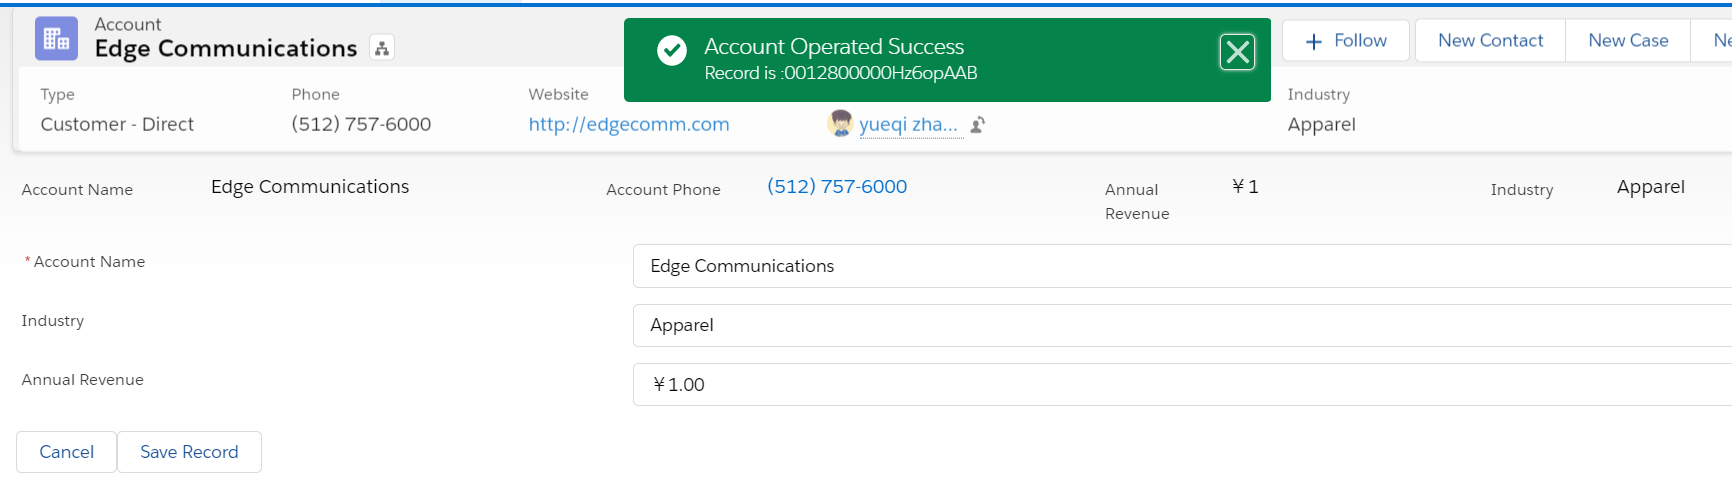
效果展示
1) 包含錯誤的情況展示
2. 正常保存的展示
二. Wire Service
從上面內容可以看到,LDS已經很強大了,但是針對LDS處理不了的情況呢,比如獲取父表資訊,對數據中的內容進行格式化處理,這些可能標準功能很難達到或者達不到,這種我們便需要wire adapter去對LDS進行增強。
1. 使用封裝的函數進行LDS增強
我們在組件中使用@wire標籤在javascript中去獲取數據,這些數據由lightning/ui*Api 模組的一個wire adapter獲取。
wire adapter有很多強大的功能,比如getRecord / getFieldValue(record, field)。 我們在程式碼中經常會看到 import salesforce/xxx 以及 import lightning/ui*Api/xxx,我們會在下一節LWC部落格中詳細的講解。
我們稱wire service在某種程度上是reactive的,原因是它提供了一個reactive的變數,我們使用$符號聲明在變數前面,當這個變數改變以後,wire service將會獲取一個新的版本的數據,從而重新渲染component。
我們基於三個步驟使用wire service。
1 import { adapterId } from 'adapterModule'; 2 @wire(adapterId, adapterConfig) 3 propertyOrFunction;
adapterId: wire adapter的標識符。比如我們需要用到lightning/uiRecordApi中的getRecord,那getRecord為這裡的adapterId;
adapterModule:當前這個標識符封裝在哪個適配器模組中,lwc封裝了好多的wire adapter 標識符,他們在以下的adapterModule中:lightning/uiListApi / lightning:uiObjectInfoApi / lightning:uiRecordApi
adapterConfig:針對wire adapter特定的配置對象資訊。配置對象的屬性值可以是字元串,也可以通過@salesforce/schema方式引入的表和欄位資訊。salesforce比較推薦後者;
propertyOrFunction:一個私有變數或者方法,這個變數或者方法從wire service通過配置資訊獲取到最終的數據。如果這個是一個變數聲明了wire,返回的結果為data property以及error property,如果這個是一個方法聲明了wire,這個方法返回的結果包含data property 以及error property。
概念看起來比較繞,通過一個demo(getRecord)便可以更好的了解。
https://developer.salesforce.com/docs/component-library/documentation/lwc/lwc.reference_wire_adapters_record
getRecord wire adapter在lightning/uiRecordApi模組下,所以第一個步驟確定為:
import {getRecord} from ‘lightning/uiRecordApi’
adapterConfig 針對getRecord有兩個可以的配置項。
1) { recordId: string, fields: string[], optionalFields?: string[]}
2){ recordId: string, layoutTypes: string[], modes?: string[], optionalFields?: string[]}
- recordId代表想要獲取的記錄的ID
- fields / layoutTypes這兩個必須要有一個存在。fields代表當前想要查詢的欄位,官方建議我們使用@salesforce/schema方式獲取相關的metadata資訊。這裡需要注意的是,如果當前的上下文用戶沒有針對欄位的訪問許可權,將會報錯。
- layoutTypes: compact/full這兩個取值,因為pagelayout可能會有改變,所以針對要求固定欄位的情況下,使用上述fields方式。如果要跟隨page layout方式,可以選擇此方式
- modes: 當選擇了layoutTypes以後,我們可以選擇modes,可選擇的值為Create/Edit/View。
- optionalFields和fields功能類似,區別為如果引入一個上下文用戶沒有訪問許可權的欄位,使用此參數不會報錯,沒有許可權的欄位對應的值不會返回而已。
demo用於獲取account的name並對name進行每個字母都大寫處理:
RecordViewFormWithWireService.js:使用wire adapter中的getRecord獲取相關metadata的value,然後進行format處理。salesforce建議我們獲取metadata命名採用object_field_name方式,當然這個是規範,不是規則。這裡之所以對wiredAccount獲取值部分添加data不為undefined原因是當我們載入數據時,最開始wiredAccount為{},所以get accountName方法會掛掉提示undefined資訊,取Account Name值有兩種方式,一種是通過各種點的方式取到,另一個是通過wire service封裝的getFieldValue方法獲取。
1 /* eslint-disable no-console */ 2 import { LightningElement,wire,api,track } from 'lwc'; 3 import { getRecord,getFieldValue } from 'lightning/uiRecordApi'; 4 import ACCOUNT_NAME_FIELD from '@salesforce/schema/Account.Name'; 5 import ACCOUNT_INDUSTRY_FIELD from '@salesforce/schema/Account.Industry'; 6 import ACCOUNT_ANNUAL_REVENUE from '@salesforce/schema/Account.AnnualRevenue'; 7 const ACCOUNT_FIELDS = [ACCOUNT_NAME_FIELD,ACCOUNT_INDUSTRY_FIELD,ACCOUNT_ANNUAL_REVENUE]; 8 export default class RecordViewFormWithWireService extends LightningElement { 9 @api recordId; 10 11 @wire(getRecord,{recordId:'$recordId',fields:ACCOUNT_FIELDS}) 12 wiredAccount; 13 14 get accountName() { 15 // console.log(JSON.stringify(this.wiredAccount)); 16 // console.log('xx'); 17 // if(this.wiredAccount.data !== undefined) { 18 // return this.wiredAccount.data.fields.Name.value.toUpperCase(); 19 // } 20 // return ''; 21 return this.wiredAccount.data != undefined ? getFieldValue(this.wiredAccount.data,ACCOUNT_NAME_FIELD).toUpperCase() : ''; 22 } 23 }
recordViewFormWithWireService.html
1 <template> 2 {accountName} 3 </template>
結果展示:

上面的wire service中只簡單的描述了getRecord的用法以及順帶描述了getFieldValue,LWC提供了很多的wire adapter function,下一節的部落格會有詳細的說明。當我們使用了wire adapter增強LDS以後,可以做到更強的功能,比如獲取父對象欄位值,進行欄位值的format。但是我們想要更複雜的操作,比如對數據進行filter,獲取子數據資訊,那我們就得需要訪問apex獲取數據了。下面內容為通過apex獲取數據。
2. 和後台apex方法交互
有兩種方式可以調用apex方法,一種是wire方式直接調用,另外一種通過指定的命令方式。下面對這兩種方式進行簡單的介紹。
兩種方式的第一步均需要引入這個需要調用的apex
1 import apexMethodName from '@salesforce/apex/Namespace.Classname.apexMethodReference';
apexMethodName—用來識別引入的apex方法的名稱。這個名稱通常和方法名稱相同並且後期引用均使用此名稱。
apexMethodReference—引用的apex中的method的名稱
Classname—當前的method所在的apex class的名稱
Namespace—當前的namespace,默認為c.如果是c的情況下可以自動省略
比如我們在 ContactController中有一個方法名字是getContactList,則我們的apexMethodName默認應該命名為 getContactList,
apexMethodRefernce為getContactList,Classname為ContactController,Namespace為c。如下所示:
import getContactList from ‘@salesforce/apex/ContactController.getContactList’;
我們在aura項目中,如果js中調用apex中的方法要求當前的方法聲明為@AuraEnabled,同樣使用LWC也要求後台的apex方法需要聲明為@AuraEnabled,並且方法要求static & (public / global)
當我們針對的是獲取數據,沒有DML操作情況下,我們可以聲明方法為cacheable=true去提升客戶端的性能。如果當前的數據存在DML操作,不是純粹的取數據,則不應該聲明cacheable=true。
我們針對和apex交互的兩種方式,使用wire方式必須要指定後台的apex方法聲明 cacheable=true,使用命令方式則不需要有這個限制。當然,如果我們使用了cacheable聲明以後,當我們覺得數據可能不是最新或者是有問題的數據情況下,我們可以調用refreshApex()去獲取最新的數據。
如果我們apex中涉及到和外部系統的長時間的交互,我們可以對方法聲明 continuation=true,如果同時聲明了 cacheable以及continuation,則中間使用空格分隔。如下所示:
@AuraEnabled(continuation=true cacheable=true)
後台方法的要求已經說完了,下面介紹兩種方式的調用。
1)wire方式調用:
@wire(apexMethod, { apexMethodParams })
propertyOrFunction;
apexMethod: 和上面import的apexMethodName相同;
apexMethodParams:apexMethodName傳遞的參數。後台的方法可以無參數和有參數,如果無參數將apexMethodParams設置為null,如果有參數則傳遞此參數。這裡需要注意的是,如果apexMethodParams設置為null可以正常調用,意思是無參方法,如果此參數為undefined,則wire不會調用後台的此方法。
propertyOrFunction:wire裝載給變數或者方法。如果是變數,後台方法如果沒有錯誤情況下,返回的是正常的返回內容。否則返回的是error變數。
如果是方法,則方法對應的是一個object,object中包含了data變數或者error變數。說起來比較繞,通過一個例子更好的了解。
下面的例子為wire裝載給方法。wiredContacts返回變數中有兩個參數,error,data。我們通常判斷如果data不為空,則正常返回。如果error不為空,則代表當前的數據獲取存在異常。demo中沒有形參,如果想要有形參,在getContactList方法後面使用逗號分隔以後添加形參
1 @wire(getContactList) 2 wiredContacts({ error, data }) { 3 if (data) { 4 this.contacts = data; 5 this.error = undefined; 6 } else if (error) { 7 this.error = error; 8 this.contacts = undefined; 9 } 10 }
下面的例子為wire裝載給變數。findContacts有一個參數searchKey。我們使用$符號代表當前的變數是動態的reactive的,返回值給contacts。如果正常返回,contacts裡面是後台的apex 返回的數據列表。如果存在error,contacts裡面是error變數。
1 @wire(findContacts, { searchKey: '$searchKey' }) 2 contacts;
因為後台聲明了cacheable以後,只有刷新以後才能重新裝載最新版本的數據。LWC針對wire聲明的變數提供了refreshApex方法。使用兩步走。
1. import { refreshApex } from '@salesforce/apex'; 2. refreshApex(wiredProperty)
其中wiredProperty為我們使用wire標籤聲明的變數。這裡需要注意的一點是,針對wire聲明的方法無法使用此方法進行刷新快取操作。
如果聲明了方法我們想清空快取,需要先聲明變數。然後方法中對此變數賦值,然後再refreshApex中傳遞聲明的變數。
下面以一個例子更好的了解wire方式調用apex程式碼以及refreshApex的使用。
ContactController中聲明了一個方法findContacts,形參是一個string用來傳遞想要搜索的contact的name。此方法使用AuraEnabled並且指定了cacheable=true,則LWC針對前台處理可以使用wire方式,也可以使用命令方式。
1 public with sharing class ContactController { 2 @AuraEnabled(cacheable=true) 3 public static List<Contact> findContacts(String searchKey) { 4 String key = '%' + searchKey + '%'; 5 return [SELECT Id, Name, Title, Phone, Email FROM Contact WHERE Name LIKE :key LIMIT 10]; 6 } 7 }
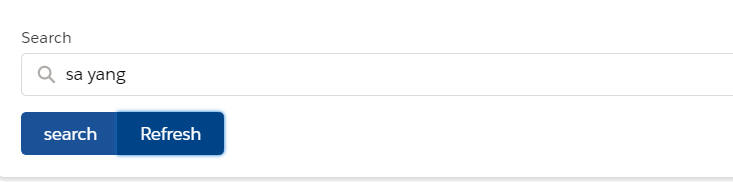
contactListSearchWithWireService.html:展示搜索出來的contact的資訊,上面有一個輸入框以及兩個按鈕,點擊search進行搜索,點擊refresh清空快取重新獲取。
1 <template> 2 <lightning-card icon-name="custom:custom63"> 3 <div class="slds-m-around_medium"> 4 <lightning-input type="search" class="slds-m-bottom_small" label="Search" value={searchKey}></lightning-input> 5 <lightning-button-group> 6 <lightning-button variant="brand" label="search" onclick={handleSearch}></lightning-button> 7 <lightning-button variant="brand" label="Refresh" onclick={handleRefresh}></lightning-button> 8 </lightning-button-group> 9 <template if:true={contacts}> 10 <template for:each={contacts} for:item="contact"> 11 <p key={contact.Id}>{contact.Name}</p> 12 </template> 13 </template> 14 <template if:true={error}> 15 <!-- TODO --> 16 </template> 17 </div> 18 </lightning-card> 19 </template>
contactListSearchWithWireService.js:這裡需要注意的一點是我們使用wire裝載的一個方法名字是wiredContacts,為了後期可以針對方法使用refreshApex,我們設置了storedContacts變數,並且在wire方法中設置了值,針對refreshApex方法我們更新此變數。因為我們在searchKey使用了$符號,標識它是reactive的,變化以後會重新執行方法,所以我們點擊search時只需要賦值searchKey變數便可以達到調用wire方法重新讀取數據的作用了。
1 import { LightningElement, track,wire } from 'lwc'; 2 import findContacts from '@salesforce/apex/ContactController.findContacts'; 3 import {refreshApex} from '@salesforce/apex' 4 export default class ContactListSearchWithWireService extends LightningElement { 5 @track searchKey; 6 @track contacts; 7 @track errors; 8 storedContacts; 9 10 @wire(findContacts, { searchKey: '$searchKey' }) 11 wiredContacts(storedContacts) { 12 this.storedContacts = storedContacts; 13 const {data,error} = storedContacts; 14 if(data) { 15 this.contacts = data; 16 this.errors = undefined; 17 } else if(error) { 18 this.errors = error; 19 this.contacts = undefined; 20 } 21 } 22 23 handleSearch(event) { 24 this.searchKey = this.template.querySelector('lightning-input').value; 25 } 26 27 handleRefresh(event) { 28 refreshApex(this.storedContacts); 29 } 30 }
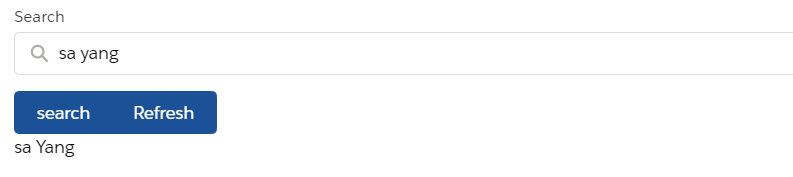
結果展示:
1) 當我們輸入sa yang點擊search 以後會搜索出來sa yang數據,即使後期sa yang這條數據有改掉不符合要求,點擊search還會搜索出來,因為有快取。
2) 當我們點擊refresh以後,更改過的數據將不再展示在結果區域。
上面的demo我們使用wire裝載函數以及針對函數情況下使用apexRefresh的方式。下面的demo為使用wire裝載變數並且使用apexRefresh刷新變數快取的demo。
contactListSearchWithWireProperty.html:因為我們後台返回的是變數,所以我們針對for:each使用需要property.data方式。
1 <template> 2 <lightning-card icon-name="custom:custom63"> 3 <div class="slds-m-around_medium"> 4 <lightning-input type="search" class="slds-m-bottom_small" label="Search" value={searchKey}></lightning-input> 5 <lightning-button-group> 6 <lightning-button variant="brand" label="search" onclick={handleSearch}></lightning-button> 7 <lightning-button variant="brand" label="Refresh" onclick={handleRefresh}></lightning-button> 8 </lightning-button-group> 9 <template if:true={contacts.data}> 10 <template for:each={contacts.data} for:item="contact"> 11 <p key={contact.Id}>{contact.Name}</p> 12 </template> 13 </template> 14 <template if:true={conacts.error}> 15 <!-- TODO --> 16 </template> 17 </div> 18 </lightning-card> 19 </template>
1 import { LightningElement, track,wire } from 'lwc'; 2 import findContacts from '@salesforce/apex/ContactController.findContacts'; 3 import {refreshApex} from '@salesforce/apex' 4 export default class ContactListSearchWithWireProperty extends LightningElement { 5 @track searchKey; 6 7 @wire(findContacts, { searchKey: '$searchKey' }) 8 contacts; 9 10 handleSearch(event) { 11 this.searchKey = this.template.querySelector('lightning-input').value; 12 } 13 14 handleRefresh(event) { 15 refreshApex(this.contacts); 16 } 17 }
兩個demo的顯示效果相同,這裡不多做展示。
2) 使用命令方式調用後台方法。
我們使用wire方式操作後台的apex通過上面的兩個例子可以很好的理解了,但是使用wire方式有一個大的前置條件,需要後台的方法聲明cacheable=true。
我們針對數據獲取的方法使用wire方式很好,但是針對DML操作的方法不能使用cacheable=true就只能使用我們這種命令方式的訪問後台的方式。
此種方式的固定寫法為:
1 methodName({ param : parameterObject }) 2 .then(result => { 3 this.message = result; 4 this.error = undefined; 5 }) 6 .catch(error => { 7 this.message = undefined; 8 this.error = error; 9 });
後台的要求區別已經說完了,再說一下前端的區別。使用wire方式返回的是一個stream data,並且參數是reactive的,只要參數改變,就會自動觸發wire。使用上述方式返回的是promise,此種方式只能當次調用有效,如果後期有變化,則需要重新調用。
另外一點為refreshApex只能用在wire裝載的方法和變數,使用此種方式不支援此方法。
參數部分為可選項,如果不傳遞參數則直接methodName()。如果傳遞參數使用{}方式傳遞即可。
我們還是使用上面的例子,只是把JS端改成以命令方式編寫,html端重複內容不再粘貼(需要去掉refresh按鈕),如下:
1 import { LightningElement,track } from 'lwc'; 2 import findContacts from '@salesforce/apex/ContactController.findContacts'; 3 export default class ContactListSearchWithImperative extends LightningElement { 4 @track searchKey; 5 @track contacts; 6 @track errors; 7 8 handleSearch() { 9 this.searchKey = this.template.querySelector('lightning-input').value; 10 findContacts({searchKey:this.searchKey}) 11 .then(result => { 12 this.contacts = result; 13 this.errors = undefined; 14 }) 15 .catch(error =>{ 16 this.errors = error; 17 this.contacts = undefined; 18 }); 19 } 20 }
效果展示同上面相同。
三. Configuration File Tag
我們在創建一個LWC component時,會默認生成一個html / js /meta xml文件,其中meta xml 會指定LWC component很多配置特性,比如當前的LWC component可以引用在哪種類型的lightning page中,api version等配置資訊。主要配置項有以下幾點:
apiVersion: 指定LWC component的api version;
description:當前LWC component的描述資訊,當顯示在lightning app builder或者community builder的列表中我們滑鼠移動到上面會展示此描述資訊,此配置項是一個可選項,不必填;
isExposed:用來指定當前的component是否可以暴露給lightning app builder或者community builder使用;此標籤很像aura中針對aura:component的implements的用法;
masterLabel: 用來指定當前的component在lightning app builder或者community builder顯示的名字。默認名字顯示的是定義的component的API name,如果我們想在列表初顯示需要顯示的名字,我們可以設置此欄位。和description一樣,這個是可選項,非必填;
targets:用來指定當前的component在哪裡可以添加。當我們指定isExposed為true時,則必須要有targets資訊。targets下面有taget子標籤,用來標識當前的component可以加在什麼類型的lightning page中。target的可選值如下:
- lightning__AppPage:允許當前的component在lightning app builder使用在app page中;
- lightning__HomePage:允許當前的component在lightning app builder使用在home page中;
- lightning__RecordPage:允許當前的component在lightning app builder使用在record page中;
- lightning__Inbox:允許當前的component在lightning app builder中使用,用於為outlook/gmail集成添加email 應用窗;
- lightningCommunity__Page:允許當前的component在community builder中使用在lightning community page;
- lightningCommunity__Default:和lightningCommunity__Page共同使用。添加此項可以包括可配置的變數當這個component引用的時候;
- lightningSnapin__ChatMessage:允許在Embedded Service Chat Setup中選擇此component。
我們在項目中常用的配置就是lightning__AppPage / lightning__HomePage / lightning__RecordPage了。
targetConfigs:用來配置不同類型的lightning page和不同的初始化的component 變數。一個lwc component可能有很多的變數聲明,我們針對不同類型的lightning page中需要初始化不同的變數,便可以使用此標籤去實現。和上面的targets一樣,他也是一個父標籤,內容在子標籤targetConfig 聲明。targetConfig有一個屬性叫做targets,我們可以使用此屬性去聲明當前的配置項針對哪個類型的lightning page,針對多個類型的lightning page,我們可以使用逗號’,’分隔。例如:
<targetConfig targets="lightning__RecordPage,lightning__AppPage">
targetConfig下可以配置三個子標籤,分別是property / objects / supportedFormFactors,用來給變數進行初始化操作。下面對這三個子標籤分別描述。
1. Property: 我們在LWC js中會使用@api標籤聲明public變數,使用Property在引用在lightning app builder或者community builder的時候我們可以設置一些初始值以及初始化配置。Property有以下的屬性:
- type:用來聲明變數的類型,比如 Integer/ String / Boolean .
- required:用來標識當前的變數是否必須設置。默認值為false;
- placeholder: 僅用於type為String的情況,用於當輸入框為空的時候在輸入框中展示的提示資訊;
- name:我們在js中聲明的變數名稱,兩者必須完全匹配。
- min: 當type為Integer的時候,設置我們想要設置變數的最小值;
- max: 當type為Integer的時候,設置我們想要設置變數的最大值;
- label:在工具中展示attribute的顯示的label 名稱;
- description:在工具中展示attribute的描述資訊;
- default:當前attribute的默認值;
- datasource:當type為string情況下需要渲染變數為picklist,則使用此屬性,不同之間的字元串使用逗號’,’分割。
上述的屬性中,只有name以及type是必填項,其他都是可選項。
2. objects:當我們在target中聲明當前的LWC component在targetConfig中配置了可以引用在lightning record page時,我們可以指定當前的component可以用於哪些objects使用。
同targetConfigs一樣,他也有一個子標籤叫做object用來聲明可以用在哪個object中使用。object標籤不能使用*來聲明可以引用所有objects
3. supportedFormFactors:我們訪問salesforce可能使用手機或者電腦,我們針對不同的媒介訪問不同的頁面(home page/ record page等)可能需要展示不同的大小,這時我們就需要設置supportedFormFactors了。針對此配置項的配置資訊,詳情可以查看https://developer.salesforce.com/docs/component-library/documentation/lwc/lwc.use_config_form_factors
總結:篇中主要介紹的是LDS在LWC中的使用方式以及在LDS功能無法滿足情況下,如何使用wire service以及訪問後台方法進行增強。篇中有引入salesforce/ lightning/ui*Api甚至PageReference等資訊下篇LWC內容會詳細闡述。篇中有錯誤的地方歡迎指出,有不懂的歡迎留言。
