Fastdfs集群部署以及基本操作
- 2020 年 11 月 16 日
- 筆記
FastDFS引言
本地存儲與分散式文件系統

本地存儲的缺點:
-
是否有備份? 沒有
-
成本角度? 貴
伺服器 :用於計算 —- cpu/記憶體
用於存儲 —- 硬碟大
-
存儲瓶頸? 容量有限
-
是否使用於應用伺服器的集群環境? 不適用
-
。。。等等
解決本地存儲的缺點 : 使用分散式文件系統 — 引入存儲服務的概念
支援冗餘備份;可以增加節點,所以理論上沒有瓶頸;支援集群環境;支援負載均衡特性,可以在一個存儲節點壓力大時,將請求分給其他存儲節點。
數據存儲的方式:
- 關係型資料庫(mysql,oracle…):用於強事務環境
- 非關係型資料庫(redis…):用於弱化事務環境,性能高
- 分散式文件系統(FastDFS…):用於存儲二進位數據(圖片/影片/音頻)
FastDFS概述
FastDFS(Distributed File System (DFS))是一個開源的分散式文件系統,她對文件進行管理,功能包括:文件存儲、文件同步(冗餘備份)、文件訪問(文件上傳、文件下載)等,解決了大容量存儲和負載均衡的問題。特別適合以文件為載體的在線服務,如相冊網站、影片網站等等
FastDFS服務端有兩個角色:跟蹤器(tracker)和存儲節點(storage)。
跟蹤器主要做調度工作,在訪問上起負載均衡的作用。
存儲節點存儲文件,完成文件管理的所有功能:存儲、同步和提供存取介面,FastDFS同時對文件的meta data(元數據)進行管理。所謂文件的meta data就是文件的相關屬性,以鍵值對(key value pair)方式表示,如:width=1024,其中的key為width,value為1024。文件meta data是文件屬性列表,可以包含多個鍵值對。
FastDFS架構
FastDFS架構圖:

FastDFS架構圖詳解 :
註:圖中文件上傳到存儲節點後返回的文件在文件系統中的path,即為文件在FastDFS中的文件標識,分為兩個部分:卷名和文件名,二者缺一不可。
跟蹤器和存儲節點都可以由一台至多台伺服器構成。跟蹤器和存儲節點中的伺服器均可以隨時增加或下線而不會影響線上服務。其中跟蹤器中的所有伺服器都是對等的,可以根據伺服器的壓力情況隨時增加或減少。
為了支援大容量,存儲節點(伺服器)採用了分卷(或分組)的組織方式。存儲系統由一個或多個卷組成,卷與卷之間的文件是相互獨立的,所有卷 的文件容量累加就是整個存儲系統中的文件容量。一個卷可以由一台或多台存儲伺服器組成,一個卷下的存儲伺服器中的文件都是相同的,卷中的多台存儲伺服器起 到了冗餘備份和負載均衡的作用。
在卷中增加伺服器時,同步已有的文件由系統自動完成,同步完成後,系統自動將新增伺服器切換到線上提供服務。
當存儲空間不足或即將耗盡時,可以動態添加卷。只需要增加一台或多台伺服器,並將它們配置為一個新的卷,這樣就擴大了存儲系統的容量。
FastDFS的集群部署
一、伺服器規劃
| 伺服器地址 | 用途 |
|---|---|
| 192.168.0.121 | 跟蹤伺服器1(Tracker-01) |
| 192.168.0.122 | 跟蹤伺服器2(Tracker-02) |
| 192.168.0.123 | 存儲伺服器1(Storage-group1-01) |
| 192.168.0.124 | 跟蹤伺服器2(Storage-group1-02) |
| 192.168.0.125 | 跟蹤伺服器3(Storage-group2-01) |
| 192.168.0.126 | 跟蹤伺服器4(Storage-group2-02) |
系統:centos7
用戶:root
二、相關軟體安裝包
libfastcommon-1.0.7.tar.gz FastDFS_v5.05.tar.gz fastdfs-nginx-module_v1.16.tar.gz nginx-1.13.11.tar.gz ngx_cache_purge-2.3.tar.gz相關軟體包已經上傳至github
github地址: //github.com/yaoxipenga/software-pag.git
三、FastDFS 的安裝(所有跟蹤伺服器和存儲伺服器均執行如下操作)
1、安裝所需的依賴包
yum install make cmake gcc gcc-c++2、安裝FastDFS依賴包libfastcommon
cd /usr/local/src
tar -zxvf libfastcommon-1.0.7.tar.gz
cd libfastcommon-1.0.7
./make.sh
./make.sh install
3、安裝FastDFS
cd /usr/local/src/
tar -zxvf FastDFS_v5.05.tar.gz
cd FastDFS
./make.sh
./make.sh install
採用默認安裝方式,相應的文件與目錄檢查如下:
1)服務腳本
/etc/init.d/fdfs_storaged
/etc/init.d/fdfs_trackerd
2)配置文件(示例配置文件)
/etc/fdfs/client.conf.sample
/etc/fdfs/storage.conf.sample
/etc/fdfs/tracker.conf.sample
3)命令行工具(/usr/bin目錄下)

4)因為 FastDFS 服務腳本設置的 bin 目錄是/usr/local/bin, 但實際命令安裝在/usr/bin,所以需要修改 FastDFS 服務腳本中相應的命令路徑,也就是把/etc/init.d/fdfs_storaged和/etc/init.d/fdfs_tracker 兩個腳本中的/usr/local/bin 修改成/usr/bin:

注意: 以上操作無論是配置 tracker 還是配置 storage 都是必須的,而 tracker 和 storage 的區別主要是在安裝完 fastdfs 之後的配置過程中。
三、配置tracker伺服器(192.168.0.121、192.168.0.122)
1、複製tracker樣例配置文件,並重命名
cp /etc/fdfs/tracker.conf.sample /etc/fdfs/tracker.conf2、修改tracker配置文件
vim /etc/fdfs/tracker.conf
# 修改的內容如下:
disabled=false              # 啟用配置文件
port=22122                  # tracker伺服器埠(默認22122)
base_path=/fastdfs/tracker  # 存儲日誌和數據的根目錄
store_lookup=0              # 輪詢方式上傳
其它參數保留默認配置, 具體配置解釋可參考官方文檔說明:
//bbs.chinaunix.net/thread-1941456-1-1.html
3、創建基礎數據目錄
mkdir -p /data/fastdfs/tracker4、啟動tracker伺服器
/etc/init.d/fdfs_trackerd start
或者
systemctl start fdfs_trackerd
或者
fdfs_trackerd /etc/fdfs/tracker.conf start
初次啟動,會在/data/fastdfs/tracker目錄下生成logs、data兩個目錄。
drwxr-xr-x 2 root root 178 May  3 22:34 data
drwxr-xr-x 2 root root  26 May  2 18:57 logs
檢查FastDFS Tracker Server是否啟動成功:
ps aux | grep fdfs_trackerd5、tracker server的關閉命令
/etc/init.d/fdfs_trackerd stop
或者
systemctl stop fdfs_trackerd
或者
fdfs_trackerd /etc/fdfs/tracker.conf stop
6、設置tracker server開機啟動
chkconfig fdfs_trackerd on四、配置storage伺服器(192.168.0.123、192.168.0.124、192.168.0.125、192.168.0.126)
1、複製storage樣例配置文件,並重命名
cp /etc/fdfs/storage.conf.sample /etc/fdfs/storage.conf2、修改storage配置文件
vim /etc/fdfs/storage.conf
# 修改的內容如下:
disabled=false     # 啟用配置文件
port=23000                                         # storage的埠號,同一個組的 storage 埠號必須相同
base_path=/data/fastdfs/storage       # 存儲日誌和數據的根目錄
store_path0=/data/fastdfs/storage     # 第一個存儲目錄
store_path_count=1                    #存儲路徑個數,需要和store_path個數匹配
tracker_server=192.168.0.121:22122    # tracker伺服器的IP地址和埠
tracker_server=192.168.0.122:22122    # 多個tracker直接添加多條配置
配置group_name
不同分組配置不同group_name,第一組為group1, 第二組為group2
group_name=group1
group_name=group2
其它參數保留默認配置, 具體配置解釋可參考官方文檔說明:
//bbs.chinaunix.net/thread-1941456-1-1.html
3、創建基礎數據目錄
mkdir -p /data/fastdfs/storage4、啟動storage伺服器
/etc/init.d/fdfs_storaged start
或者
systemctl start fdfs_storaged
或者
fdfs_storaged /etc/fdfs/tracker.conf start
初次啟動,會在/data/fastdfs/storage目錄下生成logs、data兩個目錄。
drwxr-xr-x 259 root root 8192 May  3 23:06 data
drwxr-xr-x   2 root root   26 May  2 19:12 logs
檢查FastDFS Tracker Server是否啟動成功:
ps aux | grep fdfs_storaged所有 Storage 節點都啟動之後,可以在任一 Storage 節點上使用如下命令查看集群資訊:
/usr/bin/fdfs_monitor /etc/fdfs/storage.conf
看到存儲節點狀態為 ACTIVE 則表示已生效。
5、storage server的關閉命令
/etc/init.d/fdfs_storaged stop
或者
systemctl stop fdfs_storaged
或者
fdfs_storaged /etc/fdfs/tracker.conf stop
6、設置storage server開機啟動
chkconfig fdfs_storaged on五、文件上傳測試(192.168.0.121)
1、修改Tracker伺服器客戶端配置文件
cp /etc/fdfs/client.conf.sample /etc/fdfs/client.conf
vim /etc/fdfs/client.conf
# 修改以下配置,其它保持默認
base_path=/data/fastdfs/tracker
tracker_server=192.168.0.121:22122 # tracker伺服器IP和埠
tracker_server=192.168.0.122:22122  #tracker伺服器IP2和埠
2、執行文件上傳命令
#/root/test.png 是需要上傳文件路徑
/usr/bin/fdfs_upload_file /etc/fdfs/client.conf /root/test.png
返迴文件ID號:group1/M00/00/00/wKgAfFzMX_2AB9V9AADa-k_GxyQ840.jpg
(能返回以上文件ID,說明文件已經上傳成功)
六、在所有storage節點(192.168.0.123、192.168.0.124、192.168.0.125、192.168.0.126)安裝Nginx
1、fastdfs-nginx-module 作用說明
FastDFS 通過 Tracker 伺服器,將文件放在 Storage 伺服器存儲, 但是同組存儲伺服器之間需要進入文件複製, 有同步延遲的問題。假設 Tracker 伺服器將文件上傳到了 192.168.50.137,上傳成功後文件 ID已經返回給客戶端。此時 FastDFS 存儲集群機制會將這個文件同步到同組存儲 192.168.50.138,在文件還沒有複製完成的情況下,客戶端如果用這個文件 ID 在 192.168.50.138 上取文件,就會出現文件無法訪問的錯誤。而 fastdfs-nginx-module 可以重定向文件連接到源伺服器取文件,避免客戶端由於複製延遲導致的文件無法訪問錯誤。(解壓後的 fastdfs-nginx-module 在 nginx 安裝時使用)
2、解壓fastdfs-nginx-module_v1.16.tar.gz
cd /usr/local/src/
tar -zxvf fastdfs-nginx-module_v1.16.tar.gz
3、修改 fastdfs-nginx-module的config配置文件
cd fastdfs-nginx-module/src
vim config
將/usr/local/路徑改為/usr/,或者直接執行命令:%s+/usr/local/+/usr/+g批量替換
4、安裝nginx
yum install -y gcc gcc-c++ make automake autoconf libtool pcre pcre-devel zlib zlib-devel openssl openssl-devel
cd /usr/local/src/
tar -zxvf nginx-1.13.11.tar.gz
cd nginx-1.13.11
./configure --prefix=/usr/local/nginx --with-http_ssl_module --with-http_stub_status_module --with-pcre --with-http_realip_module --add-module=/usr/local/src/fastdfs-nginx-module/src
make && make install
5、複製 fastdfs-nginx-module 源碼中的配置文件到 /etc/fdfs 目錄,並修改
cp /usr/local/src/fastdfs-nginx-module/src/mod_fastdfs.conf /etc/fdfs/
vim /etc/fdfs/mod_fastdfs.conf
修改以下配置:
connect_timeout=10
base_path=/tmp
tracker_server=192.168.0.121:22122  # tracker伺服器IP和埠
tracker_server=192.168.0.122:22122  # tracker伺服器IP2和埠
group_name=group1                   # 當前伺服器的group名
url_have_group_name=true            # url中包含group名稱
store_path0=/data/fastdfs/storage   # 存儲路徑
group_count=2                       # 設置組的個數

#在最後添加
[group1]
group_name=group1
storage_server_port=23000
store_path_count=1
store_path0=/data/fastdfs/storage

[group2]
group_name=group2
storage_server_port=23000
store_path_count=1
store_path0=/data/fastdfs/storage
注意group_name的設置,如果是group1就設置為group1,如果是group2就設置為group2。
6、複製 FastDFS 的部分配置文件到 /etc/fdfs 目錄
cd /usr/local/src/FastDFS/conf
cp http.conf mime.types /etc/fdfs/
7、配置 Nginx,簡潔版nginx配置樣例
user nobody;
worker_processes 1;
events {
    worker_connections 1024;
}
http {
    include mime.types;
    default_type application/octet-stream;
    sendfile on;
    keepalive_timeout 65;
    server {
        listen 8888;
        server_name localhost;
        location ~/group[1-2]/M00 {
            ngx_fastdfs_module;
        }
        error_page 500 502 503 504 /50x.html;
        location = /50x.html {
            root html;
        }
    }

}
說明:
A、8888 埠值是要與/etc/fdfs/storage.conf中的 http.server_port=8888 相對應,因為 http.server_port 默認為 8888,如果想改成 80,則要對應修改過來。
B、Storage 對應有多個 group 的情況下,訪問路徑帶 group 名,如/group1/M00/00/00/xxx,對應的 Nginx 配置為:
location ~/group([0-9])/M00 {
       ngx_fastdfs_module;
}
C、如查下載時如發現老報 404,將 nginx.conf 第一行 user nobody 修改為 user root 後重新啟動。
8、啟動Nginx
/usr/local/nginx/sbin/nginx9、通過瀏覽器訪問測試時上傳的文件
//192.168.0.123:8888/group1/M00/00/00/wKgAfFzMX_2AB9V9AADa-k_GxyQ840.jpg
//192.168.0.124:8888/group1/M00/00/00/wKgAfFzMX_2AB9V9AADa-k_GxyQ840.jpg
七、在tracker節點(192.168.0.121、192.168.0.122)安裝Nginx
1、 在 tracker 上安裝的 nginx 主要為了提供 http 訪問的反向代理、負載均衡以及快取服務
2、安裝nginx,加入ngx_cache_purge(加入快取模組)
yum install -y gcc gcc-c++ make automake autoconf libtool pcre pcre-devel zlib zlib-devel openssl openssl-devel
cd /usr/local/src/
tar -zxvf nginx-1.13.11.tar.gz
tar -zxvf ngx_cache_purge-2.3.tar.gz
cd nginx-1.13.11
./configure --prefix=/usr/local/nginx --with-http_ssl_module --with-http_stub_status_module --with-pcre --with-http_realip_module --add-module=/usr/local/src/ngx_cache_purge-2.3
make && make install
3、配置nginx負載均衡和快取
user root;
worker_processes 1;
#error_log logs/error.log;
#error_log logs/error.log notice;
#error_log logs/error.log info;
#pid logs/nginx.pid;
events {
	worker_connections 1024;
	use epoll;
}
http {
	include mime.types;
	default_type application/octet-stream;
	#log_format main '$remote_addr - $remote_user [$time_local] "$request" '
	# '$status $body_bytes_sent "$http_referer" '
	# '"$http_user_agent" "$http_x_forwarded_for"';
	#access_log logs/access.log main;
	sendfile on;
	tcp_nopush on;
	#keepalive_timeout 0;
	keepalive_timeout 65;
	#gzip on;
	#設置快取
	server_names_hash_bucket_size 128;
	client_header_buffer_size 32k;
	large_client_header_buffers 4 32k;
	client_max_body_size 300m;
	proxy_redirect off;
	proxy_set_header Host $http_host;
	proxy_set_header X-Real-IP $remote_addr;
	proxy_set_header X-Forwarded-For $proxy_add_x_forwarded_for;
	proxy_connect_timeout 90;
	proxy_send_timeout 90;
	proxy_read_timeout 90;
	proxy_buffer_size 16k;
	proxy_buffers 4 64k;
	proxy_busy_buffers_size 128k;
	proxy_temp_file_write_size 128k;
	#設置快取存儲路徑、存儲方式、分配記憶體大小、磁碟最大空間、快取期限
	proxy_cache_path /data/fastdfs/cache/nginx/proxy_cache levels=1:2 keys_zone=http-cache:200m max_size=1g inactive=30d;
	proxy_temp_path /data/fastdfs/cache/nginx/proxy_cache/tmp;
	#設置 group1 的伺服器
	upstream fdfs_group1 {
		server 192.168.0.123:8888 weight=1 max_fails=2 fail_timeout=30s;
		server 192.168.0.124:8888 weight=1 max_fails=2 fail_timeout=30s;
	}
	#設置 group2 的伺服器
	upstream fdfs_group2 {
		server 192.168.0.125:8888 weight=1 max_fails=2 fail_timeout=30s;
		server 192.168.0.126:8888 weight=1 max_fails=2 fail_timeout=30s;
	}
	server {
		listen 8000;
		server_name localhost;
		#charset koi8-r;
		#access_log logs/host.access.log main;
		#設置 group 的負載均衡參數
		location /group1/M00 {
			proxy_next_upstream http_502 http_504 error timeout invalid_header;
			proxy_cache http-cache;
			proxy_cache_valid 200 304 12h;
			proxy_cache_key $uri$is_args$args;
			proxy_pass //fdfs_group1;
			expires 30d;
		}
		location /group2/M00 {
			proxy_next_upstream http_502 http_504 error timeout invalid_header;
			proxy_cache http-cache;
			proxy_cache_valid 200 304 12h;
			proxy_cache_key $uri$is_args$args;
			proxy_pass //fdfs_group2;
			expires 30d;
		}
		#設置清除快取的訪問許可權
		location ~/purge(/.*) {
			allow 127.0.0.1;
			allow 192.168.0.0/24;
			deny all;
			proxy_cache_purge http-cache $1$is_args$args;
		}
		#error_page 404 /404.html;
		# redirect server error pages to the static page /50x.html
		#
		error_page 500 502 503 504 /50x.html;
			location = /50x.html {
			root html;
		}
	}
}
按以上 nginx 配置文件的要求,創建對應的快取目錄:
mkdir -p /data/fastdfs/cache/nginx/proxy_cache
mkdir -p /data/fastdfs/cache/nginx/proxy_cache/tmp
4、啟動Nginx
/usr/local/nginx/sbin/nginx5、文件訪問測試
前面直接通過訪問Storage節點中的Nginx來訪問文件
//192.168.0.123:8888/group1/M00/00/00/wKgAfFzMX_2AB9V9AADa-k_GxyQ840.jpg
//192.168.0.124:8888/group1/M00/00/00/wKgAfFzMX_2AB9V9AADa-k_GxyQ840.jpg
現在可以通過Tracker中的Nginx來進行訪問
1)通過Tracker1中的Nginx來訪問
//192.168.0.121:8000/group1/M00/00/00/wKgAfFzMX_2AB9V9AADa-k_GxyQ840.jpg
2)通過Tracker2中的Nginx來訪問
//192.168.0.122:8000/group1/M00/00/00/wKgAfFzMX_2AB9V9AADa-k_GxyQ840.jpg
由上面的文件訪問效果可以看到,每一個 Tracker 中的 Nginx 都單獨對後端的 Storage 組做了負載均衡,但整套FastDFS集群如果想對外提供統一的文件訪問地址,還需要對兩個Tracker中的Nginx進行HA集群。
八、實現高可用的訪問
上面說到了,現在的文件訪問時通過192.168.0.121:8000或者192.168.0.122:8000來實現的,這樣並未實現訪問文件的高可用。
1、如果是在阿里雲的ECS上搭建FastDFS集群(或者其他雲平台)
如果是在阿里雲上,那非常簡單,直接用SLB(或者類似負載均衡)代理到兩台Tracker伺服器上就行。
2、內網環境搭建FastDFS集群
我們需要在內網環境中再搭建兩套Nginx+Keepalived服務,用一個VIP實現高可用。具體實現比較簡單,這邊不在贅述。
FastDFS部分指令簡介
輸入fdfs_ —> 連按兩下tab鍵 —> 顯示所有FastDFS的fdfs_xxx指令
1. 監控指令 — fdfs_monitor
-
指令參數
fdfs_monitor <config_file> [-h <tracker_server>] [list|delete|set_trunk_server <group_name> [storage_id]] -
註: 參數含義:
- <config_file> :配置文件路徑
- [-h <tracker_server>] :(可選參數)
- [list|delete|set_trunk_server [storage_id]] :(可選參數)
-
指令使用
[root@tracker fdfs]# fdfs_monitor /etc/fdfs/client.conf -


2. 上傳指令 — fdfs_upload_file
-
指令參數
fdfs_upload_file <config_file> <local_filename> [storage_ip:port] [store_path_index] -
註: 參數含義:
- <config_file> :配置文件路徑
- <local_filename> :本地文件路徑
- [storage_ip:port] :(可選參數)
- [store_path_index] :(可選參數)
-
指令使用
[root@tracker fdfs]# fdfs_upload_file /etc/fdfs/client.conf 上傳的文件路徑 -

註: 上傳文件後會返迴文件在FastDFS中的唯一文件標識,即卷名+文件名

3. 下載指令 — fdfs_download_file
-
指令參數
fdfs_download_file <config_file> <file_id> [local_filename] [<download_offset> <download_bytes>] -
註: 參數含義:
1. <config_file> :配置文件路徑 2. <file_id> :文件在FastDFS中的唯一文件標識,即卷名+文件名 3. [local_filename] :文件下載地址 4. <download_offset> :(可選參數)文件下載開始時間 5. <download_bytes> :(可選參數)文件下載的位元組數 -
指令使用
[root@tracker fdfs]# fdfs_download_file /etc/fdfs/client.conf group1/M00/00/00/wKhygVwnUUOAcgYHCCZp2Ahsb3g964.rpm /root/java/xxx.rpm -


4. 查看文件資訊指令 — fdfs_file_info
-
指令參數
fdfs_file_info <config_file> <file_id> -
註: 參數含義:
- <config_file> :配置文件路徑
- <file_id> :文件在FastDFS中的唯一文件標識,即卷名+文件名
-
指令使用
[root@tracker fdfs]# fdfs_file_info /etc/fdfs/client.conf group1/M00/00/00/wKhygVwnUUOAcgYHCCZp2Ahsb3g964.rpm -


5. 刪除指令 — fdfs_delete_file
-
指令參數
fdfs_delete_file <config_file> <file_id> -
註: 參數含義:
- <config_file> :配置文件路徑
- <file_id> :文件在FastDFS中的唯一文件標識,即卷名+文件名
-
指令使用
[root@tracker fdfs]# fdfs_delete_file /etc/fdfs/client.conf group1/M00/00/00/wKhygVwnUUOAcgYHCCZp2Ahsb3g964.rpm -

註: 刪除指令使用後,文件在該卷中的所有備份都會被刪除,因為卷內的存儲節點會相互同步,故慎用。

6. 文件追加上傳及追加內容指令 — fdfs_upload_appender & fdfs_append_file
注意: 文件追加命令 fdfs_append_file 的使用前提是 要追加內容的文件是通過 文件追加上傳命令 fdfs_upload_appender 上傳的
-
指令參數
fdfs_upload_appender <config_file> <local_filename> -
註: 參數含義:
- <config_file> :配置文件路徑
- <local_filename> :將要上傳的可追加內容的文件的本地路徑
fdfs_append_file <config_file> <appender_file_id> <local_filename> -
註: 參數含義:
- <config_file> :配置文件路徑
- <appender_file_id> :需要追加內容的文件在FastDFS中的唯一文件標識,即卷名+文件名
- <local_filename> :將要追加到其他文件的文件的本地路徑
-
指令使用
# ====== 上傳需要追加內容的文件 ====== [root@tracker fdfs]# fdfs_upload_appender /etc/fdfs/client.conf /root/java/a.txt # ====== 追加內容 ====== [root@tracker fdfs]# fdfs_append_file /etc/fdfs/client.conf group1/M00/00/00/wKhygVwnhXWEcq9VAAAAAJXO_uM135.txt /root/java/b.txt -

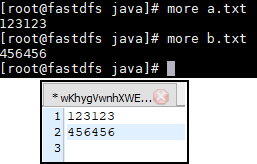
註: 上傳文件後會返迴文件在FastDFS中的唯一文件標識,即**卷名+文件名 **


