實戰–dango自帶的分頁(極簡)
- 2019 年 11 月 2 日
- 筆記
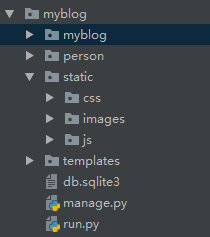
注意,我將templates定義在項目的同級目錄下:
在settings.py中配置
TEMPLATES = [ { 'BACKEND': 'django.template.backends.django.DjangoTemplates', 'DIRS': [os.path.join(BASE_DIR,'templates')], 'APP_DIRS': True, 'OPTIONS': { 'context_processors': [ 'django.template.context_processors.debug', 'django.template.context_processors.request', 'django.contrib.auth.context_processors.auth', 'django.contrib.messages.context_processors.messages', ], }, }, ]
urls.py
from django.urls import path from . import views app_name='person' urlpatterns=[ path('test/', views.test), path('test/<int:pn>',views.test,name='test'), ]
views.py
from django.shortcuts import render from .models import Book from django.core.paginator import Paginator def test(request,pn=1): #獲取所有的查詢 book_obj=Book.objects.all() #傳給paginator,每頁顯示兩條 paginator=Paginator(book_obj,2) #pn是顯示第幾頁,默認是第一頁 page=paginator.page(pn) #將page通過context傳給前端 context={'page':page} return render(request,'test/test.html',context=context)
models.py
class Book(models.Model): id = models.AutoField(primary_key=True) title = models.CharField(max_length=128,null=False) def __str__(self): return "book_title:{}".format(self.title)
tempates/test/test.html
<!doctype html> <html lang="en"> <head> <meta charset="UTF-8"> <meta name="viewport" content="width=device-width, user-scalable=no, initial-scale=1.0, maximum-scale=1.0, minimum-scale=1.0"> <meta http-equiv="X-UA-Compatible" content="ie=edge"> <title>Document</title> <style> li{ float: left; list-style: none; margin-left: 5px; } </style> </head> <body> <div> <div style="position: absolute;top: 35%;left: 40%;"> <table border="1"> <thread> <tr> <th>id</th> <th>title</th> </tr> </thread> <tbody> {% for item in page %} <tr> <td width="120px">{{item.id}}</td> <td width="120px">{{item.title}}</td> </tr> {% endfor %} </tbody> </table> </div> <!--底部分頁按鈕顯示--> <div style="position: absolute;top: 50%;left: 44%" <nav aria-label="Page navigation"> <div class="pagination"> <ul class="pagination" > {% if page.has_previous %} <li><a href="/test/{{page.previous_page_number}}" aria-label="Previous"> <span aria-hidden="true">«</span></a></li> {% endif %} {% for num in page.paginator.page_range%} {%if pindex == page.number%} <li><a href="">{{ num }}</a></li> {%else%} <li><a href="/test/{{num}}">{{ num }}</a></li> {%endif%} {% endfor %} {% if page.has_next %} <li><a href="{% url 'person:test' page.next_page_number %}" aria-label="Next"> <span aria-hidden="true">»</span></a></li> {% endif %} </ul> </div> </nav> </div> </body> </html>
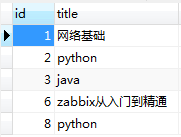
最終效果(不要在意css,不大美觀,哈哈)

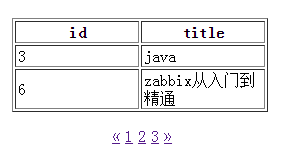
在顯示下網頁源程式碼:
<!doctype html> <html lang="en"> <head> <meta charset="UTF-8"> <meta name="viewport" content="width=device-width, user-scalable=no, initial-scale=1.0, maximum-scale=1.0, minimum-scale=1.0"> <meta http-equiv="X-UA-Compatible" content="ie=edge"> <title>Document</title> <style> li{ float: left; list-style: none; margin-left: 5px; } </style> </head> <body> <div> <div style="position: absolute;top: 35%;left: 40%;"> <table border="1"> <thread> <tr> <th>id</th> <th>title</th> </tr> </thread> <tbody> <tr> <td width="120px">3</td> <td width="120px">java</td> </tr> <tr> <td width="120px">6</td> <td width="120px">zabbix從入門到精通</td> </tr> </tbody> </table> </div> <!--底部分頁按鈕顯示--> <div style="position: absolute;top: 50%;left: 44%" <nav aria-label="Page navigation"> <div class="pagination"> <ul class="pagination" > <li><a href="/test/1" aria-label="Previous"> <span aria-hidden="true">«</span></a></li> <li><a href="/test/1">1</a></li> <li><a href="/test/2">2</a></li> <li><a href="/test/3">3</a></li> <li><a href="/test/3" aria-label="Next"> <span aria-hidden="true">»</span></a></li> </ul> </div> </nav> </div> </body> </html>
總結:這是實現分頁最簡單的了,至於美觀,可以結合bootstrap來進行美化。
技術總結:最基本的是Paginator裡面的一些值(當然此處我並沒有去嘗試其他的,有興趣的可以去搜下,也挺簡單的)。然後其中的一個就是前端pn值如何通過url傳值給後端,注意標藍的地方。
學習不易,且學且珍惜!!!