Java自動化測試框架-05 – 來給你的測試報告化個妝整個形 – (上)(詳細教程)
- 2019 年 10 月 31 日
- 筆記
簡介
前邊通過宏哥的講解和分享想必小夥伴們和童鞋們都已經見過testng框架生成的測試報告,是不是它的樣子和長相實在是不敢讓大傢伙恭維。那麼今天宏哥就當一回美容師,由宏哥來給它美美容;當一回外科醫生,做一名整形醫生。由宏哥來主刀,給它整整形。讓她變得豐滿、美麗、可愛一些。
本來面貌
執行完測試用例之後,會在項目的test-output(默認目錄)下生成測試報告
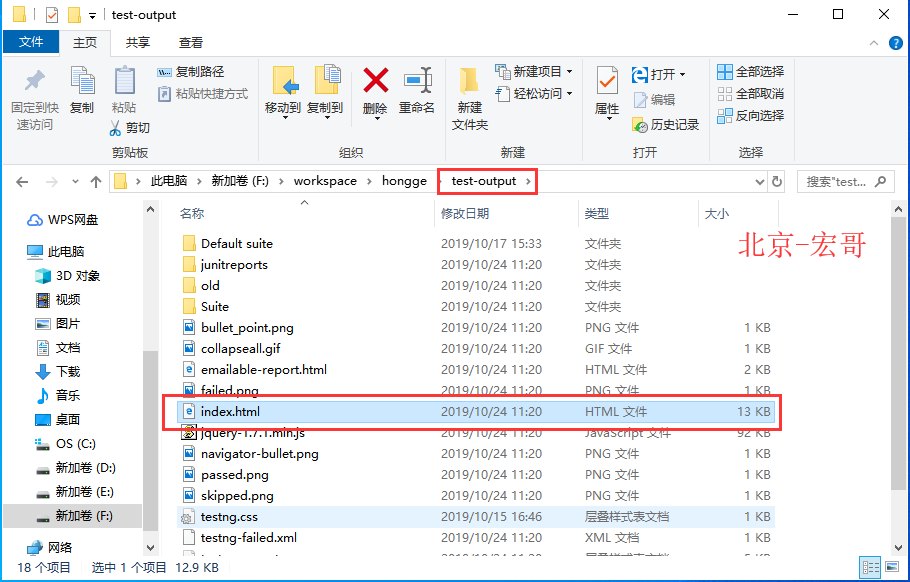
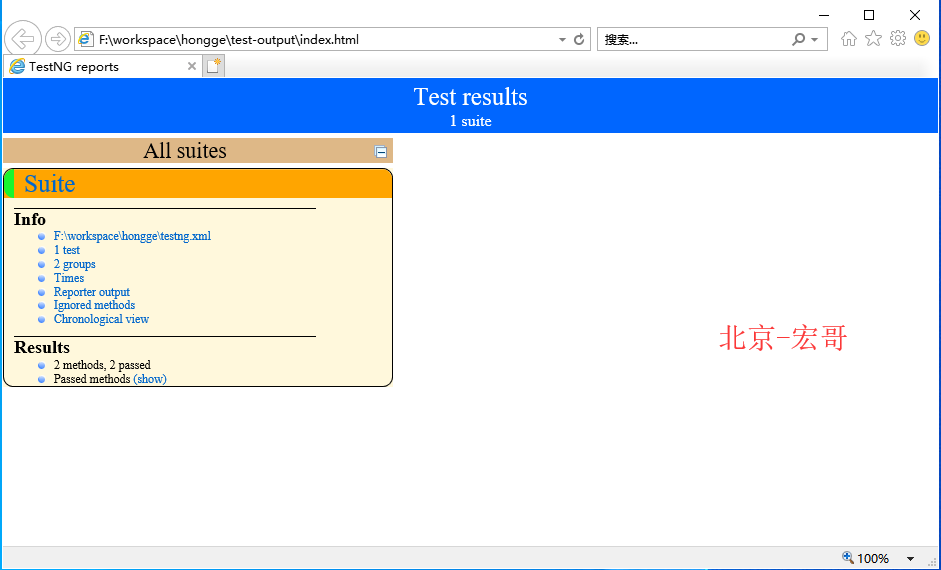
打開index.html文件,測試結果摘要,包括:套件名、測試用例成功數、測試用例失敗數、測試用例忽略數和testng.xml文件
簡略測試報告
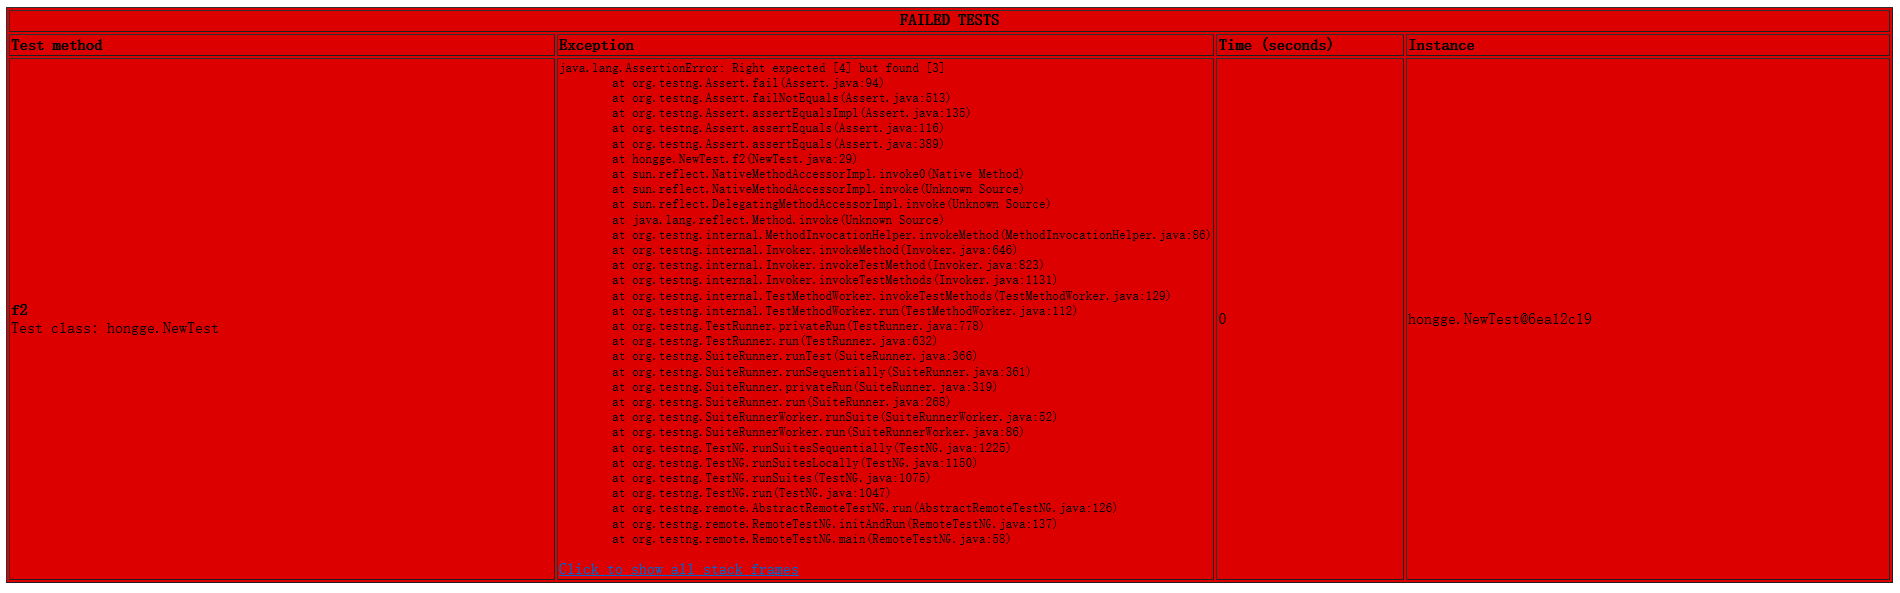
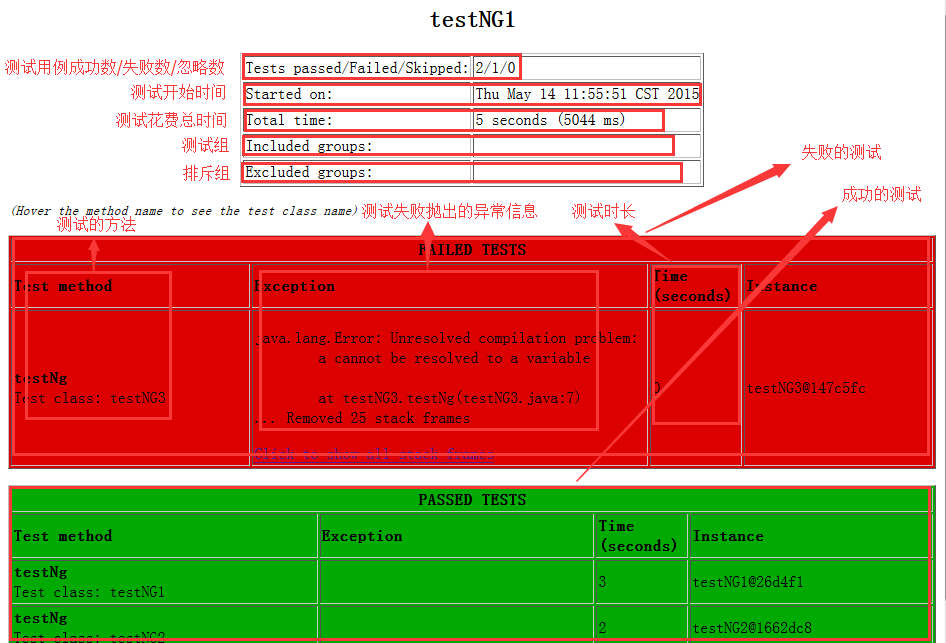
詳細測試報告
測試用例都成功的話,測試結果以綠底標誌:

測試用例有失敗的話,測試結果以紅底標誌:
點擊”Link”鏈接,可以查看testng.xml文件的內容:

詳細的測試結果介紹:
套餐一(普通會員)
ReportNG 是一個配合TestNG運行case後自動幫你在test-output文件內生成一個相對較為美觀的測試報告!
ReportNG 裡面Log 是不支援中文的,我改過ReportNG.jar源碼,具體方法看最下面,也可以找我直接要jar!
話不多說直接上
1、首先從GitHub拉取ReportNG源碼,地址:https://github.com/dwdyer/reportng,下載好後解壓。
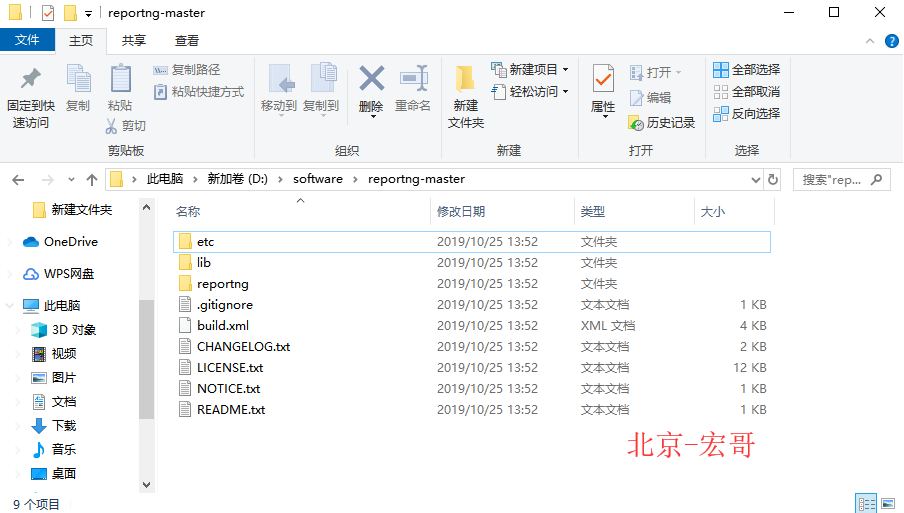
2、導入到編輯器如Eclipse,注意:import的時候請選擇以Maven項目import,請選擇reportng-master目錄下的reportng文件,作為新的project
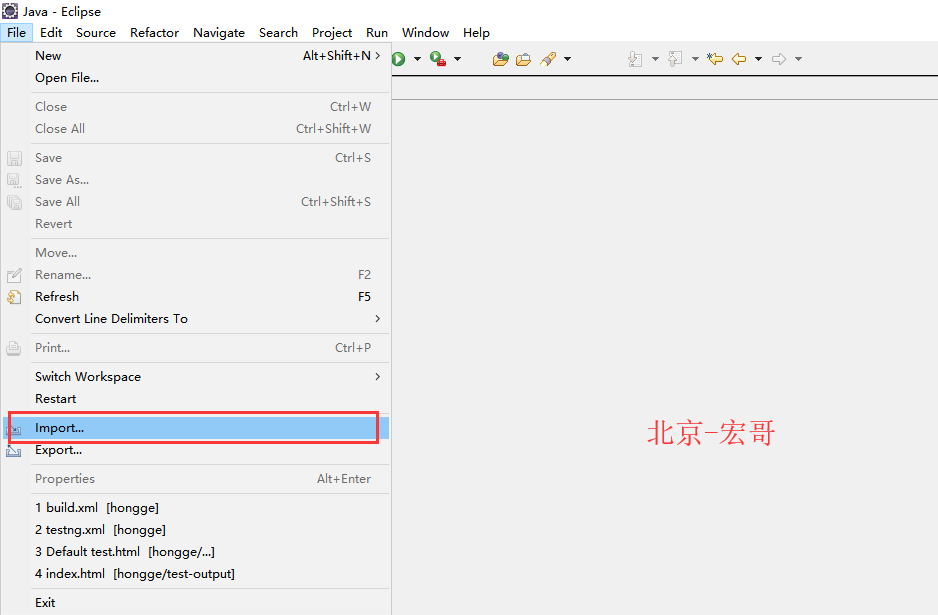
(1)點擊File->import
(2)選擇Existing Maven Projects,點擊Next

(3)選擇解壓好的ReportNG項目,點擊Finish

(4)導入後的項目如圖所示,導入後切記忙於修改源程式碼,就算你把程式碼改爛了也改不對,而且會報亂七八糟的錯誤,讓你懷疑人生
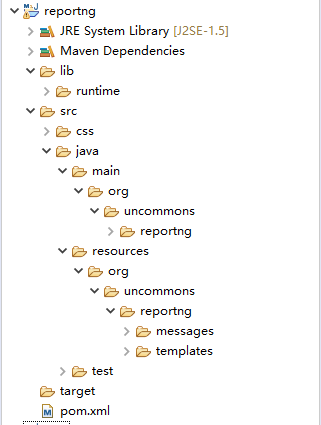
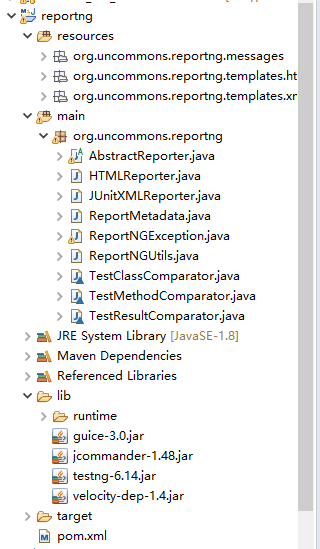
(5)項目導入後,修改項目成如下圖所示目錄,且添加相應jar包到lib
 ‘
‘
3、修改原程式碼
(1)報告中亂碼的解決辦法,修改AbstractReporter中的generateFile這個方法中的程式碼如下
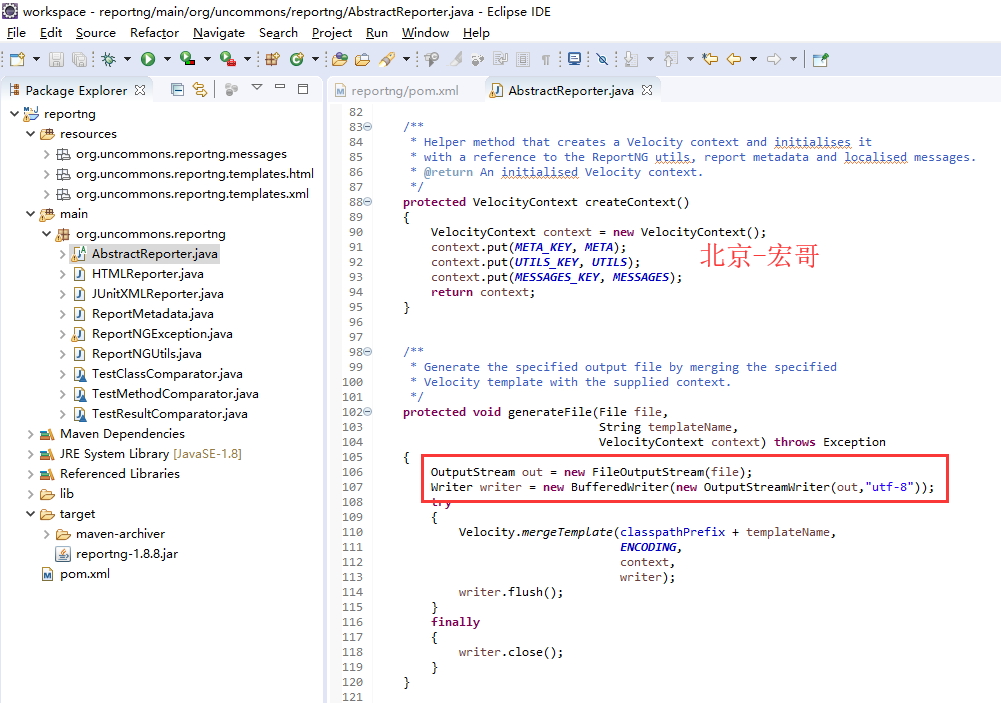
參考程式碼:
OutputStream out = new FileOutputStream(file); Writer writer = new BufferedWriter(new OutputStreamWriter(out,"utf-8"));
或者這樣也可以:
OutputStream out = new FileOutputStream(file); Writer writer = new BufferedWriter(new OutputStreamWriter(out,ENCODING));
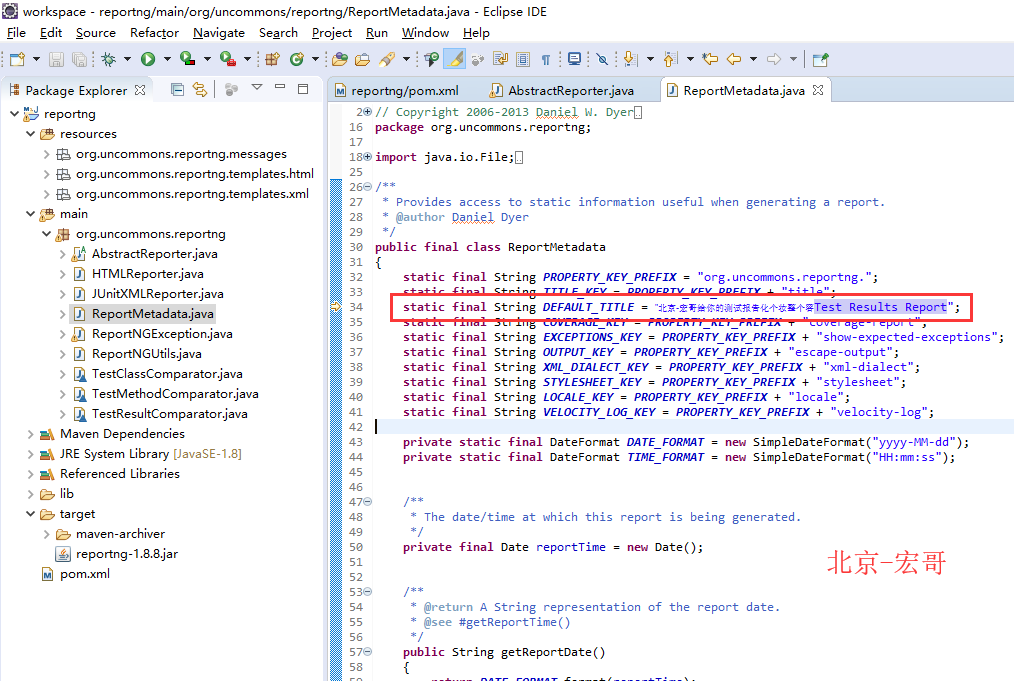
(2)修改測試報告名稱,修改ReportMetadata中DEFAULT_TITLE
(3)修改默認generatedBy,修改reportng.properties中的generatedBy

(4)修改默認日期顯示,修改ReportMetadata.java中的DATE_FORMAT,TIME_FORMAT

(5)修改pom.xml
<?xml version="1.0" encoding="UTF-8"?> <project xmlns="http://maven.apache.org/POM/4.0.0" xmlns:xsi="http://www.w3.org/2001/XMLSchema-instance" xsi:schemaLocation="http://maven.apache.org/POM/4.0.0 http://maven.apache.org/xsd/maven-4.0.0.xsd"> <modelVersion>4.0.0</modelVersion> <groupId>reportng</groupId> <artifactId>reportng</artifactId> <version>1.8.8</version> <dependencies> <dependency> <groupId>org.apache.httpcomponents</groupId> <artifactId>httpclient</artifactId> <version>4.3.6</version> </dependency> <dependency> <groupId>org.apache.velocity</groupId> <artifactId>velocity-engine-core</artifactId> <version>2.0</version> </dependency> <dependency> <groupId>org.testng</groupId> <artifactId>testng</artifactId> <version>6.9.6</version> </dependency> <dependency> <groupId>org.uncommons</groupId> <artifactId>reportng</artifactId> <version>1.1.4</version> <scope>test</scope> <exclusions> <exclusion> <groupId>org.testng</groupId> <artifactId>testng</artifactId> </exclusion> </exclusions> </dependency> <dependency> <groupId>com.google.inject</groupId> <artifactId>guice</artifactId> <version>3.0</version> <!--<scope>test</scope>--> </dependency> </dependencies> <build> <plugins> <plugin> <groupId>org.apache.maven.plugins</groupId> <artifactId>maven-surefire-plugin</artifactId> <version>2.18.1</version> <configuration> <properties> <property> <name>usedefaultlisteners</name> <value>false</value> </property> <property> <name>listener</name> <value>org.uncommons.reportng.HTMLReporter, org.uncommons.reportng.JUnitXMLReporter</value> </property> </properties> <!-- <suiteXmlFiles> <suiteXmlFile>testng.xml</suiteXmlFile> </suiteXmlFiles> --> <workingDirectory>target/</workingDirectory> </configuration> </plugin> </plugins> </build> <properties> <project.build.sourceEncoding>UTF-8</project.build.sourceEncoding> </properties> </project>
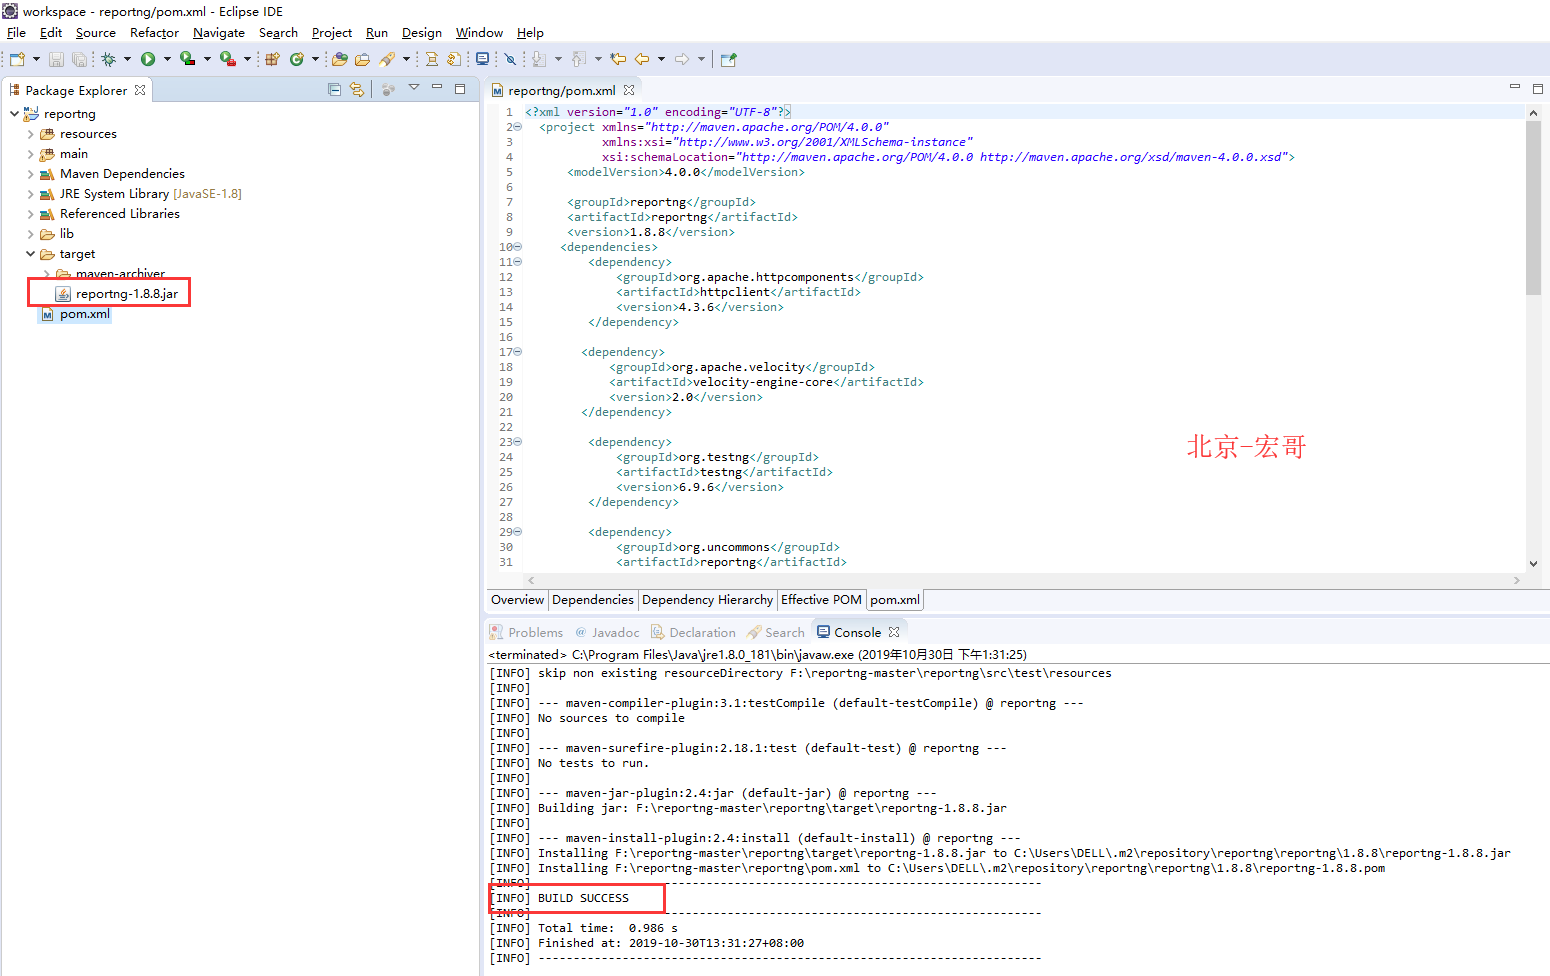
4.打包,pom.xml右擊選擇Run As->Maven install,

5.控制台顯示BUILD SUCCESS,則構建成功,刷新當前項目,在target目錄下會生成一個jar文件:reportng-1.8.8.jar
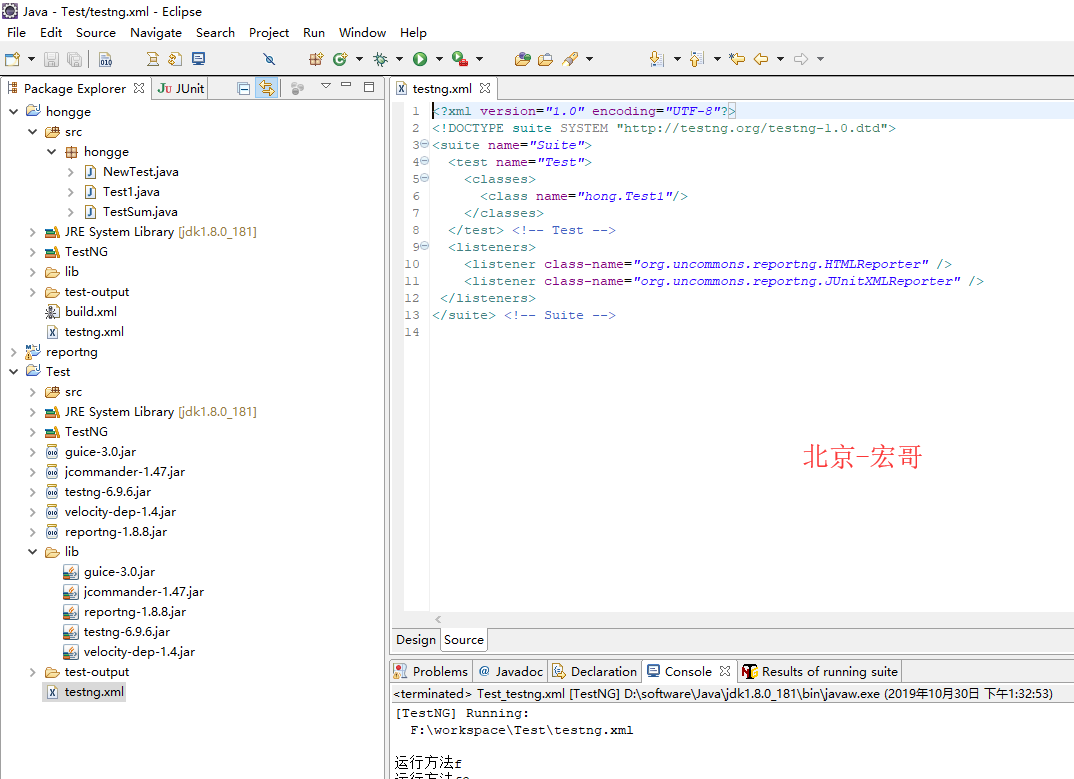
6.測試,新建一個測試項目(大家請隨意),導入相應jar包,選擇運行testng.xml,記得添加
- <listeners>
- <listener class-name=“org.uncommons.reportng.HTMLReporter” />
- <listener class-name=“org.uncommons.reportng.JUnitXMLReporter” />
- </listeners>
7.報告展示,修改後的jar包已上傳到群共享,需要的小夥伴可以加群自己下載哦。
套餐二(VIP會員)
testng-xslt
testNG自帶生成的測試報告不太美觀,可以使用testng-xslt進行美化,步驟如下:
1、官網下載testng-xslt包,http://testng-xslt.googlecode.com/files/testng-xslt-1.1.zip
親測現在google可能訪問不了,可到我的網盤裡下載,鏈接: https://pan.baidu.com/s/1HC52IgKBRd9agQ1B8HyfVg 提取碼: ferk
2、解壓後的文件目錄如下圖所示:
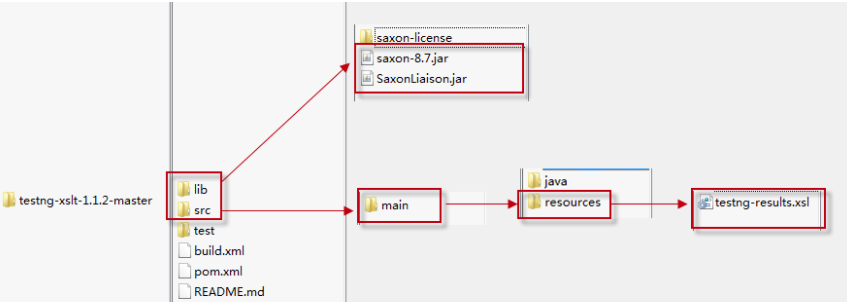
3、複製testng-results.xsl(testng-xslt-1.1srcmainresources)文件到test-output目錄下
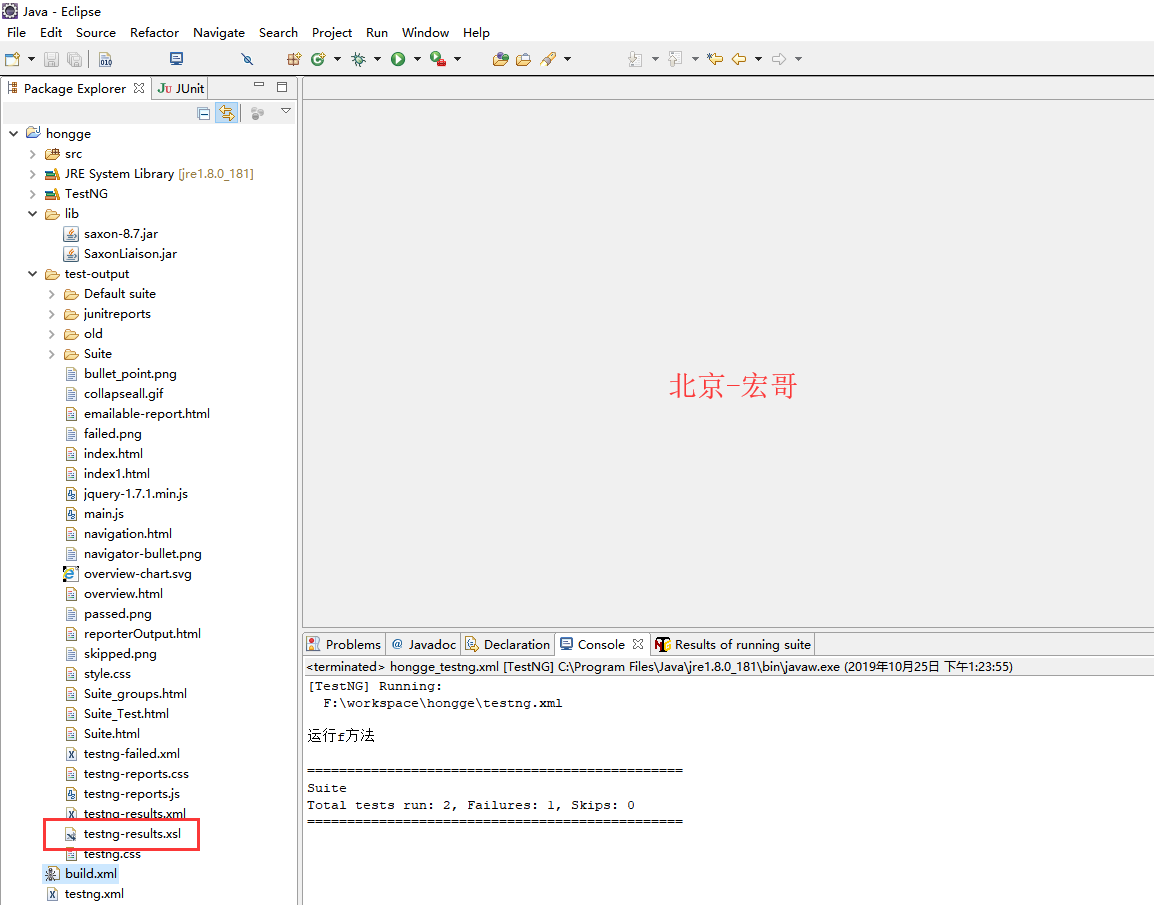
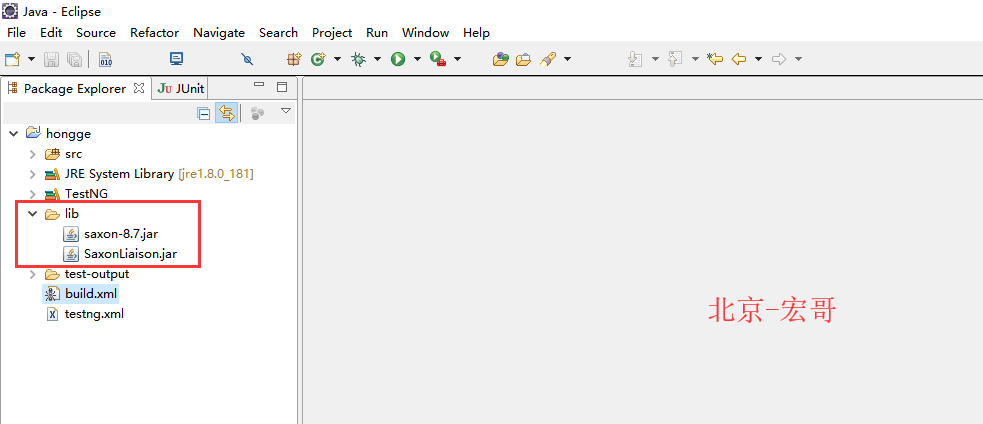
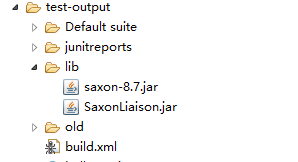
4、解壓文件testng-xslt-1.1.2,把 lib 文件下的saxon-8.7.jar 和 SaxonLiason.jar 拷貝到項目的lib文件夾(若沒有則新建)下,並導入到項目中(lib文件夾的路徑必須放在test-output下,不然後面會影響生成構建文件)
5、安裝ant,http://mirror.bit.edu.cn/apache/ant/binaries/apache-ant-1.9.4-bin.zip
Ant 下載安裝配置使用教程
一、Ant 簡介
1、Apache Ant 是一個Java庫和命令行工具,其任務是將構建文件中描述的進程作為目標和擴展點相互依賴。Ant提供了許多內置任務,允許編譯,組裝,測試和運行Java應用程式。
2、Ant是用Java編寫的。Ant的用戶可以開發自己的包含Ant任務和類型的“antlibs”,並提供大量現成的商業或開源“antlibs”。
3、類似於 Maven ,統一構建的項目管理工具。
二、下載
1、當前最新版: http://mirror.bit.edu.cn/apache//ant/binaries/apache-ant-1.10.5-bin.zip
2、歷史版本下載: https://archive.apache.org/dist/ant/binaries/
三、安裝
1、解壓 apache-ant-1.10.5-bin.zip
2、目錄結構如下:

3、配置 ANT_HOME , Path , classpath
ANT_HOME = F:softant-1.10.5
Path = %ANT_HOME%bin;
classpath = %ANT_HOME%lib;

4、類似於 MAVEN_HOME , JAVA_HOME 的配置。
四、測試
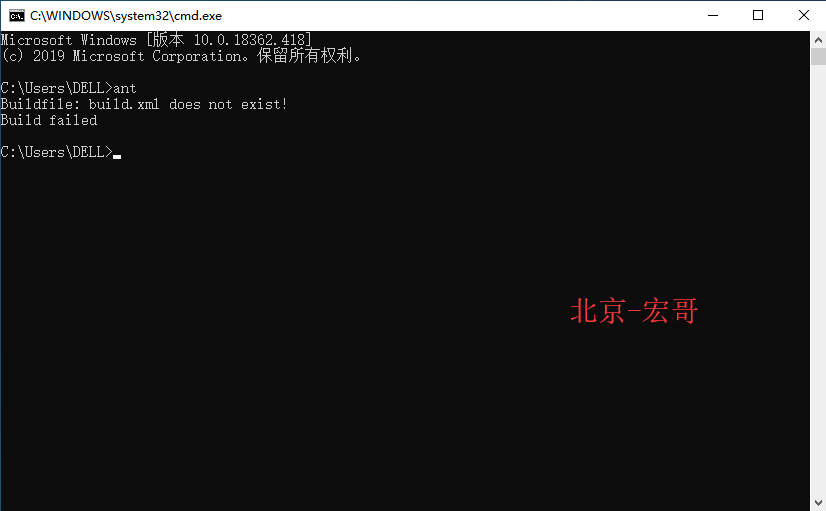
1、 Win + R —> cmd —> 輸入 ant , 出現 如下:
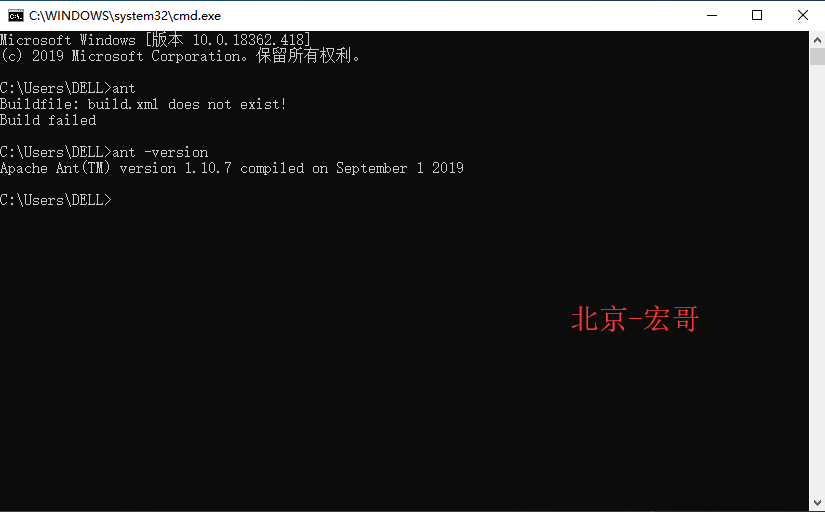
2、查看 ant 版本 : ant -version
6、在project目錄下,新建build.xml文件,內容如下:
<project name="hongge" basedir="." > <property name="lib.dir" value="lib" /> <path id="test.classpath" > <!-- adding the saxon jar to your classpath --> <fileset dir="${lib.dir}" includes="*.jar" /> </path> <target name="transform" > <!-- 需要根據自己的環境進行配置(將E:/workspace/testNG/替換成你自己project的目錄) --> <xslt in="F:/workspace/hongge/test-output/testng-results.xml" style="F:/workspace/hongge/test-output/testng-results.xsl" out="F:/workspace/hongge/test-output/index1.html" > <!-- 需要根據自己的環境進行配置(將E:/workspace/testNG/替換成你自己project的目錄) --> <param name="testNgXslt.outputDir" expression="F:/workspace/hongge/test-output/" /> <classpath refid="test.classpath" /> </xslt> </target> </project>
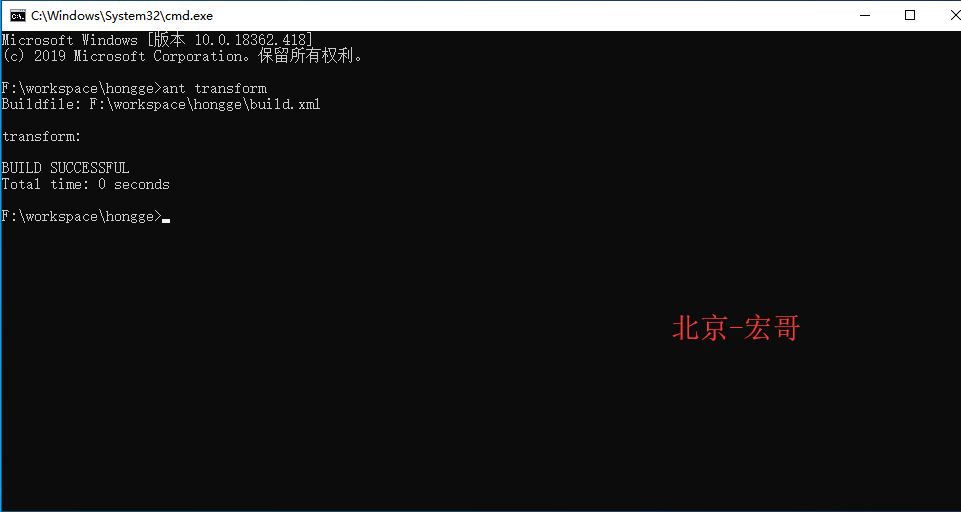
7、在cmd里,切換到project的目錄,執行ant transform:
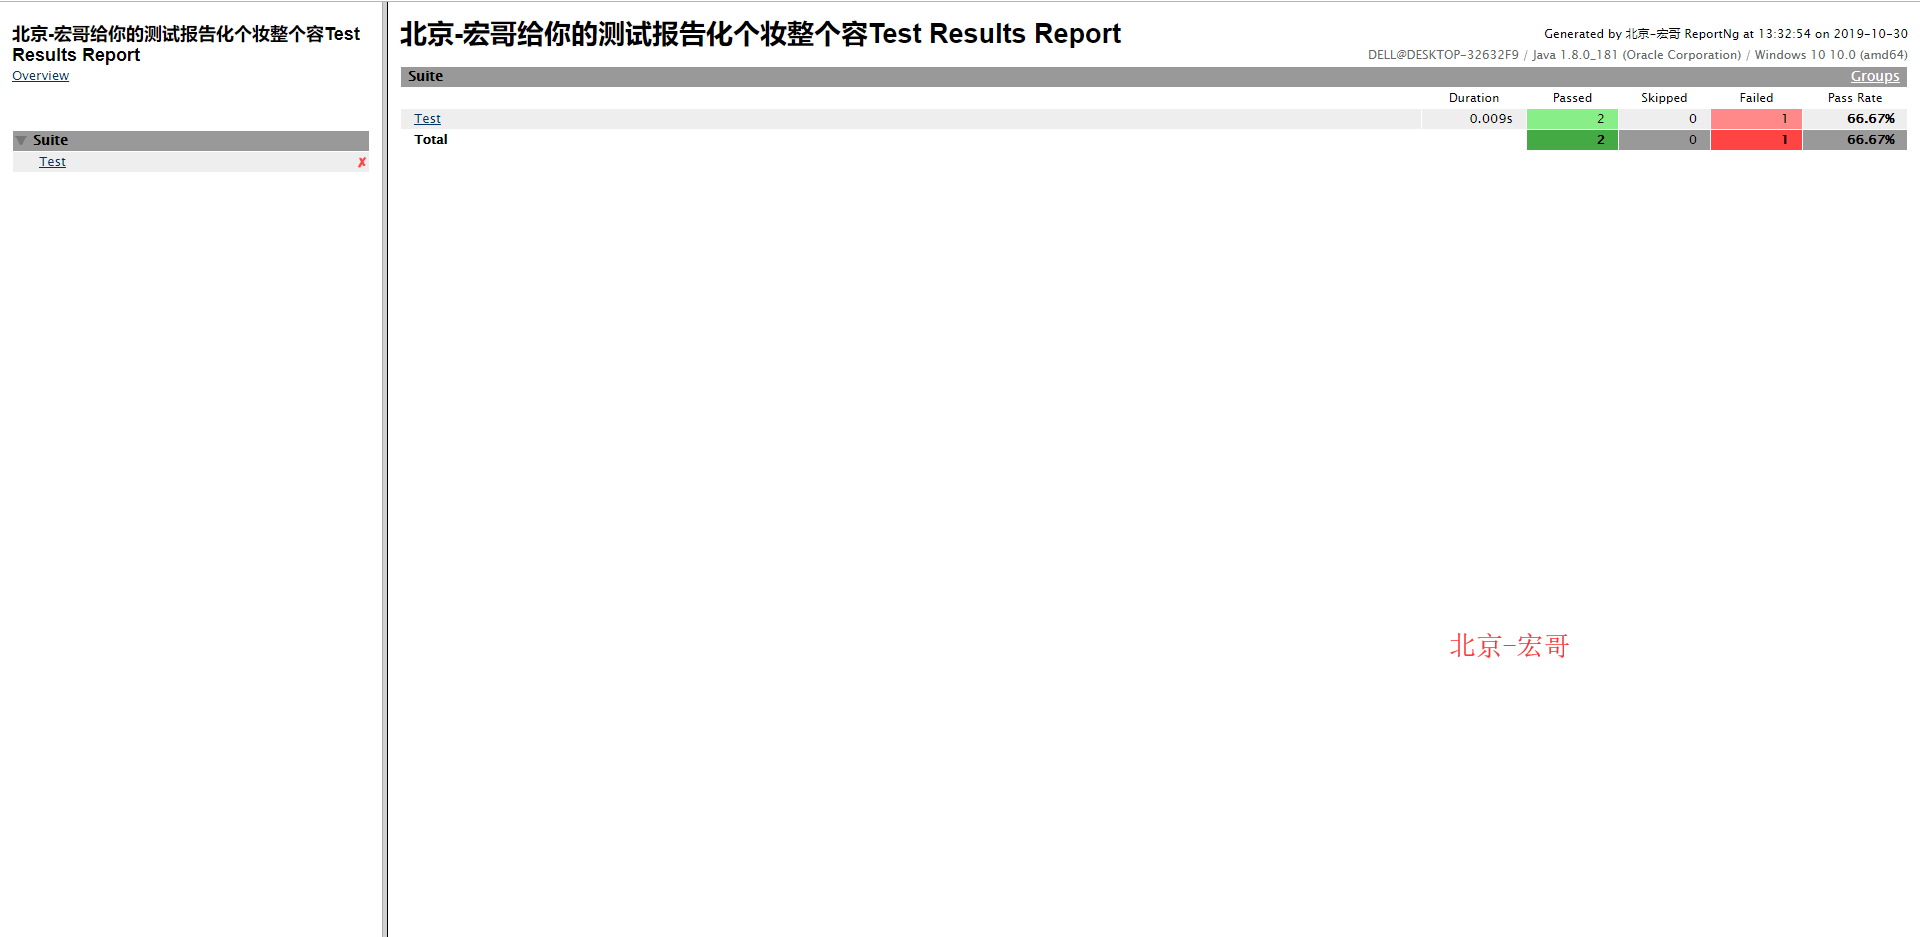
8、到配置的路徑下,打開生成的文件index1.html,以圖形化的介面展示測試結果:

小結
好了,今天分享就到這裡。
有問題加入java自動化測試交流群:694280102
個人公眾號 微信群 (微信群已滿100,可以加宏哥的微信拉你進群,請備註:進群)


您的肯定就是我進步的動力。如果你感覺還不錯,就請鼓勵一下吧!記得點波 推薦 哦!!!(點擊右邊的小球即可!(^__^) 嘻嘻……)


