[Spring cloud 一步步實現廣告系統] 20. 系統運行測試
- 2019 年 10 月 3 日
- 筆記
系統運行
經過長時間的編碼實現,我們的主體模組已經大致完成,因為之前我們都是零散的對各個微服務自行測試,接下來,我們需要將所有的服務模組進行聯調測試,Let’s do it.
清除測試數據&測試文件
我們在實現各個服務的過程中,添加了不少的測試文件和測試數據,為了不影響我們最終的展示效果,我們先將之前的歷史數據清理掉。
drop database advertisement;依然使用flyway 添加我們的測試數據:
INSERT INTO `ad_user` VALUES (10,'Isaac','B2E56F2420D73FEC125D2D51641C5713',1,'2019-08-14 20:29:01','2019-08-14 20:29:01'); INSERT INTO `ad_creative` VALUES (10,'第一個創意',1,1,720,1080,1024,0,1,10,'https://www.life-runner.com','2019-08-14 21:31:31','2019-08-14 21:31:31'); INSERT INTO `ad_plan` VALUES (10,10,'推廣計劃名稱',1,'2019-11-28 00:00:00','2019-11-20 00:00:00','2019-11-19 20:42:27','2019-08-14 20:57:12'); INSERT INTO `ad_unit` VALUES (10,10,'第一個推廣單元',1,1,10000000,'2019-11-20 11:43:26','2019-11-20 11:43:26'),(12,10,'第二個推廣單元',1,1,15000000,'2019-01-01 00:00:00','2019-01-01 00:00:00'); INSERT INTO `ad_unit_district` VALUES (10,10,'陝西省','西安市'),(11,10,'陝西省','西安市'),(12,10,'陝西省','西安市'),(14,10,'山西省','陽泉市'); INSERT INTO `ad_unit_hobby` VALUES (10,10,'爬山'),(11,10,'讀書'),(12,10,'寫程式碼'); INSERT INTO `ad_unit_keyword` VALUES (10,10,'汽車'),(11,10,'火車'),(12,10,'飛機'); INSERT INTO `relationship_creative_unit` VALUES (10,10,10);導出測試索引文件
可參考 全量索引傳送門 ,或者下載源碼github傳送門 / gitee傳送門 ,運行mscx-ad-db項目,然後執行 http://localhost:7002/ad-db/export/plan。
開發自測 Unit Test
一個合格的開發人員是絕對不能容忍自己的程式碼存在傻X bug 存在的,但是個人總會有犯錯的時候,那麼我們要怎麼避免此類非業務發展導致的基礎問題呢,這時候,開發的UT就顯得非常Important了。
廣告投放系統測試
我們來編寫投放系統的單元測試,如下圖:
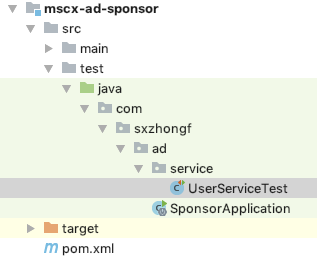
單元測試模組的目錄結構與我們的正式項目結構保持一致,如果你需要給單元測試編寫特例化配置,把我們的application.yml配置文件copy到UT中就可以了,這裡就不做贅述。
-
用戶服務單元測試
@RunWith(SpringRunner.class) @SpringBootTest( classes = {SponsorApplication.class}, webEnvironment = SpringBootTest.WebEnvironment.NONE ) public class UserServiceTest { @Autowired private IUserService userService; @Test // @Transactional public void testCreateUser() throws AdException { UserRequestVO userRequestVO = new UserRequestVO("Isaac Zhang"); UserResponseVO responseVO = userService.createUser(userRequestVO); assert responseVO.getUserName() == "Isaac Zhang"; System.out.printf("創建用戶: %s", JSON.toJSONString(responseVO)); } }
大家可以看到,在上述程式碼中,我們測試了創建用戶的service方法,特別注意2個點:
@Transactional註解.
因為我們使用的是和正式服務相同的資料庫,我們在測試的時候就會真實的插入一個用戶到ad_user表中,如果我們不想這個用戶存入表中,就需要加上@Transactional註解,我們的創建就不會commit,也就不會被插入到真實資料庫中。@SpringBootTest註解
classes表明測試啟動類是哪個,webEnvironment = SpringBootTest.WebEnvironment.NONE表明我們當前的測試並非一個web環境。
這裡就不針對每一個service進行單元測試的編寫,但是大家一定要記住,在真實的企業開發環境中,大的開發團隊一定會對單元測試的程式碼覆蓋率有一個要求,一般都不會低於60%,我個人對自己的行程式碼覆蓋率是 > 80%.這樣才能真實的保證我們的每一個方法都盡量都執行和驗證到。
大家嘗試依次實現其餘的單元測試吧。
廣告檢索系統測試
我們的檢索服務對外只提供一個服務,因此我們只需要創建一個Test類就可以了,let’s code.
package com.sxzhongf.ad.search; import com.sxzhongf.ad.AdSearchApplication; import com.sxzhongf.ad.search.vo.SearchRequest; import com.sxzhongf.ad.search.vo.SearchResponse; import com.sxzhongf.ad.search.vo.feature.DistrictFeature; import com.sxzhongf.ad.search.vo.feature.FeatureRelation; import com.sxzhongf.ad.search.vo.feature.HobbyFeatrue; import com.sxzhongf.ad.search.vo.feature.KeywordFeature; import com.sxzhongf.ad.search.vo.media.AdSlot; import com.sxzhongf.ad.search.vo.media.App; import com.sxzhongf.ad.search.vo.media.Device; import com.sxzhongf.ad.search.vo.media.Geo; import org.junit.Test; import org.junit.runner.RunWith; import org.springframework.beans.factory.annotation.Autowired; import org.springframework.boot.test.context.SpringBootTest; import org.springframework.test.context.junit4.SpringRunner; import java.util.Arrays; import java.util.Collections; import java.util.List; /** * SearchTest for 搜索服務測試用例 * * @author <a href="mailto:[email protected]">Isaac.Zhang | 若初</a> */ @RunWith(SpringRunner.class) @SpringBootTest(classes = AdSearchApplication.class, webEnvironment = SpringBootTest.WebEnvironment.NONE) public class SearchTest { @Autowired private ISearch search; @Test public void testFetchAds() { SearchRequest request = new SearchRequest().builder() .mediaId("isaac-search-mediaId") .requestInfo(new SearchRequest.RequestInfo( "request id", Arrays.asList( new AdSlot().builder() .adSlotCode("slot code") .height(800) .minCpm(1024) .positionType(1) .type(Arrays.asList(1)) .build() ), buildSimpleApp(), buildSimpleGeo(), buildSimpleDevice() )) .featureInfo( buildSimpleFeatureInfo( Arrays.asList("汽車", "火車", "飛機"), Collections.singletonList( new DistrictFeature.ProvinceAndCity( "陝西省", "西安市" ) ), Arrays.asList("爬山", "寫程式碼", "飛機"), FeatureRelation.OR ) ) .build(); SearchResponse response = search.fetchAds(request); // assert response.adSlotRelationAds.get(0).contains("key"); System.out.println("開始查詢廣告拉:" + response); } /** * 創建demo {@link App} */ private App buildSimpleApp() { return new App().builder() .activityName("simple App activityName") .appCode("simple App appCode") .appName("simple app name") .packageName("simple app package name") .build(); } /** * 創建demo {@link Geo} */ private Geo buildSimpleGeo() { return new Geo().builder() .longitude(Float.valueOf("100.2222222")) .latitude(Float.valueOf("38.8888888")) .city("xiaan") .province("shaanxi") .build(); } /** * 創建demo {@link Device} */ private Device buildSimpleDevice() { return new Device().builder() .deviceCode("simple device code") .deviceMacAddr("simple mac addr") .displaySize("simple display size") .ip("127.0.0.1") .model("simple model") .screenSize("simple screen size") .serialName("simple serial name") .build(); } private SearchRequest.FeatureInfo buildSimpleFeatureInfo( List<String> keywords, List<DistrictFeature.ProvinceAndCity> provinceAndCities, List<String> hobbys, FeatureRelation featureRelation ) { return new SearchRequest.FeatureInfo( new KeywordFeature(keywords), new DistrictFeature(provinceAndCities), new HobbyFeatrue(hobbys), featureRelation ); } } 在這個測試用例中,我們主要的複雜性是在組件各種查詢條件,這個就需要各位夥伴在理解業務的時候需要萬分上心。
