three.js 郭先生製作太陽系
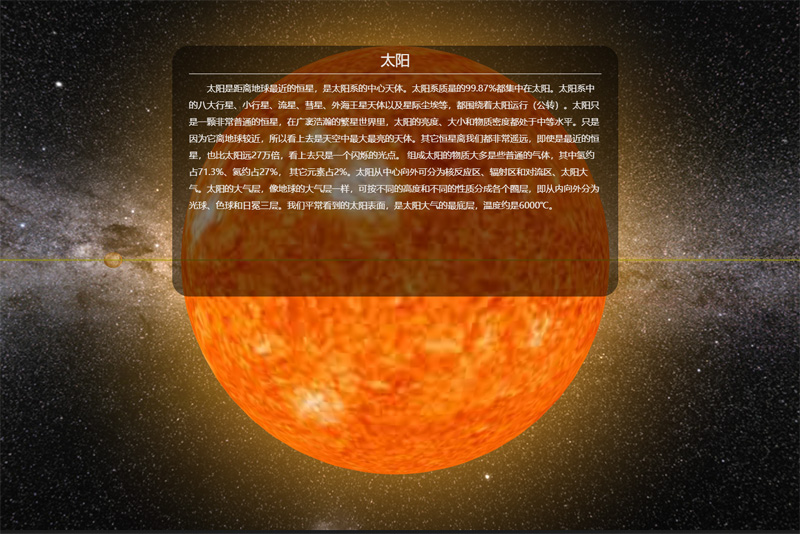
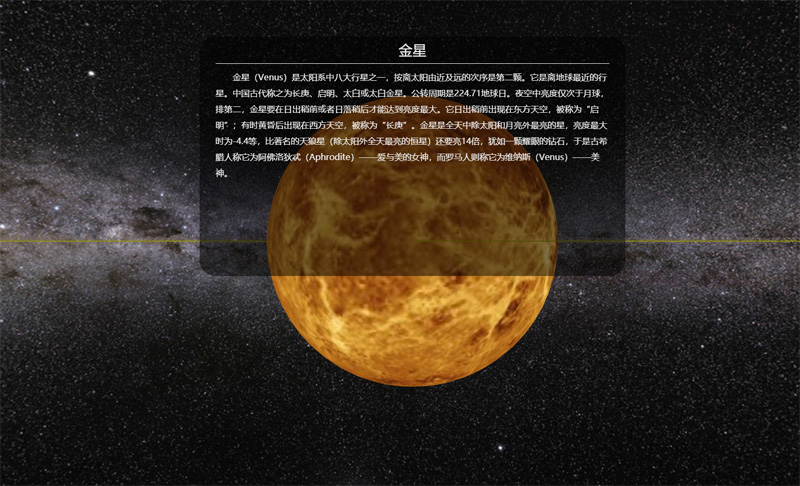
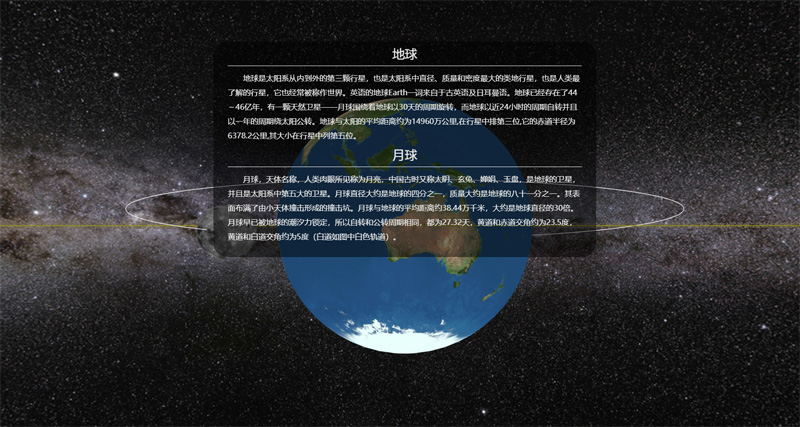
今天郭先生收到評論,想要之前製作太陽系的案例,因為找不到了,於是在vue版本又製作一版太陽系,在線案例請點擊部落格原文(載入時間比較長,請稍等一下)。話不多說先看效果圖。


圖片有點多,先放三張,相比於上一個版本,這個版本製作更加細緻,動畫更加流暢。那麼下面分析一下主要程式碼。
1. 先介紹一下變數
這裡查了一些資料radiuses、distances、pub_rotation、self_rotation、pitchs分別為八大行星半徑比、到太陽的距離比、公轉比、自轉比、自轉軸傾角比。
radiuses: [2440, 6052, 6371, 3397, 71492, 60268, 25559, 24766],
distances: [5791, 10820, 14960, 22794, 77833, 142940, 287099, 450400],
pub_rotation: [88, 225, 365, 687, 4329, 10767, 30769, 60152],
self_rotation: [58.65, 243, 1, 1, 0.41, 0.42, 0.64, 0.65],
pitchs: [0, 177, 23, 25, 3, 27, 98, 28],
sunObj: {
    radius: 60000//實際695500,為了好看太陽半徑縮小了
},
moonObj: {
    distance: 800, //實際90 為了好看地月距離放大了
    radius: 1737,
    pitchs: 5,
    self_rotation: 27.25,
    pub_rotation: 27.25
},
asteriodObj: {
    radius: 2000,//2000
    pub_rotation: 408
},
2. 引入星球的紋理貼圖
由於星球的貼圖載入比較慢,所以要在貼圖載入之後,再進行後續操作。
let loader = new THREE.TextureLoader();
taiyangT = loader.load('/static/images/texture/planets/sun.jpg');
shuixingT = loader.load('/static/images/texture/planets/shuixing.jpg');
jinxingT = loader.load('/static/images/texture/planets/jinxing.jpg');
diqiuT = loader.load('/static/images/texture/planets/diqiu.jpg');
huoxingT = loader.load('/static/images/texture/planets/huoxing.jpg');
muxingT = loader.load('/static/images/texture/planets/muxing.jpg');
tuxingT = loader.load('/static/images/texture/planets/tuxing.jpg');
tianwangxingT = loader.load('/static/images/texture/planets/tianwangxing.jpg');
haiwangxingT = loader.load('/static/images/texture/planets/haiwangxing.jpg');
yueqiuT = loader.load('/static/images/texture/planets/yueqiu.jpg');
asteriodsT = loader.load('/static/images/texture/planets/asteriod.jpg');
tuxinghuanT = loader.load('/static/images/texture/planets/tuxingring.png');
3. 繪製星球,並在場景中添加
這裡我們寫了一個公共的方法createMesh,這個方法傳兩個參數貼圖和索引,可以根據這個索引找到自轉周期、公轉周期距離等等。
shuixing = this.createMesh(shuixingT, 0);
jinxing = this.createMesh(jinxingT, 1);
diqiu = this.createMesh(diqiuT, 2);
huoxing = this.createMesh(huoxingT, 3);
muxing = this.createMesh(muxingT, 4);
tuxing = this.createMesh(tuxingT, 5);
tianwangxing = this.createMesh(tianwangxingT, 6);
haiwangxing = this.createMesh(haiwangxingT, 7);
taiyang = this.createTaiyang();
yueqiu = this.createYueqiu();

scene.add(shuixing);
scene.add(jinxing);
scene.add(diqiu);
scene.add(huoxing);
scene.add(muxing);
scene.add(tuxing);
scene.add(tianwangxing);
scene.add(haiwangxing);
scene.add(taiyang);
scene.add(yueqiu);
創建公共網格方法如下
createMesh(texture, index) {
    let sphere = new THREE.SphereGeometry(this.radiuses[index] * this.radius_ratio, 60, 30);
    let material = new THREE.MeshBasicMaterial({map: texture});
    let mesh = new THREE.Mesh(sphere, material);
    mesh.position.x = this.distance_ratio * this.distances[index];
    return mesh;
}
創建太陽網格方法如下
createYueqiu() {
    let sphere = new THREE.SphereGeometry(this.moonObj.radius * this.radius_ratio, 30, 20);
    let material = new THREE.MeshBasicMaterial({map: yueqiuT});
    let mesh = new THREE.Mesh(sphere, material);
    mesh.position.x = this.distance_ratio * this.moonObj.distance;
    let moon = new THREE.Object3D();
    moon.position.copy(diqiu.position);
    moon.add(mesh);
    return moon;
}
4. 星體自轉和公轉
在render函數中調用自轉和公轉函數,控制自轉的屬性就是mesh.rotation。控制公轉的屬性就是mesh.position。這裡使用歐拉角和THREE.Math方法
selfRotate() {
    shuixing.rotation.copy(new THREE.Euler(THREE.Math.degToRad(this.pitchs[0]), Math.sqrt(1 / this.self_rotation[0]) * this.self_ratio * this.timeS, 0));
    jinxing.rotation.copy(new THREE.Euler(THREE.Math.degToRad(this.pitchs[1]), Math.sqrt(1 / this.self_rotation[1]) * this.self_ratio * this.timeS, 0));
    diqiu.rotation.copy(new THREE.Euler(THREE.Math.degToRad(this.pitchs[2]), Math.sqrt(1 / this.self_rotation[2]) * this.self_ratio * this.timeS, 0));
    huoxing.rotation.copy(new THREE.Euler(THREE.Math.degToRad(this.pitchs[3]), Math.sqrt(1 / this.self_rotation[3]) * this.self_ratio * this.timeS, 0));
    muxing.rotation.copy(new THREE.Euler(THREE.Math.degToRad(this.pitchs[4]), Math.sqrt(1 / this.self_rotation[4]) * this.self_ratio * this.timeS, 0));
    tuxing.rotation.copy(new THREE.Euler(THREE.Math.degToRad(this.pitchs[5]), Math.sqrt(1 / this.self_rotation[5]) * this.self_ratio * this.timeS, 0));
    tianwangxing.rotation.copy(new THREE.Euler(0, Math.sqrt(1 / this.self_rotation[6]) * this.self_ratio * this.timeS, THREE.Math.degToRad(this.pitchs[6]), 'ZYX'));
    haiwangxing.rotation.copy(new THREE.Euler(THREE.Math.degToRad(this.pitchs[7]), Math.sqrt(1 / this.self_rotation[7]) * this.self_ratio * this.timeS, 0));
    // yueqiu.children[0].rotation.copy(new THREE.Euler(THREE.Math.degToRad(this.moonObj.pitchs), Math.sqrt(1 / this.moonObj.self_rotation) * this.self_ratio * this.timeS, 0));
    yueqiu.position.copy(diqiu.position);
    yueqiu.rotation.copy(new THREE.Euler(THREE.Math.degToRad(this.moonObj.pitchs), Math.sqrt(1 / this.moonObj.self_rotation) * this.self_ratio * this.timeS, 0));
    asteriods.rotation.copy(new THREE.Euler(0, this.timeS * this.pub_ratio / this.asteriodObj.pub_rotation / 2, 0));
},
pubRotate() {
    shuixing.position.set(Math.cos(this.timeP * this.pub_ratio / this.pub_rotation[0]) * this.distance_ratio * this.distances[0], 0, -Math.sin(this.timeP * this.pub_ratio / this.pub_rotation[0]) * this.distance_ratio * this.distances[0]);
    jinxing.position.set(Math.cos(this.timeP * this.pub_ratio / this.pub_rotation[1]) * this.distance_ratio * this.distances[1], 0, -Math.sin(this.timeP * this.pub_ratio / this.pub_rotation[1]) * this.distance_ratio * this.distances[1]);
    diqiu.position.set(Math.cos(this.timeP * this.pub_ratio / this.pub_rotation[2]) * this.distance_ratio * this.distances[2], 0, -Math.sin(this.timeP * this.pub_ratio / this.pub_rotation[2]) * this.distance_ratio * this.distances[2]);
    huoxing.position.set(Math.cos(this.timeP * this.pub_ratio / this.pub_rotation[3]) * this.distance_ratio * this.distances[3], 0, -Math.sin(this.timeP * this.pub_ratio / this.pub_rotation[3]) * this.distance_ratio * this.distances[3]);
    muxing.position.set(Math.cos(this.timeP * this.pub_ratio / this.pub_rotation[4]) * this.distance_ratio * this.distances[4], 0, -Math.sin(this.timeP * this.pub_ratio / this.pub_rotation[4]) * this.distance_ratio * this.distances[4]);
    tuxing.position.set(Math.cos(this.timeP * this.pub_ratio / this.pub_rotation[5]) * this.distance_ratio * this.distances[5], 0, -Math.sin(this.timeP * this.pub_ratio / this.pub_rotation[5]) * this.distance_ratio * this.distances[5]);
    tianwangxing.position.set(Math.cos(this.timeP * this.pub_ratio / this.pub_rotation[6]) * this.distance_ratio * this.distances[6], 0, -Math.sin(this.timeP * this.pub_ratio / this.pub_rotation[6]) * this.distance_ratio * this.distances[6]);
    haiwangxing.position.set(Math.cos(this.timeP * this.pub_ratio / this.pub_rotation[7]) * this.distance_ratio * this.distances[7], 0, -Math.sin(this.timeP * this.pub_ratio / this.pub_rotation[7]) * this.distance_ratio * this.distances[7]);
}
5. 使用動畫,提升逼格
這裡使用了tween控制相機的position和lookat屬性,實現空間穿梭的感覺。
initTween() {
    let pos = {x: 0, y: 0, z: -96, lx: 0, ly: 0, lz: 0};
    tween1 = new TWEEN.Tween(pos).to({x: 57.91, y: 0, z: -5, lx: 57.91, ly: 0, lz: 0}, 20 * this.animation_time);
    tween1.easing(TWEEN.Easing.Linear.None);
    tween2 = new TWEEN.Tween(pos).to({x: 108.2, y: 0, z: -13, lx: 108.2, ly: 0, lz: 0}, 22 * this.animation_time);
    tween2.easing(TWEEN.Easing.Linear.None);
    tween3 = new TWEEN.Tween(pos).to({x: 149.6, y: 0, z: -14, lx: 149.6, ly: 0, lz: 0}, 24 * this.animation_time);
    tween3.easing(TWEEN.Easing.Linear.None);
    tween4 = new TWEEN.Tween(pos).to({x: 227.94, y: 0, z: -6, lx: 227.94, ly: 0, lz: 0}, 27 * this.animation_time);
    tween4.easing(TWEEN.Easing.Linear.None);
    tween5 = new TWEEN.Tween(pos).to({x: 436.5, y: 0, z: -6, lx: 436.5, ly: 0, lz: 0}, 30 * this.animation_time);
    tween5.easing(TWEEN.Easing.Linear.None);
    tween6 = new TWEEN.Tween(pos).to({x: 778.33, y: 0, z: -112, lx: 778.33, ly: 0, lz: 0}, 34 * this.animation_time);
    tween6.easing(TWEEN.Easing.Linear.None);
    tween7 = new TWEEN.Tween(pos).to({x: 1429.4, y: 0, z: -155, lx: 1429.4, ly: 0, lz: 0}, 35 * this.animation_time);
    tween7.easing(TWEEN.Easing.Linear.None);
    tween8 = new TWEEN.Tween(pos).to({x: 2871, y: 0, z: -46, lx: 2871, ly: 0, lz: 0}, 36 * this.animation_time);
    tween8.easing(TWEEN.Easing.Linear.None);
    tween9 = new TWEEN.Tween(pos).to({x: 4504, y: 0, z: -46, lx: 4504, ly: 0, lz: 0}, 37 * this.animation_time);
    tween9.easing(TWEEN.Easing.Linear.None);
    tween10 = new TWEEN.Tween(pos).to({x: -600, y: 452, z: 0, lx: 778.33, ly: 0, lz: 0}, 38 * this.animation_time);
    tween10.easing(TWEEN.Easing.Linear.None);

    tween1.chain(tween2).onUpdate(onUpdate).delay(50 * this.animation_time).onStart(() => this.show1 = false).onComplete(() => this.show2 = true);
    tween2.chain(tween3).onUpdate(onUpdate).delay(50 * this.animation_time).onStart(() => this.show2 = false).onComplete(() => this.show3 = true);
    tween3.chain(tween4).onUpdate(onUpdate).delay(50 * this.animation_time).onStart(() => this.show3 = false).onComplete(() => this.show4 = true);
    tween4.chain(tween5).onUpdate(onUpdate).delay(50 * this.animation_time).onStart(() => this.show4 = false).onComplete(() => this.show5 = true);
    tween5.chain(tween6).onUpdate(onUpdate).delay(50 * this.animation_time).onStart(() => this.show5 = false).onComplete(() => this.show6 = true);
    tween6.chain(tween7).onUpdate(onUpdate).delay(50 * this.animation_time).onStart(() => this.show6 = false).onComplete(() => this.show7 = true);
    tween7.chain(tween8).onUpdate(onUpdate).delay(50 * this.animation_time).onStart(() => this.show7 = false).onComplete(() => this.show8 = true);
    tween8.chain(tween9).onUpdate(onUpdate).delay(50 * this.animation_time).onStart(() => this.show8 = false).onComplete(() => this.show9 = true);
    tween9.chain(tween10).onUpdate(onUpdate).delay(50 * this.animation_time).onStart(() => this.show9 = false).onComplete(() => this.show10 = true);
    tween10.onUpdate(onUpdate).delay(50 * this.animation_time).onStart(() => this.show10 = false);

    tween1.start();
},
主要程式碼差不多就是這樣,像這樣製作太陽系並不難,只要你敢想。
轉載請註明地址:郭先生的部落格

