Day12-微信小程式實戰-交友小程式-優化「附近的人」頁面與serach組件的布局和樣式以及搜索歷史記錄和本地快取*內附程式碼)
回顧/:我們已經實現了顯示附近的人的功能了,可以多個人看到附近的人頁面了
但是還是要進行優化有幾個問題:1、我們用戶選擇了其他的自定義頭像之後,在首頁可以看到頭像的變化,但是在附近的人中頭像會變成報錯的樣式:如:
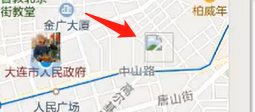
也就是500了,也就是找不到這個圖片了,解決方法:看開發文檔-》雲開發
//developers.weixin.qq.com/miniprogram/dev/wxcloud/guide/storage/api.html
其中有一個 「換取臨時鏈接」的功能(通過這個方法可以臨時的拿到一個圖片的路徑了),然後這個路徑就可以對應到我們的iconpath中了,有直接看demo
wx.cloud.getTempFileURL({
  fileList: ['cloud://xxx.png'],
  success: res => {
    // fileList 是一個有如下結構的對象數組
    // [{
    //    fileID: 'cloud://xxx.png', // 文件 ID
    //    tempFileURL: '', // 臨時文件網路鏈接
    //    maxAge: 120 * 60 * 1000, // 有效期
    // }]
    console.log(res.fileList)
  },
  fail: console.error
})
我們剛剛換了頭像的測試號,可以看到在資料庫中

正常的試https這樣的,但是我們修改了之後,它的路徑變成了我們設置的默認的,cloud開始的了
所以我們就可以直接在near.js裡面用for來判斷每個欄位符不符合條件即可了,一旦找到了這個cloud開頭的路徑的話,也就是if裡面進行的東西
我們就要換取臨時的路徑即可了,如果else的話,我們還是和之前一樣的,直接push進去即可了
if裡面的話直接copy文檔裡面的demo即可了
我們通過

裡面的那個tempFileURL就是一個臨時的路徑了
 getNearUsers(){
    db.collection('users').where({
      location: _.geoNear({
        geometry: db.Geo.Point(this.data.longitude, this.data.latitude),
        minDistance: 0,
        maxDistance: 5000
        //這1000和5000的單位是米
      }),
      islocation : true
    }).field({
      longitude : true,
      latitude : true ,
      userPhoto : true
    }).get().then((res)=>{
      console.log(res.data);
      let data = res.data;
      let result = [];
      if(data.length){

        for(let i=0;i<data.length;i++){
          if(data[i].userPhoto.includes('cloud://')){
            wx.cloud.getTempFileURL({
              fileList: [data[i].userPhoto ],
              success: res => {
                // console.log(res.fileList[0].tempFileURL)
                result.push({
                  // 然後就是把我們獲取到的臨時路徑直接賦值給iconpath即可了
                  iconPath: res.fileList[0].tempFileURL,
                  id: data[i]._id,
                  latitude: data[i].latitude,
                  longitude: data[i].longitude,
                  width: 30,
                  height: 30
                });

              }
            })
          }
          else{
            result.push({
              iconPath: data[i].userPhoto,
              id: data[i]._id,
              latitude: data[i].latitude,
              longitude: data[i].longitude,
              width: 30,
              height: 30
            });
          }

        }
        this.setData({
          markers : result
        });
      }
    });
  }
如果只是這個程式碼的話,會發現我們測試帳號的如何資訊都無法渲染出來,這個是因為js是非同步操作的,我們要在if之後立馬就進行 setdata操作即可了
如何在全部for結束之後也再次的進行setdata操作即可了,完整程式碼就是
getNearUsers(){
    db.collection('users').where({
      location: _.geoNear({
        geometry: db.Geo.Point(this.data.longitude, this.data.latitude),
        minDistance: 0,
        maxDistance: 5000
        //這1000和5000的單位是米
      }),
      islocation : true
    }).field({
      longitude : true,
      latitude : true ,
      userPhoto : true
    }).get().then((res)=>{
      console.log(res.data);
      let data = res.data;
      let result = [];
      if(data.length){

        for(let i=0;i<data.length;i++){
          if(data[i].userPhoto.includes('cloud://')){
            wx.cloud.getTempFileURL({
              fileList: [data[i].userPhoto ],
              success: res => {
                // console.log(res.fileList[0].tempFileURL)
                result.push({
                  // 然後就是把我們獲取到的臨時路徑直接賦值給iconpath即可了
                  iconPath: res.fileList[0].tempFileURL,
                  id: data[i]._id,
                  latitude: data[i].latitude,
                  longitude: data[i].longitude,
                  width: 30,
                  height: 30
                });
                this.setData({
                  markers: result
                });
              }
            })
          }
          else{
            result.push({
              iconPath: data[i].userPhoto,
              id: data[i]._id,
              latitude: data[i].latitude,
              longitude: data[i].longitude,
              width: 30,
              height: 30
            });
          }

        }
        this.setData({
          markers : result
        });
      }
    });
  }
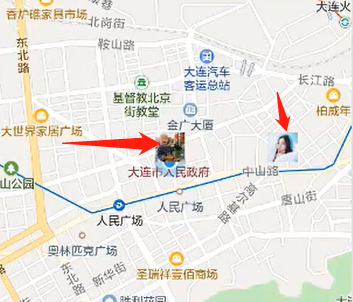
得到的效果就是,可以看到另外一個用戶剛剛它換的頭像了
(後面的優化就是可以點擊這個用戶的頭像之後我們就可以跳轉到它的詳情頁面了
這個功能在實現起來其實頁不複雜的,有一個和markers對應的事件,也就是點擊了這個markers就會觸發這個事件了
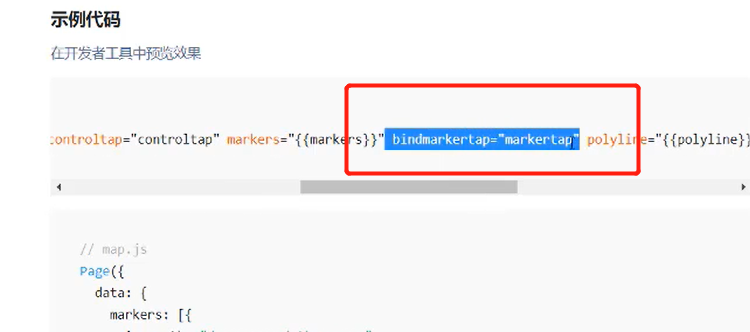
通過這個事件其實我們是可以拿到id值得

 markertap(ev){
    console.log(ev);
  }
通過在near.js裡面得這個函數,然後我們點擊一下地圖裡面的marker圖片之後,我們得到的值就是:

這個markerID其實對應的就是用戶的id值了
  markertap(ev){
    // console.log(ev);
    wx.navigateTo({
      url: '/pages/detail/detail?userId=' + ev.markerId
    })
  }
通過這個程式碼其實就可以實現,點擊地圖裡面的圖標的話我們就可以跳轉到這個用戶的詳情頁面去了
3、後面要測試的就是假如測試帳號關閉了共享位置的話
通過測試我們發現,測試號關閉了共享位置的話,在地圖裡面即使是刷新了還是會看到這個用戶的頭像的
(其實程式碼是沒有錯的,把項目關了再重啟之後會看到這個關閉了共享位置的用戶頭像就消失了
(其實還有其他可以優化的,就是可以在地圖的頭像上面加一段語音介紹自己等等的,因為小程式其實也是支援的,或者是可以計算我和你的距離
或者是我去你那邊的話我過去的導航和路線是怎麼樣的
二、search組件的布局和樣式
(就是在主頁的上面添加一個查找的框)
1、實現新建一個叫search的組件
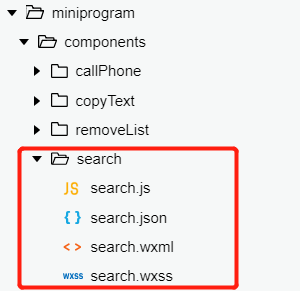
創立好了之後,就可以在首頁進行引用了
2、先在index.JSON文件裡面引入這個組件
{
  "usingComponents": {
    "search" : "/components/search/search"
  }
}
3、在主頁裡面和用標籤一樣引用就可以了
可以直接在index.wxml中通過 <search /> 來使用即可了

該search組件就被引入了
通過基本的結構wxml
<!--components/search/search.wxml-->
<view class="container">
  <view class="search">
    <view class="search-text">
      <text class="iconfont iconsousuo"></text>
      <input type="text" placeholder="搜索喵星人" />
    </view>
    <view class="search-cancel">取消</view>
  </view>
</view>
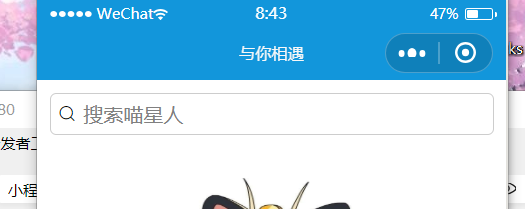
得到的效果:

會發現我們放大鏡圖標沒有顯示出來,所以我們要配置一下,讓這個圖標可以穿透出來即可了
也就是之前copyText.js寫過的
  options: {
    styleIsolation: 'apply-shared'
  },
就是為了讓這個圖標可以生效的
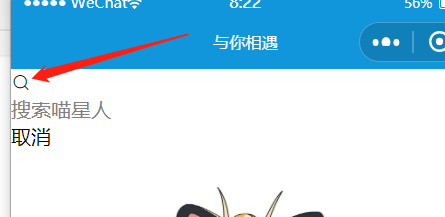
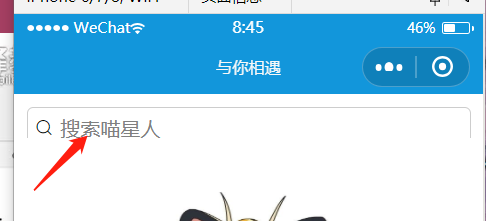
這樣的話,我們的放大鏡就進來了
之後就可以對search.wxss的樣式進行設計了
/* components/search/search.wxss */
.container{position: fixed;left: 0;top: 0;width: 100%;height: 70rpx;z-index: 999;}
.search{ display: flex ; align-items: center;}
.search-text{ display: flex; align-items: center;flex: 1;}
但是發現,圖片和這個組件融合在一起了

這是因為因為是組件的引入的話,就不像在主頁面一樣,可以佔位置的,所以就要到index.wxss設置一下讓index騰出一個空間來放這個搜索框的
通過在

就是直接通過margin來騰出位置即可了
上面其實是在index.wxss中給上面的騰出來100rpx的空間
/* components/search/search.wxss */
.container{position: fixed;left: 0;top: 0;width: 100%;height: 70rpx;z-index: 999;}
.search{ display: flex ; align-items: center; margin:20rpx;}
.search-text{ display: flex; align-items: center;flex: 1;border: 1px #cdcdcd solid;border-radius:10rpx; height: 65rpx}
.search-text .iconsousuo{margin: 0 10rpx;}
.search-cancel{margin: 0 10rpx;}
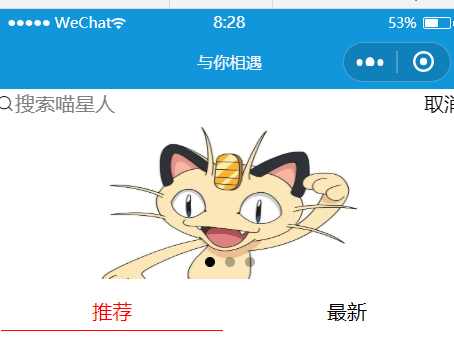
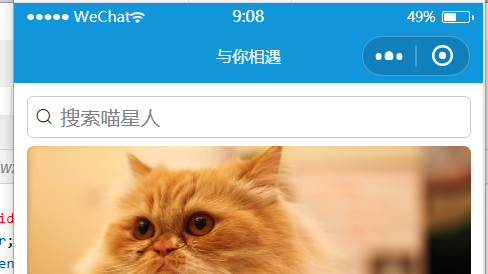
得到的效果就是:
但是有一個問題就是:我們在還沒點擊搜索的時候,其實不用顯示後面的「取消」按鈕的,這個的話就要通過js邏輯來實現了
定義了一個isfocus來表示游標有沒有顯示的(這個取消的按鈕其實是在我們獲取了游標之後才會有的)
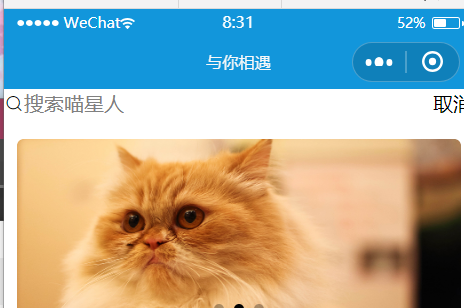
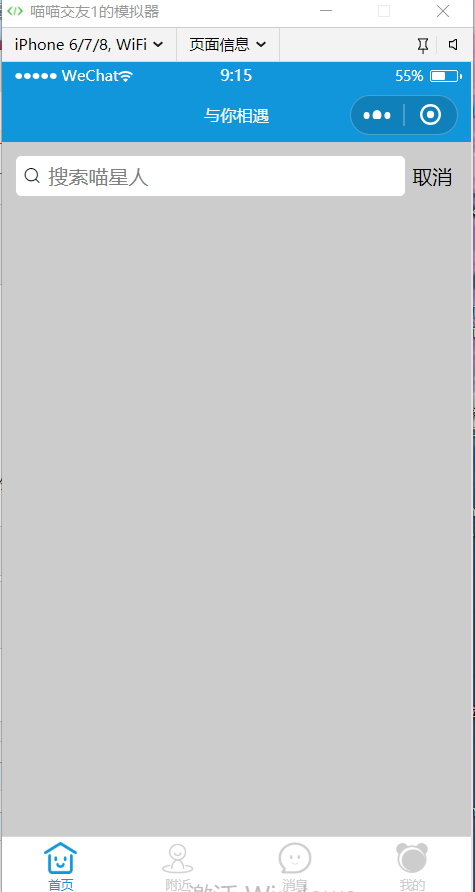
通過在取消按鈕加上了一個wx:if判斷之後,得到的效果就是:
並且當我們獲取到了游標之後,這個搜索框會適應整個頁面的高度了
給contaner加上了 overflow: hidden; 之後得到的效果就是這個搜索框的下邊框「不見了」
這個是因為,我們得container這個大得塊要比我們輸入框得高度要小了,這個時候就可以在wxss裡面通過調節container得height
即可了
因為如果我們點擊了那個輸入框得胡,也就是聚焦了得話,我們得上面得搜索框的大容器顯示的樣式是和沒聚焦的時候顯示的不同的,所以我們就可以用三目運算符來通過這個isfocus來決定使用哪個容器,也就是說我們可以定義兩個樣式不同的容器了
<view class="{{ isFocus ? 'containerFocus' : 'container' }}">
.containerFocus{position: fixed;left: 0;top: 0;width: 100%;height: 100%;z-index: 999;
background: #ccc}
然後我們自行的吧js文件裡面定義的isFocus變數 定義weighted是true來看看我們獲取游標之後的效果是怎麼樣的:
之後我們就要通過邏輯里控制他們的聚焦切換不同的container了,如果是已經點擊聚焦的了話,還有一個就是可以看到我們搜索的歷史記錄,還有列表等等
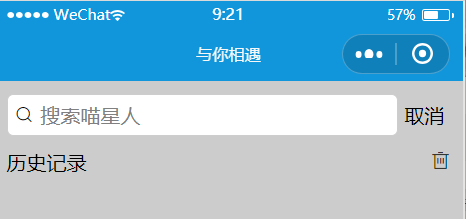
通過:
<view class="search-history">
    <text>歷史記錄</text>
    <text class="iconfont iconshanchu"></text>
  </view>
.search-history{ display: flex;justify-content: space-between;margin:20rpx;}
效果:
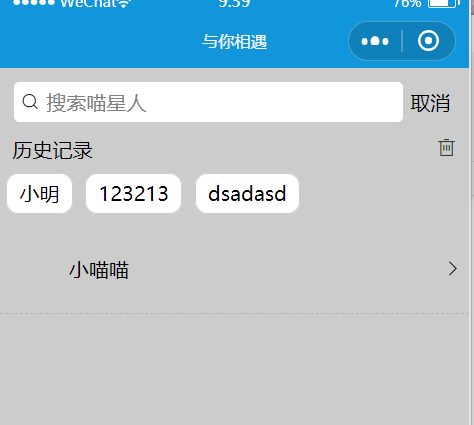
然後就是要搞一個搜索池了:
  <view class="search-history-btn">
    <text>小明</text>
    <text>123213</text>
    <text>dsadasd</text>
  </view>
.search-history{ display: flex;justify-content: space-between;margin:20rpx;}
.search-history-btn text{ border: 1px #cdcdcd solid; padding: 10rpx 20rpx;background: white;
border-radius: 20rpx; margin:10rpx;}
效果:(注意上面是給每一個搜索的text進行樣式的定義

上面就吧搜索的關鍵詞的布局搞好了,下面就是要對搜索的列表進行定義了(其實這個搜索的列表和我們好友的列表是很像的,可以直接直接copy 在friendList.wxml裡面的這個結構了
  <navigator wx:for="{{ friendList }}" wx:key="{{ index }}" url="{{ '../detail/detail?userId=' + item._id}}" open-type="navigate">
      <view class="friendList-item">
        <view>
         <image src="{{ item.userPhoto }}" />
         <text> {{ item.nickName }} </text>
        </view>
        <text class="iconfont iconyoujiantou"></text>
      </view>
     </navigator>
然後對 searchList-item 的樣式也是直接拷貝friendList的wxss
.friendList-item{
  /* 這裡可以直接把user.wxss中的樣式複印過來了 */
  height: 120rpx;border-bottom:1px #b4b5b6 dashed;
padding: 10rpx; display: flex;align-items: center;justify-content: space-between;
}
.friendList-item view{display : flex; align-items: center;}
.friendList-item image{width: 100rpx;height: 100rpx;border-radius: 50%;}
綜上所述,我們的程式碼就是:
 CSS
CSS
<!--components/search/search.wxml-->
<view class="{{ isFocus ? 'containerFocus' : 'container' }}">
  <view class="search">
    <view class="search-text">
      <text class="iconfont iconsousuo"></text>
      <input type="text" placeholder="搜索喵星人" />
    </view>
    <view wx:if="{{ isFocus }}" class="search-cancel">取消</view>
  </view>

  <view class="search-history">
    <text>歷史記錄</text>
    <text class="iconfont iconshanchu"></text>
  </view>
  <view class="search-history-btn">
    <text>小明</text>
    <text>123213</text>
    <text>dsadasd</text>
  </view>

    <navigator url="" open-type="navigate">
      <view class="searchList-item">
        <view>
         <image src="" />
         <text>小喵喵</text>
        </view>
        <text class="iconfont iconyoujiantou"></text>
      </view>
     </navigator>

</view>
html
然後還要在search.js裡面通過
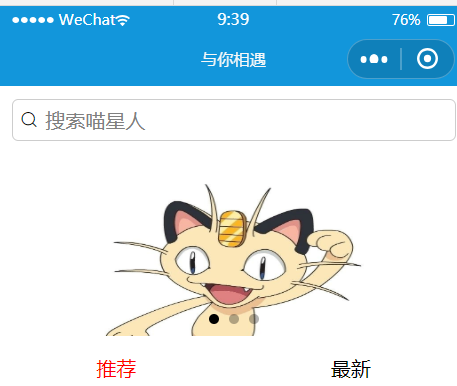
(未選中搜索框時
三、實現搜索歷史記錄及本地快取
1、我們先在searc.wxml的輸入框標籤加一個處理點擊這個輸入框的一個點擊事件
還有我們在取消的標籤中,也要加一個點擊事件,點擊了的話就吧isFocus變成是false即可了
 <input type="text" placeholder="搜索喵星人" bindfocus="handleFocus" />


<view wx:if="{{ isFocus }}" class="search-cancel" bindtap="handleCancel">取消</view>
 methods: {
    handleFocus(){
     this.setData({
       isFocus : true
     });
    },
    handleCancel(){
      this.setData({
        isFocus: false
      });
    }
  }
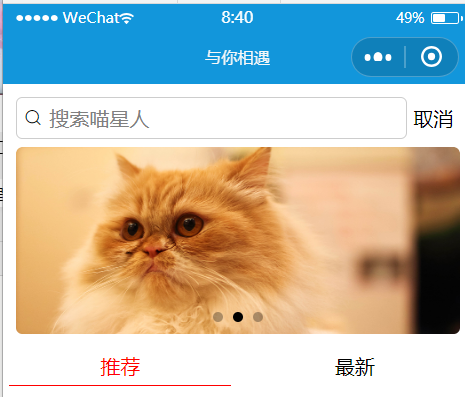
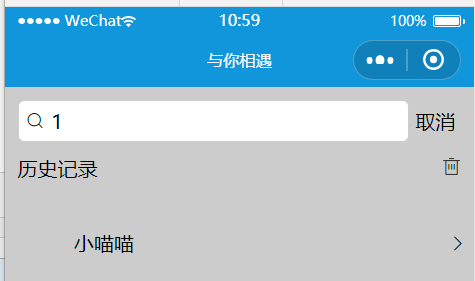
得到的效果就是:點擊輸入框,就跳轉到輸入,點擊取消,就跳轉到首頁
還有一個小bug就是,因為輸入框的話,會默認只有在一個範圍以內,才可以輸入的,所以我們就可以讓這個輸入框適應整個範圍,可以在
給 search.wxss中添加一個程式碼:
.search-text input {flex: 1;}
就讓這個輸入框可以自動的填滿整個的搜索框了
3、之後就是對輸入的東西進行處理了,可以是邊輸入邊搜索,也可以是輸入之後回車了才進行搜索,如果是邊輸入就邊搜索的話,我們可以通過bindinput來進行監聽的,那如果要是按回車的時候搜索怎麼辦呢—這個其實小程式幫我們搞好了
//developers.weixin.qq.com/miniprogram/dev/wxcloud/guide/storage/api.html
就可以通過在input中加上 bindconfirm 這個屬性來完成的,我們就定義了一個 handleConfirm 這個方法是只有我們回車了才會進行觸發的

在手機端裡面的回車 其實默認的是 「完成」兩個字的(就是點擊這個輸入框的時候,手機就會彈出軟鍵盤了,它的確定按鈕是「搜索」兩個字的,那這個該怎麼樣去修改呢==微信也提供了
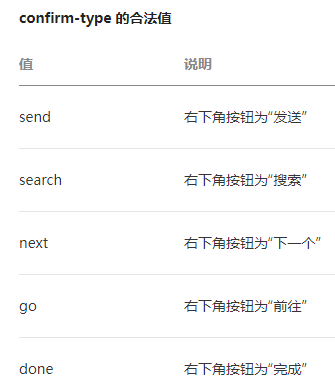
默認的是我們的 done 也就是完成
所以就在input標籤中,吧confirm-type 屬性變成是 search 即可了,(這樣的話在手機的軟鍵盤就會顯示 搜索 兩個字了)
(下面我們要做的就是 吧這個搜索的 放在歷史裡面管理起來了)
//developers.weixin.qq.com/miniprogram/dev/wxcloud/guide/storage/api.html
demo:
wx.setStorage({
  key:"key",
  data:"value"
})
設置的話,就是我們用戶點擊回車 之後,就可以吧這個搜索裡面的 ev.detail.value放到本地存儲裡面即可了
因為這個setStorage的話,我們要讓這個data是一個數組才行的,然後我們先通過
data : [111]看看能不能吧這個111存放到這個數組裡面
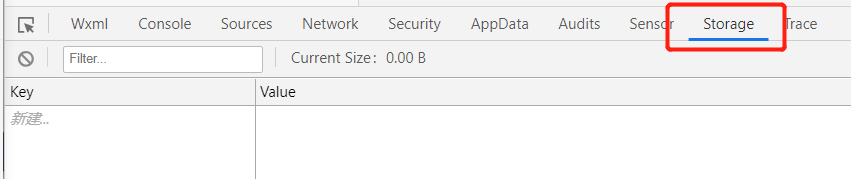
可以在下面的調試板中 找到Storage 讓我們查看一下
可以看到,我們隨便輸入一點東西,然後按 回車 之後可以看到
先在search.js的data裡面定義一個 數組
然後我們就可以在wxml中,吧我們的歷史消息text,用一個數組來for出來了
 <view class="search-history-btn">
    <text wx:for="{{ historyList }}" wx:key="{{ index }}">{{ item }}</text>
  </view>

然後我們在一開始 聚焦了之後,就立馬從storage裡面吧數組拿出來,用getStorage方法:
//developers.weixin.qq.com/miniprogram/dev/wxcloud/guide/storage/api.html
wx.getStorage({
  key: 'key',
  success (res) {
    console.log(res.data)
  }
})

使用上面的demo之後,會報錯,這個報錯一般都是因為success的回調的時候要用箭頭函數才行的
   wx.getStorage({
        key: 'searchHistory',
        success:(res)=> {
          this.setData({
            historyList: res.data
          });
        }
      })
修改了之後,我們點擊 聚焦 之後
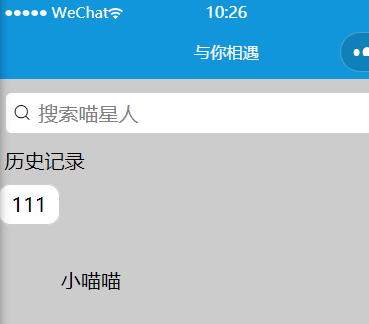
這個 111 就是我們剛剛寫入到 searchStorage 數組裡面的
(這個有一個小bug,就是,假如我們輸入了兩次相同的搜索,然後存入到歷史記錄再列印出來的話,會有兩個的,我們不應該有兩個相同的歷史記錄的
但是我們搜索重複詞的話,我們也是顯示一次,然後把這個搜索的提升到最前面去),表示最近搜索,並且歷史記錄也要有一個數量的,不能把在一年之間的全部搜索記錄都顯示出來的
這個去重的功能:1、實現克隆一份數組
(unshift的話就是往數組的頭添加東西的,ES6本身就帶有一個set來完成去重功能的)
   handleConfirm(ev){
      // console.log(ev.detail.value);
      let cloneHistoryList = [...this.data.historyList];
      cloneHistoryList.unshift(ev.detail.value);
      wx.setStorage({
        key: "searchHistory",
        data: [...new Set(cloneHistoryList)]
      })
    }
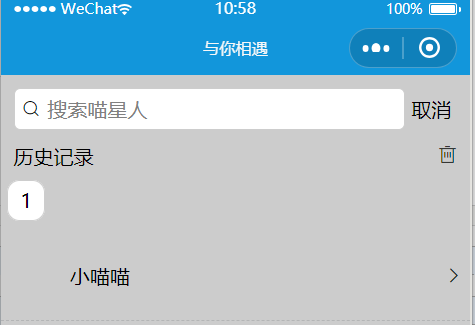
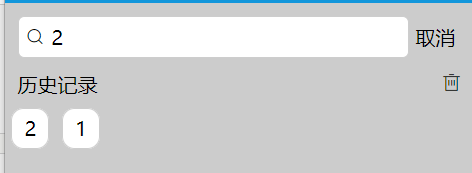
我們的效果就達到了,重複輸入的話,會被提前,=
然後下面我們就要實現 歷史記錄的刪除功能了
就可以直接在這個刪除圖標的wxml中添加一個 bindtap點擊事件 handleDelete 即可了(這個刪除的話,是刪除掉全部的歷史記錄的)
(微信給我們提供的對storage的操作中,remove是操作某一項的,而clear是刪除掉所有的
//developers.weixin.qq.com/miniprogram/dev/wxcloud/guide/storage/api.html
wx.clearStorage()
直接這樣寫即可了
====**但是這樣可能如果我們後面在storage裡面也定義了其他的東西,這個語句的話會把其他快取也會清理掉的,所以我們這裡還是使用remove好點的
wx.removeStorage({
  key: 'key',
  success (res) {
    console.log(res)
  }
})
因為我們也是要在這個成功的回到中,把這個歷史數據數組設置為空數組,所以我們就要使用成功返回的箭頭函數才行的
即可實現刪除功能了,
效果就是:
之後再次輸入1的時候,
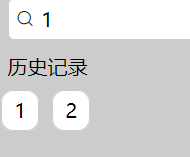
然後就是清空 歷史記錄:
下面是這個部分的程式碼
//components/search/search.js
Component({
  /**
   * 組件的屬性列表
   */
  options: {
    styleIsolation: 'apply-shared'
  },
  properties: {

  },

  /**
   * 組件的初始數據
   */
  data: {
    isFocus : false,
    historyList : []
  },

  /**
   * 組件的方法列表
   */
  methods: {

    handleFocus(){

      wx.getStorage({
        key: 'searchHistory',
        success:(res)=> {
          this.setData({
            historyList: res.data
          });
        }
      })

     this.setData({
       isFocus : true
     });
    },
    handleCancel(){
      this.setData({
        isFocus: false
      });
    },
    handleConfirm(ev){
      // console.log(ev.detail.value);
      let cloneHistoryList = [...this.data.historyList];
      cloneHistoryList.unshift(ev.detail.value);
      wx.setStorage({
        key: "searchHistory",
        data: [...new Set(cloneHistoryList)]
      })
    },
    handleHistoryDelete(){
      wx.removeStorage({
        key: 'searchHistory',
        success:(res)=>{
          this.setData({
            historyList : []
          });

        }
      })
    }
  }
})
<!--components/search/search.wxml-->
<view class="{{ isFocus ? 'containerFocus' : 'container' }}">
  <view class="search">
    <view class="search-text">
      <text class="iconfont iconsousuo"></text>
      <input type="text" placeholder="搜索喵星人" bindfocus="handleFocus" bindconfirm="handleConfirm" confirm-type="search"/>
    </view>
    <view wx:if="{{ isFocus }}" class="search-cancel" bindtap="handleCancel">取消</view>
  </view>

  <view class="search-history">
    <text>歷史記錄</text>
    <text bindtap="handleHistoryDelete" class="iconfont iconshanchu"></text>
  </view>
  <view class="search-history-btn">
    <text wx:for="{{ historyList }}" wx:key="{{ index }}">{{ item }}</text>
  </view>

    <navigator url="" open-type="navigate">
      <view class="searchList-item">
        <view>
         <image src="" />
         <text>小喵喵</text>
        </view>
        <text class="iconfont iconyoujiantou"></text>
      </view>
     </navigator>

</view>
/* components/search/search.wxss */
.container{position: fixed;left: 0;top: 0;width: 100%;height: 90rpx;z-index: 999;overflow: hidden;}
.containerFocus{position: fixed;left: 0;top: 0;width: 100%;height: 100%;z-index: 999;
background: #ccc}
.search{ display: flex ; align-items: center; margin:20rpx;}
.search-text{ display: flex; align-items: center;flex: 1;border: 1px #cdcdcd solid;border-radius:10rpx; height: 65rpx; background: white;}
.search-text input {flex: 1;}
.search-text .iconsousuo{margin: 0 10rpx;}
.search-cancel{margin: 0 10rpx;}

.search-history{ display: flex;justify-content: space-between;margin:20rpx;margin-bottom: 30rpx;}
.search-history-btn{ margin-bottom: 30rpx; }
.search-history-btn text{ border: 1px #cdcdcd solid; padding: 10rpx 20rpx;background: white;
border-radius: 20rpx; margin:10rpx;}


.searchList-item{
  /* 這裡可以直接把user.wxss中的樣式複印過來了 */
  height: 120rpx;border-bottom:1px #b4b5b6 dashed;
padding: 10rpx; display: flex;align-items: center;justify-content: space-between;
}
.searchList-item view{display : flex; align-items: center;}
.searchList-item image{width: 100rpx;height: 100rpx;border-radius: 50%;}

