RabbitMQ 高級應用
本文是作者原創,版權歸作者所有.若要轉載,請註明出處.
本文RabbitMQ版本為rabbitmq-server-3.7.17,erlang為erlang-22.0.7.請各位去官網查看版本匹配和下載,也可以留言,我發安裝包
過期時間TTL(Time To Live)
過期時間TTL表示可以對消息設置預期的時間,在這個時間內都可以被消費者接收穫取;過了之後消息將自動被刪除。RabbitMQ可以對消息和隊列設置TTL。目前有兩種方法可以設置。
- 第一種方法是通過隊列屬性設置,隊列中所有消息都有相同的過期時間。
- 第二種方法是對消息進行單獨設置,每條消息TTL可以不同。
如果上述兩種方法同時使用,則消息的過期時間以兩者之間TTL較小的那個數值為準。消息在隊列的生存時間一旦超過設置的TTL值,就稱為dead message被投遞到死信隊列, 消費者將無法再收到該消息。
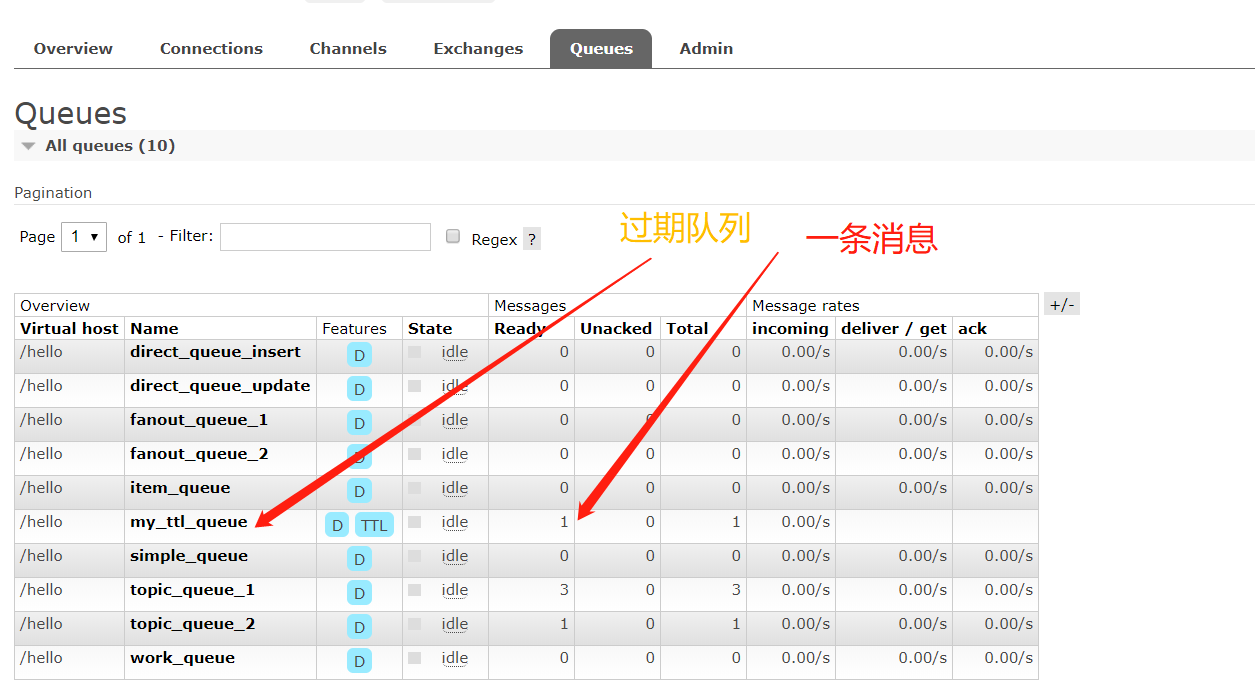
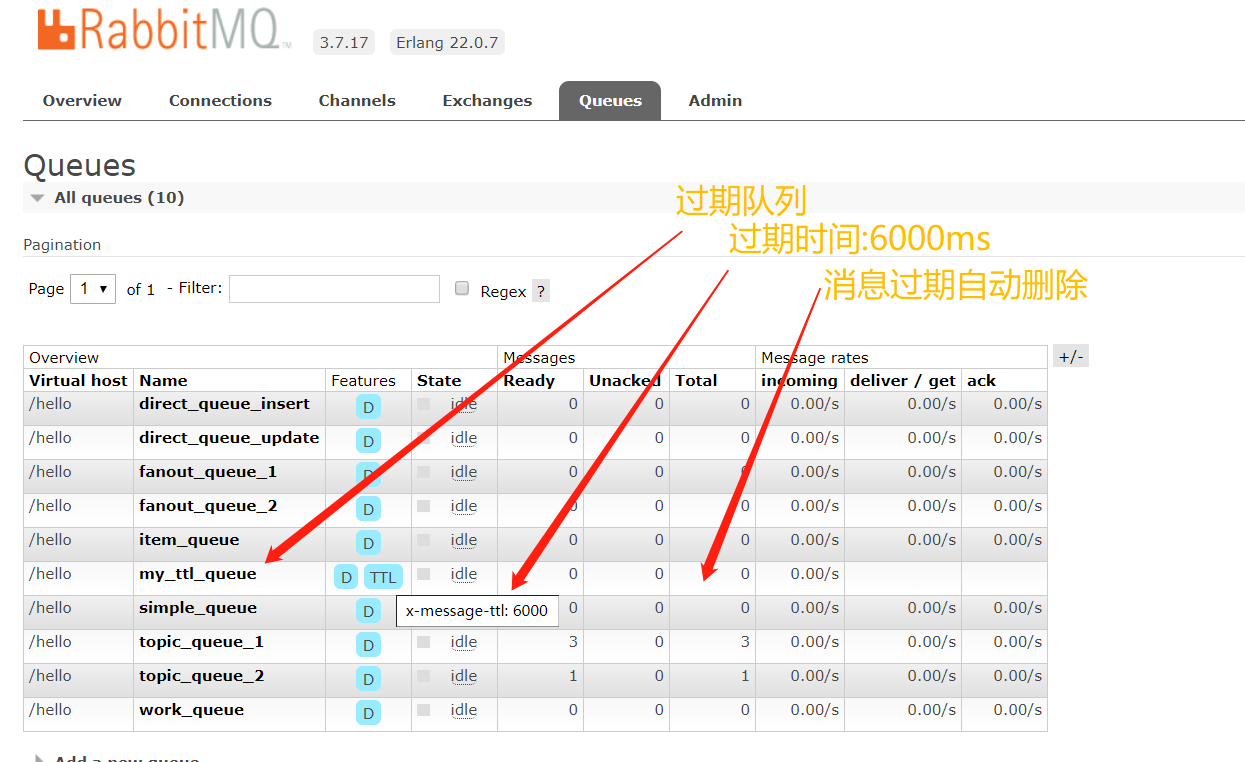
1. 設置隊列TTL
配置resources\spring\spring-rabbitmq.xml 文件
<?xml version="1.0" encoding="UTF-8"?>
<beans xmlns="//www.springframework.org/schema/beans"
       xmlns:xsi="//www.w3.org/2001/XMLSchema-instance"
       xmlns:rabbit="//www.springframework.org/schema/rabbit"
       xsi:schemaLocation="
       //www.springframework.org/schema/beans //www.springframework.org/schema/beans/spring-beans.xsd
       //www.springframework.org/schema/rabbit //www.springframework.org/schema/rabbit/spring-rabbit.xsd">

    <!--定義過期隊列及其屬性,不存在則自動創建-->
    <rabbit:queue id="my_ttl_queue" name="my_ttl_queue" auto-declare="true">
        <rabbit:queue-arguments>
            <!--投遞到該隊列的消息如果沒有消費都將在6秒之後被刪除-->
            <entry key="x-message-ttl" value-type="long" value="6000"/>
        </rabbit:queue-arguments>
    </rabbit:queue>
<rabbit:connection-factory id="connectionFactory" host="192.168.75.163"
                           port="5672"
                           username="test01"
                           password="test01"
                           virtual-host="/hello"

/>
</beans>
參數 x-message-ttl 的值 必須是非負 32 位整數 (0 <= n <= 2^32-1) ,以毫秒為單位表示 TTL 的值。這樣,值 6000 表示存在於 隊列 中的當前 消息 將最多只存活 6 秒鐘
如果不設置TTL,則表示此消息不會過期。如果將TTL設置為0,則表示除非此時可以直接將消息投遞到消費者,否則該消息會被立即丟棄。
然後在測試類中編寫如下方法發送消息到上述定義的隊列:
@RunWith(SpringRunner.class)
@SpringBootTest
public class ProducerTest {

    @Autowired
    private RabbitTemplate rabbitTemplate;

    /**
     * 過期隊列消息
     * 投遞到該隊列的消息如果沒有消費都將在6秒之後被刪除
     */
    @Test
    public void ttlQueueTest(){
        //路由鍵與隊列同名
        rabbitTemplate.convertAndSend("my_ttl_queue", "發送到過期隊列my_ttl_queue,6秒內不消費則不能再被消費。");
    }

}
啟動類中導入配置文件
//導入配置文件
@ImportResource("classpath:/spring/spring-rabbitmq.xml")
@SpringBootApplication
public class ProducerApplication {

    public static void main(String[] args) {
        SpringApplication.run(ProducerApplication.class, args);
    }

}
執行單元測試,看結果
6秒後,再看結果
2. 設置消息TTL
消息的過期時間;只需要在發送消息(可以發送到任何隊列,不管該隊列是否屬於某個交換機)的時候設置過期時間即可。
在測試類中編寫如下方法發送消息並設置過期時間到隊列:
/**
     * 過期消息
     * 該消息投遞任何交換機或隊列中的時候;如果到了過期時間則將從該隊列中刪除
     */
    @Test
    public void ttlMessageTest(){
        MessageProperties messageProperties = new MessageProperties();
        //設置消息的過期時間,3秒
        messageProperties.setExpiration("3000");
        Message message = new Message("測試過期消息,3秒鐘過期".getBytes(), messageProperties);
        //路由鍵與隊列同名
        rabbitTemplate.convertAndSend("my_ttl_queue", message);
    }
expiration 欄位以微秒為單位表示 TTL 值。且與 x-message-ttl 具有相同的約束條件。因為 expiration 欄位必須為字元串類型,broker 將只會接受以字元串形式表達的數字。
當同時指定了 queue 和 message 的 TTL 值,則兩者中較小的那個才會起作用。
死信隊列
DLX,全稱為Dead-Letter-Exchange , 可以稱之為死信交換機,也有人稱之為死信郵箱。
當消息在一個隊列中變成死信(dead message)之後,它能被重新發送到另一個交換機中,這個交換機就是DLX ,綁定DLX的隊列就稱之為死信隊列。
消息變成死信,可能是由於以下的原因:
- 消息被拒絕
- 消息過期
- 隊列達到最大長度
DLX也是一個正常的交換機,和一般的交換機沒有區別,它能在任何的隊列上被指定,實際上就是設置某一個隊列的屬性。
當這個隊列中存在死信時,Rabbitmq就會自動地將這個消息重新發布到設置的DLX上去,進而被路由到另一個隊列,即死信隊列。
要想使用死信隊列,只需要在定義隊列的時候設置隊列參數 x-dead-letter-exchange 指定交換機即可。

具體步驟如下
1. 定義死信交換機
<!--定義定向交換機中的持久化死信隊列,不存在則自動創建-->
<rabbit:queue id="my_dlx_queue" name="my_dlx_queue" auto-declare="true"/>

<!--定義廣播類型交換機;並綁定上述隊列-->
<rabbit:direct-exchange id="my_dlx_exchange" name="my_dlx_exchange" auto-declare="true">
    <rabbit:bindings>
        <!--綁定路由鍵my_ttl_dlx、my_max_dlx,可以將過期的消息轉移到my_dlx_queue隊列-->
        <rabbit:binding key="my_ttl_dlx" queue="my_dlx_queue"/>
        <rabbit:binding key="my_max_dlx" queue="my_dlx_queue"/>
    </rabbit:bindings>
</rabbit:direct-exchange>
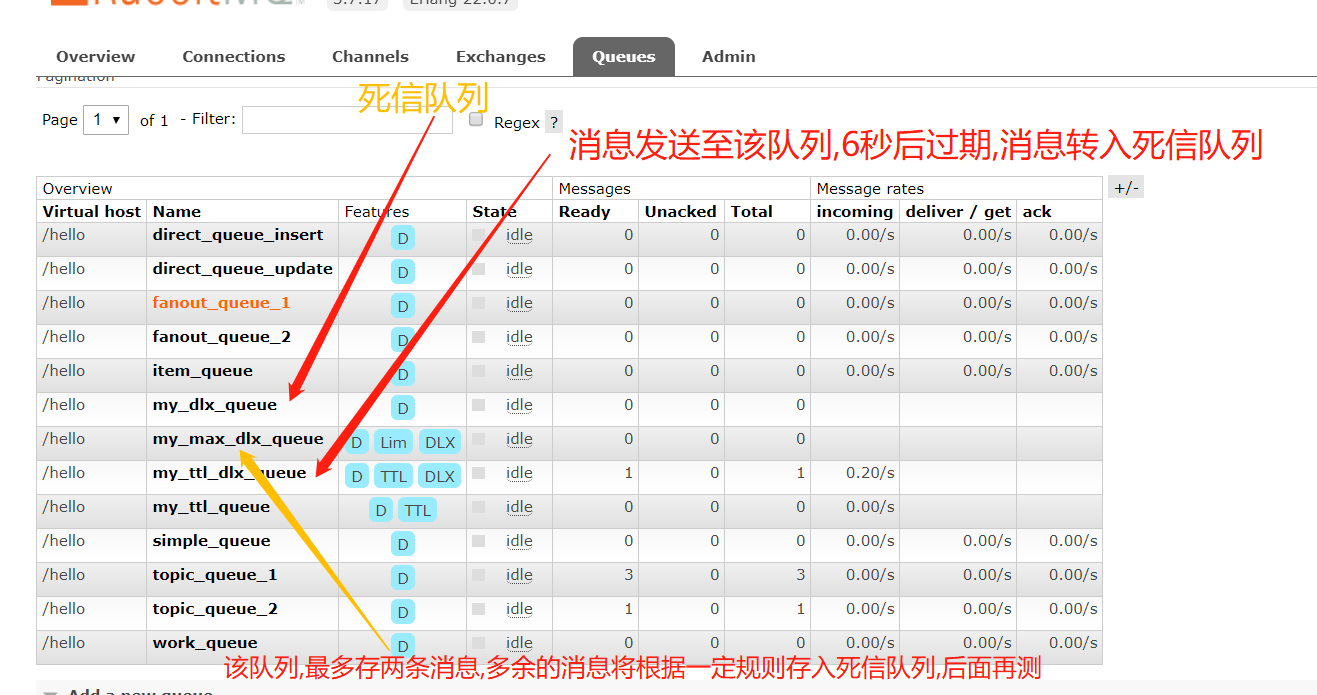
2. 隊列設置死信交換機
<!--定義過期隊列及其屬性,不存在則自動創建-->
<rabbit:queue id="my_ttl_dlx_queue" name="my_ttl_dlx_queue" auto-declare="true">
    <rabbit:queue-arguments>
        <!--投遞到該隊列的消息如果沒有消費都將在6秒之後被投遞到死信交換機-->
        <entry key="x-message-ttl" value-type="long" value="6000"/>
        <!--設置當消息過期後投遞到對應的死信交換機-->
        <entry key="x-dead-letter-exchange" value="my_dlx_exchange"/>
    </rabbit:queue-arguments>
</rabbit:queue>

<!--定義限制長度的隊列及其屬性,不存在則自動創建-->
<rabbit:queue id="my_max_dlx_queue" name="my_max_dlx_queue" auto-declare="true">
    <rabbit:queue-arguments>
        <!--投遞到該隊列的消息最多2個消息,如果超過則最早的消息被刪除投遞到死信交換機-->
        <entry key="x-max-length" value-type="long" value="2"/>
        <!--設置當消息過期後投遞到對應的死信交換機-->
        <entry key="x-dead-letter-exchange" value="my_dlx_exchange"/>
    </rabbit:queue-arguments>
</rabbit:queue>

<!--定義定向交換機 根據不同的路由key投遞消息-->
<rabbit:direct-exchange id="my_normal_exchange" name="my_normal_exchange" auto-declare="true">
    <rabbit:bindings>
        <rabbit:binding key="my_ttl_dlx" queue="my_ttl_dlx_queue"/>
        <rabbit:binding key="my_max_dlx" queue="my_max_dlx_queue"/>
    </rabbit:bindings>
</rabbit:direct-exchange>
3. 消息過期的死信隊列測試
/**
     * 過期消息投遞到死信隊列
     * 投遞到一個正常的隊列,但是該隊列有設置過期時間,到過期時間之後消息會被投遞到死信交換機(隊列)
     */
    @Test
    public void dlxTTLMessageTest(){
        rabbitTemplate.convertAndSend(
                "my_normal_exchange",
                "my_ttl_dlx",
                "測試過期消息;6秒過期後會被投遞到死信交換機2222");
    }
運行看結果
6秒後

4. 消息溢出的死信隊列測試
/**
     * 消息長度超過2,會投遞到死信隊列中
     */
    @Test
    public void dlxMaxMessageTest(){
        rabbitTemplate.convertAndSend(
                "my_normal_exchange",
                "my_max_dlx",
                "發送消息4:消息長度超過2,會被投遞到死信隊列中!");

        rabbitTemplate.convertAndSend(
                "my_normal_exchange",
                "my_max_dlx",
                "發送消息5:消息長度超過2,會被投遞到死信隊列中!");

        rabbitTemplate.convertAndSend(
                "my_normal_exchange",
                "my_max_dlx",
                "發送消息6:消息長度超過2,會被投遞到死信隊列中!");

    }
運行,看結果
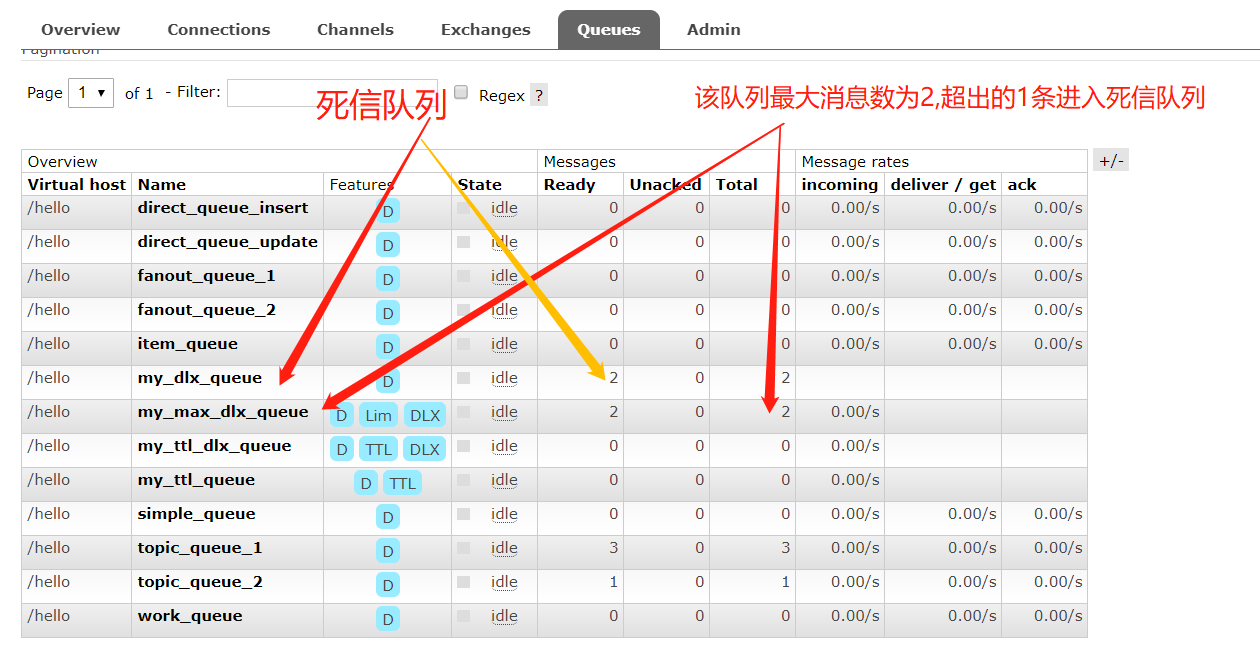
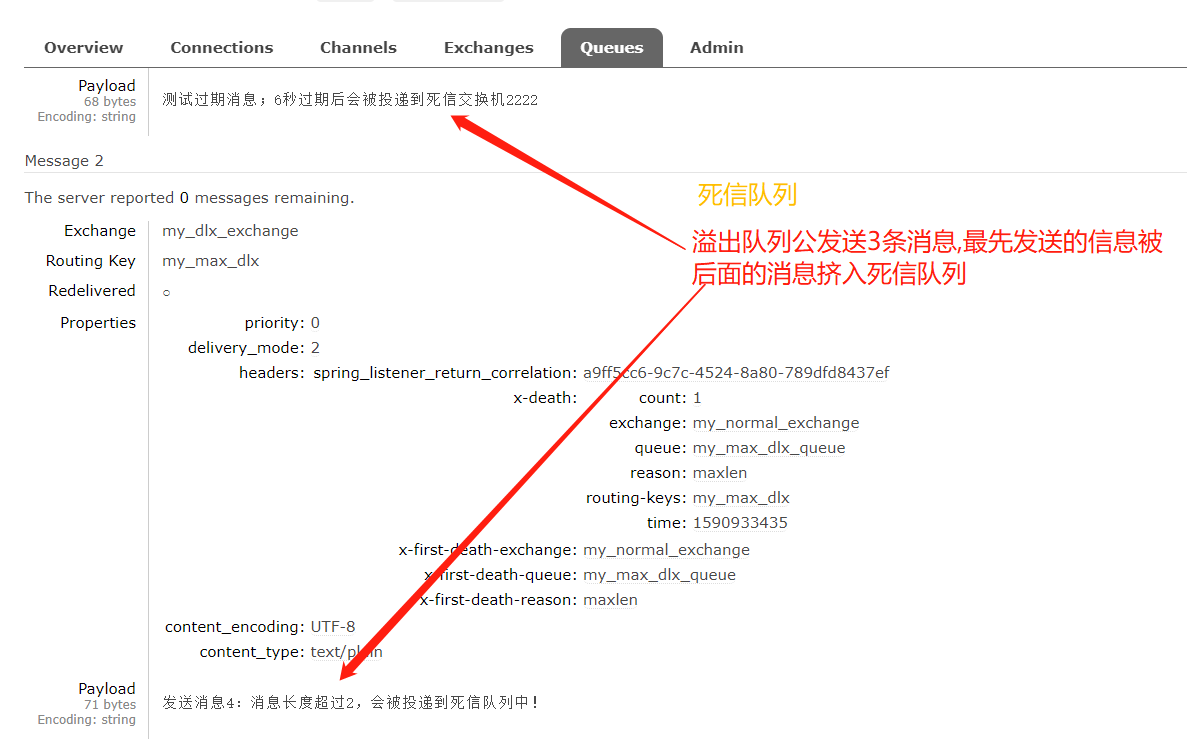
上面發送的3條消息中的第1條消息會被投遞到死信隊列中
延遲隊列
延遲隊列存儲的對象是對應的延遲消息;所謂「延遲消息」 是指當消息被發送以後,並不想讓消費者立刻拿到消息,而是等待特定時間後,消費者才能拿到這個消息進行消費。
在RabbitMQ中延遲隊列可以通過 過期時間 + 死信隊列 來實現

延遲隊列的應用場景;如:
- 在電商項目中的支付場景;如果在用戶下單之後的幾十分鐘內沒有支付成功;那麼這個支付的訂單算是支付失敗,要進行支付失敗的異常處理(將庫存加回去),這時候可以通過使用延遲隊列來處理
- 在系統中如有需要在指定的某個時間之後執行的任務都可以通過延遲隊列處理
具體程式碼不演示了
消息確認機制
確認並且保證消息被送達,提供了兩種方式:發布確認和事務。(兩者不可同時使用)在channel為事務時,不可引入確認模式;同樣channel為確認模式下,不可使用事務。
1 發布確認
消息發送成功確認
connectionFactory 中啟用消息確認:
<rabbit:connection-factory id="connectionFactory" host="192.168.75.163"
                               port="5672"
                               username="test01"
                               password="test01"
                               virtual-host="/hello"
                               publisher-confirms="true"
    />
配置消息確認回調方法如下:
<!-- 消息回調處理類 -->
<bean id="confirmCallback" class="com.itheima.rabbitmq.MsgSendConfirmCallBack"/>
<!--定義rabbitTemplate對象操作可以在程式碼中方便發送消息-->
<!-- confirm-callback="confirmCallback" 表示:消息失敗回調 -->
<rabbit:template id="rabbitTemplate" connection-factory="connectionFactory"
        confirm-callback="confirmCallback"/>
消息確認回調方法如下:
public class MsgSendConfirmCallBack implements RabbitTemplate.ConfirmCallback {
    public void confirm(CorrelationData correlationData, boolean ack, String cause) {
        if (ack) {
            System.out.println("消息確認成功....");
        } else {
            //處理丟失的消息
            System.out.println("消息確認失敗," + cause);
        }
    }
}
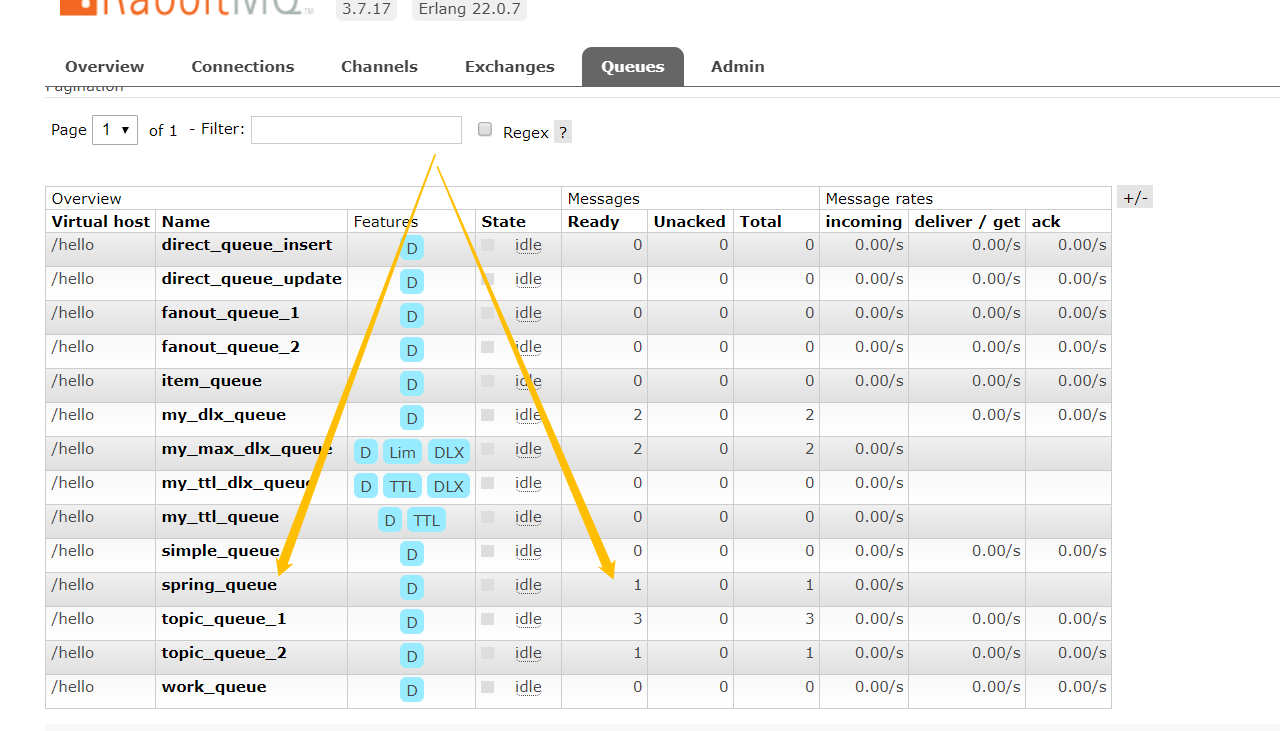
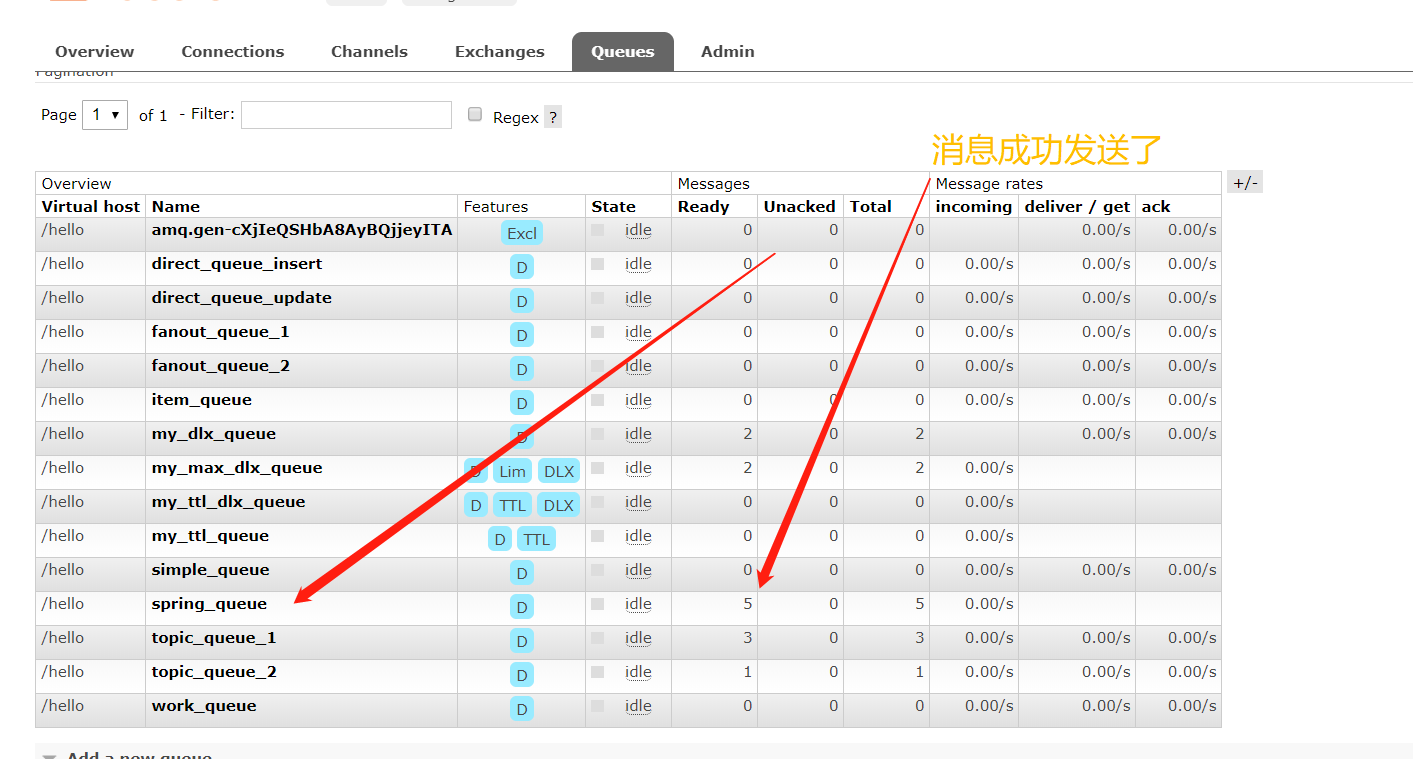
我們手動建一個spring_queue隊列.並測試如下:
 @Test
    public void queueTest(){
        //路由鍵與隊列同名
        rabbitTemplate.convertAndSend("spring_queue", "只發隊列spring_queue的消息。");
    }
查看結果

消息發送失敗回調
connectionFactory 中啟用回調:
!-- publisher-returns="true" 表示:啟用了失敗回調 -->
<rabbit:connection-factory id="connectionFactory" host="${rabbitmq.host}"
        port="${rabbitmq.port}"
        username="${rabbitmq.username}"
        password="${rabbitmq.password}"
        virtual-host="${rabbitmq.virtual-host}"
        publisher-returns="true" />
配置消息失敗回調方法如下:
<!-- 消息失敗回調類 -->
<bean id="sendReturnCallback" class="com.itheima.rabbitmq.MsgSendReturnCallback"/>
<!-- return-callback="sendReturnCallback" 表示:消息失敗回調 ,同時需配置mandatory="true",否則消息則丟失-->
<rabbit:template id="rabbitTemplate" connection-factory="connectionFactory"
        confirm-callback="confirmCallback" return-callback="sendReturnCallback"
        mandatory="true"/>
注意:同時需配置mandatory=”true”,否則消息則丟失
消息失敗回調方法如下:
public class MsgSendReturnCallback implements RabbitTemplate.ReturnCallback {
    public void returnedMessage(Message message, int i, String s, String s1, String s2) {
        String msgJson  = new String(message.getBody());
        System.out.println("Returned Message:"+msgJson);
    }
}
模擬消息發送失敗,功能測試如下:
@Test
public void testFailQueueTest() throws InterruptedException {
    //exchange 正確,queue 錯誤 ,confirm被回調, ack=true; return被回調 replyText:NO_ROUTE
    amqpTemplate.convertAndSend("test_fail_exchange", "", "測試消息發送失敗進行確認應答。");
}
失敗回調結果如下:

事務支援
場景:業務處理伴隨消息的發送,業務處理失敗(事務回滾)後要求消息不發送。rabbitmq 使用調用者的外部事務,通常是首選,因為它是非侵入性的(低耦合)。
外部事務的配置
<rabbit:template id="rabbitTemplate"
                     connection-factory="connectionFactory"

                     mandatory="true"
                     channel-transacted="true"
    />

    <!--平台事務管理器-->
    <bean id="transactionManager" class="org.springframework.amqp.rabbit.transaction.RabbitTransactionManager">
        <property name="connectionFactory" ref="connectionFactory"/>
    </bean>
測試類或者測試方法上加入@Transactional註解
   @Test
    @Transactional //開啟事務
    //@Rollback(false)//在測試的時候,需要手動的方式制定回滾的策略
    public void queueTest2(){
        //路由鍵與隊列同名
        rabbitTemplate.convertAndSend("spring_queue", "只發隊列spring_queue的消息--02222222222222222222。");
        System.out.println("----------------dosoming:可以是資料庫的操作,也可以是其他業務類型的操作---------------");
        //模擬業務處理失敗
        //System.out.println(1/0);
        rabbitTemplate.convertAndSend("spring_queue", "只發隊列spring_queue的消息--02。");
    }
運行看結果

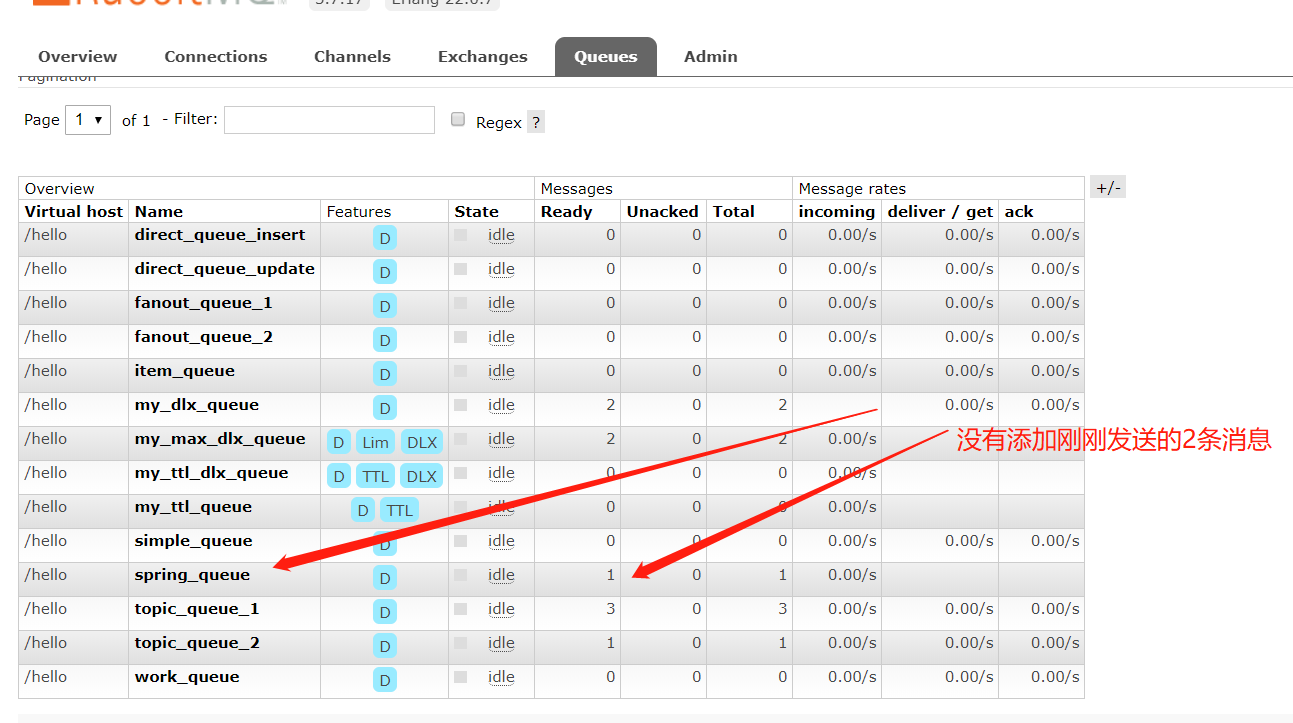
因為是測試類,所以spring自動回滾了,需要我們手動禁止回滾
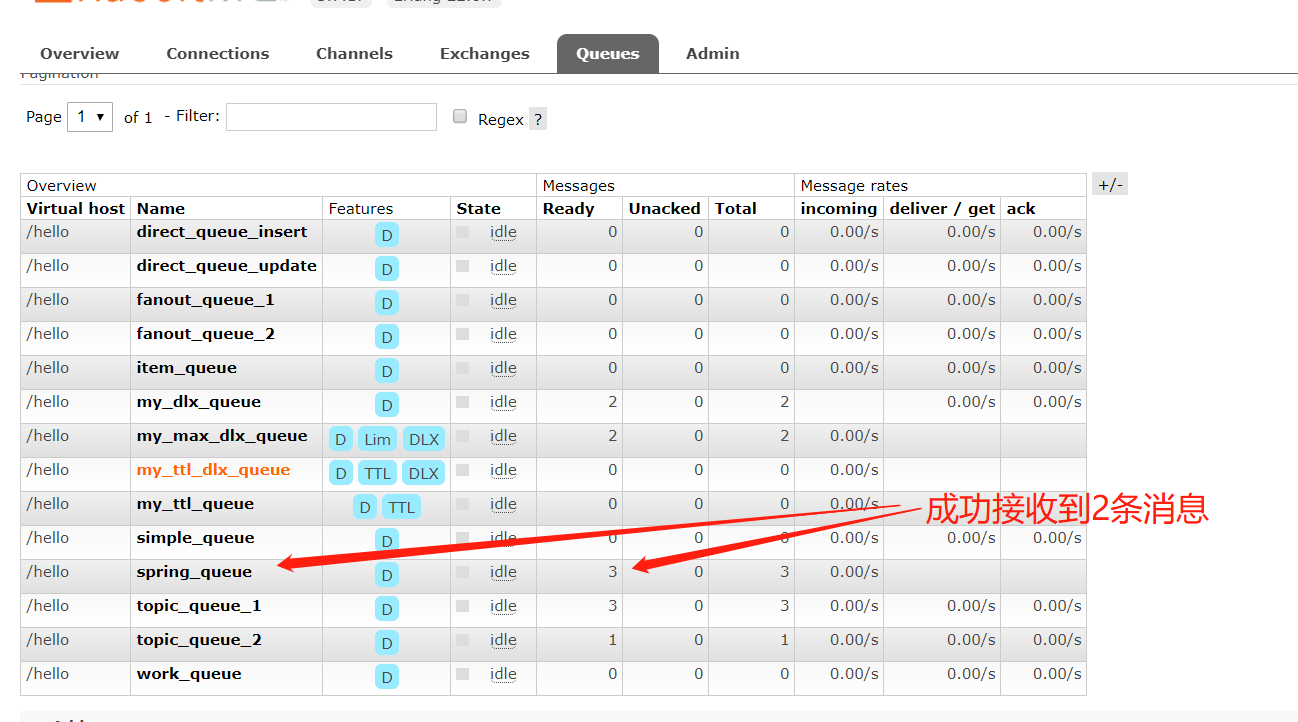
   @Test
    @Transactional //開啟事務
    @Rollback(false)//在測試的時候,需要手動的方式制定回滾的策略
    public void queueTest2(){
        //路由鍵與隊列同名
        rabbitTemplate.convertAndSend("spring_queue", "只發隊列spring_queue的消息--02222222222222222222。");
        System.out.println("----------------dosoming:可以是資料庫的操作,也可以是其他業務類型的操作---------------");
        //模擬業務處理失敗
        //System.out.println(1/0);
        rabbitTemplate.convertAndSend("spring_queue", "只發隊列spring_queue的消息--02。");
    }
再執行一次測試類,查看結果
我們手動弄個異常,再試一次
  @Test
    @Transactional //開啟事務
    @Rollback(false)//在測試的時候,需要手動的方式制定回滾的策略
    public void queueTest2(){
        //路由鍵與隊列同名
        rabbitTemplate.convertAndSend("spring_queue", "只發隊列spring_queue的消息--02222222222222222222。");
        System.out.println("----------------dosoming:可以是資料庫的操作,也可以是其他業務類型的操作---------------");
        //模擬業務處理失敗
        System.out.println(1/0);
        rabbitTemplate.convertAndSend("spring_queue", "只發隊列spring_queue的消息--02。");
    }
看結果

這裡4條是因為我手動禁止了回滾
結果應該是沒問題的,就不測試了
消息追蹤
1.消息追蹤啟用與查看
消息中心的消息追蹤需要使用Trace實現,Trace是Rabbitmq用於記錄每一次發送的消息,方便使用Rabbitmq的開發者調試、排錯。可通過插件形式提供可視化介面。
Trace啟動後會自動創建系統Exchange:amq.rabbitmq.trace ,每個隊列會自動綁定該Exchange,綁定後發送到隊列的消息都會記錄到Trace日誌。
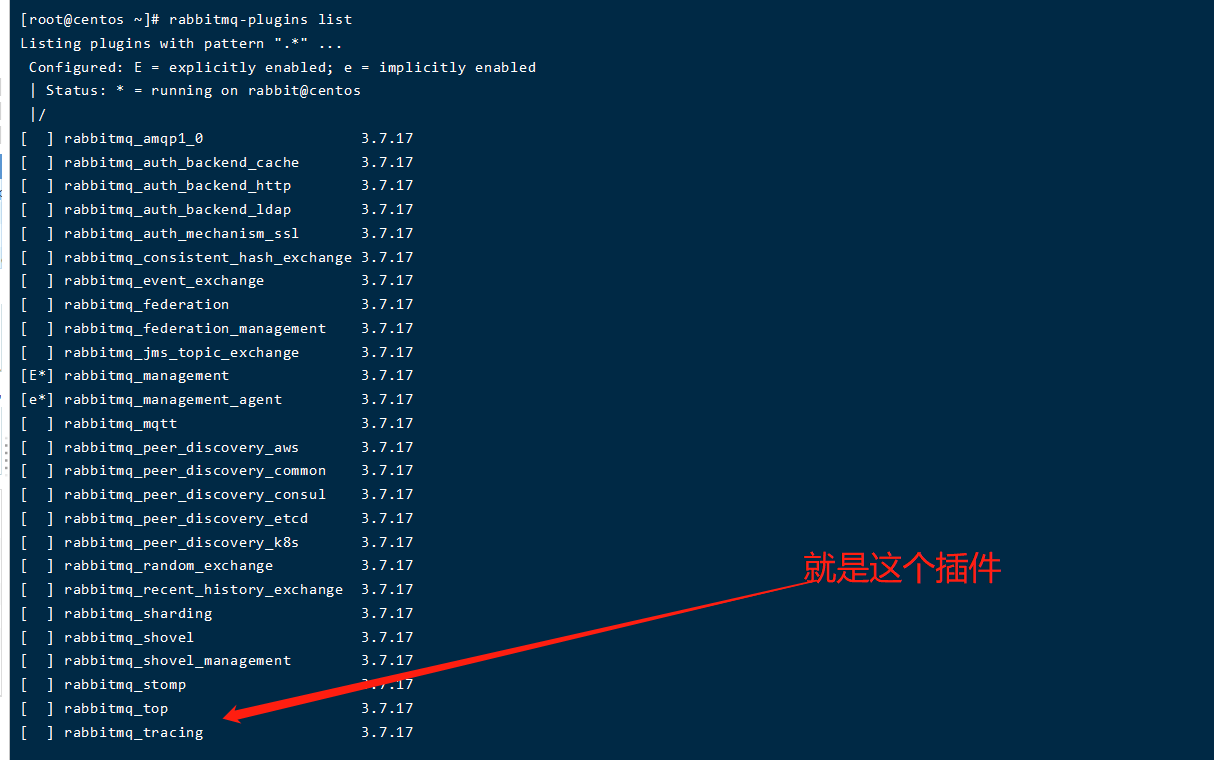
查看插件列表
rabbitmq-plugins list
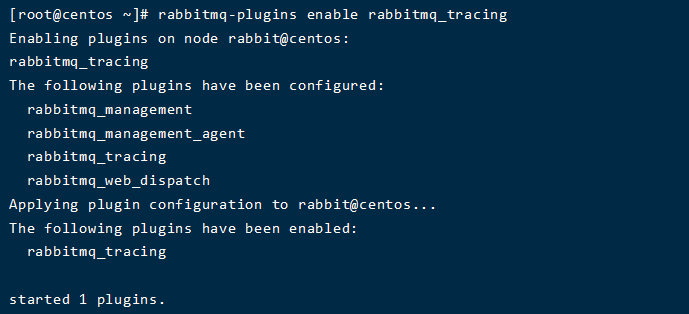
rabbitmq啟用trace插件
rabbitmq-plugins enable rabbitmq_tracing
| 命令集 | 描述 |
|---|---|
| rabbitmq-plugins list | 查看插件列表 |
| rabbitmq-plugins enable rabbitmq_tracing | rabbitmq啟用trace插件 |
| rabbitmqctl trace_on | 打開trace的開關 |
| rabbitmqctl trace_on -p test01 | 打開trace的開關(itcast為需要日誌追蹤的vhost) |
| rabbitmqctl trace_off | 關閉trace的開關 |
| rabbitmq-plugins disable rabbitmq_tracing | rabbitmq關閉Trace插件 |
| rabbitmqctl set_user_tags test01 administrator | 只有administrator的角色才能查看日誌介面 |

安裝插件並開啟 trace_on 之後,會發現多個 exchange:amq.rabbitmq.trace ,類型為:topic。

2 日誌追蹤
首先重新登錄管理控制台

第一步:發送消息
@Test
    public void queueTest3() throws InterruptedException {
        rabbitTemplate.convertAndSend("spring_queue", "只發隊列spring_queue的消息--01。");
    }
第二步:查看trace
第三步:點擊Tracing查看Trace log files

第四步:點擊itest-log.log確認消息軌跡正確性


