24-Java-Spring框架(二)
- 2020 年 5 月 5 日
- 筆記
- 語言__Java語言
Spring框架的了解、SpringIOC的部分內容請閱讀23-Java-Spring框架(二)
三、Spring Web MVC(Model View Controller)
1.SpringMVC了解
Spring提供了一個Web MVC框架,便於開發MVC結構的Java Web程式。Spring MVC屬於SpringFrameWork的後續產品,已經融合在Spring Web Flow裡面。
Spring 框架提供了構建 Web 應用程式的全功能 MVC 模組。使用 Spring 可插入的 MVC 架構,從而在使用Spring進行WEB開發時,可以選擇使用Spring的Spring
MVC框架或集成其他MVC開發框架。
通過策略介面,Spring 框架是高度可配置的,而且包含多種視圖技術,例如 JavaServer Pages(JSP)技術、Velocity、Tiles、iText和POI。Spring MVC 框架
並不知道使用的視圖,所以不會強迫開發者只使用 JSP 技術。Spring MVC 分離了控制器、模型對象、過濾器以及處理程式對象的角色,這種分離讓它們更容易進行
訂製。
SpringMVC框架中提供了一個控制器(DispatcherServlet),負責接收客服端的請求,然後將請求分發到不同的處理器進行業務請求,最後由控制器完成轉發動作。
2.SpringMVC相關組件
(1)DispatcherServlet(前端控制器,請求入口)
(2)HandlerMapping(控制器,請求派發)
(3)Controller(控制器,請求處理流程)
(4)ModelAndView(模型,封裝處理結果和視圖)
(5)ViewResolver(視圖,視圖顯示處理器)
3.SpringMVC請求流程:SpringMVC是通過傳統的Servlet來實現對框架源程式碼的封裝以及整個流程的控制
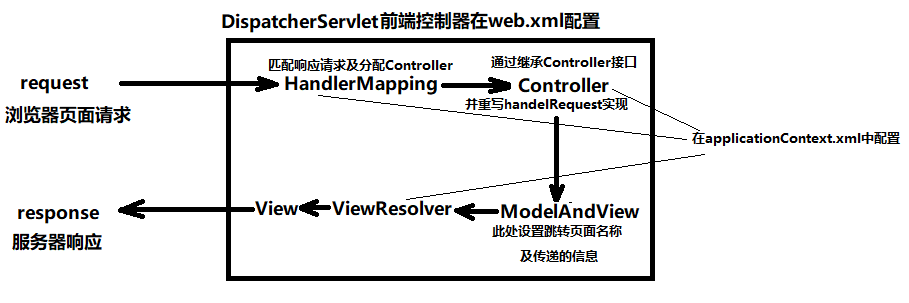
(1)瀏覽器向伺服器(tomcat)發送http請求,web伺服器對http請求進行解析,解析後如果URL地址匹配了DispatcherSerlvet的映射路徑(serlvet-mapping),
web容器就會將請求交給DispatcherServlet來處理。
(2)DispatcherServet接收到請求後,再次對URL進行解析,得到URI,然後調用相應的方法得到HandlerMapping,再根據URI調用這個對象相對應的方法得
到Handler,此時並不會操作它,需要調用HandlerAdapter對Hander進行調用以及控制。
(3)DispatcherServlet根據得到的Handler對象選擇合適的HandlerAdapter創建實例,執行攔截器中的preHander()方法
(4)Handler執行完畢後返回一個ModeAndView對象給DispatcherServlet。
(5)這個ModeAndView只是一個邏輯視圖,並不是真正的視圖,DispatcherServlet通過ViewResolver視圖解析器將邏輯視圖轉化成一個真正的視圖
(6)DispatcherServlet通過Model將ModeAndView中得到的數據解析後渲染視圖,將得到的最終的視圖通過http響應返回客服端。
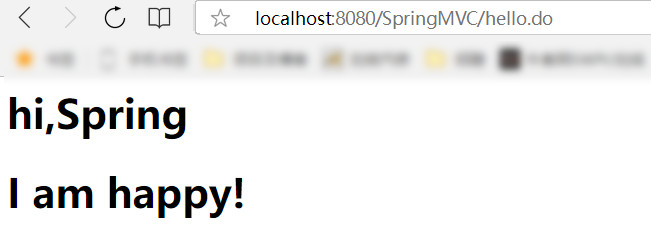
4.SpringMVC的運用一(通過XML配置的方式)
第一步:搭建SpringMVC環境
(1)創建web項目
(2)添加SpringIOC和web MVC相關jar包(想要如下jar包的網友評論留言私聊)
ioc相關jar包:
aopalliance-1.0.jar
aspectjweaver-1.5.3.jar
spring-aop-4.1.6.RELEASE.jar
spring-aspects-4.1.6.RELEASE.jar
webmvc相關jar包:
spring-web-4.1.6.RELEASE.jar
spring-webmvc-4.1.6.RELEASE.jar
(3)添加Spring配置文件applicationContext.xml(也可以用註解的方式代替此步驟)
(4)在web.xml中配置DispatcherServlet前端控制器組件
 1 <?xml version="1.0" encoding="UTF-8"?>
 2 <web-app version="3.0"
 3     xmlns="//java.sun.com/xml/ns/javaee"
 4     xmlns:xsi="//www.w3.org/2001/XMLSchema-instance"
 5     xsi:schemaLocation="//java.sun.com/xml/ns/javaee
 6     //java.sun.com/xml/ns/javaee/web-app_3_0.xsd">
 7   <display-name></display-name>
 8   <welcome-file-list>
 9     <welcome-file>Hello.jsp</welcome-file>
10   </welcome-file-list>
11
12   <servlet>
13       <servlet-name>springmvc</servlet-name>
14       <servlet-class>org.springframework.web.servlet.DispatcherServlet</servlet-class>
15
16       <init-param>
17           <param-name>contextConfigLocation</param-name>
18           <param-value>classpath:applicationContext.xml</param-value>
19       </init-param>
20
21       <load-on-startup>1</load-on-startup>
22   </servlet>
23
24   <servlet-mapping>
25       <servlet-name>spring</servlet-name>
26       <!-- 攔截以.do結尾的請求 -->
27       <url-pattern>*.do</url-pattern>
28   </servlet-mapping>
29 </web-app>
第二步:開發SpringMVC
(1)設計請求到響應的處理流程
(2)編寫Controller組件
 1 package com.springmvc.Controller;
 2
 3 import javax.servlet.http.HttpServletRequest;
 4 import javax.servlet.http.HttpServletResponse;
 5
 6 import org.springframework.web.servlet.ModelAndView;
 7 import org.springframework.web.servlet.mvc.Controller;
 8
 9 //XML配置
10 //首先創建ControllerClass 實現Controller介面返回ModelAndView
11 public class ControllerClass implements Controller{
12
13     //該方法是約定的處理請求的方法,請求進入Controller對象後自動調用該方法
14     @Override
15     public ModelAndView handleRequest(HttpServletRequest request,HttpServletResponse response) throws Exception {
16         System.out.println("進入Controller組件");
17
18
19         //接下來往JSP頁面傳遞一個消息並跳轉到Hello.jsp頁面
20         ModelAndView mav = new ModelAndView();
21         mav.setViewName("Hello");//指定視圖名稱
22         mav.getModel().put("msg","I am happy!");
23         return mav;
24     }
25 }
(3)JSP或html頁面
 1 <%@ page language="java" import="java.util.*" pageEncoding="UTF-8"%>
 2 <%
 3 String path = request.getContextPath();
 4 String basePath = request.getScheme()+"://"+request.getServerName()+":"+request.getServerPort()+path+"/";
 5 %>
 6
 7 <!DOCTYPE HTML PUBLIC "-//W3C//DTD HTML 4.01 Transitional//EN">
 8 <html>
 9   <head>
10     <base href="<%=basePath%>">
11     <title>My JSP 'Hello.jsp' starting page</title>
12     <meta http-equiv="pragma" content="no-cache">
13     <meta http-equiv="cache-control" content="no-cache">
14     <meta http-equiv="expires" content="0">
15     <meta http-equiv="keywords" content="keyword1,keyword2,keyword3">
16     <meta http-equiv="description" content="This is my page">
17
18   </head>
19
20   <body>
21         <h1>hi,Spring</h1>
22         <h1>${msg }</h1>
23   </body>
24 </html>
(4)在applicationContext.xml中配置Controller組件(也可以用註解的方式代替此步驟)
(5)在applicationContext.xml中配置HandlerMapping組件(也可以用註解的方式代替此步驟)
(6)在applicationContext.xml中配置ViewResolver組件
 1 <?xml version="1.0" encoding="UTF-8"?>
 2 <beans xmlns="//www.springframework.org/schema/beans"
 3        xmlns:xsi="//www.w3.org/2001/XMLSchema-instance"
 4        xmlns:context="//www.springframework.org/schema/context"
 5        xmlns:aop="//www.springframework.org/schema/aop"
 6        xmlns:tx="//www.springframework.org/schema/tx"
 7        xmlns:jdbc="//www.springframework.org/schema/jdbc"
 8        xmlns:jee="//www.springframework.org/schema/jee"
 9        xmlns:mvc="//www.springframework.org/schema/mvc"
10        xmlns:util="//www.springframework.org/schema/util"
11        xsi:schemaLocation="
12             //www.springframework.org/schema/beans //www.springframework.org/schema/beans/spring-beans.xsd
13             //www.springframework.org/schema/tx //www.springframework.org/schema/tx/spring-tx.xsd
14             //www.springframework.org/schema/aop //www.springframework.org/schema/aop/spring-aop.xsd
15             //www.springframework.org/schema/util //www.springframework.org/schema/util/spring-util.xsd
16             //www.springframework.org/schema/jdbc //www.springframework.org/schema/jdbc/spring-jdbc.xsd
17             //www.springframework.org/schema/jee //www.springframework.org/schema/jee/spring-jee.xsd
18             //www.springframework.org/schema/mvc //www.springframework.org/schema/mvc/spring-mvc.xsd
19             //www.springframework.org/schema/context //www.springframework.org/schema/context/spring-context.xsd">
20
21         <!-- 配置Contorller組件 -->
22         <bean id="Controller" class="com.springmvc.Controller.ControllerClass"></bean>
23
24         <!-- 配置HandlerMapping組件 -->
25         <bean id="simpleurlhandlermapping" class="org.springframework.web.servlet.handler.SimpleUrlHandlerMapping">
26             <property name="mappings">
27                 <props>
28                     <prop key="/hello.do">Controller</prop>
29                 </props>
30             </property>
31         </bean>
32
33         <!-- 配置ViewResolver視圖解析器 -->
34         <!-- 完整的頁面路徑:前綴+視圖名稱+後綴 -->
35         <bean id="ViewResolver" class="org.springframework.web.servlet.view.InternalResourceViewResolver">
36             <!-- 前綴 -->
37             <property name="prefix" value="/"></property>
39             <!-- 後綴 -->
40             <property name="suffix" value=".jsp"></property>
41         </bean>
42 </beans>
第三步:測試運行
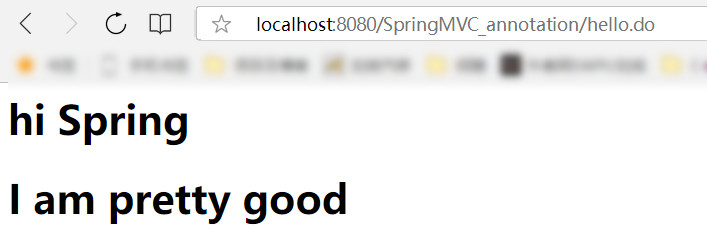
5.SpringMVC的運用二(通過註解的方式)
第一步:搭建SpringMVC環境
(1)創建web項目
(2)添加SpringIOC、AOP和web MVC相關jar包(想要如下jar包的網友評論留言私聊)
ioc相關jar包:
aopalliance-1.0.jar
aspectjweaver-1.5.3.jar
spring-aop-4.1.6.RELEASE.jar
spring-aspects-4.1.6.RELEASE.jar
aop相關jar包:
aopalliance-1.0.jar
aspectjweaver-1.5.3.jar
spring-aop-4.1.6.RELEASE.jar
spring-aspects-4.1.6.RELEASE.jar
webmvc相關jar包:
spring-web-4.1.6.RELEASE.jar
spring-webmvc-4.1.6.RELEASE.jar
(3)添加Spring配置文件applicationContext.xml(也可以用註解的方式代替此步驟)
(4)在web.xml中配置DispatcherServlet前端控制器組件(同運用一的web.xml)
第二步:開發SpringMVC
(1)設計請求到響應的處理流程
(2)編寫Controller組件
 1 package com.springmvc.Controller;
 2
 3 import org.springframework.stereotype.Controller;
 4 import org.springframework.web.bind.annotation.RequestMapping;
 5 import org.springframework.web.servlet.ModelAndView;
 6
 7 @Controller//此處相當於繼承了Controller介面的作用
 8 public class ControllerClass {
 9
10     @RequestMapping("/hello.do")//此處等價於applicationContext.xml中的配置HandlerMapping組件
11     public ModelAndView hello(){
12         System.out.println("進入Controller組件");
13
14         //接下來往JSP頁面傳遞一個消息並跳轉到Hello.jsp頁面
15         ModelAndView mav = new ModelAndView();
16         mav.setViewName("Hello");
17         mav.getModel().put("msg", "I am pretty good");
18         return mav;
19     }
20 }
(3)JSP或html頁面(同運用一的Hello.jsp)
(4)在applicationContext.xml中配置handler組件
(5)在applicationContext.xml中配置組件掃描
(6)在applicationContext.xml中配置ViewResolver組件
 1 <?xml version="1.0" encoding="UTF-8"?>
 2 <beans xmlns="//www.springframework.org/schema/beans"
 3        xmlns:xsi="//www.w3.org/2001/XMLSchema-instance"
 4        xmlns:context="//www.springframework.org/schema/context"
 5        xmlns:aop="//www.springframework.org/schema/aop"
 6        xmlns:tx="//www.springframework.org/schema/tx"
 7        xmlns:jdbc="//www.springframework.org/schema/jdbc"
 8        xmlns:jee="//www.springframework.org/schema/jee"
 9        xmlns:mvc="//www.springframework.org/schema/mvc"
10        xmlns:util="//www.springframework.org/schema/util"
11        xsi:schemaLocation="
12             //www.springframework.org/schema/beans //www.springframework.org/schema/beans/spring-beans.xsd
13             //www.springframework.org/schema/tx //www.springframework.org/schema/tx/spring-tx.xsd
14             //www.springframework.org/schema/aop //www.springframework.org/schema/aop/spring-aop.xsd
15             //www.springframework.org/schema/util //www.springframework.org/schema/util/spring-util.xsd
16             //www.springframework.org/schema/jdbc //www.springframework.org/schema/jdbc/spring-jdbc.xsd
17             //www.springframework.org/schema/jee //www.springframework.org/schema/jee/spring-jee.xsd
18             //www.springframework.org/schema/mvc //www.springframework.org/schema/mvc/spring-mvc.xsd
19             //www.springframework.org/schema/context //www.springframework.org/schema/context/spring-context.xsd">
20
21         <!-- 配置Handler簡配 -->
22         <mvc:annotation-driven/>
23
24         <!-- 配置組件掃描 -->
25         <context:component-scan base-package="com.springmvc"/>
26
27         <!-- 配置ViewResolver視圖解析器 -->
28         <!-- 完整的頁面路徑:前綴+視圖名稱+後綴 -->
29         <bean id="ViewResolver" class="org.springframework.web.servlet.view.InternalResourceViewResolver">
30             <!-- 前綴 -->
31             <property name="prefix" value="/"></property>
32             <!-- 後綴 -->
33             <property name="suffix" value=".jsp"></property>
34         </bean>
35 </beans>
第三步:測試運行