JavaScript图形实例:递归生成树
- 2020 年 7 月 1 日
- 笔记
- JavaScript程序设计
观察自然界中树的分叉,一根主干生长出两个侧干,每个侧干又长出两个侧干,以此类推,便生长出疏密有致的结构。这样的生长结构,使用递归算法可以模拟出来。
例如,分叉的侧干按45°的偏转角度进行生长的递归示意图如图1所示。

图1 生成树的递归示意图
按照树分叉生长侧干的递归思想,编写如下的HTML代码。
<!DOCTYPE html>
<head>
<title>递归分形树(一)</title>
</head>
<body>
<canvas id=”myCanvas” width=”600″ height=”400″ style=”border:3px double #996633;”>
</canvas>
<script type=”text/javascript”>
var canvas = document.getElementById(‘myCanvas’);
var ctx = canvas.getContext(‘2d’);
var maxdepth =4;
var curdepth = 0;
var alph=Math.PI/4;
function growtree()
{
ctx.translate(300,380);
branch(-Math.PI/2);
}
function branch(angle)
{
curdepth++;
ctx.save();
ctx.strokeStyle = “green”;
ctx.lineWidth = 6;
ctx.rotate(angle);
ctx.beginPath();
ctx.moveTo(0,0);
ctx.lineTo(100,0);
ctx.stroke();
ctx.translate(100,0);
ctx.scale(0.75,0.75);
if(curdepth <= maxdepth)
{
branch(alph);
branch(-alph);
}
ctx.restore();
curdepth–;
}
growtree();
</script>
</body>
</html>
在浏览器中打开包含这段HTML代码的html文件,可以看到在浏览器窗口中绘制出分叉树形,如图2所示。
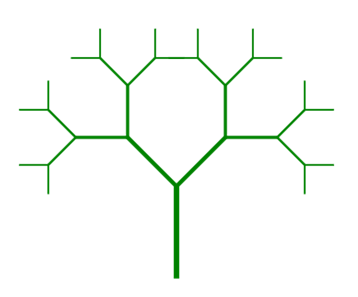
图2 递归深度maxdepth =4,alph=45°的分叉树形
若将递归深度“maxdepth=4”修改为“maxdepth=12”,则在浏览器窗口中绘制出如图3所示的分叉树形。

图3 递归深度maxdepth =12,alph=45°的分叉树形
若将递归深度“maxdepth=4”修改为“maxdepth=10”,分叉偏转角度从45°(alph=Math.PI/4)修改为30°(alph=Math.PI/6),则在浏览器窗口中绘制出如,4所示的分叉树形。
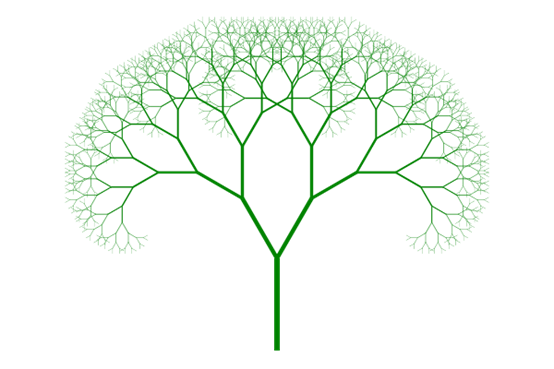 图4 递归深度maxdepth =10,alph=30°的分叉树形
由图3和图4可知,分叉的偏转角度不同,树形也会不同。实际上,自然界中树的侧干的生长不会按同一个角度进行分叉的,若将分叉的偏转角度取随机值,编写如下的HTML代码。
<!DOCTYPE html>
<head>
<title>递归分形树(二)</title>
</head>
<body>
<canvas id=”myCanvas” width=”600″ height=”400″ style=”border:3px double #996633;”></canvas>
<script type=”text/javascript”>
var canvas = document.getElementById(‘myCanvas’);
var ctx = canvas.getContext(‘2d’);
var maxdepth =10;
var curdepth = 0;
function growtree()
{
ctx.translate(300,380);
branch(-Math.PI/2);
}
function branch(angle)
{
curdepth++;
ctx.save();
ctx.strokeStyle = “green”;
ctx.lineWidth = 6;
ctx.rotate(angle);
ctx.beginPath();
ctx.moveTo(0,0);
ctx.lineTo(100,0);
ctx.stroke();
ctx.translate(100,0);
ctx.scale(0.75,0.75);
if(curdepth <= maxdepth)
{
branch(randomRange(0,Math.PI/4));
branch(randomRange(-Math.PI/4,0));
}
ctx.restore();
curdepth–;
}
function randomRange(min,max)
{
return Math.random()*(max-min) + min;
}
growtree();
</script>
</body>
</html>
在浏览器中打开包含这段HTML代码的html文件,在浏览器窗口中可能会绘制出如图5所示的分叉树形。
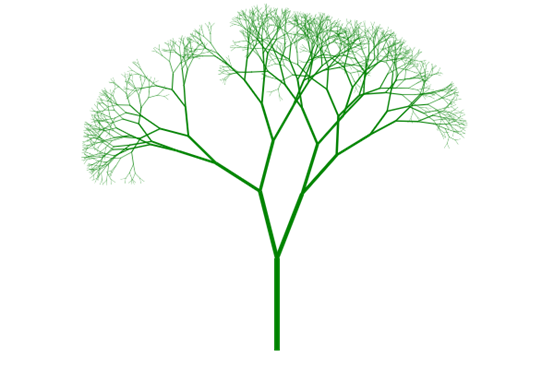
图5 分叉树形
不断地刷新浏览器窗口,可以随机绘制出不同的分叉树形,如图6所示。
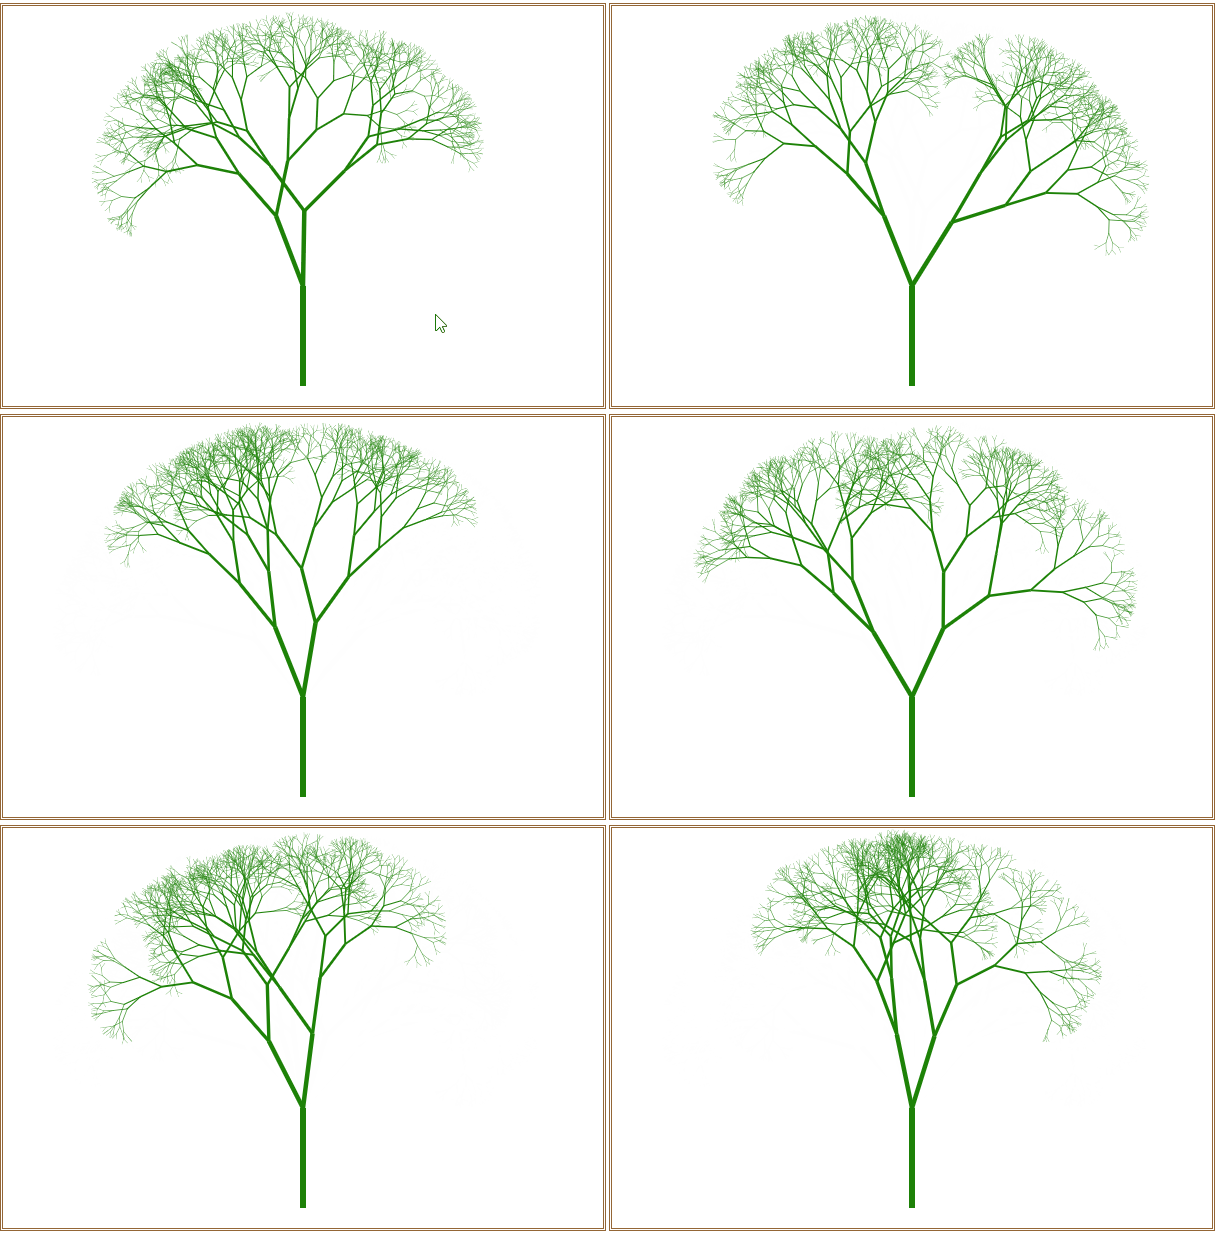
图6 绘制出的不同分叉树形
如果将递归树形的生成元改为如图7所示的三分叉,即在上面HTML文件中的两行代码
branch(randomRange(0,Math.PI/4));
branch(randomRange(-Math.PI/4,0));
中间加上一行代码 branch(0); 再将递归深度“var maxdepth =10;”修改为“var maxdepth =6;”,则在浏览器窗口中可能会绘制出如图8所示的分叉树形。
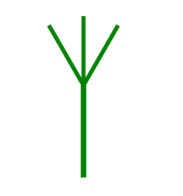
图7 三分叉生成元

图8 三分叉递归树形
我们可以在树梢画一个红色小圆,表示树儿开花了,编写如下的HTML文件。
<!DOCTYPE html>
<head>
<title>递归分形树(三)</title>
</head>
<body>
<canvas id=”myCanvas” width=”600″ height=”400″ style=”border:3px double #996633;”></canvas>
<script type=”text/javascript”>
var canvas = document.getElementById(‘myCanvas’);
var ctx = canvas.getContext(‘2d’);
var maxdepth =10;
var curdepth = 0;
function growtree()
{
ctx.translate(300,380);
branch(-Math.PI/2);
}
function branch(angle)
{
curdepth++;
ctx.save();
ctx.strokeStyle = “green”;
ctx.lineWidth = 6;
ctx.rotate(angle);
ctx.beginPath();
ctx.moveTo(0,0);
ctx.lineTo(100,0);
ctx.stroke();
ctx.translate(100,0);
ctx.scale(0.75,0.75);
if(curdepth < maxdepth)
{
branch(randomRange(0,Math.PI/4));
branch(randomRange(-Math.PI/4,0));
}
if(curdepth == maxdepth)
{
ctx.fillStyle = ‘#ff0000’;
ctx.beginPath();
ctx.arc(0,0,20,0,Math.PI*2,true);
ctx.fill();
}
ctx.restore();
curdepth–;
}
function randomRange(min,max)
{
return Math.random()*(max-min) + min;
}
growtree();
</script>
</body>
</html>
在浏览器中打开包含这段HTML代码的html文件,在浏览器窗口中可能会绘制出如图9所示的分叉树形。

图9 树梢开红花的分叉树形
不断地刷新浏览器窗口,可以随机绘制出不同的分叉树形,如图10所示。
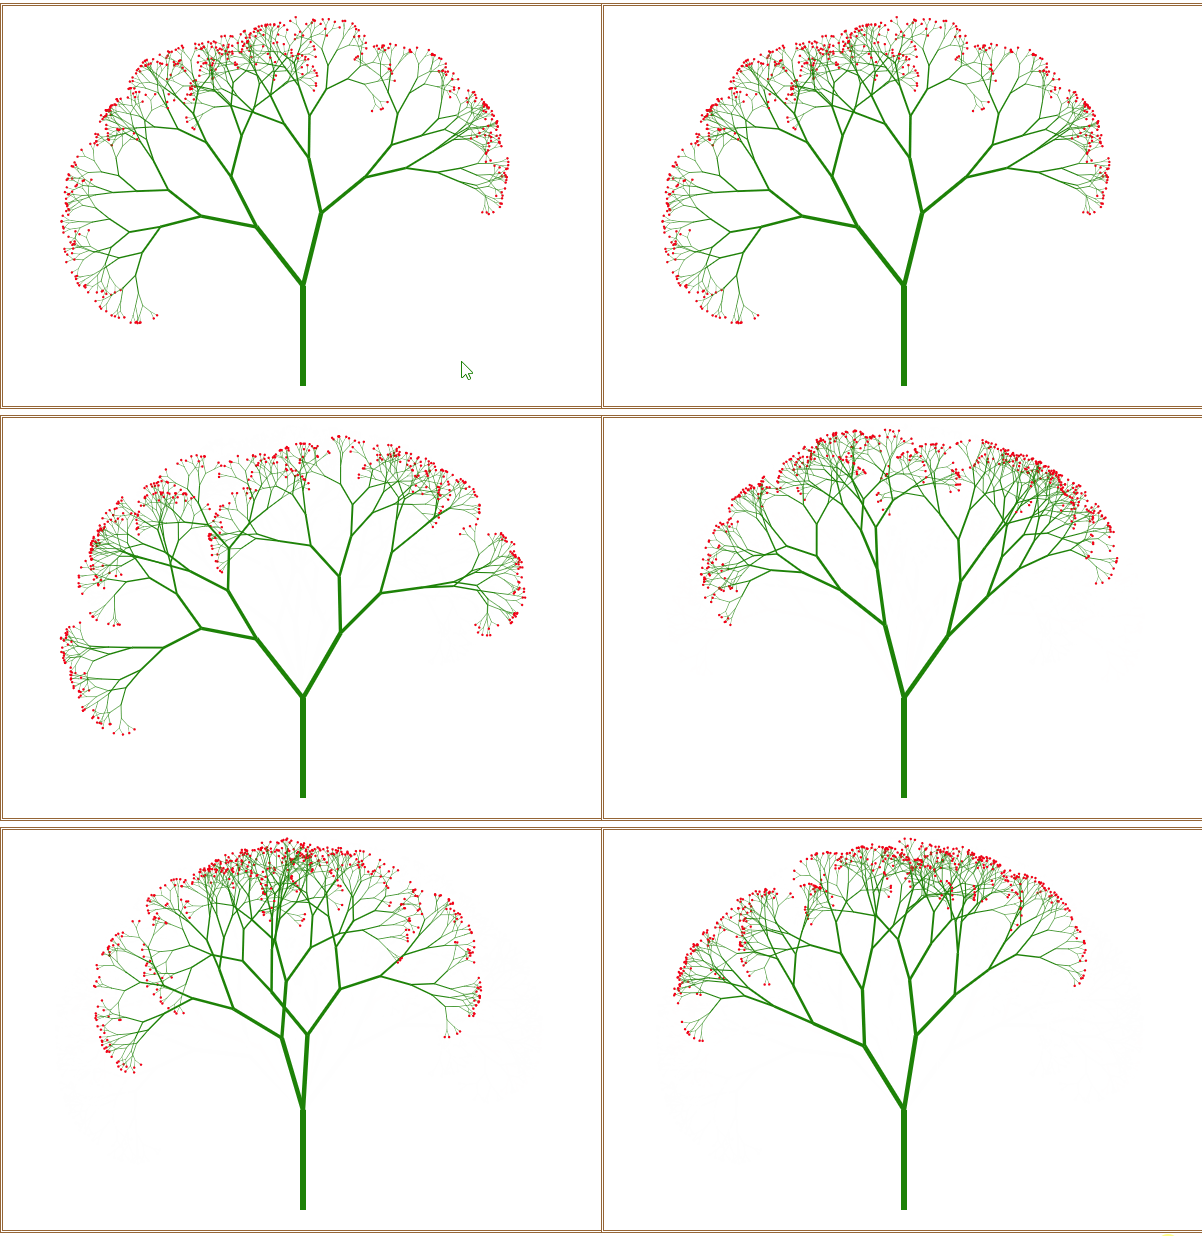
图10 绘制出的不同树梢开红花的分叉树形


