abp(net core)+easyui+efcore實現倉儲管理系統——入庫管理之五(四十一)
- 2020 年 3 月 26 日
- 筆記
abp(net core)+easyui+efcore實現倉儲管理系統目錄
abp(net core)+easyui+efcore實現倉儲管理系統——EasyUI前端頁面框架 (十八)
abp(net core)+easyui+efcore實現倉儲管理系統——ABP WebAPI與EasyUI結合增刪改查之八(三十四)
在上一篇abp(net core)+easyui+efcore實現倉儲管理系統——入庫管理之四(四十)文章中我們已經定義了應用的接口,並在應用層實現了這些接口。接下來我們要在展示層來實現前端功能。
八 創建InStockController繼承自TPLMSControllerBase
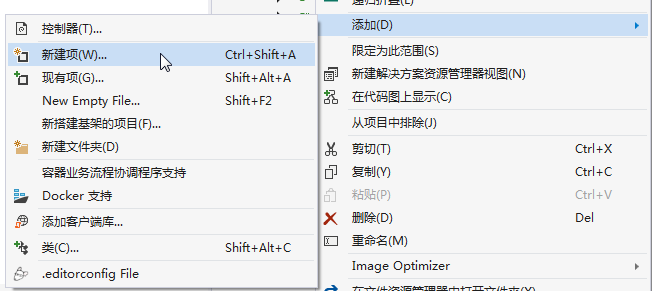
1. 在Visual Studio 2017的“解決方案資源管理器”中,右鍵單擊在領域層“ABP.TPLMS.Web.Mvc”項目中的Controller目錄。 選擇“添加” > “新建項…”。如下圖。
2. 在彈出對話框“添加新項-ABP.TPLMS.Web.Mvc”中選擇“控制器類”,然後在名稱輸入框中輸入“InStockController”,然後點擊“添加”按鈕。
3.在InStockController.cs文件中輸入如下代碼,通過構造函數注入對應用服務的依賴。
using System; using System.Collections.Generic; using System.Linq; using System.Threading.Tasks; using Abp.Runtime.Validation; using Abp.Web.Models; using ABP.TPLMS.Controllers; using ABP.TPLMS.Entitys; using ABP.TPLMS.Helpers; using ABP.TPLMS.InStocks; using ABP.TPLMS.InStocks.Dto; using ABP.TPLMS.Models.InStock; using Microsoft.AspNetCore.Mvc; namespace ABP.TPLMS.Web.Controllers { public class InStockController : TPLMSControllerBase { private readonly IInStockOrderAppService _inSOAppService; private readonly IInStockOrderDetailAppService _inSODAppService; private const int MAX_COUNT = 1000; public InStockController(IInStockOrderAppService InSOAppService,IInStockOrderDetailAppService InSODAppService) { _inSOAppService = InSOAppService; _inSODAppService = InSODAppService; } public IActionResult Index() { return View(); } [DontWrapResult] [HttpPost] public string List() { var page = Request.Form["page"].ToString(); var size = Request.Form["rows"].ToString(); int pageIndex = page == null ? 1 : int.Parse(page); int pageSize = size == null ? 20 : int.Parse(size); PagedInStockResultRequestDto paged = new PagedInStockResultRequestDto(); paged.MaxResultCount = MAX_COUNT; paged.SkipCount = ((pageIndex - 1) < 0 ? 0 : pageIndex - 1) * pageSize; paged.BeginTime = DateTime.Now.AddMonths(-1); paged.EndTime = DateTime.Now.AddDays(1); var query = _inSOAppService.GetAll(paged).GetAwaiter().GetResult(); var isoList = query.Items; int total = query.TotalCount; var json = JsonEasyUI(isoList, total); return json; } [DontWrapResult] public string GetDetail(string no) { PagedInStockDetailResultRequestDto paged = new PagedInStockDetailResultRequestDto(); paged.MaxResultCount = MAX_COUNT; paged.InStockNo = no; var podList = _inSODAppService.GetAll(paged).GetAwaiter().GetResult().Items; ; var json = JsonEasyUI(podList); return json; } [HttpPost] [DisableValidation] public ActionResult Add(InStockOrderDto iso) { string result = "NO"; try { PagedInStockResultRequestDto condition = new PagedInStockResultRequestDto(); condition.No = iso.No; var isoExists = _inSOAppService.GetAll(condition).GetAwaiter().GetResult(); if (isoExists.TotalCount > 0) { return Content(result); } CreateUpdateInStockOrderDto cuIso = ObjectMapper.Map<CreateUpdateInStockOrderDto>(iso); // TODO: Add logic here var obj= _inSOAppService.Create(cuIso); result = "OK"; } catch(Exception ex) { result = "NO"; } return Content(result); } [HttpPost] [DisableValidation] public string Update(InStockOrderDto iso) { string result = "NO"; List<InStockOrderDetailDto> list = new List<InStockOrderDetailDto>(); try { string deleted = Request.Form["deleted"]; string inserted = Request.Form["inserted"]; string updated = Request.Form["updated"]; string head = Request.Form["postdata"]; if (!string.IsNullOrEmpty(head)) { //把json字符串轉換成對象 iso = JsonHelper.Instance.Deserialize<InStockOrderDto>(head); } if (!string.IsNullOrEmpty(deleted)) { //把json字符串轉換成對象 List<InStockOrderDetailDto> listDeleted = JsonHelper.Instance.Deserialize<List<InStockOrderDetailDto>>(deleted); //TODO 下面就可以根據轉換後的對象進行相應的操作了 if (listDeleted != null && listDeleted.Count > 0) { list.AddRange(listDeleted.ToArray()); } } if (!string.IsNullOrEmpty(inserted)) { //把json字符串轉換成對象 List<InStockOrderDetailDto> listInserted = JsonHelper.Instance.Deserialize<List<InStockOrderDetailDto>>(inserted); if (listInserted != null && listInserted.Count > 0) { list.AddRange(listInserted.ToArray()); } } if (!string.IsNullOrEmpty(updated)) { //把json字符串轉換成對象 List<InStockOrderDetailDto> listUpdated = JsonHelper.Instance.Deserialize<List<InStockOrderDetailDto>>(updated); if (listUpdated != null && listUpdated.Count > 0) { list.AddRange(listUpdated.ToArray()); } } if (iso == null) { return "沒有表頭!"; } // TODO: Add update logic here iso.InStockOrderDetail = list; result = _inSOAppService.Save(iso); } catch { } if (result == "OK") { return "更新成功!"; } else return "更新失敗!"; } [HttpPost] [DisableValidation] public ActionResult ImportCargo(CargoModel cargos) { string result = "NO"; try { // TODO: 導入貨物信息 result = _inSOAppService.ImportCargo(cargos.Ids, cargos.No); } catch { } return Content(result); } [HttpPost] [DontWrapResult] public ActionResult Delete(string ids) { string result = "NO"; try { // TODO: Add Delete logic here bool flag = _inSOAppService.DeleteById(ids); if (flag) { result = "OK"; } } catch { } return Content(result); } } }
九、使用EasyUI創建入庫單管理頁面
1. 在Visual Studio 2017的“解決方案資源管理器”中,右鍵單擊在領域層“ABP.TPLMS.Web.Mvc”項目中的Views目錄。 選擇“添加” > “新建文件夾”。並重命名為“InStock”。
2. 在Visual Studio 2017的“解決方案資源管理器”中,鼠標右鍵單擊“InStock”文件夾,然後選擇“添加” > “新建項…”。 在“添加新項-ABP.TPLMS.Web.Mvc”對話框中,選擇“Razor視圖”,並將名稱命名為Index.cshmtl。如下圖。

3. 在我們剛才創建的Index.cshmtl文件中,編寫如下代碼:
@using ABP.TPLMS.Web.Startup @{ ViewData["Title"] = PageNames.InStock; } @section scripts{ <script src="~/view-resources/Views/InStock/Index.js" asp-append-version="true"></script> <script type="text/javascript"> $(function () { initable(); reloaded(); $('#box').tabs({ width: 780, //選項卡容器寬度 height: 465, //選項卡容器高度 onSelect: function (title, index) { var rcv = $("#RcvUpdate").val(); if (title == "入庫單明細") { $("#rcv").val(rcv); } } }); }); </script> } <div data-options="region:'center'" style="overflow: hidden;"> <div id="containter" style="width: 1000px; height: auto; margin: 0px auto;"> <!--toolbar--> <div style="margin-bottom:1px;font-weight:bold;"> <a href="#" id="add" class="easyui-linkbutton" data-options="iconCls:'icon-add'" style="width:100px; height:30px; ">生成入庫單</a> <a href="#" id="del" class="easyui-linkbutton" data-options="iconCls:'icon-remove'" style="width:100px; height:30px; ">刪除</a> <a href="#" id="edit" class="easyui-linkbutton" data-options="iconCls:'icon-edit'" style="width:100px; height:30px; ">修改</a> <a href="#" id="submits" class="easyui-linkbutton" data-options="iconCls:'icon-ok'" style="width:100px; height:30px; ">提交</a> <a href="#" id="reload" class="easyui-linkbutton" data-options="iconCls:'icon-reload'" style="width:100px; height:30px; ">刷新</a> </div> <!--panel--> <div data-options="region:'center',split:false" style="height:500px;"> <!--表格--> <table id="dgINSO"></table> </div> </div> </div>
4. 在Visual Studio 2017的“解決方案資源管理器”中,找到領域層“ABP.TPLMS.Web.Mvc”項目中的wwwroot目錄下的view-resources目錄。使用鼠標右鍵單擊此目錄,在彈出菜單中選擇“添加” > “新建文件夾”。並重命名為“InStock”。
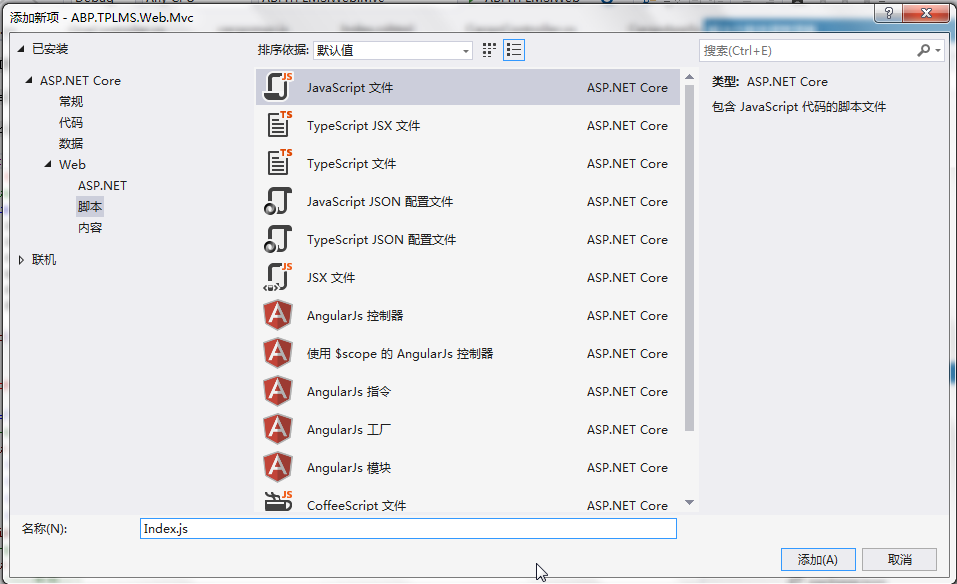
5. 在Visual Studio 2017的“解決方案資源管理器”中,鼠標右鍵單擊“InStock”文件夾,然後選擇“添加” > “新建項…”。 在“添加新項-ABP.TPLMS.Web.Mvc”對話框中,選擇“javascript文件”,並將名稱命名為Index.js。如下圖。
6. 在Index.js文件中,我們寫入如下代碼。
//-----------------------系統管理-->入庫單管理-----------------------------------------// //刷新數據 function initable() { $("#dgINSO").datagrid({ url: "/InStock/List", //url:"api/services/app/instock/GetAllInStockOrders", title: "入庫單管理", pagination: true, pageSize: 10, pageList: [10, 20, 30], fit: true, fitColumns: false, loadMsg: "正在加載入庫單信息...", nowarp: false, border: false, idField: "Id", sortName: "Id", sortOrder: "asc", frozenColumns: [[//凍結列 { field: "ck", checkbox: true, align: "left", width: 50 } ]], columns: [[ { title: "編號", field: "Id", width: 50, sortable: true }, { title: "入庫單號", field: "No", width: 100, sortable: true }, {title: "狀態", field: "Status", width: 50 }, { title: '到貨日期', field: 'ReceiveTime', width: 100, align: 'center' }, { title: "貨主", field: "OwnerCode", width: 150, sortable: true }, { title: "預計到貨時間", field: "PreDeliveryTime", width: 150, sortable: false }, { title: '客戶', field: 'CustomerName', width: 60, align: 'center' }, { title: '收貨人',field: 'Oper', width: 100, align: 'center' }, { title: '審核人',field: 'Checker', width: 120, align: 'center' }, { title: '件數', field: 'PackageNum', width: 120, align: 'center' }, { title: '創建時間', field: 'CreationTime', width: 100, align: 'center' } ]] }); } function reloaded() { //reload $("#reload").click(function () { // $('#dgINSO').datagrid('reload'); });}
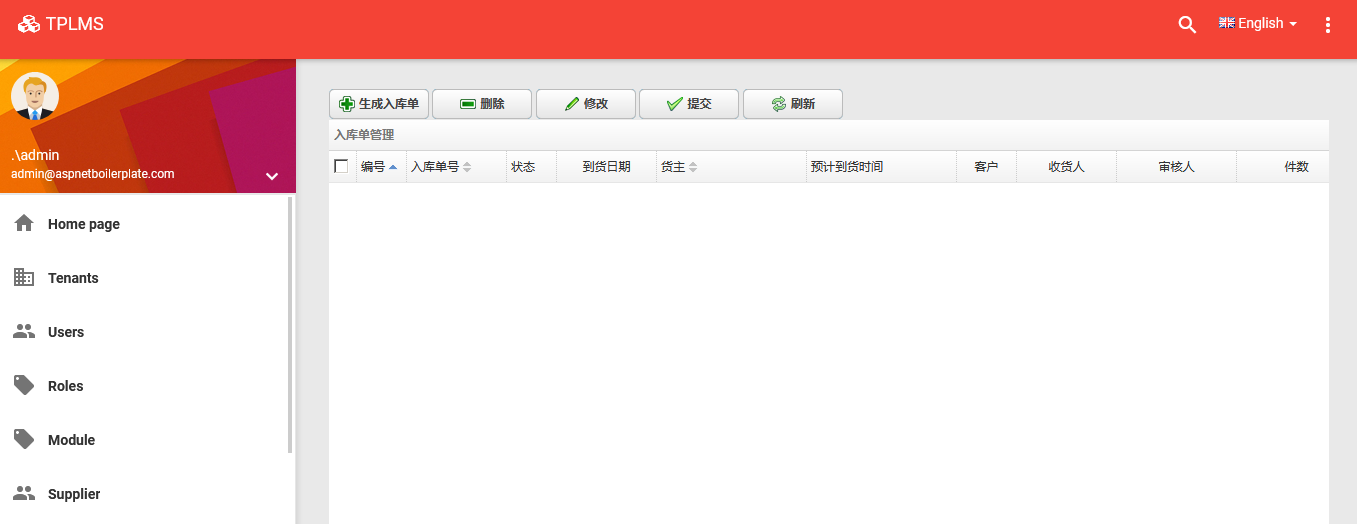
7. 在Visual Studio 2017中按F5運行應用程序。登錄之後,點擊“[入庫管理]”菜單,我們可以看到貨物管理列表頁面。如下圖。