2流高手速成記(之四):SpringBoot整合redis及mongodb
- 2022 年 10 月 22 日
- 筆記
- JAVA, Java/Spring, spring, Spring Boot
最近很忙,好不容易才抽出了時間,咱們接上回
上次我們主要講了如何通過SpringBoot快速集成mybatis/mybatis-plus,以實現業務交互中的數據持久化,而這一切都是基於關係型數據庫(SQL)實現的
本節我們來把關注點轉向NoSQL
NoSQL的概念:
NoSQL,泛指非關係型的數據庫。隨着互聯網web2.0網站的興起,傳統的關係數據庫在處理web2.0網站,特別是超大規模和高並發的SNS類型的web2.0純動態網站已經顯得力不從心,出現了很多難以克服的問題,而非關係型的數據庫則由於其本身的特點得到了非常迅速的發展。NoSQL數據庫的產生就是為了解決大規模數據集合多重數據種類帶來的挑戰,特別是大數據應用難題。(——來自百度百科)
得益於其直接基於內存的存儲方式,NoSQL的訪問速度可以用「飛快」兩個字來形容
在生產環境中,NoSQL常常配合傳統關係型數據庫來使用,比如構建一層數據緩存來極大的提升數據的讀取速度
NoSQL在日常業務的驅動之下,逐漸發展出幾個主要的類別:鍵值對數據庫、文檔型數據庫、列存儲數據庫以及圖形化數據庫
這4類NoSQL數據庫之中最具代表性的,當屬鍵值對數據庫類別下的Redis,以及文檔型數據庫的Mongodb,本節我們重點關注這兩個產品在SpringBoot下的整合及使用
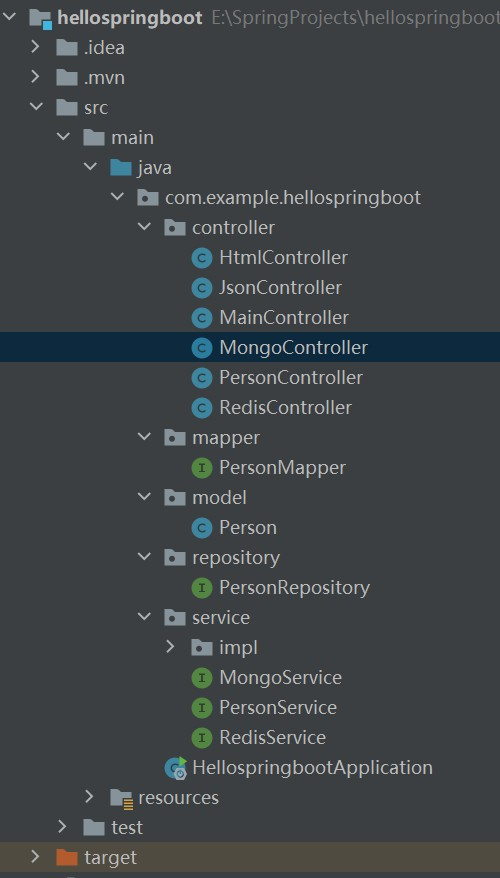
照慣例先上項目結構:
一、先看Redis的使用:
1. 在pom.xml中添加Redis相關依賴項
        <!-- 引入redis依賴(基於lettuce) -->
        <dependency>
            <groupId>org.springframework.boot</groupId>
            <artifactId>spring-boot-starter-data-redis</artifactId>
        </dependency>
        <dependency>
            <groupId>org.apache.commons</groupId>
            <artifactId>commons-pool2</artifactId>
        </dependency>
2. 在application.properties中添加Redis的相關配置
# redis相關設置
spring.redis.database=0
spring.redis.host=127.0.0.1
spring.redis.port=6379
spring.redis.password=
# redis默認基於lettuce內核
spring.redis.lettuce.pool.max-active=8
spring.redis.lettuce.pool.max-idle=8
spring.redis.lettuce.pool.max-wait=-1ms
spring.redis.lettuce.pool.min-idle=0
這裡關於lettuce內核有必要給大家解釋一下:
在SpringBoot2.x版本之前,其集成的默認Redis庫是Jedis,而在2.x版本之後才改為默認基於Lettuce
Jedis默認和Redis直連,為非線程安全模型,並發環境下需要池化使用
而Lettuce則是線程安全的,並發環境下可以通過一個實例搞定
當然,你也可以在SpringBoot2.x環境下依然使用Jedis,只需要把 spring.redis.lettuce 相關配置替換為 spring.redis.jedis 即可
更多內容大家感興趣可以從網上查閱相關資料,這裡推薦一篇://blog.csdn.net/kenkao/article/details/127085687
3. 新建 service/RedisService 接口及其實現類 service/impl/RedisServiceImpl
package com.example.hellospringboot.service;

public interface RedisService {
    void set(String key, String val);
    String get(String key);
}
package com.example.hellospringboot.service.impl;

import com.example.hellospringboot.service.RedisService;
import org.springframework.beans.factory.annotation.Autowired;
import org.springframework.data.redis.core.StringRedisTemplate;
import org.springframework.data.redis.core.ValueOperations;
import org.springframework.stereotype.Service;

@Service
public class RedisServiceImpl implements RedisService {

    @Autowired
    StringRedisTemplate redis;

    public void set(String key, String val){
        ValueOperations<String,String> ops = redis.opsForValue();
        ops.set(key, val);
    }

    public String get(String key){
        ValueOperations<String,String> ops = redis.opsForValue();
        return ops.get(key);
    }
}
我們在Service中自動裝載一個StringRedisTemplate實例,而後通過其創建Operation對象,進行可以進行各種Redis讀寫操作
4. 新建 controller/RedisController
package com.example.hellospringboot.controller;

import com.example.hellospringboot.service.RedisService;
import org.springframework.beans.factory.annotation.Autowired;
import org.springframework.web.bind.annotation.GetMapping;
import org.springframework.web.bind.annotation.PostMapping;
import org.springframework.web.bind.annotation.RequestMapping;
import org.springframework.web.bind.annotation.RestController;

import javax.servlet.http.HttpSession;

@RestController
@RequestMapping("/redis")
public class RedisController {

    @Autowired
    RedisService service;

    @PostMapping("/set")
    public void set(String key, String val){
        service.set(key, val);
    }

    @GetMapping("/get")
    public String get(String key){
        return service.get(key);
    }

}
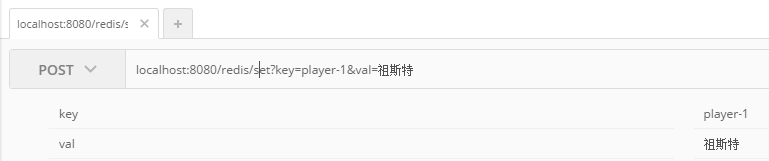
5. 通過Postman進行結果驗證
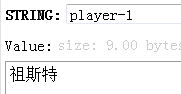
通過RDM查看寫入redis的數據:
之後是讀操作:
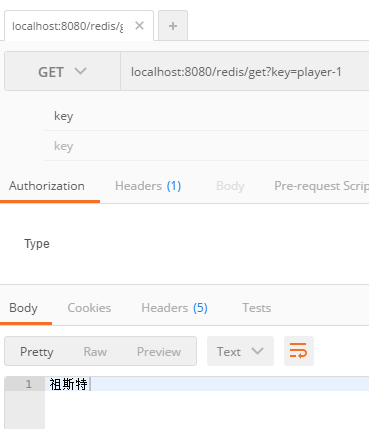
至此我們便完成了SpringBoot中集成Redis的操作
二、MongoDB的使用
1. 首先還是先添加MongoDB相關依賴項
        <!-- 引入mongodb依賴 -->
        <dependency>
            <groupId>org.springframework.boot</groupId>
            <artifactId>spring-boot-starter-data-mongodb</artifactId>
        </dependency>
2. 然後是添加MongoDB相關配置
# mongodb相關設置
spring.data.mongodb.authentication-database=admin
spring.data.mongodb.database=local
spring.data.mongodb.host=127.0.0.1
spring.data.mongodb.port=27017
#spring.data.mongodb.username=admin
#spring.data.mongodb.password=admin
各注釋項內容依次是:身份驗證庫、目標數據庫、主機地址、端口以及用戶名和口令
由於我沒有設置用戶名和口令,所以直接注釋掉這兩項
3. 新建 repository/PersonRepository
package com.example.hellospringboot.repository;

import com.example.hellospringboot.model.Person;
import org.springframework.data.mongodb.repository.MongoRepository;
import org.springframework.stereotype.Repository;

@Repository
public interface PersonRepository extends MongoRepository<Person, Integer> {
    Person findByNameIs(String name);
    Person findByIdIs(int id);
    Person findByIdAndName(int id, String name);
    Person findByIdOrName(int id, String name);
}
這裡出現了非常神奇的一幕:
我們僅需要提供一個接口,而不用提供具體實現!
僅憑方法的命名規範,spring.data.mongodb就能自行分析開發者的意圖,進行補全內部的業務邏輯!
而同樣具備這種智能化能力的還有spring.jpa,後者也是一種非常便捷高效數據庫驅動,與mybatis屬於同類產品
順便也給大家提供一份方法命名規範清單,請各位在方法命名時務必遵循以下規則:
| 關鍵字 | 方法命名 | sql where字句 |
| And | findByNameAndPwd | where name= ? and pwd =? |
| Or | findByNameOrSex | where name= ? or sex=? |
| Is,Equals | findById,findByIdEquals | where id= ? |
| Between | findByIdBetween | where id between ? and ? |
| LessThan | findByIdLessThan | where id < ? |
| LessThanEqual | findByIdLessThanEqual | where id <= ? |
| GreaterThan | findByIdGreaterThan | where id > ? |
| GreaterThanEqual | findByIdGreaterThanEqual | where id > = ? |
| After | findByIdAfter | where id > ? |
| Before | findByIdBefore | where id < ? |
| IsNull | findByNameIsNull | where name is null |
| isNotNull,NotNull | findByNameNotNull | where name is not null |
| Like | findByNameLike | where name like ? |
| NotLike | findByNameNotLike | where name not like ? |
|
StartingWith |
findByNameStartingWith | where name like ‘?%’ |
| EndingWith | findByNameEndingWith | where name like ‘%?’ |
| Containing | findByNameContaining | where name like ‘%?%’ |
| OrderBy | findByIdOrderByXDesc | where id=? order by x desc |
| Not | findByNameNot | where name <> ? |
| In | findByIdIn(Collection<?> c) | where id in (?) |
| NotIn | findByIdNotIn(Collection<?> c) | where id not in (?) |
| True |
findByAaaTue |
where aaa = true |
| False | findByAaaFalse | where aaa = false |
| IgnoreCase | findByNameIgnoreCase | where UPPER(name)=UPPER(?) |
4. Service接口定義及實現
package com.example.hellospringboot.service;

import com.example.hellospringboot.model.Person;

public interface MongoService {
    public void insert(Person person);
    public Person findByName(String name);
    public Person findById(int id);
    public Person findByIdAndName(int id, String name);
    public Person findByIdOrName(int id, String name);
}
package com.example.hellospringboot.service.impl;

import com.example.hellospringboot.model.Person;
import com.example.hellospringboot.repository.PersonRepository;
import com.example.hellospringboot.service.MongoService;
import org.springframework.beans.factory.annotation.Autowired;
import org.springframework.stereotype.Service;

@Service
public class MongoServiceImpl implements MongoService {

    @Autowired
    PersonRepository repository;

    public void insert(Person person){
        repository.insert(person);
    }

    public Person findByName(String name){
        return repository.findByNameIs(name);
    }

    public Person findById(int id){
        return repository.findByIdIs(id);
    }

    public Person findByIdAndName(int id, String name){
        return repository.findByIdAndName(id, name);
    }

    public Person findByIdOrName(int id, String name){
        return repository.findByIdOrName(id, name);
    }
}
5. Controller實現
package com.example.hellospringboot.controller;

import com.example.hellospringboot.model.Person;
import com.example.hellospringboot.service.MongoService;
import org.springframework.beans.factory.annotation.Autowired;
import org.springframework.web.bind.annotation.GetMapping;
import org.springframework.web.bind.annotation.PostMapping;
import org.springframework.web.bind.annotation.RequestMapping;
import org.springframework.web.bind.annotation.RestController;

@RestController
@RequestMapping("/mongo")
public class MongoController {

    @Autowired
    MongoService service;

    @PostMapping("/insert")
    public void insert(Person person){
        service.insert(person);
    }

    @GetMapping("/findByName")
    public Person findByName(String name){
        return service.findByName(name);
    }

    @GetMapping("/findById")
    public Person findById(int id){
        return service.findById(id);
    }

    @GetMapping("/findByIdAndName")
    public Person findByIdAndName(int id, String name){
        return service.findByIdAndName(id, name);
    }

    @GetMapping("/findByIdOrName")
    public Person findByIdOrName(int id, String name) {
        return service.findByIdOrName(id, name);
    }
}
Service及Controller的實現不再做過多贅述,還是老一套
6. Postman驗證結果
向mongodb中寫入一條數據

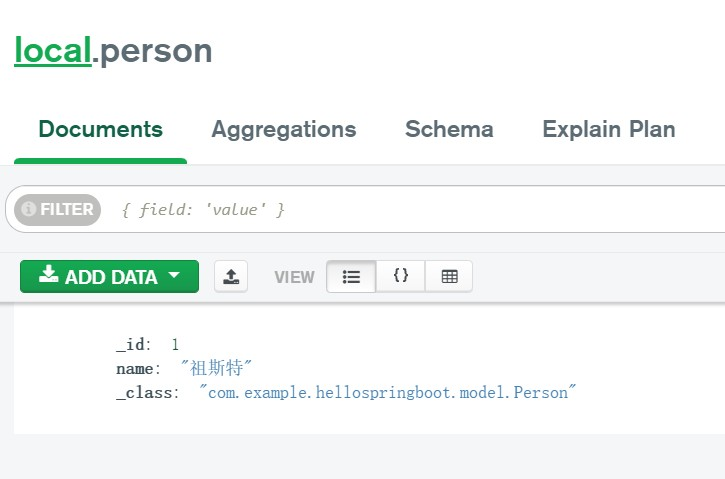
之後是幾種讀取操作:

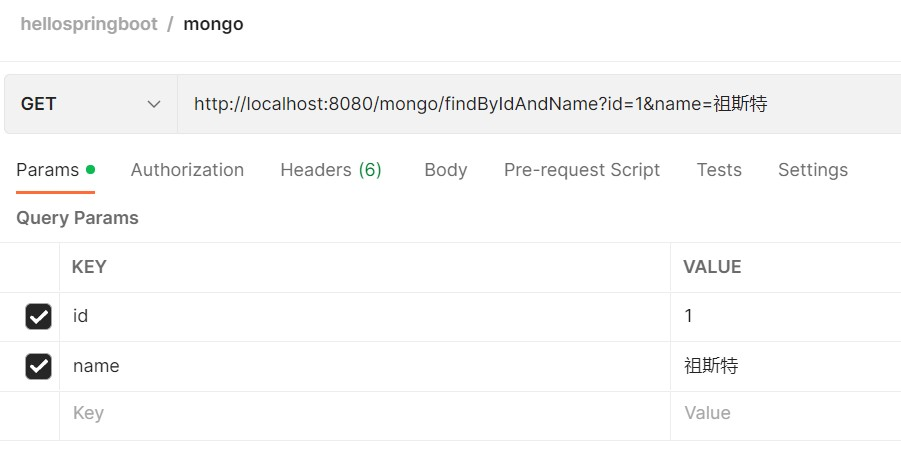
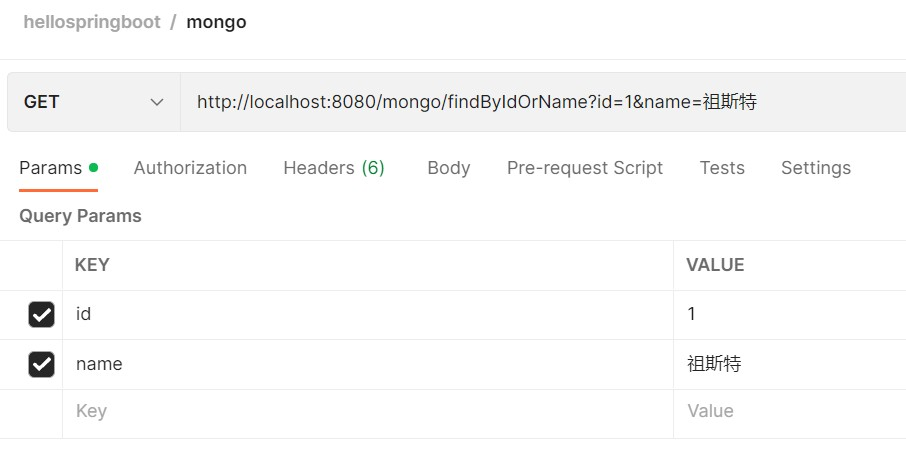
不論是與或操作,我們都可以得到正確的結果
到這裡,mongodb的集成就完成了
三、基於Redis實現Session配置共享
這部分純屬附送內容 ^ ^
前邊我們已經完成了對Redis的集成操作,而基於Redis我們可以非常便捷的實現服務端Session配置的跨節點共享
服務端Session默認存儲在本地,而當我們需要多台服務器共享一套Session配置時,本地化Session便不再滿足我們的要求
而基於SpringSession,我們可以完全透明化的替換掉默認的Session容器,直接改為基於Redis存儲
1. 添加相關依賴
        <!-- 引入spring session無縫替換原有的session系統 -->
        <dependency>
            <groupId>org.springframework.session</groupId>
            <artifactId>spring-session-data-redis</artifactId>
        </dependency>
2. 新增兩個RedisController方法
    @PostMapping("/setSession")
    public void setSession(String key, String val, HttpSession session){
        session.setAttribute(key, val);
    }

    @GetMapping("/getSession")
    public Object getSession(String key, HttpSession session){
        return session.getAttribute(key);
    }
就完事兒了?對!就完事兒了 ^ ^,超級簡單是吧?
到此,我們就完成了SpringBoot對於Redis以及MongoDB的集成和使用
非常感慨於SpringBoot框架設計的智能化及人性化,就像身邊有一哥們說的:這年頭,框架都能直接聽懂人話了!哈哈
下一節我們討論一個生產環境下常常面臨的實際問題——安全管理
Shiro框架要來咯!敬請期待——


