2流高手速成記(之三):SpringBoot整合mybatis/mybatis-plus實現數據持久化
- 2022 年 9 月 27 日
- 筆記
- Java/Spring
接上回
上一篇我們簡單介紹了基於SpringBoot實現簡單的Web開發,本節來看Web開發中必不可少的內容——數據持久化
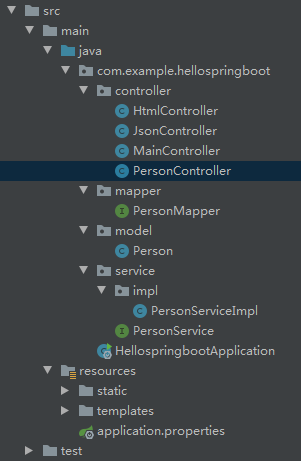
先看項目結構:
1. 創建數據表
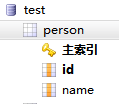
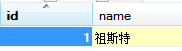
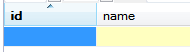
打開mysql,打開數據庫 test (沒有可以創建一個),創建表格 person
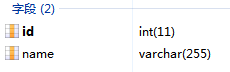
給 person 表創建兩個字段 id、name
2. 打開 pom.xml,添加相關依賴
        <!-- 引入mybatis、mybatis-plus、mysql等依賴 -->
        <dependency>
            <groupId>org.mybatis.spring.boot</groupId>
            <artifactId>mybatis-spring-boot-starter</artifactId>
            <version>2.2.2</version>
        </dependency>
        <dependency>
            <groupId>com.baomidou</groupId>
            <artifactId>mybatis-plus-boot-starter</artifactId>
            <version>3.5.2</version>
        </dependency>
        <dependency>
            <groupId>mysql</groupId>
            <artifactId>mysql-connector-java</artifactId>
        </dependency>
mybatis-spring-boot-starter 滿足了 mybatis在springboot下的拆箱即用
mybatis-plus-boot-starter 實現了 mybatis-plus 的自動化配置,同樣拆箱即用
注意:是mybatis-plus-boot-starter,不是mybatis-plus;前者包含後者的引用,如果只引用後者執行程序會報錯!
由於mybatis-plus是基於mybatis的,所以兩者引用缺一不可
mysql-connector-java 是基礎的mysql驅動接口,這個也是不可或缺的
mybatis是安全、優秀的java持久層框架,基於xml可靈活定製sql語句
mybatis-plus在mybatis的基礎上做了更進一步的簡化,可免去xml編寫
同時,mybatis-plus遵循非侵入式設計的原則,即完全兼容原mybatis的使用習慣,非常方便
3. 給application.properties添加數據庫配置
# mysql相關設置
spring.datasource.username=admin
spring.datasource.password=admin
spring.datasource.url=jdbc:mysql://localhost:3306/test?useSSL=false&useUnicode=true&characterEncoding=utf-8&serverTimezone=GMT%2B8
spring.datasource.driver-class-name=com.mysql.cj.jdbc.Driver
到這裡可能有人會問,咋沒看到mybatis.xml的配置?不是一般都會有一句:
#指定Mybatis的Mapper文件
mybatis.mapper-locations=classpath:mapper/*xml
如果我們使用mybatis的原生功能,這一句配置是需要加上的,但是如果我們基於mybatis-plus,可以先不加這一句,因為它是免xml配置的!
4. 新建 model/Person
package com.example.hellospringboot.model;

public class Person {

    private Integer id = 0;

    private String name = "";

    public Integer getId() {
        return id;
    }

    public void setId(Integer id) {
        this.id = id;
    }

    public String getName() {
        return name;
    }

    public void setName(String name) {
        this.name = name;
    }
}
注意:類名 Person 要和數據庫表名 person 一致(首字母大寫是Java的類命名規則,這個沒有問題)
id和name兩個字段的名稱和類型也要和數據庫保持一致
5. 新建 mapper/PersonMapper
package com.example.hellospringboot.mapper;

import com.baomidou.mybatisplus.core.mapper.BaseMapper;
import com.example.hellospringboot.model.Person;
import org.apache.ibatis.annotations.Mapper;
import org.springframework.stereotype.Repository;

@Mapper
@Repository
public interface PersonMapper extends BaseMapper<Person> {
}
這裡讓PersonMapper繼承自mybatis-plus提供的BaseMapper,這是啟用mybatis-plus免xml特性的關鍵!
BaseMapper為我們定製常用的數據庫增刪改查的方法,直接繼承使用即可!
6. 新建 service/PersonService 接口及其實現類 service/impl/PersonServiceImpl
package com.example.hellospringboot.service;

import com.example.hellospringboot.model.Person;
import java.util.List;

public interface PersonService {
    Integer insert(Person person);
    Integer update(Person person);
    Integer delete(int id);
    List<Person> select();
}
package com.example.hellospringboot.service.impl;

import com.example.hellospringboot.mapper.PersonMapper;
import com.example.hellospringboot.model.Person;
import com.example.hellospringboot.service.PersonService;
import org.springframework.beans.factory.annotation.Autowired;
import org.springframework.stereotype.Service;

import java.util.List;

@Service
public class PersonServiceImpl implements PersonService {

    @Autowired
    PersonMapper mapper;

    public Integer insert(Person person){
        return mapper.insert(person);
    }

    public Integer update(Person person){
        return mapper.updateById(person);
    }

    public Integer delete(int id){
        return mapper.deleteById(id);
    }

    public List<Person> select(){
        return mapper.selectList(null);
    }
}
我們給mapper新增了@Repository註解,可以讓Service自動裝載Mapper不報錯
通過代碼我們可以看到,繼承自BaseMapper<Person>的PersonMapper,不加任何代碼不寫任何xml,就可以支持Person數據模型的常見的增刪改查等操作,真的非常方便!
7. 新建 controller/PersonController
package com.example.hellospringboot.controller;

import com.example.hellospringboot.model.Person;
import com.example.hellospringboot.service.PersonService;
import org.springframework.beans.factory.annotation.Autowired;
import org.springframework.web.bind.annotation.GetMapping;
import org.springframework.web.bind.annotation.PostMapping;
import org.springframework.web.bind.annotation.RequestMapping;
import org.springframework.web.bind.annotation.RestController;

import java.util.List;

@RestController
@RequestMapping("/person")
public class PersonController {

    @Autowired
    PersonService service;

    @PostMapping("/insert")
    public Integer insert(Person person){
        return service.insert(person);
    }

    @PostMapping("/update")
    public Integer update(Person person){
        return service.update(person);
    }

    @PostMapping("/delete")
    public Integer delete(int id){
        return service.delete(id);
    }

    @GetMapping("/select")
    public List<Person> select(){
        return service.select();
    }
}
我們這裡使用了@RestController註解,這樣可以非常方便的測試我們的業務邏輯
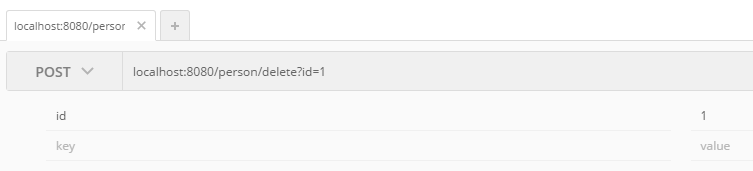
這裡可以看到,insert、update、delete三個寫方法我們使用了Post協議,select讀方法使用了Get協議
其實標準的RestApi風格另外還有Put和Delete協議,這裡其實沒有嚴格的規定
由於Get協議的參數是直接暴露在url串里的,所以一般寫方法我們不建議使用Get協議
8. 使用Postman測試結果
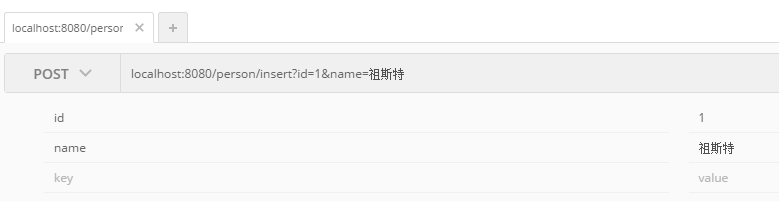
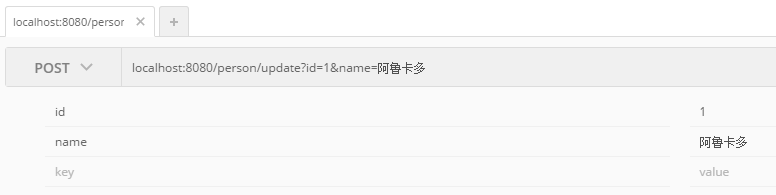
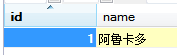
我們在請求參數中分別傳入id和name,springboot框架會自動將其拼裝成Person對象,真的是非常智能化!
另外,得益於mybatis-plus免xml的特性,我們不用自己手寫任何的xml邏輯實現,甚至通篇未出現任何大家常見的mybatis相關配置!
以上。
本節內容我們介紹了數據持久化的相關操作,並且是基礎傳統的關係型數據庫——mysql
下一節我們將共同探討如何使用SpringBoot整合redis及mongodb,敬請期待!

