ESP32-S2原生USB 燒錄 TinyUF2 bootloader 加 CircuitPython
概述
ESP32-S2最令我心儀的改進是原生支持USB,即帶有一個集成了收發器的全速 USB OTG 外設,符合 USB 1.1 規範,理論速度1.5m/s,利用得當將會是一個非常巨大的進步。
目前ESP32-S2已經得到CircuitPython的支持,本文內容是我經過一番資料查詢和整理後做出的關於僅使用原生USB接口來燒錄 TinyUF2 bootloader 加 CircuitPython 的方法總結。
本文列舉的操作是在一款搭載 ESP32-S2-WROVER 模組的小型開發板ESP32-S2-Saola-1上進行的,操作系統為Windows10,其他不同型號的模組及開發板則需進行對應適配,在下就不另作描述了。
在開發板上接一個直連芯片的USB母口
- ESP32-S2-Saola-1開發板上並沒有提供直連ESP32-S2的USB接口,需要參考 ESP32-S2-WROVER模組技術規格書(PDF)中的管腳定義確定 USB OTG 從哪些管腳引出的,也可以直接看看外圍設計原理圖。


- 整一個四線的USB Type-C母口對應接口焊接上去,當然別的USB接口型號也類似。

將ESP32-S2設為 bootloader 引導模式
參考ESP32-S2官方API指南中的通過USB升級設備固件章節,通過原生USB接口與PC連接上後,按住 Boot 鍵的同時按一下 Reset 鍵,再鬆開 Boot 鍵,使ESP32-S2芯片處於 bootloader 引導模式,此時在windows設備管理器里即可以查看到新的USB串行設備。

通過esptool將TinyUF2燒錄進ESP32-S2的flash中
- 確保已經安裝了python3.4或更高版本,進入cmd命令提示符窗口,輸入:
pip install esptool
- 安裝上esptool後,再輸入以下命令擦除flash:
esptool -p com9 --after no_reset erase_flash
--after no_reset在此處比較關鍵,指定在esptool.py操作完成後,不重置芯片,而將芯片留在 bootloader 引導模式中,執行結果如下:
>esptool -p com9 --after no_reset erase_flash
esptool.py v3.1-dev
Serial port com9
Connecting...
Detecting chip type... ESP32-S2
Chip is ESP32-S2
Features: WiFi, ADC and temperature sensor calibration in BLK2 of efuse
Crystal is 40MHz
MAC: xx:xx:xx:xx:xx:xx
Uploading stub...
Running stub...
Stub running...
Erasing flash (this may take a while)...
Chip erase completed successfully in 16.3s
Staying in bootloader.
>
-
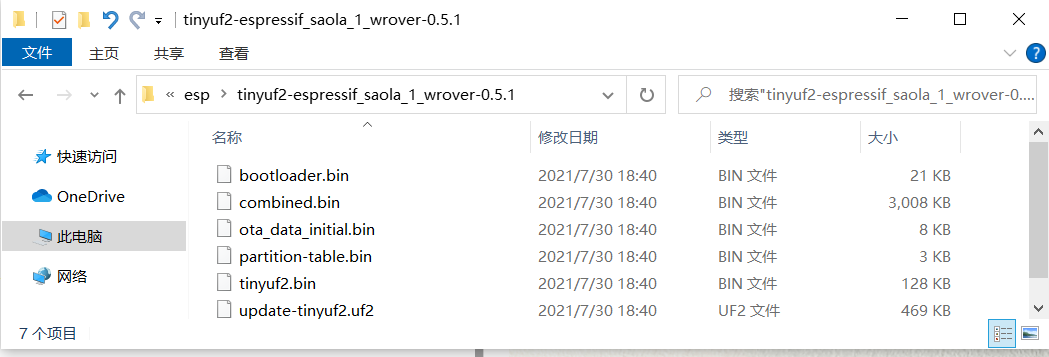
在此連接:github TinyUF2 下載對應開發板型號的 tinyuf2-espressif_saola_1_wrover-0.5.1.zip 文件到本地然後解壓。
-
在cmd中輸入指令進入此文件路徑中,例如:

請在
cd /d後正確輸入你所解壓到的文件夾的路徑
cd /d D:\Users\Wind\esp\tinyuf2-espressif_saola_1_wrover-0.5.1
- 參考TinyUF2的ESP32S2說明文檔在cmd中輸入如下指令將其燒錄進flash中:
esptool --chip esp32s2 -p com9 -b 460800 --before=default_reset --after=no_reset write_flash --flash_mode dio --flash_freq 80m --flash_size 4MB 0x8000 partition-table.bin 0xe000 ota_data_initial.bin 0x1000 bootloader.bin 0x2d0000 tinyuf2.bin
正確燒錄完成的話執行結果如下:
D:\Users\Wind\esp\tinyuf2-espressif_saola_1_wrover-0.5.1>esptool --chip esp32s2 -p com9  -b 460800 --before=default_reset --after=no_reset write_flash --flash_mode dio --flash_freq 80m --flash_size 4MB 0x8000 partition-table.bin 0xe000 ota_data_initial.bin 0x1000 bootloader.bin 0x2d0000 tinyuf2.bin
esptool.py v3.1
Serial port com9
Connecting...
Device PID identification is only supported on COM and /dev/ serial ports.

Chip is ESP32-S2
Features: WiFi, ADC and temperature sensor calibration in BLK2 of efuse
Crystal is 40MHz
MAC: 7c:df:a1:38:80:ca
Uploading stub...
Running stub...
Stub running...
Changing baud rate to 460800
Changed.
Configuring flash size...
Flash will be erased from 0x00008000 to 0x00008fff...
Flash will be erased from 0x0000e000 to 0x0000ffff...
Flash will be erased from 0x00001000 to 0x00006fff...
Flash will be erased from 0x002d0000 to 0x002effff...
Compressed 3072 bytes to 136...
Wrote 3072 bytes (136 compressed) at 0x00008000 in 0.1 seconds (effective 446.1 kbit/s)...
Hash of data verified.
Compressed 8192 bytes to 31...
Wrote 8192 bytes (31 compressed) at 0x0000e000 in 0.1 seconds (effective 645.0 kbit/s)...
Hash of data verified.
Compressed 20832 bytes to 13005...
Wrote 20832 bytes (13005 compressed) at 0x00001000 in 0.4 seconds (effective 464.5 kbit/s)...
Hash of data verified.
Compressed 130736 bytes to 82339...
Wrote 130736 bytes (82339 compressed) at 0x002d0000 in 1.5 seconds (effective 677.7 kbit/s)...
Hash of data verified.

Leaving...
Staying in bootloader.

D:\Users\Wind\esp\tinyuf2-espressif_saola_1_wrover-0.5.1>
- 按一下開發板上的RESET複位鍵,可以在本地設備管理器列表中查看到一個名為 SAOLA1RBOOT 的便攜存儲器,及一個名為 Adafruit UF2 Bootloader USB Device的磁盤驅動器


燒錄CircuitPython固件
1.前往CircuitPython官網ESP32相關下載頁面,所有CircuitPython支持的ESP32開發板都在這裡了。此處沒有我使用的ESP32-S2-Saola-1,但找到一個相似度極高的使用同一個ESP32-S2-WROVER模組的,即 NanoESP32 S2 w/WROVER 。
2.點擊CircuitPython 7.0.0-alpha.6中的DOWNLOAD .UF2 NOW下載到本地

3.最後一步很簡單,複製到 SAOLA1RBOOT 移動存儲器中。

4.待開發板自動複位後,可以在本地設備管理器列表中查看到與之前不同的便攜存儲器及磁盤驅動器,且新增了一個USB串行設備com端口。


5.通過支持CircuitPython的IDE例如Thonny即可在此開發板上進行編程。

各模式之間的切換方法
-
在燒錄好CircuitPython固件後,開發板重新上電或按一下Reset鍵,將進入CircuitPython模式。
-
按住 Boot 鍵的同時按一下 Reset 鍵,再鬆開 Boot 鍵,將進入 ESP32-S2 bootloader 模式,esptool在此模式下可對flash進行操作。
-
在0.5秒內快速按一下 Reset 鍵再按一下 Boot 鍵,將進入TinyUF2 bootloader 模式,支持UF2的固件可以由此燒錄進flash。

