1個類,2個方法,3句代碼,完成微信公眾號開發的極簡流程
- 2021 年 5 月 14 日
- 筆記
- .NET Core, Asp.Net, ASP.NET MVC, c#
概述
Senparc.Weixin SDK 是一直以來大部分 .NET 微信開發者的首選微信 SDK(以下統稱 SDK),SDK 目前已經支持了微信公眾號、小程序、企業微信、微信支付等絕大部分微信接口,為龐大的微信生態應用提供支撐。
隨着微信官方接口的不斷豐富以及各種,Sample 變得日益龐大,可以說「0基礎」去看目前 SDK Sample 是需要一些耐心的(當然這非常非常值得)。以至於也看到有開發者一見 Sample,就會誤以為 SDK 是一個很「重」的框架。
其實不然,下面我將以最簡潔的代碼:在全新 ASP.NET Core 項目里,只新建 1 個類、創建 2 個方法、添加 3 句代碼,就能完成公眾號的消息回復以及高級接口調用的演示,如果你已經使用過 SDK,整個過程只需要 5 分鐘。如果你還沒有接觸過微信開發,那麼請你留出 15 分鐘,瞬間「入門」微信開發,這將是一次性價比極高的探索!
開始開發
開發目標:在新的 ASP.NET Core 項目中,實現微信公眾號消息的回復,並調用高級接口
第一步:新建 ASP.NET Core 項目
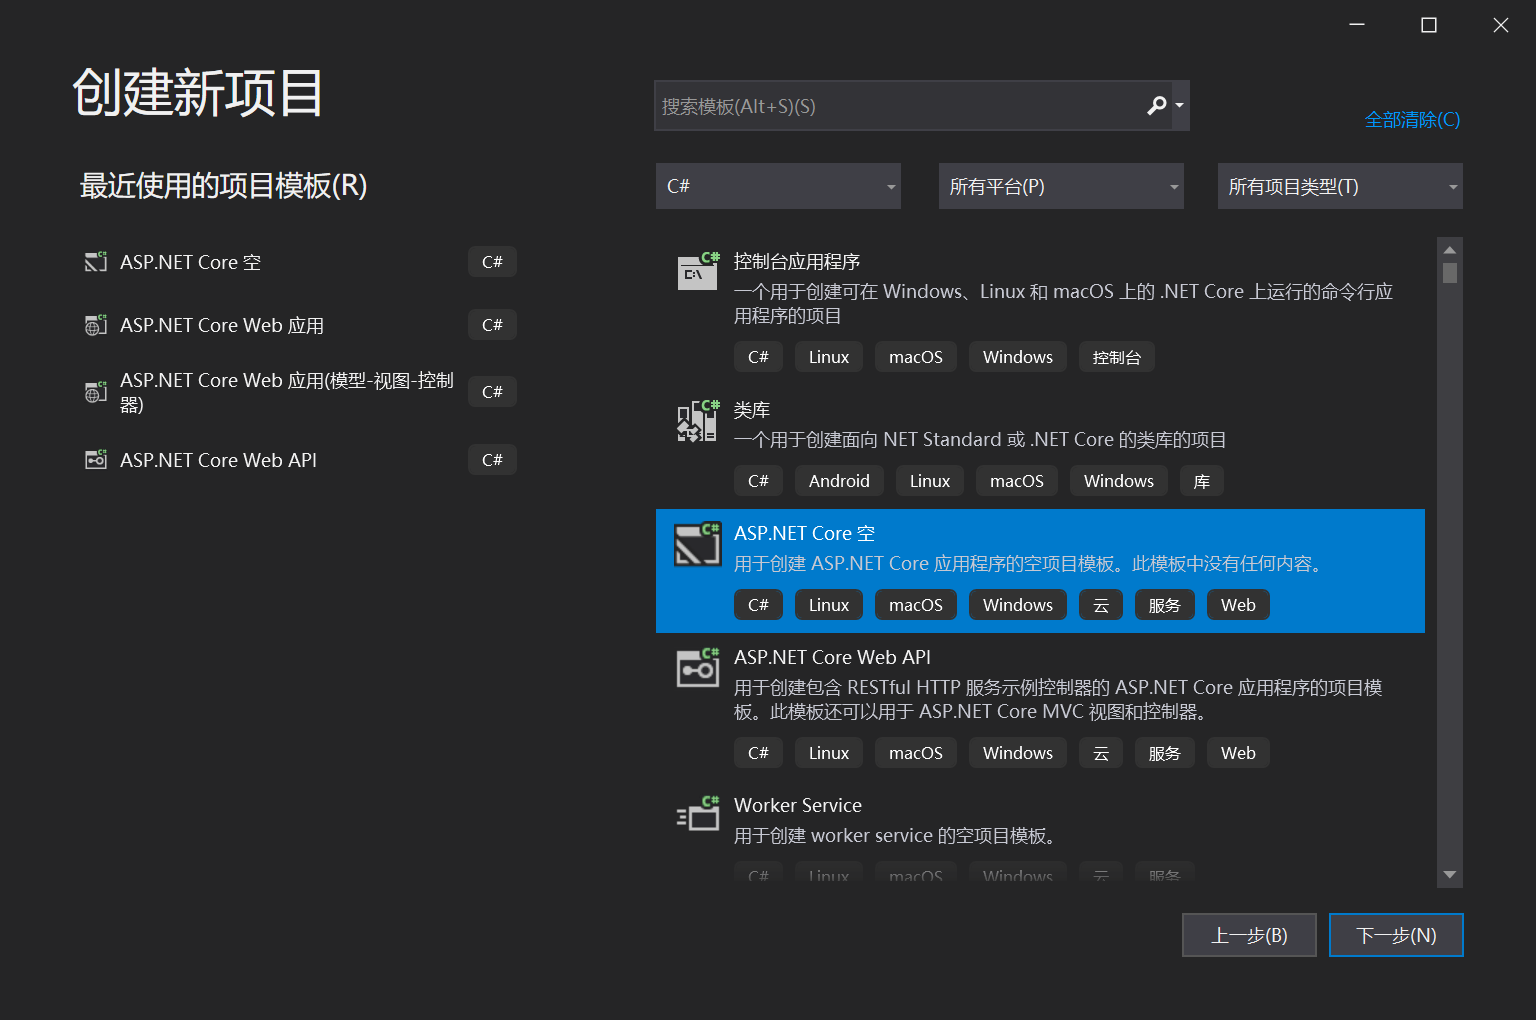
選擇代碼最簡單的【ASP.NET Core 空】項目模板
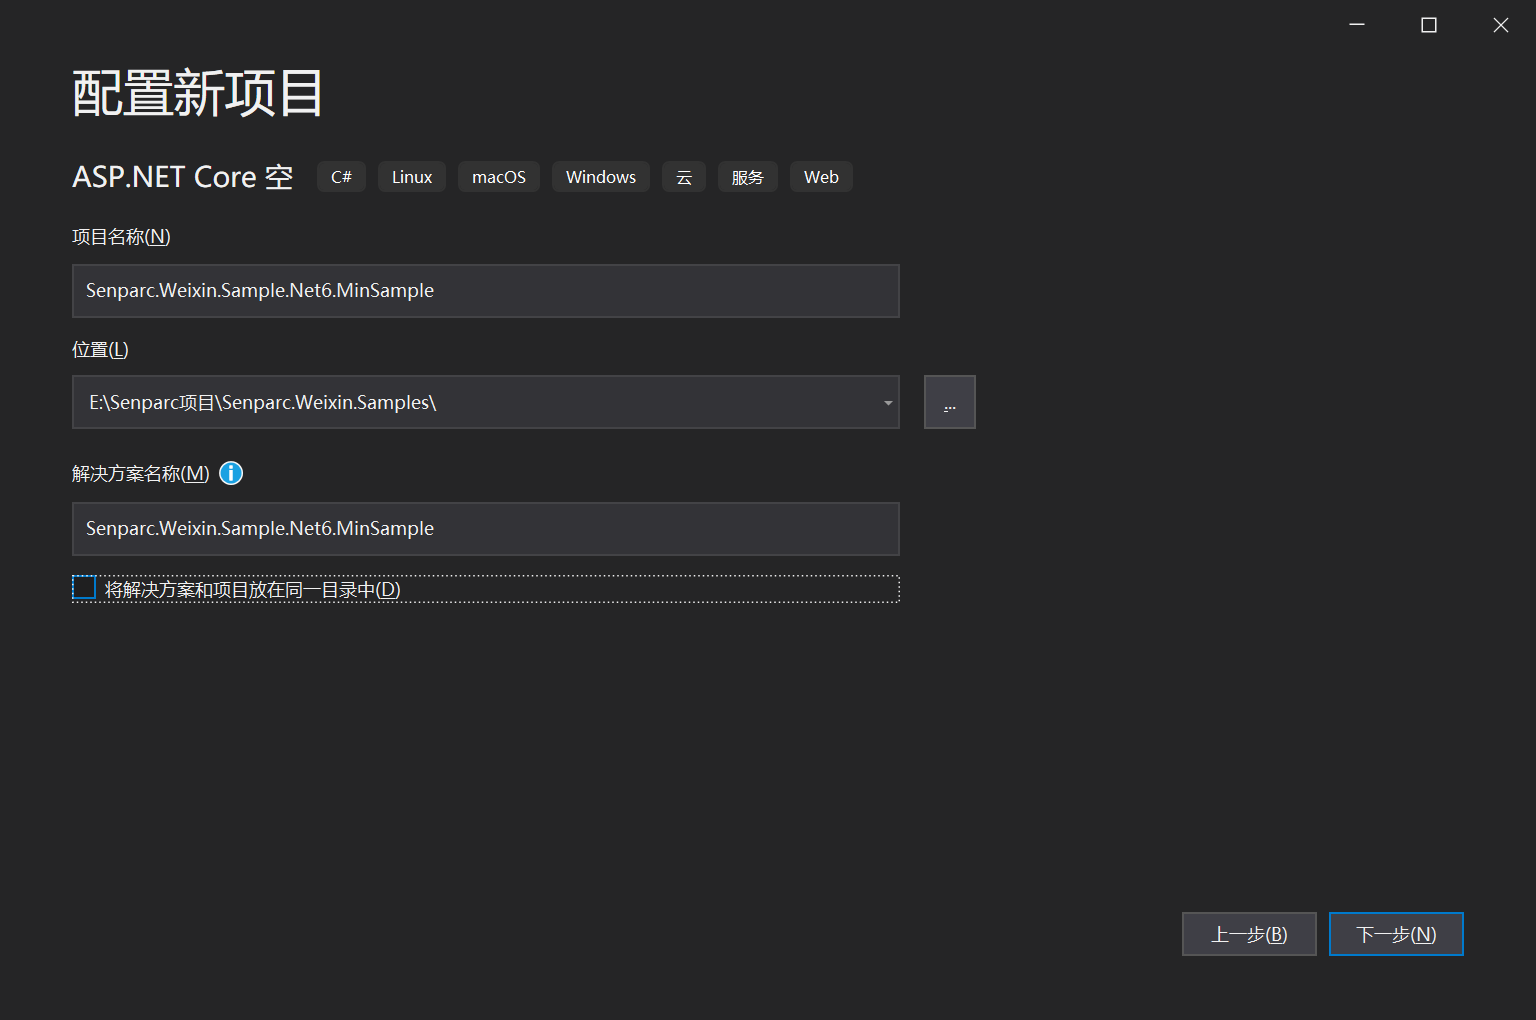
設置項目名稱和路徑
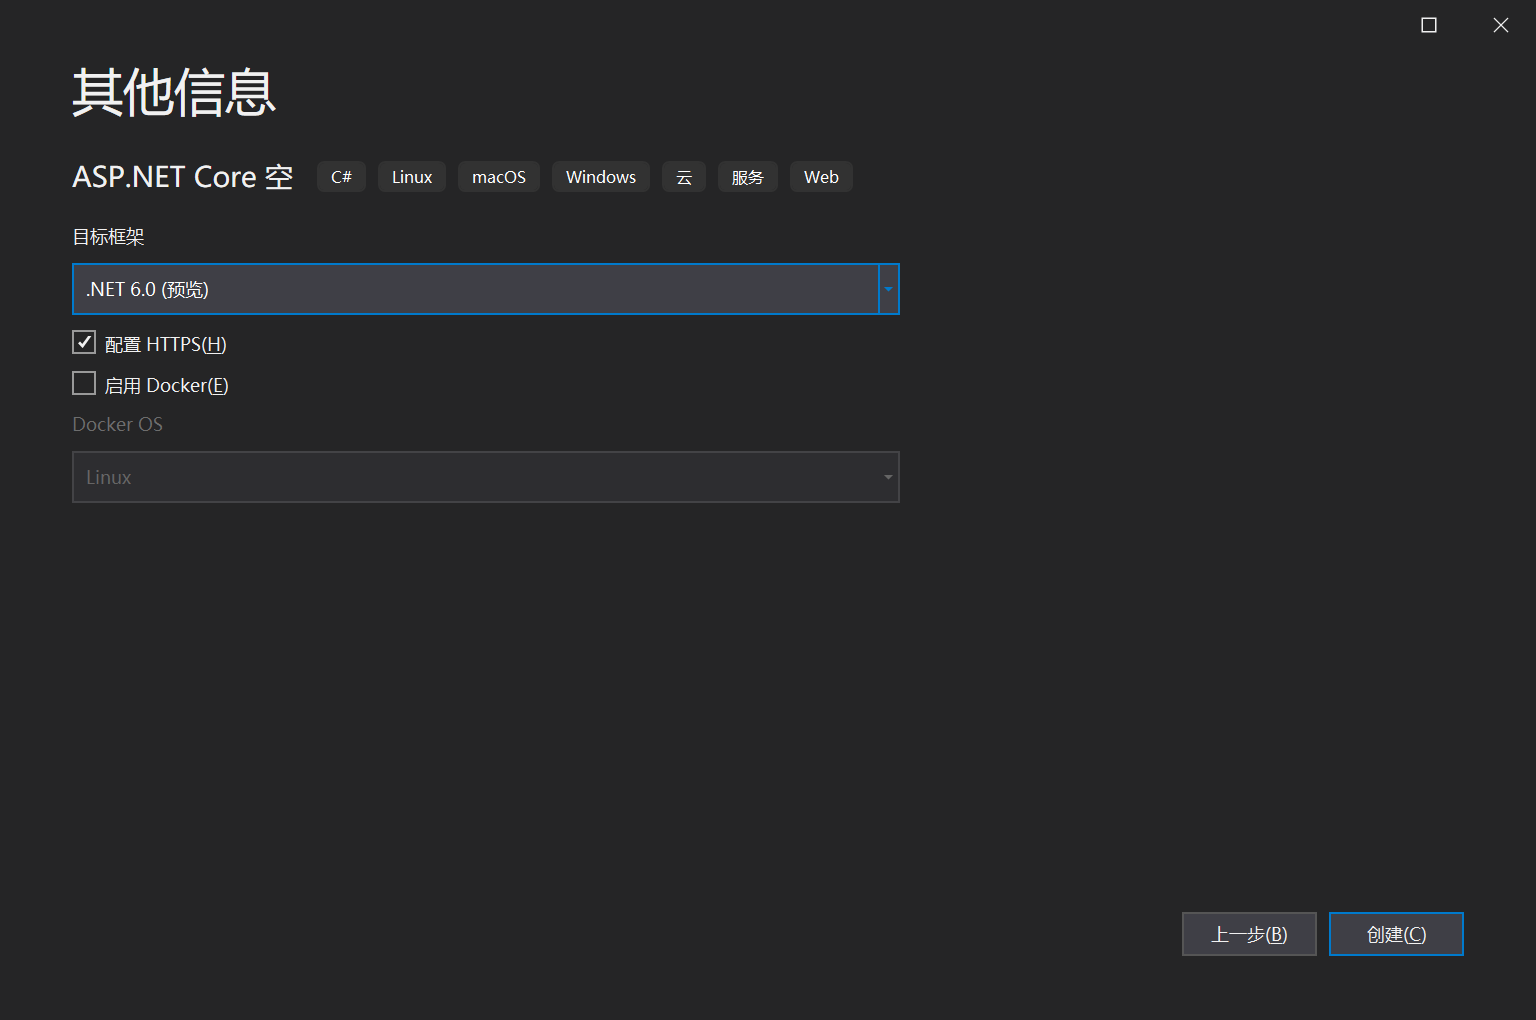
選擇.NET 6,也可以選擇其他版本
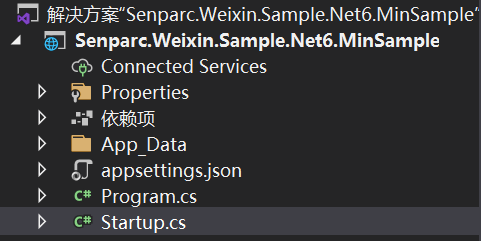
創建完成
安裝 Nuget 包:Senparc.Weixin.MP(對應公眾號)、Senparc.Weixin.MP.Middleware(對應公眾號消息中間件)。
PS:由於後者依賴前者,也可以只裝 Senparc.Weixin.MP.Middleware。
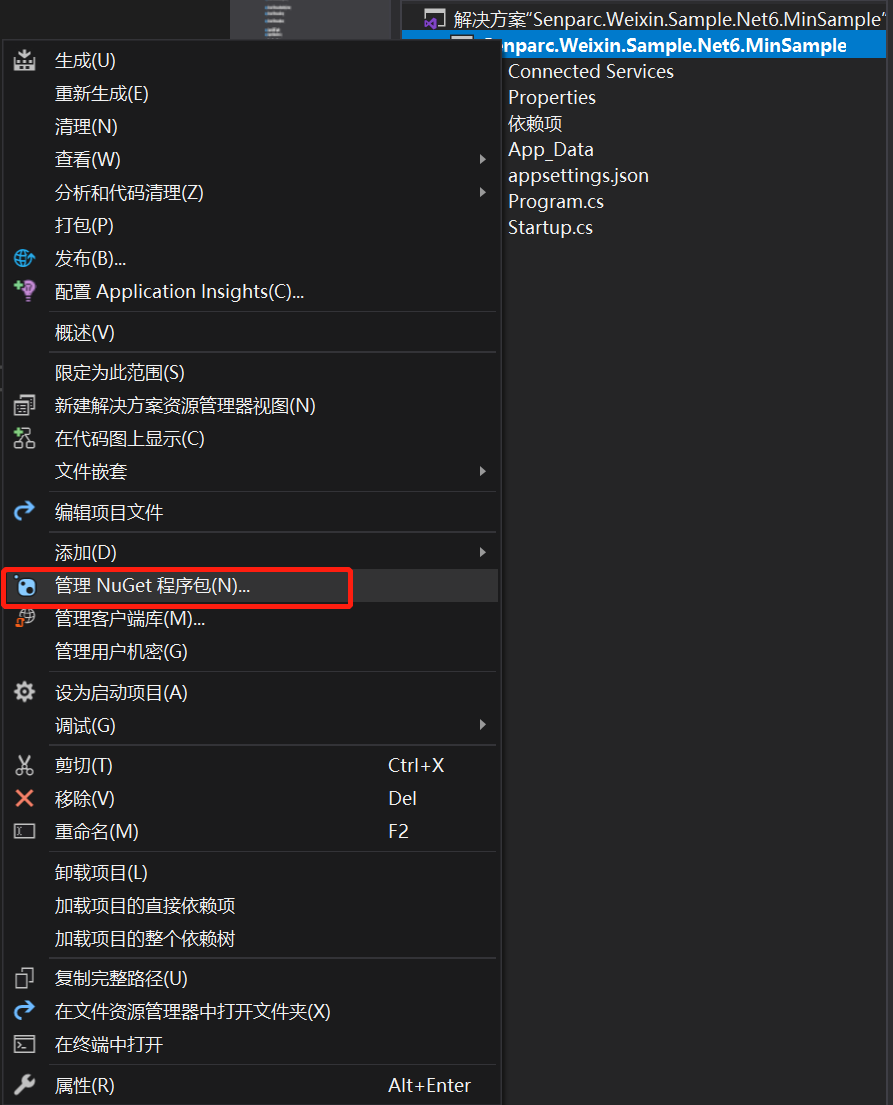
打開【管理 Nuget 工具包】窗口
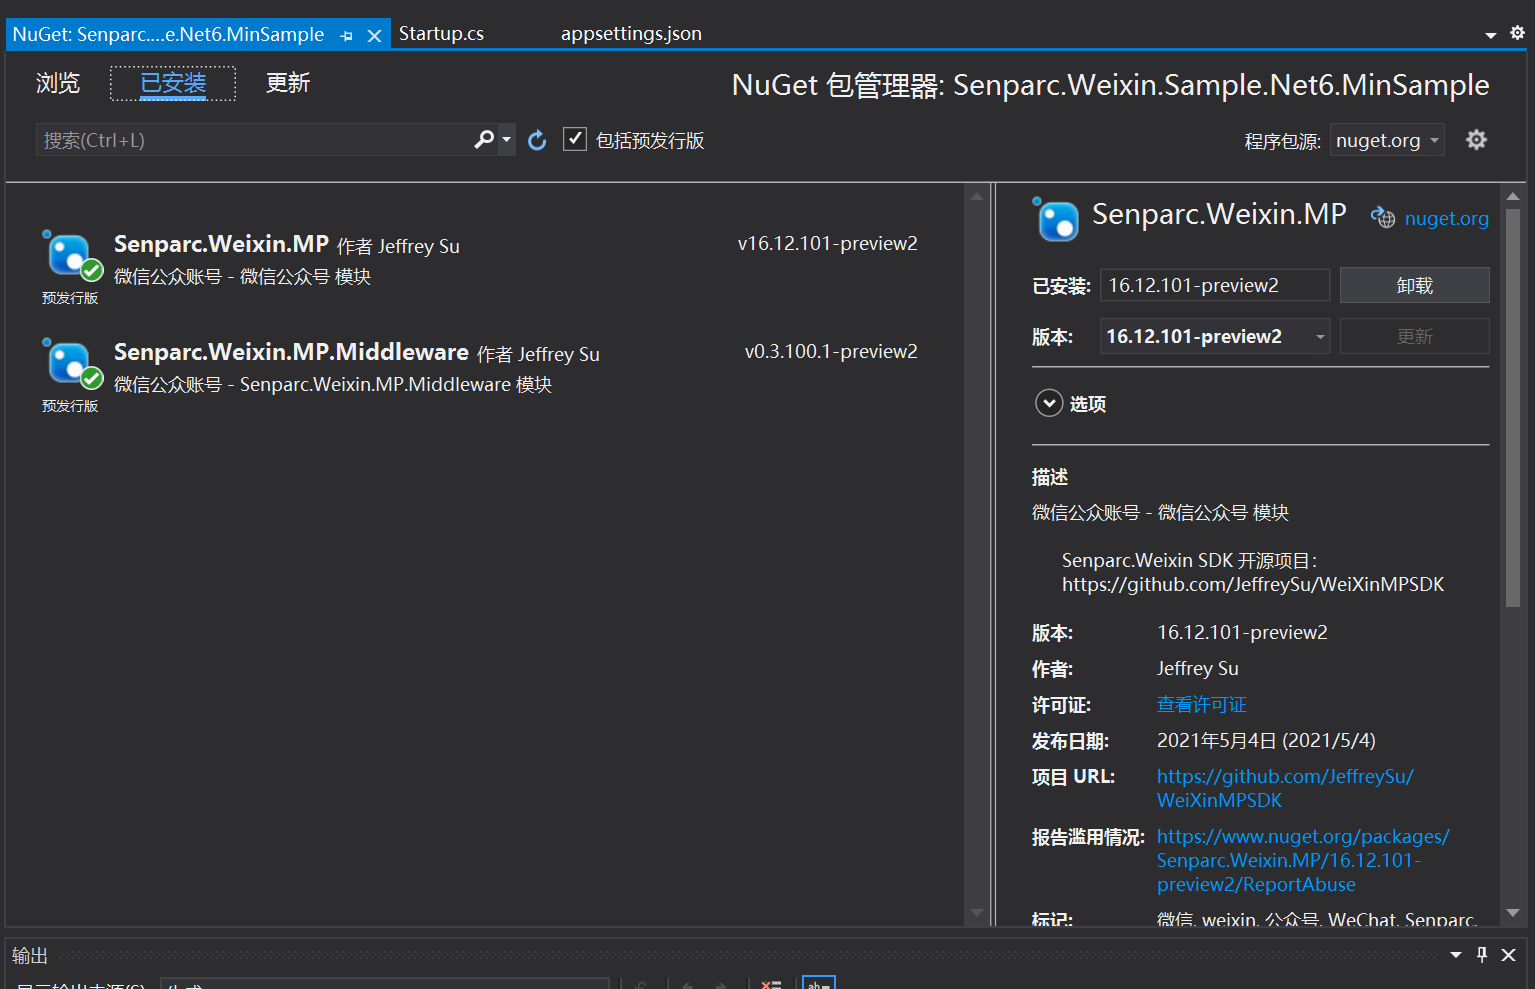
安裝 Senparc.Weixin.MP(本案例中可選)、Senparc.Weixin.MP.Middleware(本案例中必須)
默認的 startup.cs 文件,稍作修改,加入更多的依賴注入參數:
 1     public class Startup
 2     {
 3         public Startup(IConfiguration configuration)
 4         {
 5             Configuration = configuration;
 6         }
 7
 8         public IConfiguration Configuration { get; }
 9
10         public void ConfigureServices(IServiceCollection services)
11         {
12         }
13
14         public void Configure(IApplicationBuilder app, IWebHostEnvironment env,
15                 IOptions<SenparcSetting> senparcSetting, IOptions<SenparcWeixinSetting> senparcWeixinSetting)
16         {
17             if (env.IsDevelopment())
18             {
19                 app.UseDeveloperExceptionPage();
20             }
21
22             app.UseRouting();
23
24             app.UseEndpoints(endpoints =>
25             {
26                 endpoints.MapGet("/", async context =>
27                 {
28                     await context.Response.WriteAsync("Hello Senparc!");
29                 });
30             });
31         }
32     }
上述標紅的代碼為新增的代碼。
至此項目創建完成,下面將開始我們的極簡 Sample 創建之旅。
第二步:創建 CustomMessageHandler 類(1個類)
CustomMessageHandler 是處理用戶發送到微信公眾號的消息的統一事務中心,為了方便查看,CustomMessageHandler 直接添加在 startup.cs 中:
    /// <summary>
    /// 自定義消息處理器
    /// </summary>
    public class CustomMessageHandler : MessageHandler<DefaultMpMessageContext>
    {
        public CustomMessageHandler(Stream inputStream, PostModel postModel, int maxRecordCount = 0, IServiceProvider serviceProvider = null)
            : base(inputStream, postModel, maxRecordCount, false, null, serviceProvider)
        {
        }
    }
第三步:配置回復消息並調用高級接口(2個方法)
在 CustomMessageHandler 內添加2個方法,分別處理用戶發送過來的文字消息,以及還沒有進行自定義的其他消息類型:
 1         /// <summary>
 2         /// 回復以文字形式發送的信息(可選)
 3         /// </summary>
 4         public override async Task<IResponseMessageBase> OnTextOrEventRequestAsync(RequestMessageText requestMessage)
 5         {
 6             var responseMessage = base.CreateResponseMessage<ResponseMessageText>();
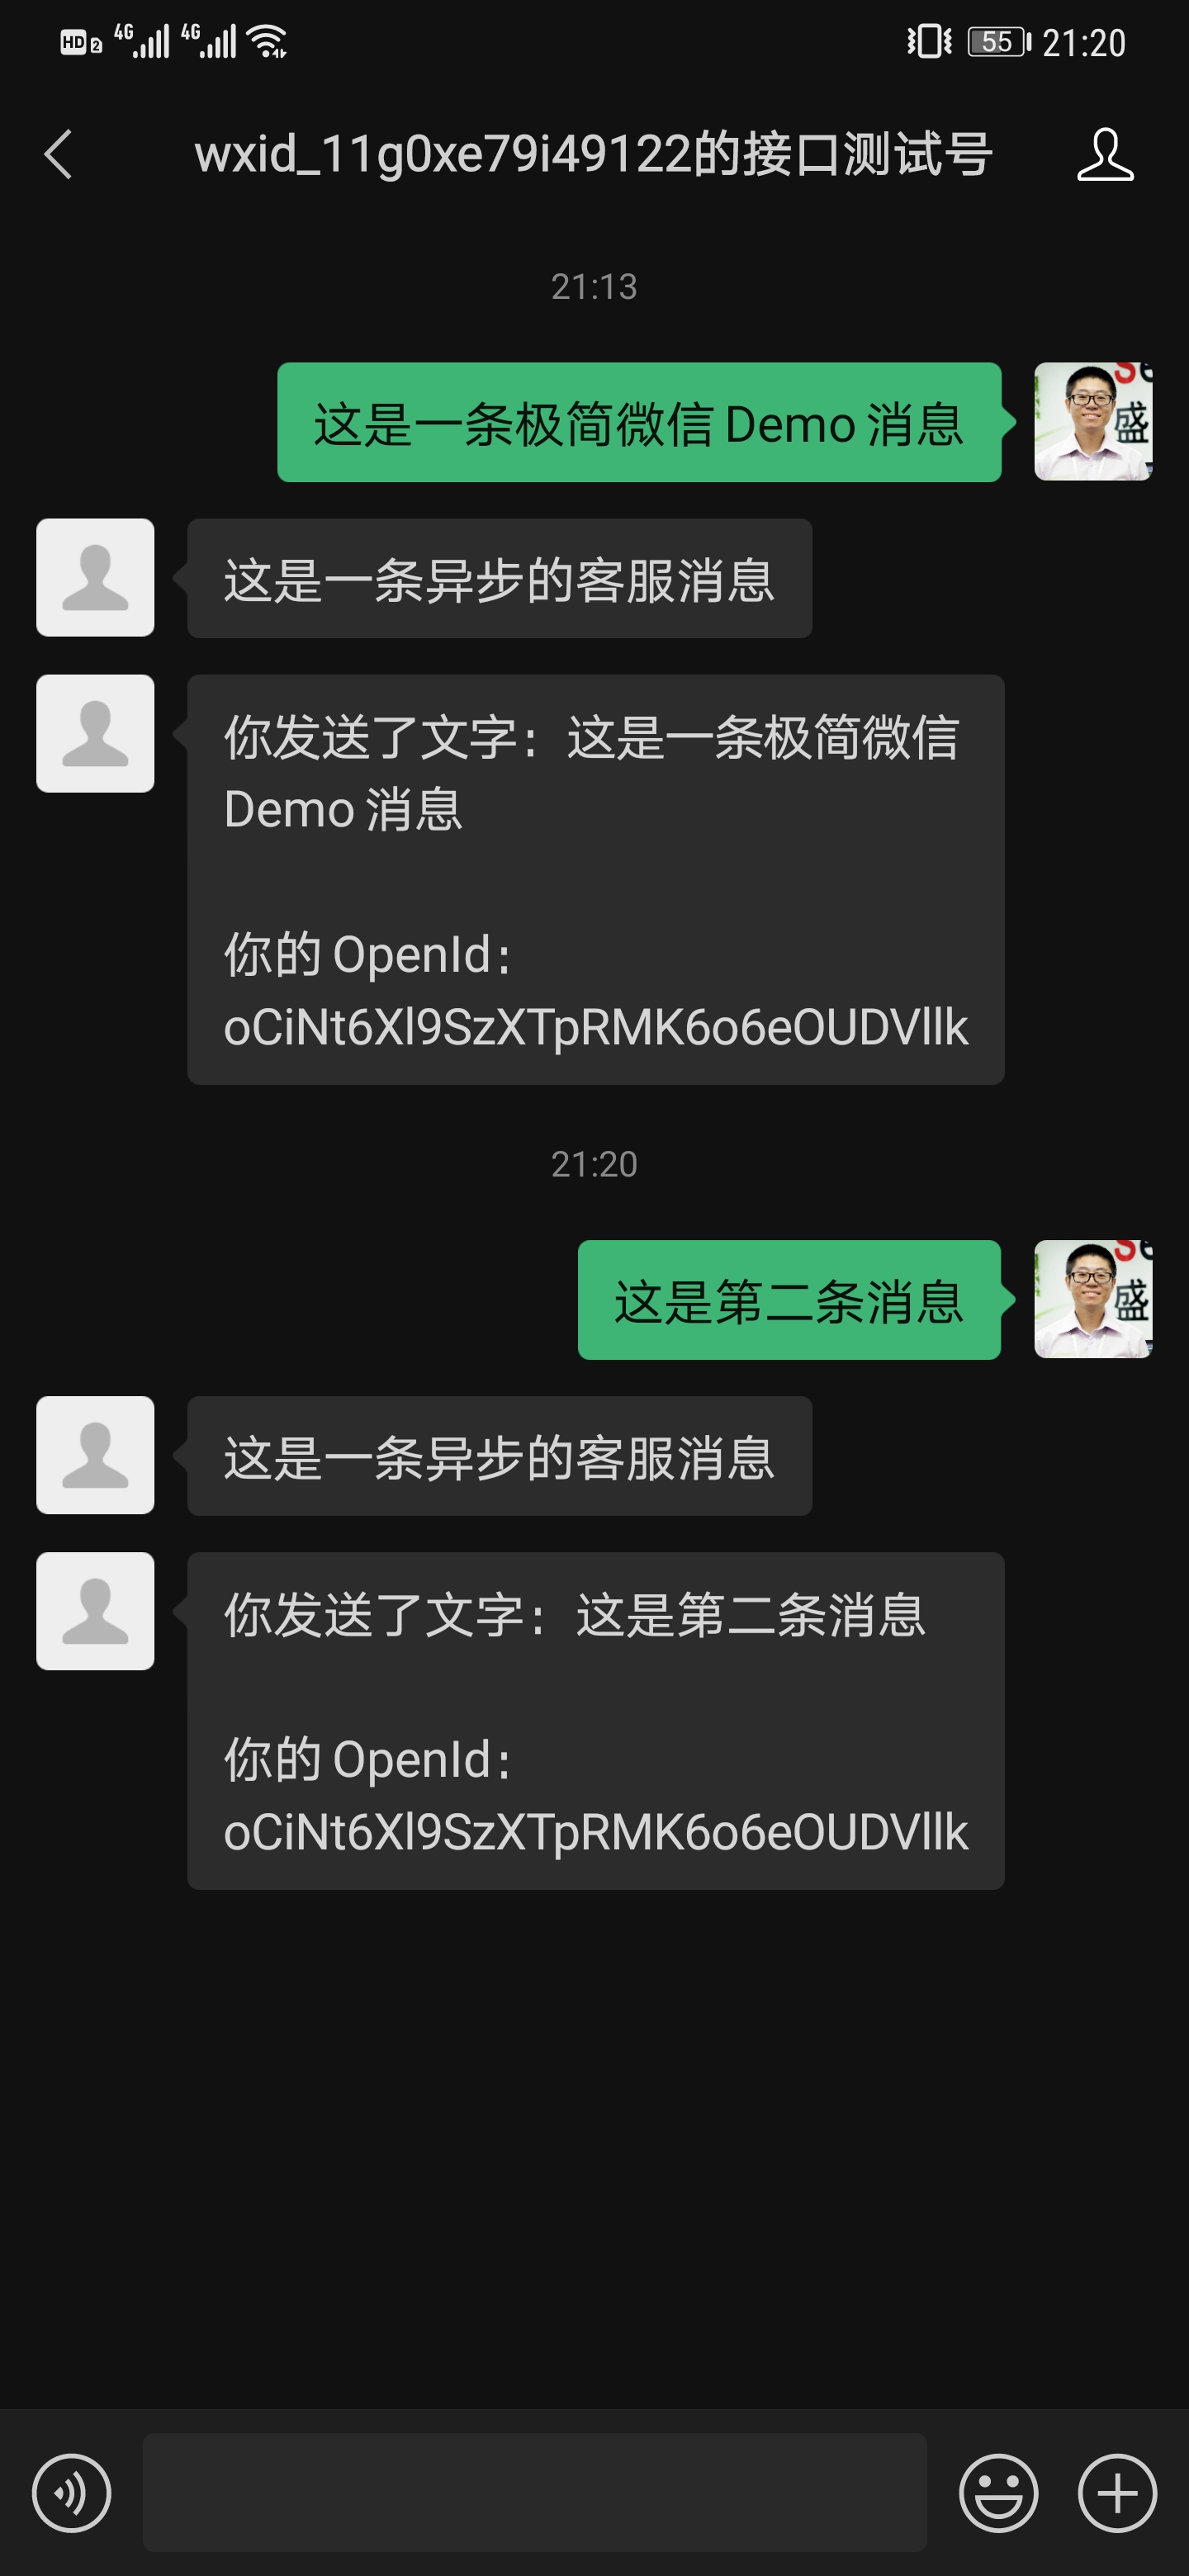
 7             await MP.AdvancedAPIs.CustomApi.SendTextAsync(Config.SenparcWeixinSetting.MpSetting.WeixinAppId, OpenId, $"這是一條異步的客服消息");//注意:只有測試號或部署到正式環境的正式服務號可用此接口
 8             responseMessage.Content = $"你發送了文字:{requestMessage.Content}\r\n\r\n你的OpenId:{OpenId}";//以文字類型消息回復
 9             return responseMessage;
10         }
11
12         /// <summary>
13         /// 默認消息
14         /// </summary>
15         public override IResponseMessageBase DefaultResponseMessage(IRequestMessageBase requestMessage)
16         {
17             var responseMessage = base.CreateResponseMessage<ResponseMessageText>();
18             responseMessage.Content = $"歡迎來到我的公眾號!當前時間:{SystemTime.Now}";//沒有自定義的消息統一回復固定消息
19             return responseMessage;
20         }
第四步:添加註冊和配置代碼(3句代碼)
說明:3 句代碼都只需要在 Startup.cs 中加入,因此整個過程不需要動用或者新建任何其他文件。
第 1 句:註冊緩存和 Senparc 微信服務:
        public void ConfigureServices(IServiceCollection services)
        {
            services.AddMemoryCache()//使用本地緩存必須添加
                    .AddSenparcWeixinServices(Configuration);//Senparc.Weixin 註冊(必須)
        }
第 2 句:註冊 Senparc.Weixin 及基礎庫;
第 3 句:使用消息中間件註冊 CustomMessageHandler:
 1         public void Configure(IApplicationBuilder app, IWebHostEnvironment env,
 2                 IOptions<SenparcSetting> senparcSetting, IOptions<SenparcWeixinSetting> senparcWeixinSetting)
 3         {
 4             if (env.IsDevelopment())
 5             {
 6                 app.UseDeveloperExceptionPage();
 7             }
 8
 9             //註冊 Senparc.Weixin 及基礎庫
10             var registerService = app.UseSenparcGlobal(env, senparcSetting.Value, _ => { }, true)
11                                      .UseSenparcWeixin(senparcWeixinSetting.Value, weixinRegister => weixinRegister.RegisterMpAccount(senparcWeixinSetting.Value));
12
13             app.UseRouting();
14
15             //使用中間件註冊 MessageHandler,指定 CustomMessageHandler 為自定義處理方法
16             app.UseMessageHandlerForMp("/WeixinAsync",
17                 (stream, postModel, maxRecordCount, serviceProvider) => new CustomMessageHandler(stream, postModel, maxRecordCount, serviceProvider),
18                 options =>
19                 {
20                     options.AccountSettingFunc = context => senparcWeixinSetting.Value;
21                 });
22
23             app.UseEndpoints(endpoints =>
24             {
25                 endpoints.MapGet("/", async context =>
26                 {
27                     await context.Response.WriteAsync("Open /WeixinAsync to connect WeChat MessageHandler");//首頁默認顯示
28                 });
29             });
30         }
其中,/WeixinAsync 是可以自定義的消息 URL 路徑。
第五步:配對微信賬號信息
微信公眾號的配置都可以統一在 appsettings.json 中配置,只需要添加 2 個節點信息,修改如下:
{
  "Logging": {
    "LogLevel": {
      "Default": "Information",
      "Microsoft": "Warning",
      "Microsoft.Hosting.Lifetime": "Information"
    }
  },
  "AllowedHosts": "*",

  //CO2NET 設置
  "SenparcSetting": {
    "IsDebug": true,
    "DefaultCacheNamespace": "DefaultCache"
  },
  //Senparc.Weixin SDK 設置
  "SenparcWeixinSetting": {
    "IsDebug": true,

    "Token": "YourToken",
    "EncodingAESKey": "EncodingAESKey",
    "WeixinAppId": "YourAppId",
    "WeixinAppSecret": "YourAppSecret"
  }
}
完成。
運行
直接運行當前項目,即可打開首頁:
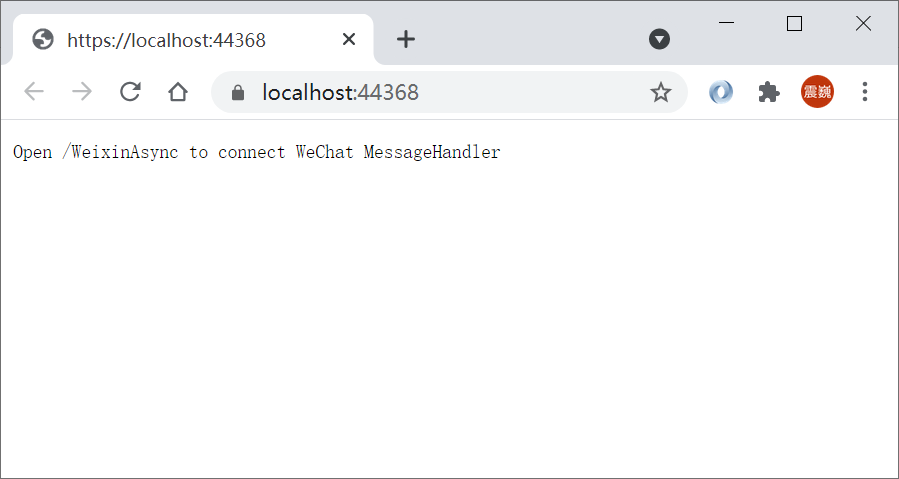
按照提示,打開 路徑 /WeixinAsync,即可看到測試成功信息:
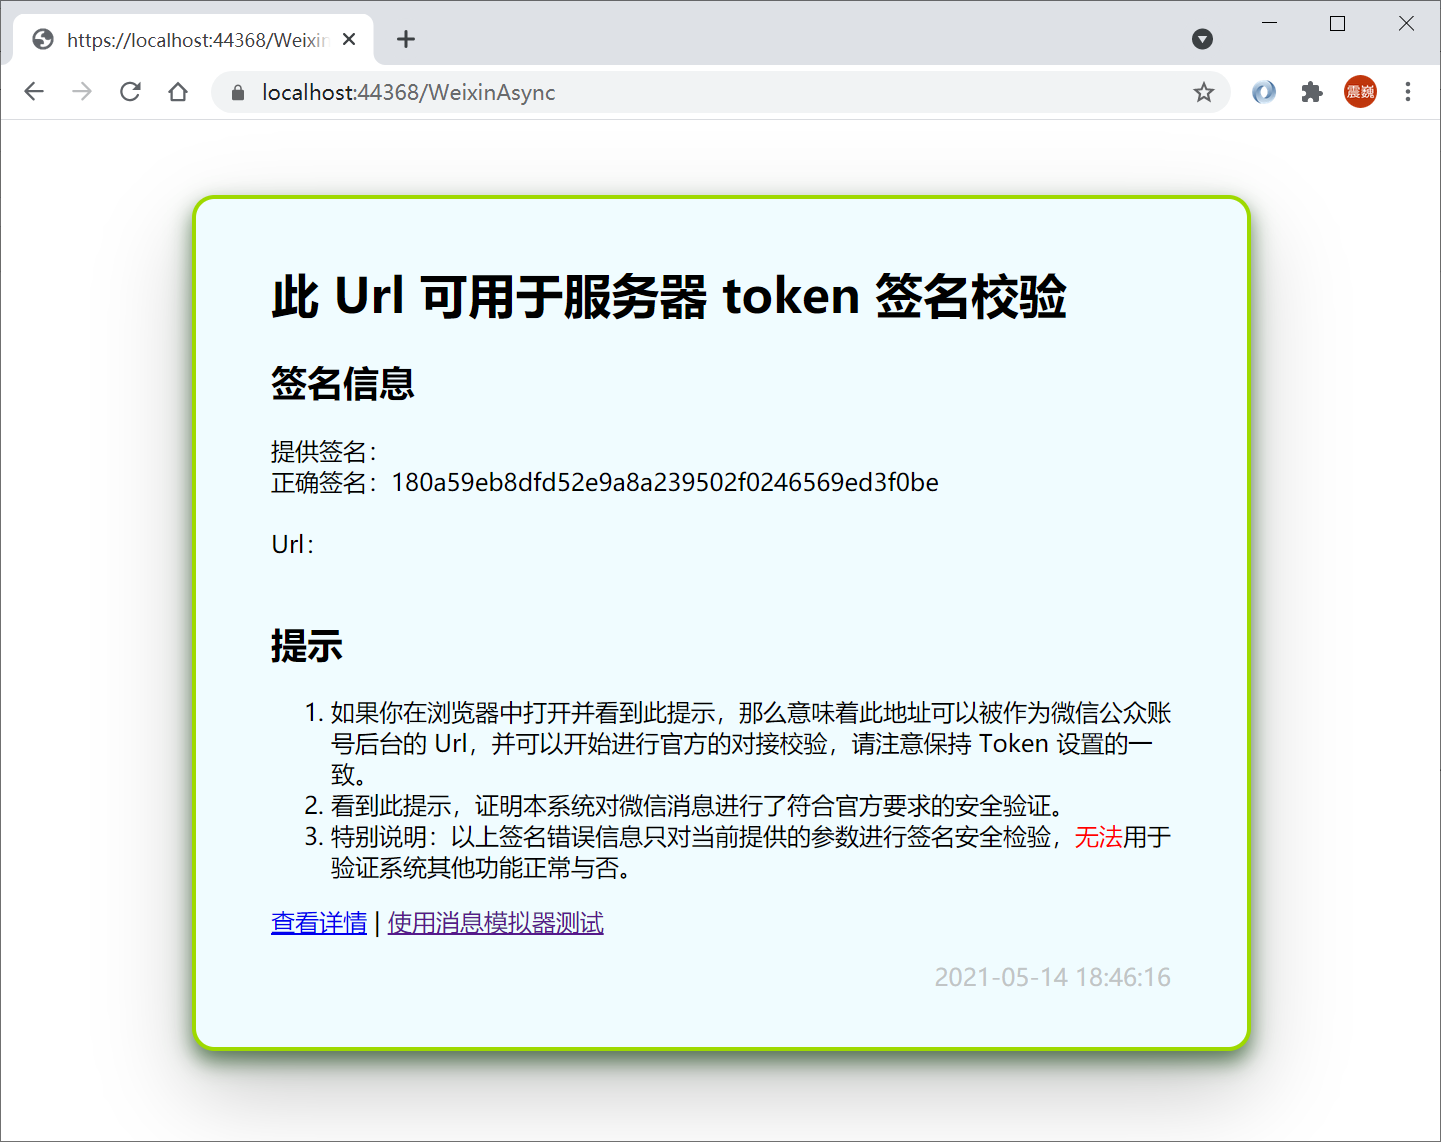
測試
將程序部署至公網(或在本地進行簡單的配置*)後,在公眾號後台配置 URL、Token等信息,即可輕鬆獲得所有驗證、消息對接的能力。當我們發送消息時,如下所示:
*那麼問題來了:我沒有服務器,也沒有註冊微信公眾號,如何在本地完成以上所有上線操作和測試呢?
——請期待下一篇:《在開發環境內網穿透測試微信公眾號》。
源碼
本文代碼已經上傳至
GitHub://github.com/JeffreySu/Senparc.Weixin.Samples/tree/main/Senparc.Weixin.Sample.Net6.MinSample
Gitee://gitee.com/JeffreySu/Senparc.Weixin.Samples/tree/main/Senparc.Weixin.Sample.Net6.MinSample

