Springboot源碼分析之EnableAspectJAutoProxy
- 2019 年 10 月 3 日
- 筆記
摘要:
Spring Framwork的兩大核心技術就是IOC和AOP,AOP在Spring的產品線中有着大量的應用。如果說反射是你通向高級的基礎,那麼代理就是你站穩高級的底氣。AOP的本質也就是大家所熟悉的CGLIB動態代理技術,在日常工作中想必或多或少都用過但是它背後的秘密值得我們去深思。本文主要從Spring AOP運行過程上,結合一定的源碼整體上介紹Spring AOP的一個運行過程。知其然,知其所以然,才能更好的駕馭這門核心技術。
@Target({ElementType.TYPE}) @Retention(RetentionPolicy.RUNTIME) @Documented @Import({AspectJAutoProxyRegistrar.class}) public @interface EnableAspectJAutoProxy { //表明該類採用CGLIB代理還是使用JDK的動態代理 boolean proxyTargetClass() default false; /** * @since 4.3.1 代理的暴露方式:解決內部調用不能使用代理的場景 默認為false表示不處理 * true:這個代理就可以通過AopContext.currentProxy()獲得這個代理對象的一個副本(ThreadLocal裏面),從而我們可以很方便得在Spring框架上下文中拿到當前代理對象(處理事務時很方便) * 必須為true才能調用AopContext得方法,否則報錯:Cannot find current proxy: Set 'exposeProxy' property on Advised to 'true' to make it available. */ boolean exposeProxy() default false; }所有的EnableXXX驅動技術都得看他的@Import,所以上面最重要的是這一句@Import(AspectJAutoProxyRegistrar.class),下面看看它
class AspectJAutoProxyRegistrar implements ImportBeanDefinitionRegistrar { AspectJAutoProxyRegistrar() { } public void registerBeanDefinitions(AnnotationMetadata importingClassMetadata, BeanDefinitionRegistry registry) { //註冊了一個基於註解的自動代理創建器 AopConfigUtils.registerAspectJAnnotationAutoProxyCreatorIfNecessary(registry); AnnotationAttributes enableAspectJAutoProxy = AnnotationConfigUtils.attributesFor(importingClassMetadata, EnableAspectJAutoProxy.class); if (enableAspectJAutoProxy != null) { //表示強制指定了要使用CGLIB if (enableAspectJAutoProxy.getBoolean("proxyTargetClass")) { AopConfigUtils.forceAutoProxyCreatorToUseClassProxying(registry); } //強制暴露Bean的代理對象到AopContext if (enableAspectJAutoProxy.getBoolean("exposeProxy")) { AopConfigUtils.forceAutoProxyCreatorToExposeProxy(registry); } } } }AspectJAutoProxyRegistrar是一個項容器註冊自動代理創建器
@Nullable public static BeanDefinition registerAspectJAnnotationAutoProxyCreatorIfNecessary( BeanDefinitionRegistry registry, @Nullable Object source) { return registerOrEscalateApcAsRequired(AnnotationAwareAspectJAutoProxyCreator.class, registry, source); }說明:spring容器的註解代理創建器就是AnnotationAwareAspectJAutoProxyCreator
@Nullable private static BeanDefinition registerOrEscalateApcAsRequired(Class<?> cls, BeanDefinitionRegistry registry, @Nullable Object source) { Assert.notNull(registry, "BeanDefinitionRegistry must not be null"); //這裡如果我們自己定義了這樣一個自動代理創建器就是用我們自定義的 if (registry.containsBeanDefinition("org.springframework.aop.config.internalAutoProxyCreator")) { BeanDefinition apcDefinition = registry.getBeanDefinition("org.springframework.aop.config.internalAutoProxyCreator"); if (!cls.getName().equals(apcDefinition.getBeanClassName())) { int currentPriority = findPriorityForClass(apcDefinition.getBeanClassName()); /** *用戶註冊的創建器,必須是InfrastructureAdvisorAutoProxyCreator *AspectJAwareAdvisorAutoProxyCreator,AnnotationAwareAspectJAutoProxyCreator之一 */ int requiredPriority = findPriorityForClass(cls); if (currentPriority < requiredPriority) { apcDefinition.setBeanClassName(cls.getName()); } } return null; } //若用戶自己沒有定義,那就用默認的AnnotationAwareAspectJAutoProxyCreator RootBeanDefinition beanDefinition = new RootBeanDefinition(cls); beanDefinition.setSource(source); //此處注意,增加了一個屬性:最高優先級執行,後面會和@Async註解一起使用的時候起關鍵作用 beanDefinition.getPropertyValues().add("order", Ordered.HIGHEST_PRECEDENCE); beanDefinition.setRole(BeanDefinition.ROLE_INFRASTRUCTURE); registry.registerBeanDefinition(AUTO_PROXY_CREATOR_BEAN_NAME, beanDefinition); return beanDefinition; }我們就成功的注入了一個Bean:AnnotationAwareAspectJAutoProxyCreator 基於註解的自動代理創建器
Spring中自動創建代理器

由此可見,Spring使用BeanPostProcessor讓自動生成代理。基於BeanPostProcessor的自動代理創建器的實現類,將根據一些規則在容器實例化Bean時為匹配的Bean生成代理實例。
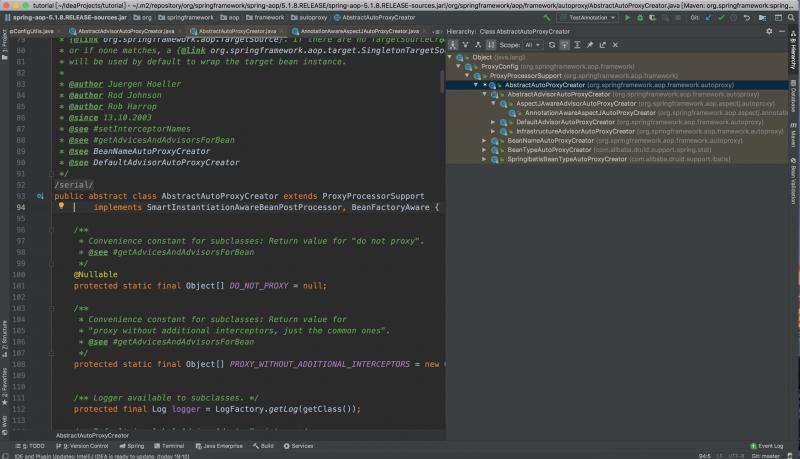
AbstractAutoProxyCreator是對自動代理創建器的一個抽象實現。最重要的是,它實現了SmartInstantiationAwareBeanPostProcessor接口,因此會介入到Spring IoC容器Bean實例化的過程。
SmartInstantiationAwareBeanPostProcessor繼承InstantiationAwareBeanPostProcessor所以它最主要的 職責是在bean的初始化前,先會執行所有的InstantiationAwareBeanPostProcessor#postProcessBeforeInstantiation,誰第一個返回了不為null的Bean,後面就都不會執行了 。然後會再執行BeanPostProcessor#postProcessAfterInitialization
protected Object getEarlyBeanReference(String beanName, RootBeanDefinition mbd, Object bean) { Object exposedObject = bean; if (!mbd.isSynthetic() && hasInstantiationAwareBeanPostProcessors()) { for (BeanPostProcessor bp : getBeanPostProcessors()) { if (bp instanceof SmartInstantiationAwareBeanPostProcessor) { SmartInstantiationAwareBeanPostProcessor ibp = (SmartInstantiationAwareBeanPostProcessor) bp; exposedObject = ibp.getEarlyBeanReference(exposedObject, beanName); } } } return exposedObject; }說明:這個方法是spring的三級緩存中的其中一環,當你調用Object earlySingletonReference = getSingleton(beanName, false);時候就會觸發,其實還有一個地方exposedObject = initializeBean(beanName, exposedObject, mbd);也會觸發導致返回一個代理對象。
protected Object initializeBean(final String beanName, final Object bean, @Nullable RootBeanDefinition mbd) { if (System.getSecurityManager() != null) { AccessController.doPrivileged((PrivilegedAction<Object>) () -> { invokeAwareMethods(beanName, bean); return null; }, getAccessControlContext()); } else { invokeAwareMethods(beanName, bean); } Object wrappedBean = bean; if (mbd == null || !mbd.isSynthetic()) { wrappedBean = applyBeanPostProcessorsBeforeInitialization(wrappedBean, beanName); } try { invokeInitMethods(beanName, wrappedBean, mbd); } catch (Throwable ex) { throw new BeanCreationException( (mbd != null ? mbd.getResourceDescription() : null), beanName, "Invocation of init method failed", ex); } if (mbd == null || !mbd.isSynthetic()) { wrappedBean = applyBeanPostProcessorsAfterInitialization(wrappedBean, beanName); } return wrappedBean; }強調: 這2個地方雖然都有後置增強的作用,但是@Async所使用的AsyncAnnotationBeanPostProcessor不是SmartInstantiationAwareBeanPostProcessor的實現類,所以此處會導致@Transactional和@Async處理循環依賴時候的不一致性。對於循環依賴後續會有單獨章節進行分享。
AbstractAdvisorAutoProxyCreator
如何創建代理對象後續文章在進行分析。

