基於Groovy搭建Ngrinder腳本調試環境
- 2019 年 10 月 31 日
- 筆記
介紹
最近公司搭建了一套壓力測試平台,引用的是開源的項目 Ngrinder,做了二次開發,在腳本管理方面,去掉官方的SVN,引用的是Git,其他就是做了熔斷處理等。
對技術一向充滿熱情的我,必須先來擁抱下傳說中的壓測平台。
一、開發腳本環境配置項:
安裝JDK1.7+,Git,Maven
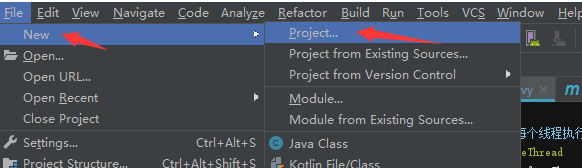
二、新建一個maven項目


三、創建一個groovy腳本TestRunner.groovy,添加以下內容
這個腳本寫的就是,向服務端發送Json 格式請求,比較簡單,未涉及到上下文參數化,混合場景配置比例,方法介紹等,到時需要再寫2篇專題
import HTTPClient.HTTPResponse import HTTPClient.NVPair import net.grinder.plugin.http.HTTPPluginControl import net.grinder.plugin.http.HTTPRequest import net.grinder.script.GTest import net.grinder.scriptengine.groovy.junit.GrinderRunner import net.grinder.scriptengine.groovy.junit.annotation.BeforeProcess import net.grinder.scriptengine.groovy.junit.annotation.BeforeThread import org.junit.Test import org.junit.runner.RunWith import static net.grinder.script.Grinder.grinder import static org.hamcrest.Matchers.is import static org.junit.Assert.assertThat // 每個測試類加這註解 @RunWith(GrinderRunner) class TestRunner{ public static GTest test public static HTTPRequest request // 在每個進程啟動前執行 @BeforeProcess static void beforeProcess() { HTTPPluginControl.getConnectionDefaults().timeout = 8000 test = new GTest(1, "查詢貸款數量") request = new HTTPRequest() grinder.logger.info("before process."); } // 在每個線程執行前執行 @BeforeThread void beforeThread() { //監聽目標方法,如果打標不會生成該方法的報告 test.record(this,"loanCountTest"); // 延時生成報告 grinder.statistics.delayReports=true; grinder.logger.info("before thread."); } private NVPair[] headers() { return [ new NVPair("Content-type", "application/json;charset=UTF-8") ]; } @Test void loanCountTest(){ def json = "{"uid": "1_1154249"}"; HTTPResponse result = request.POST("http://hdai.com/query-loaning-count",json.getBytes(), headers()); grinder.logger.info(result.getText()); if (result.statusCode == 301 || result.statusCode == 302) { grinder.logger.warn("Warning. The response may not be correct. The response code was {}.", result.statusCode); } else { assertThat("判斷響應結果:",result.statusCode, is(200)); } } }
四、拷貝以下內容到新建的 pom.xml
<project xmlns="http://maven.apache.org/POM/4.0.0" xmlns:xsi="http://www.w3.org/2001/XMLSchema-instance" xsi:schemaLocation="http://maven.apache.org/POM/4.0.0 http://maven.apache.org/xsd/maven-4.0.0.xsd"> <modelVersion>4.0.0</modelVersion> <groupId>ngrinder</groupId> <artifactId>loan-xx-perf</artifactId> <version>0.0.1</version> <properties> <ngrinder.version>3.4</ngrinder.version> <maven.compiler.source>1.7</maven.compiler.source> <maven.compiler.target>1.7</maven.compiler.target> <project.build.sourceEncoding>UTF-8</project.build.sourceEncoding> </properties> <repositories> <repository> <id>ngrinder.maven.repo</id> <url>https://github.com/naver/ngrinder/raw/ngrinder.maven.repo/releases</url> </repository> <repository> <id>ymm-central-cache</id> <url>http://maven.aliyun.com/nexus/service/local/repositories/central/content/</url> </repository> <repository> <id>aliyun</id> <url>http://maven.aliyun.com/nexus/content/groups/public/</url> </repository> </repositories> <dependencies> <dependency> <groupId>org.ngrinder</groupId> <artifactId>ngrinder-groovy</artifactId> <version>${ngrinder.version}</version> <scope>provided</scope> </dependency> </dependencies> <build> <plugins> <plugin> <groupId>org.apache.maven.plugins</groupId> <artifactId>maven-eclipse-plugin</artifactId> <version>2.9</version> <configuration> <additionalProjectnatures> <projectnature> org.eclipse.jdt.groovy.core.groovyNature </projectnature> <projectnature> org.eclipse.m2e.core.maven2Nature </projectnature> </additionalProjectnatures> </configuration> </plugin> </plugins> </build> </project>
五、完成後,目錄機構如下
resources資源目錄下,不能為空,否則上傳到 試壓機跑壓測會報錯

六、運行報錯處理


添加之後就可以運行成功

七、注意:
- 依賴jar 拉取很慢,有可能會出現超時,多嘗試下
- 測試腳本必須是Ngrinder標準的Groovy Maven項目,所以 resources資源目錄下,不能為空,我這裡隨便搞了個文件,服務端會校驗目錄結構
- 目錄結構,maven引用等,可以參考Ngrinder官方的例子:https://github.com/naver/ngrinder/wiki/Groovy-Maven-Structure
八、使用感受:
從零開始搭建了一套本地的 腳本開發環境,我覺得還是特別的快,創建maven 自動引入依賴; 語言開發方面只要熟悉java,上手Groovy 很快就能編寫腳本; 編寫腳本不像Jmeter 或 loadrunner 那樣有可視化界面,而是完全用代碼來實現,還好的是它提供了很多的工具類,不用重複造輪子。


