Helm神器,讓管理Kubernetes像yum安裝包一樣簡單
- 2019 年 10 月 30 日
- 筆記
一、什麼是Helm
Helm是K8S下的包管理器,相當於apt-get、yum、brew這樣的軟件工具,重點概念
- Helm。命令行客戶端工具。主要用於K8S應用程序Chart的創建、打包、發佈及管理倉庫
- Tiller。Helm的服務端,用於接收Heml的請求,並根據Chart生成K8S的部署文件(稱為Release),然後提交給K8S創建應用。Tiller還提供了Release的升級、回滾等一系列功能
- Chart。Helm的軟件包,採用TAR格式,類似APT的deb或者yum的fpm包,包含了一組定義了K8S資源相關的YAML文件
- Repostory。Helm的軟件倉庫,本質上是一個Web服務器,保存了一系列Char軟件包以供用戶下載
- Release。使用hel install命令在K8S集群中部署的Chart稱為Release
二、安裝
1.安裝helm客戶端
基本就是brew install之類的,或者使用統一安裝腳本,這裡我用的是brew安裝
brew install kubernetes-helm2.安裝Tiller
先在每個節點安裝socat軟件,不然會報錯
E0522 22:22:15.492436 24409 portforward.go:331] an error occurred forwarding 38398 -> 44134: error forwarding port 44134 to pod dc6da4ab99ad9c497c0cef1776b9dd18e0a612d507e2746ed63d36ef40f30174, uid : unable to do port forwarding: socat not found. Error: cannot connect to TillerTiller是以Deployment方式部署到K8S中,只需要使用以下命令安裝
helm initHelm默認會去storage.googleapis.com拉取鏡像,如果你當前執行的機器不能訪問訪域名的話可以使用以下命令安裝
helm init --client-only --stable-repo-url https://aliacs-app-catalog.oss-cn-hangzhou.aliyuncs.com/charts/ helm repo add incubator https://aliacs-app-catalog.oss-cn-hangzhou.aliyuncs.com/charts-incubator/ helm repo update3.創建服務端
helm init --service-account tiller --upgrade -i registry.cn-hangzhou.aliyuncs.com/google_containers/tiller:v2.9.1 --stable-repo-url https://kubernetes.oss-cn-hangzhou.aliyuncs.com/charts # 創建TLS認證服務端,參考地址:https://github.com/gjmzj/kubeasz/blob/master/docs/guide/helm.md helm init --service-account tiller --upgrade -i registry.cn-hangzhou.aliyuncs.com/google_containers/tiller:v2.9.1 --tiller-tls-cert /etc/kubernetes/ssl/tiller001.pem --tiller-tls-key /etc/kubernetes/ssl/tiller001-key.pem --tls-ca-cert /etc/kubernetes/ssl/ca.pem --tiller-namespace kube-system --stable-repo-url https://kubernetes.oss-cn-hangzhou.aliyuncs.com/charts在K8S中安裝Tiller服務,因數官方鏡像無法拉取,可以使用-i指定自己的鏡像,可選鏡像:registry.cn-hangzhou.aliyuncs.com/google_containers/tiller:v2.9.1(阿里雲),該鏡像的版本與helm客戶端的版本相同,使用helm version可查看helm客戶端版本。
4.給Tiller授權
因為Helm的服務端的Tiller是一個部署在kube-system命令空間下的Deployment,它會去連接Kube-Api在K8S里創建和刪除應用
創建 Kubernetes 的服務帳號和綁定角色
kubectl create serviceaccount --namespace kube-system tiller kubectl create clusterrolebinding tiller-cluster-rule --clusterrole=cluster-admin --serviceaccount=kube-system:tiller5.為 Tiller 設置帳號
# 使用 kubectl patch 更新 API 對象 $ kubectl patch deploy --namespace kube-system tiller-deploy -p '{"spec":{"template":{"spec":{"serviceAccount":"tiller"}}}}' deployment.extensions "tiller-deploy" patched查看是否授權成功
kubectl get deploy --namespace kube-system tiller-deploy --output yaml|grep serviceAccount serviceAccount: tiller serviceAccountName: tille6.驗證Tiller是否安裝成功
kubectl -n kube-system get pods|grep tiller tiller-deploy-6dcc74c957-m7brr 1/1 Running 0 3m39s ➜ helm-test helm version Client: &version.Version{SemVer:"v2.15.1", GitCommit:"cf1de4f8ba70eded310918a8af3a96bfe8e7683b", GitTreeState:"clean"} Server: &version.Version{SemVer:"v2.9.1", GitCommit:"20adb27c7c5868466912eebdf6664e7390ebe710", GitTreeState:"clean"}卸載Helm服務端Tiller命令
helm reset或 helm reset --force三、Helm使用
1.更換倉庫
若遇到Unable to get an update from the 「stable」 chart repository (https://kubernetes-charts.storage.googleapis.com) 錯誤,手動更換stable 存儲庫為阿里雲的存儲庫
# 先移除原先的倉庫 helm repo remove stable # 添加新的倉庫地址 helm repo add stable https://kubernetes.oss-cn-hangzhou.aliyuncs.com/charts # 更新倉庫 helm repo update2.查看存儲庫中可用的所有Helm chats:
helm search3.更新charts列表
helm repo update4.查看已經安裝的chats
helm list5.關於helm報錯不兼容問題
Helm Error: incompatible versions client[v2.15.0] server[v2.9.1]解決
brew unlink kubernetes-helm brew install https://raw.githubusercontent.com/Homebrew/homebrew-core/78d64252f30a12b6f4b3ce29686ab5e262eea812/Formula/kubernetes-helm.rb brew switch kubernetes-helm 2.9.1參考鏈接:https://stackoverflow.com/questions/50701224/helm-incompatible-versions-between-client-and-server
四、創建自己的chart
1.建一個cqh的包
➜ helm-test helm create cqh Creating cqh ➜ helm-test ls cqh examples get_helm.sh mongodb tiller.yaml ➜ helm-test cd cqh ➜ cqh tree . ├── Chart.yaml ├── charts ├── templates │ ├── NOTES.txt │ ├── _helpers.tpl │ ├── deployment.yaml │ ├── ingress.yaml │ └── service.yaml └── values.yaml將values.yaml的鏡像改成nginx:alpine
2.檢查配置和模板是否有效
helm install --dry-run --debug會輸出包含了模板的變量配置和最終渲染的yaml文件
➜ cqh helm install --dry-run --debug . [debug] Created tunnel using local port: '62307' [debug] SERVER: "127.0.0.1:62307" [debug] Original chart version: "" [debug] CHART PATH: /Users/chenqionghe/Downloads/helm-test/cqh NAME: agile-parrot REVISION: 1 RELEASED: Wed Oct 30 11:09:47 2019 CHART: cqh-0.1.0 USER-SUPPLIED VALUES: {} COMPUTED VALUES: affinity: {} image: pullPolicy: IfNotPresent repository: nginx tag: alpine ingress: annotations: {} enabled: false hosts: - chart-example.local path: / tls: [] nodeSelector: {} replicaCount: 1 resources: {} service: port: 80 type: ClusterIP tolerations: [] HOOKS: MANIFEST: --- # Source: cqh/templates/service.yaml apiVersion: v1 kind: Service metadata: name: agile-parrot-cqh labels: app: cqh chart: cqh-0.1.0 release: agile-parrot heritage: Tiller spec: type: ClusterIP ports: - port: 80 targetPort: http protocol: TCP name: http selector: app: cqh release: agile-parrot --- # Source: cqh/templates/deployment.yaml apiVersion: apps/v1beta2 kind: Deployment metadata: name: agile-parrot-cqh labels: app: cqh chart: cqh-0.1.0 release: agile-parrot heritage: Tiller spec: replicas: 1 selector: matchLabels: app: cqh release: agile-parrot template: metadata: labels: app: cqh release: agile-parrot spec: containers: - name: cqh image: "nginx:alpine" imagePullPolicy: IfNotPresent ports: - name: http containerPort: 80 protocol: TCP livenessProbe: httpGet: path: / port: http readinessProbe: httpGet: path: / port: http resources: {}3.部署到K8S
➜ cqh helm install . NAME: wintering-jellyfish LAST DEPLOYED: Wed Oct 30 11:13:30 2019 NAMESPACE: default STATUS: DEPLOYED RESOURCES: ==> v1/Pod(related) NAME READY STATUS RESTARTS AGE wintering-jellyfish-cqh-849b9f698c-p6tkz 0/1 ContainerCreating 0 0s ==> v1/Service NAME TYPE CLUSTER-IP EXTERNAL-IP PORT(S) AGE wintering-jellyfish-cqh ClusterIP 10.43.219.155 <none> 80/TCP 0s ==> v1beta2/Deployment NAME DESIRED CURRENT UP-TO-DATE AVAILABLE AGE wintering-jellyfish-cqh 1 1 1 0 0s NOTES: 1. Get the application URL by running these commands: export POD_NAME=$(kubectl get pods --namespace default -l "app=cqh,release=wintering-jellyfish" -o jsonpath="{.items[0].metadata.name}") echo "Visit http://127.0.0.1:8080 to use your application" kubectl port-forward $POD_NAME 8080:804.測試訪問
使用安裝後NOTES的提示命令
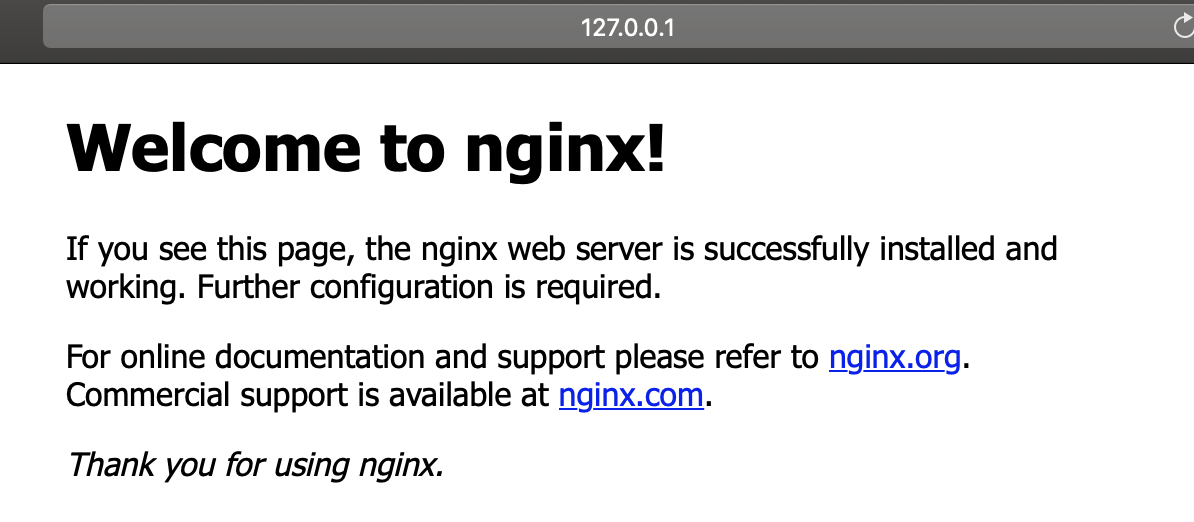
➜ ~ export POD_NAME=$(kubectl get pods --namespace default -l "app=cqh,release=wintering-jellyfish" -o jsonpath="{.items[0].metadata.name}") echo "Visit http://127.0.0.1:8080 to use your application" kubectl port-forward $POD_NAME 8080:80 Visit http://127.0.0.1:8080 to use your application Forwarding from 127.0.0.1:8080 -> 80 Forwarding from [::1]:8080 -> 80 Handling connection for 8080 Handling connection for 8080 Handling connection for 8080拉下來就可以使用127.0.0.1:8080訪問這個應用了,safari訪問如下

5.查看部署的release
➜ cqh helm list NAME REVISION UPDATED STATUS CHART NAMESPACE wintering-jellyfish 1 Wed Oct 30 11:13:30 2019 DEPLOYED cqh-0.1.0 default6.打包分享
➜ cqh helm package . Successfully packaged chart and saved it to: /Users/chenqionghe/Downloads/helm-test/cqh/cqh-0.1.0.tgz ➜ ~ ls ~/.helm/repository/local cqh-0.1.0.tgz index.yaml這時候還不能用helm search命令查找到,因為Respository目錄中的Chart包還沒有被Helm管理,可以通過helm repo list看到已經配置的Repository的信息
➜ cqh helm repo list NAME URL stable https://kubernetes-charts.storage.googleapis.com local http://127.0.0.1:8879/charts incubator https://aliacs-app-catalog.oss-cn-hangzhou.aliyuncs.com/charts-incubator/可以在本地啟動一個Repository Server,並將其加入到Helm Repo列表中。
這裡我們就使用 helm serve 命令啟動一個 Repository Server,該 Server 缺省使用 $HOME/.helm/repository/local 目錄作為 Chart 存儲,並在 8879 端口上提供服務。
➜ cqh helm serve Regenerating index. This may take a moment. Now serving you on 127.0.0.1:8879訪問如下

默認情況下該服務只監聽 127.0.0.1,如果你要綁定到其它網絡接口,可使用以下命令:
helm serve --address 192.168.100.211:8879 &如果想使用指定目錄存儲,可以加上–repo-path
$ helm serve --address 192.168.100.211:8879 --repo-path /data/helm/repository/ --url http://192.168.100.211:8879/charts/啟動了本地的helm Rpository Server後,就可以將本地Repository加入Helm的Repo列表
➜ ~ helm repo add local http://127.0.0.1:8879 "local" has been added to your repositories ➜ ~ helm repo list NAME URL stable https://kubernetes-charts.storage.googleapis.com local http://127.0.0.1:8879 incubator https://aliacs-app-catalog.oss-cn-hangzhou.aliyuncs.com/charts-incubator/現在可以搜索到了
➜ ~ helm repo update ➜ ~ helm search cqh NAME CHART VERSION APP VERSION DESCRIPTION local/cqh 0.1.0 1.0 A Helm chart for Kubernetes7.helm升級和回退一個應用
修改Chart.yaml的0.1.0版本為0.2.0,再使用helm打包發佈到本地人防國
➜ helm-test vim cqh/Chart.yaml ➜ helm-test helm package cqh Successfully packaged chart and saved it to: /Users/chenqionghe/Downloads/helm-test/cqh-0.2.0.tgz ➜ helm-test helm search cqh -l NAME CHART VERSION APP VERSION DESCRIPTION local/cqh 0.2.0 1.0 A Helm chart for Kubernetes local/cqh 0.1.0 1.0 A Helm chart for Kubernetes可以看到已經有兩個版本了
升級一個應用使用helm upgrade將已部署的mike-test升級到最新版本,可以使用–version指定版本號
➜ helm-test helm list NAME REVISION UPDATED STATUS CHART NAMESPACE looping-robin 1 Wed Oct 30 13:40:47 2019 DEPLOYED cqh-0.2.0 default ➜ helm-test ➜ helm-test ➜ helm-test helm upgrade looping-robin local/cqh Release "looping-robin" has been upgraded. Happy Helming! LAST DEPLOYED: Wed Oct 30 13:42:08 2019 NAMESPACE: default STATUS: DEPLOYED RESOURCES: ==> v1/Service NAME TYPE CLUSTER-IP EXTERNAL-IP PORT(S) AGE looping-robin-cqh ClusterIP 10.43.204.74 <none> 80/TCP 1m ==> v1beta2/Deployment NAME DESIRED CURRENT UP-TO-DATE AVAILABLE AGE looping-robin-cqh 1 1 1 1 1m ==> v1/Pod(related) NAME READY STATUS RESTARTS AGE looping-robin-cqh-5bd4c75c64-8qc2k 1/1 Running 0 1m NOTES: 1. Get the application URL by running these commands: export POD_NAME=$(kubectl get pods --namespace default -l "app=cqh,release=looping-robin" -o jsonpath="{.items[0].metadata.name}") echo "Visit http://127.0.0.1:8080 to use your application" kubectl port-forward $POD_NAME 8080:80查看歷史升級
➜ helm-test helm history looping-robin REVISION UPDATED STATUS CHART DESCRIPTION 1 Wed Oct 30 13:40:47 2019 SUPERSEDED cqh-0.2.0 Install complete 2 Wed Oct 30 13:42:08 2019 DEPLOYED cqh-0.3.0 Upgrade complete回退一個應用,根據REVISION的值
helm-test helm rollback looping-robin 1 Rollback was a success! Happy Helming!8.刪除一個應用
➜ helm-test helm delete looping-robin release "looping-robin" deleted ➜ helm-test helm ls -a looping-robin NAME REVISION UPDATED STATUS CHART NAMESPACE looping-robin 3 Wed Oct 30 13:49:37 2019 DELETED cqh-0.2.0 default如果要移除指定 Release 所有相關 Release 的歷史記錄,可以用如下命令:
➜ helm-test helm delete --purge looping-robin release "looping-robin" deleted五、其他
1.自動補全
zsh
$ source <(helm completion zsh)bash
$ source <(helm completion bash)2.安裝包如何指定命名空間
helm-test helm install --name=cqh --namespace=web cqh3.獲取應用的詳細信息
helm get cqh查看指定版本
helm get --revision 1 cqh4.如何解決服務依賴
以下聲明表明 Chart 依賴 Apache 和 MySQL 這兩個第三方 Chart
dependencies: - name: mariadb version: 2.1.1 repository: https://kubernetes-charts.storage.googleapis.com/ condition: mariadb.enabled tags: - wordpress-database - name: apache version: 1.4.0 repository: https://kubernetes-charts.storage.googleapis.com/5.如何添加第三方庫
helm repo add 存儲庫名 存儲庫URL helm repo update參考鏈接:
https://blog.csdn.net/daydayup_668819/article/details/90601967
https://docs.helm.sh/using_helm/#installing-helm
https://mp.weixin.qq.com/s?__biz=MzI3MTI2NzkxMA==&mid=2247486154&idx=1&sn=becd5dd0fadfe0b6072f5dfdc6fdf786&chksm=eac52be3ddb2a2f555b8b1028db97aa3e92d0a4880b56f361e4b11cd252771147c44c08c8913&mpshare=1&scene=24&srcid=0927K11i8Vke44AuSuNdFclU#rd
https://jimmysong.io/kubernetes-handbook/practice/helm.htmlttps://imkira.com/a14.html
https://zhaohuabing.com/2018/04/16/using-helm-to-deploy-to-kubernetes/#undefined
https://help.aliyun.com/document_detail/58587.html?spm=a2c4e.11153940.blogcont159601.20.6703174aRHyZc9


